

The illustrious squat, a most supreme compound exercise, is hailed by muscle builders across the globe as a must-do move. The squat targets the major and minor muscle groups of the lower body including the quadriceps, hamstrings, all three gluteals, hip flexors, adductor and abductor muscles, and the calves.
When done with proper form, the squat also engages the core muscles of the lower back and abdominals, while challenging your shoulders and arms. It is the king of all exercises for building muscle mass below the belt, gaining power and strength in your legs and even lends to better elasticity of the muscles.
With optimal effort and in a short period of time you not only get visible results from a consistent squat workout but gain extreme leg power. Squats are an efficient exercise you can do several times a week to build muscle and they are particularly effective when you allow for recovery in between leg workouts.
The problem with the squat is many who attempt the motion do so with improper technique. Knee blowouts, back injuries, and serious muscle tears ensue with a poorly formed squat, particularly of the weighted variety. A solid squat is only as good as the form used to execute it and with that, it’s ideal to learn the right technique and use it before implementing this exercise into your repertoire.
For more guidance on proper lifting techniques or for a programmed lifting routine, sign up for an Exercise.com PRO plan today.
Step 1: Equipment
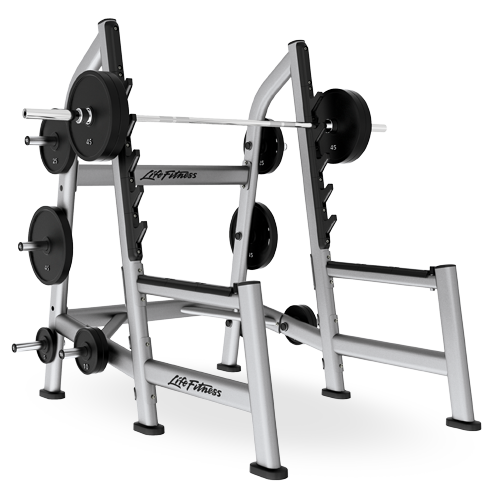
Choose your equipment wisely. Weighted squats are best done with a straight bar, set in a squat rack or Smith machine. The squat rack uses vertical posts with horizontal bar catchers. The squat rack also makes it easy to unrack and rack the bar for a quick dismount.
The Smith machine squat uses cable-type guides along with a cage. It is more restrictive and doesn’t incorporate the stabilizer muscles like a free weight squat but still serves the purpose of safety. Novices might do well starting with a Smith machine, whereas a pro lifter can advance to the squat rack. For light lifters, dumbbells are useful but if you do not have proper form, it’s a good idea to stick with a guided system first. For safety, ask a partner to spot your squats as you increase the weight.
Step 2: Back and Head Posture
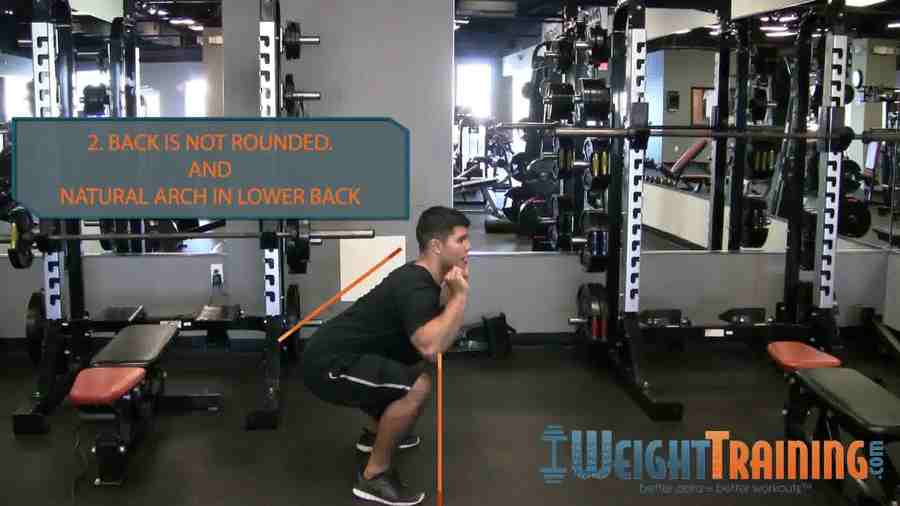
Start from standing position with a solid and straight spine. Achieve a flat back with your head facing forward, not up and not down, but eyes positioned straight ahead. Keep your chest pushed out and up with the shoulders back to optimize proper spinal alignment. The back generally has a natural curve or slight arch that you can maintain by keeping your head forward throughout the range of motion. Displacing your head by looking down or up will cause your alignment to alter and can cause injury. The posture of the back and head are two of the most important factors in a solid, injury-free squat.
Proper head and back posture makes the unracking process easier and allows you to step back slowly toward the bar, which is already placed at the proper level for unracking. Proper level means right at the crook of your upper back meeting the shoulders. To unrack you might have to lift up slightly to clear the hooks from the cage. Variations on bar placement exist but to get the right technique, start with the basic squat position.
Step 3: Grip and Stance
Place the hands on the bar with a comfortable width between your hands. Use narrow grip if you intend to challenge your back or go a tad wider for best coordination. Elbows are pushed back and in as if you are closing the gap slightly. Keep the wrists straight and in line with the forearm. To ensure proper lining of the wrists, it helps to place the thumbs on top of the bar instead of under.
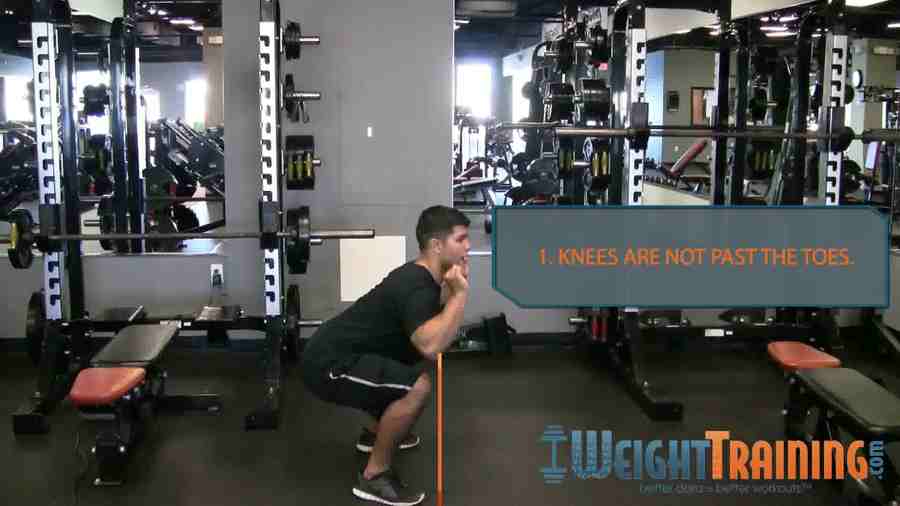
Stand with your feet about shoulder-width apart or slightly further out than shoulder-width apart, if your goal is to target the hamstrings, hips, and glutes. Use a narrow, shoulder-width stance if you aim to target the quadriceps. Keep the toes pointing slightly outward and in alignment with the knees but make sure your knees do not bow inward.
During the hinge portion of the squat, always keep your knees from extending further than your toes. The goal is for your butt to push back as you lower yourself into the squat position. As the bottom lowers, the knees stay intact and the heels of your feet absorb the majority of the pressure from the lowered movement.
Get More Out of Your Health and Fitness Routine. Go PRO!
Sign Up
Step 4: Practice Weightless
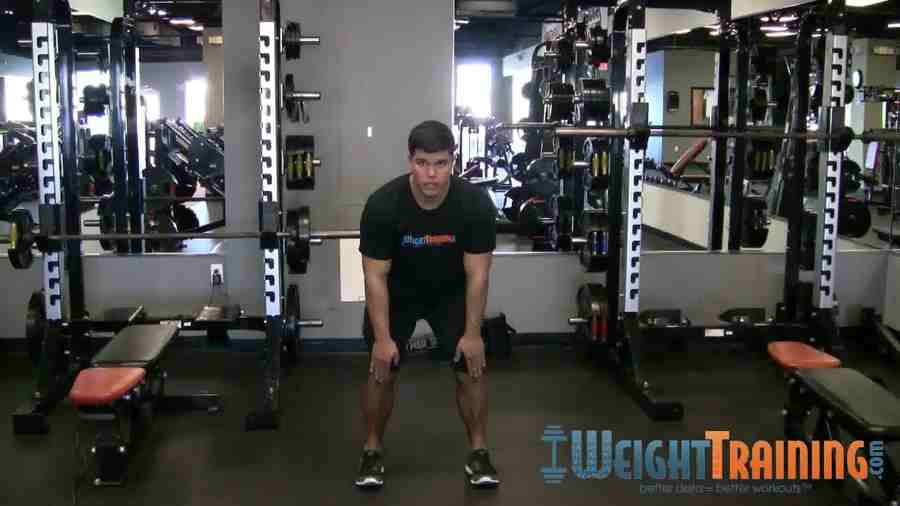
Get your form proper first before adding weight. Attempt five full weightless squats, only using the bar, from start to finish before doing the real deal. If you experience any pains in your back or knees during the technique practice, re-evaluate your posture, grip, and stance. Make adjustments accordingly before you cause injury to yourself. Remember to push from the heels and lower your bottom while keeping your knees behind your toes, face forward, chest out, and core tight. Finally, remember to breathe.
Dizziness is one of the side effects of serious squatting but it typically occurs because you concentrate so much on form you forget to breathe. Inhale as you lower yourself (be sure to keep your core and lower back as tight as possible throughout the entire movement) to ground and exhale as you rise. Recite a breathing mantra as part of your up and down in the squat to keep your energy up and prevent the black dots of low oxygen from consuming your eyes.
Step 5: Perform a Squat
Position the rack to the proper height and add weight. Ambition is admirable but until you know your lifting capacity, start with a feasible weight and then add more from there. Pros can start the squat from a low position, but until you get the technique down, keep it simple and position the rack for easy access.
Wrap a towel or padding around the portion of the bar you will place on your traps. Forego the extra pain and pad the area.
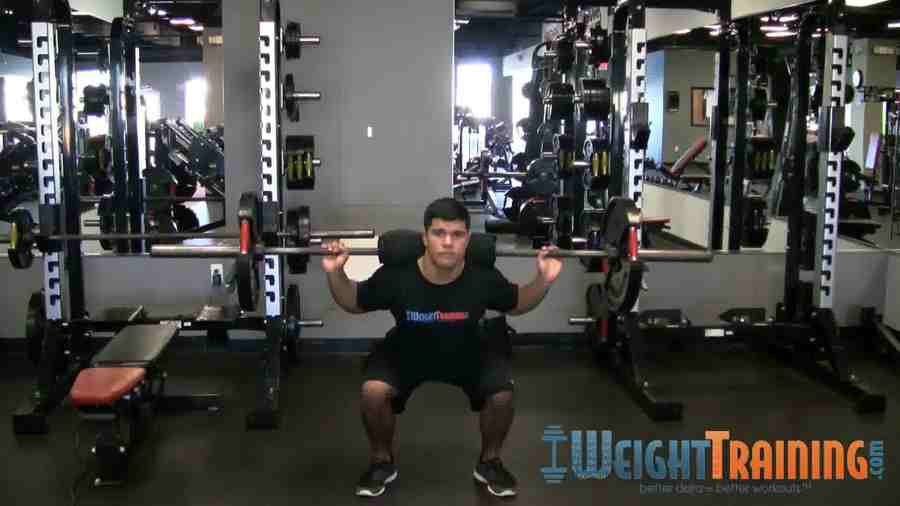
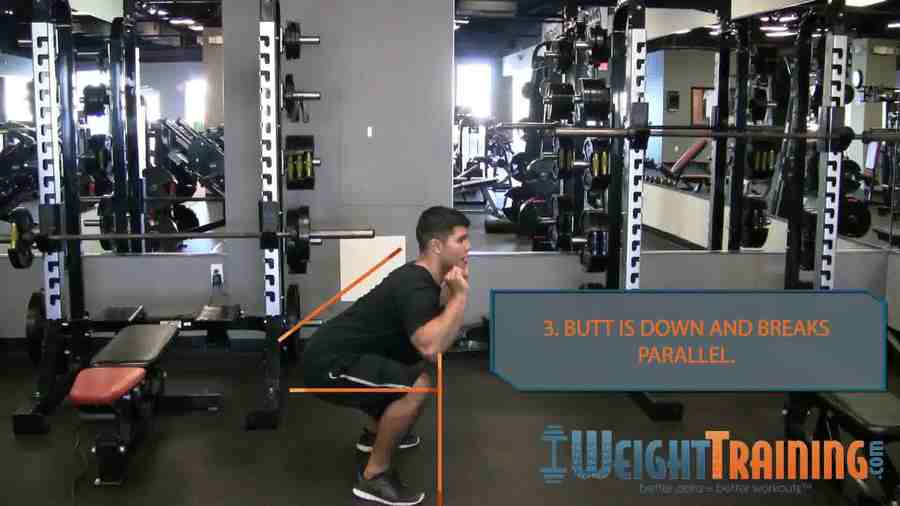
Back your body up to the bar, then place your hands in the proper grip and unrack the bar. Slowly lower your body as close to the ground as possible but keep your balance. Hip flexibility plays a role in how parallel you can get to the floor. Rise up slowly making sure your torso is at a slight angle because your bottom is pushed back, spine is slightly arched yet mostly flat, and head is facing forward. Push up with your heels yet maintain firm footing. Squeeze the glutes as you rise up and keep your knees pushed out properly without buckling or wobbling. Again, don’t forget to breathe.
Repeat for a full set. Rest and then complete the remaining reps. Use a high weight load, employing low reps (check out the 5×5 Workout Plan) or use low load, employing high reps (check out the Women’s Leg Workout Plan). Gain strength with more weight and tone with less.
Avoid Injury and Perfect Your Form
Injury is the most important thing to avoid when it comes to squats. Warm up before your sets. Make sure you have a balanced snack at least one hour before squats to ensure you have plenty of energy to perform the exercise.
As a novice to squats, start gradually with the weights and work yourself up to higher weighted lifting. Pay attention to the placement of the rack and avoid banging yourself into the bar when you initially descend toward the machine. Don’t be afraid of the full bottom-to-ground squat, but do it after you have plenty of time logged with the regular squat. Keep the theme of all things forward for a thorough, basic squat: head, eyes, fingers while gripping the bar, toes and knees all remain forward.
Master the basic squat and then try different stances. Vary from the basic squat to get a full range lower body workout that challenges your muscles. Use the proper form outlined for the basic squat but consider adding the sumo squat, or extra wide stance, front squat, utilizing the bar in front instead of on your traps, and the box squat.
Frequently Asked Questions (FAQ)
Should I weight train in the morning or evening?
Some studies have shown that lifting weights in the early evening is more beneficial because cortisol levels are lower. With that being said, the best time to weight train is when you feel the most energized and/or have the time to do so.
Are free weights better than machines?
Free weights are better for an overall workout than machines as they require the use of more stabilizer muscles; however, machines are a great addition to a well-rounded exercise routine.
When should I go up in weight?
If your last couple of reps can be done easily and quickly (with good form), then it’s time to increase the weight of your lifts.
Is a weightlifting belt necessary?
A weightlifting belt should only be worn when it’s absolutely necessary — like when you have a very heavy load on your back.
To perfect your squat, sign up for an Exercise.com PRO plan for access to hundreds of squat demonstrations, certified personal trainers, and more. Go PRO today!