How to Add Paid Group Members To Your Client Management Software
Here’s how to split a Full Name into First and Last Names with a Zapier integration.
*Note – You may want to change the quality of the video below to 1080p by clicking the gear icon and selecting the “1080p HD” option.
Step-by-Step Guide:
Step 1: Log in to Zapier.com and go to your dashboard to Choose an App.
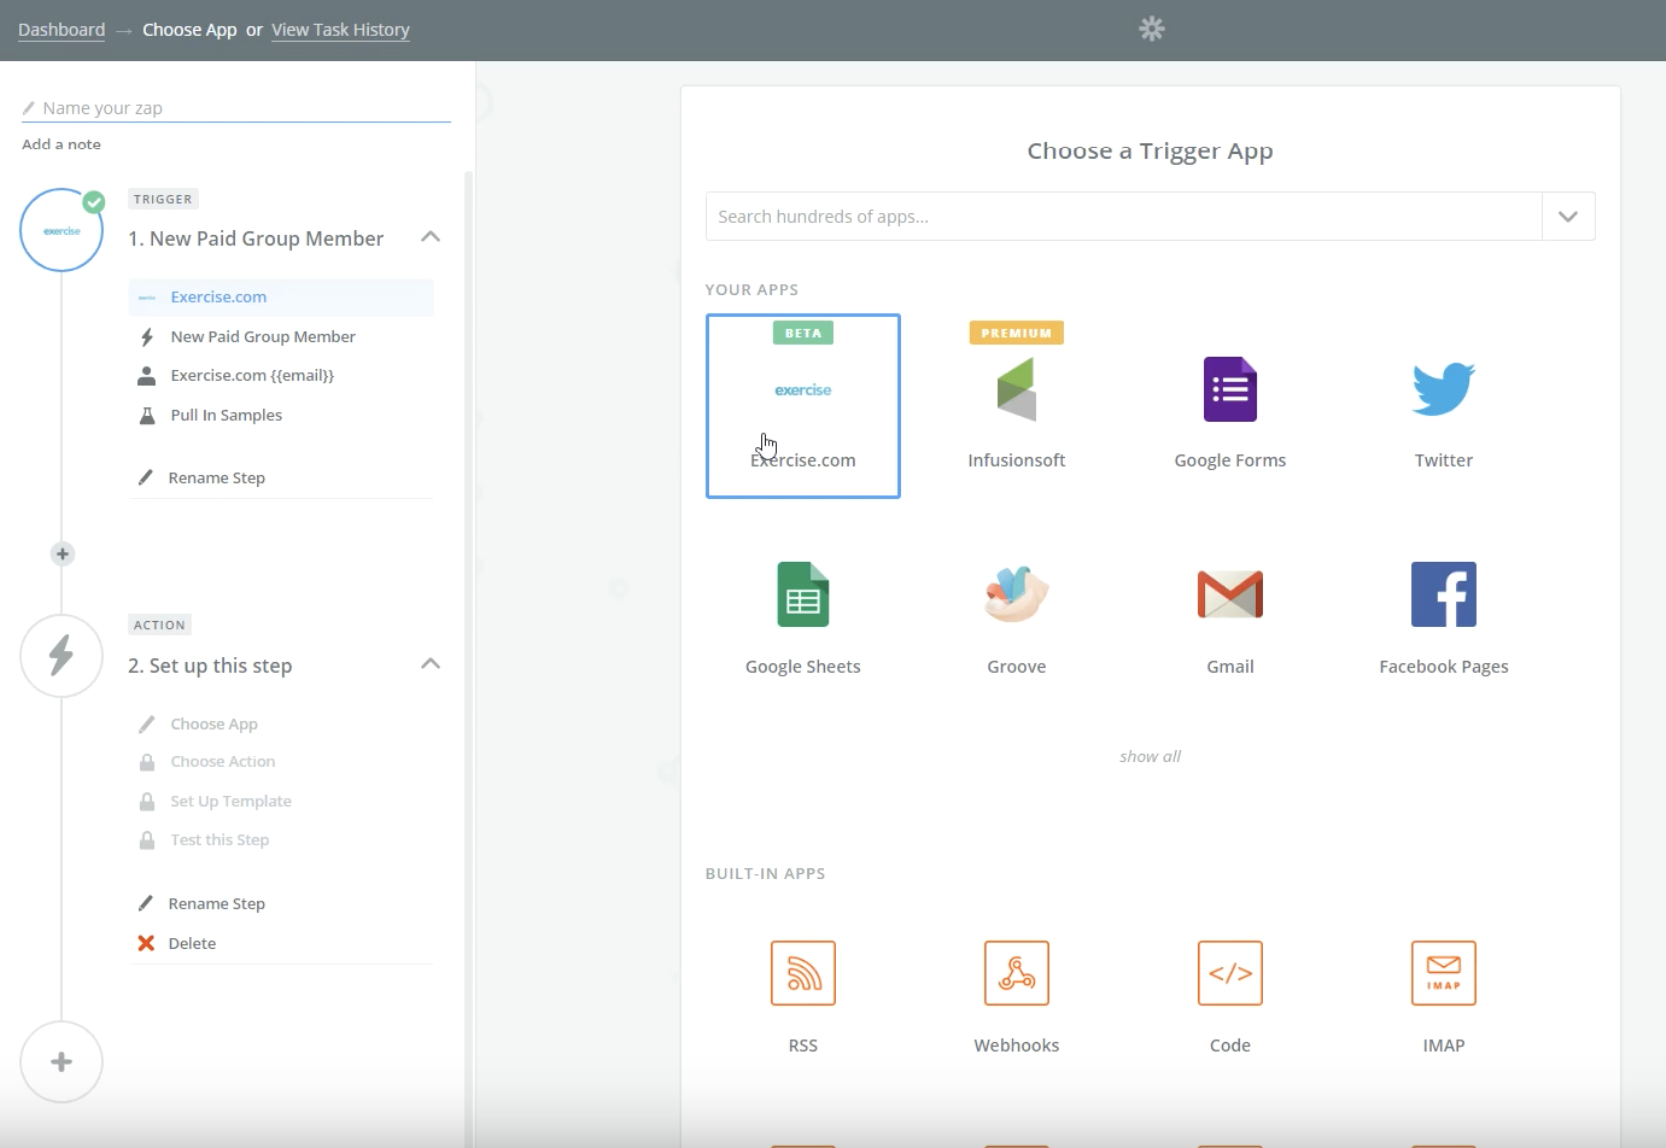
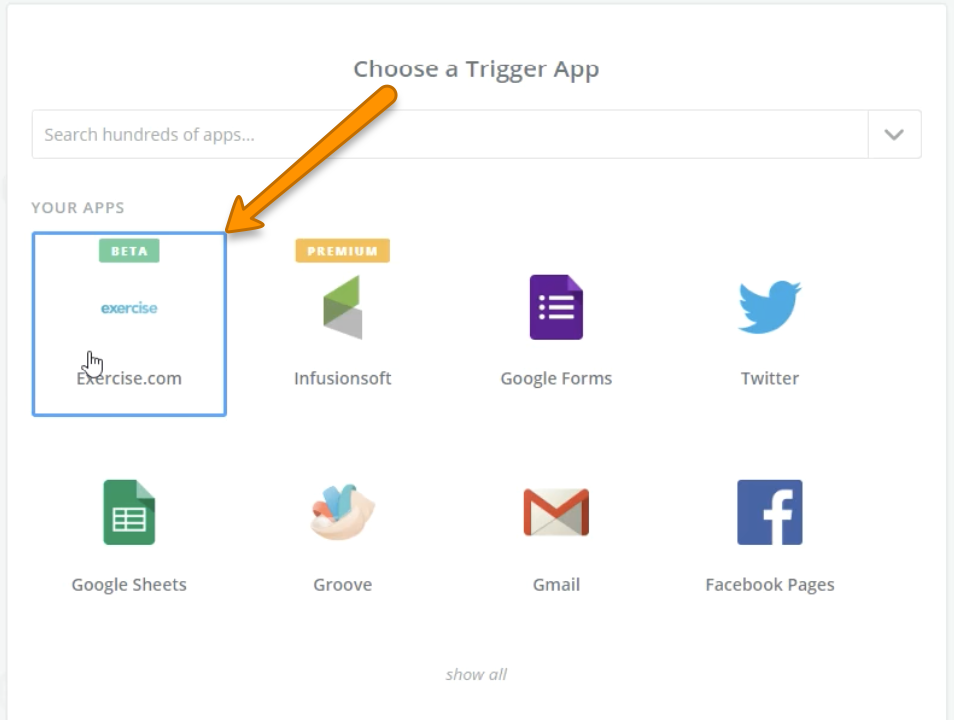
Step 2: Click the “Exercise.com” app under the “Your Apps” heading.
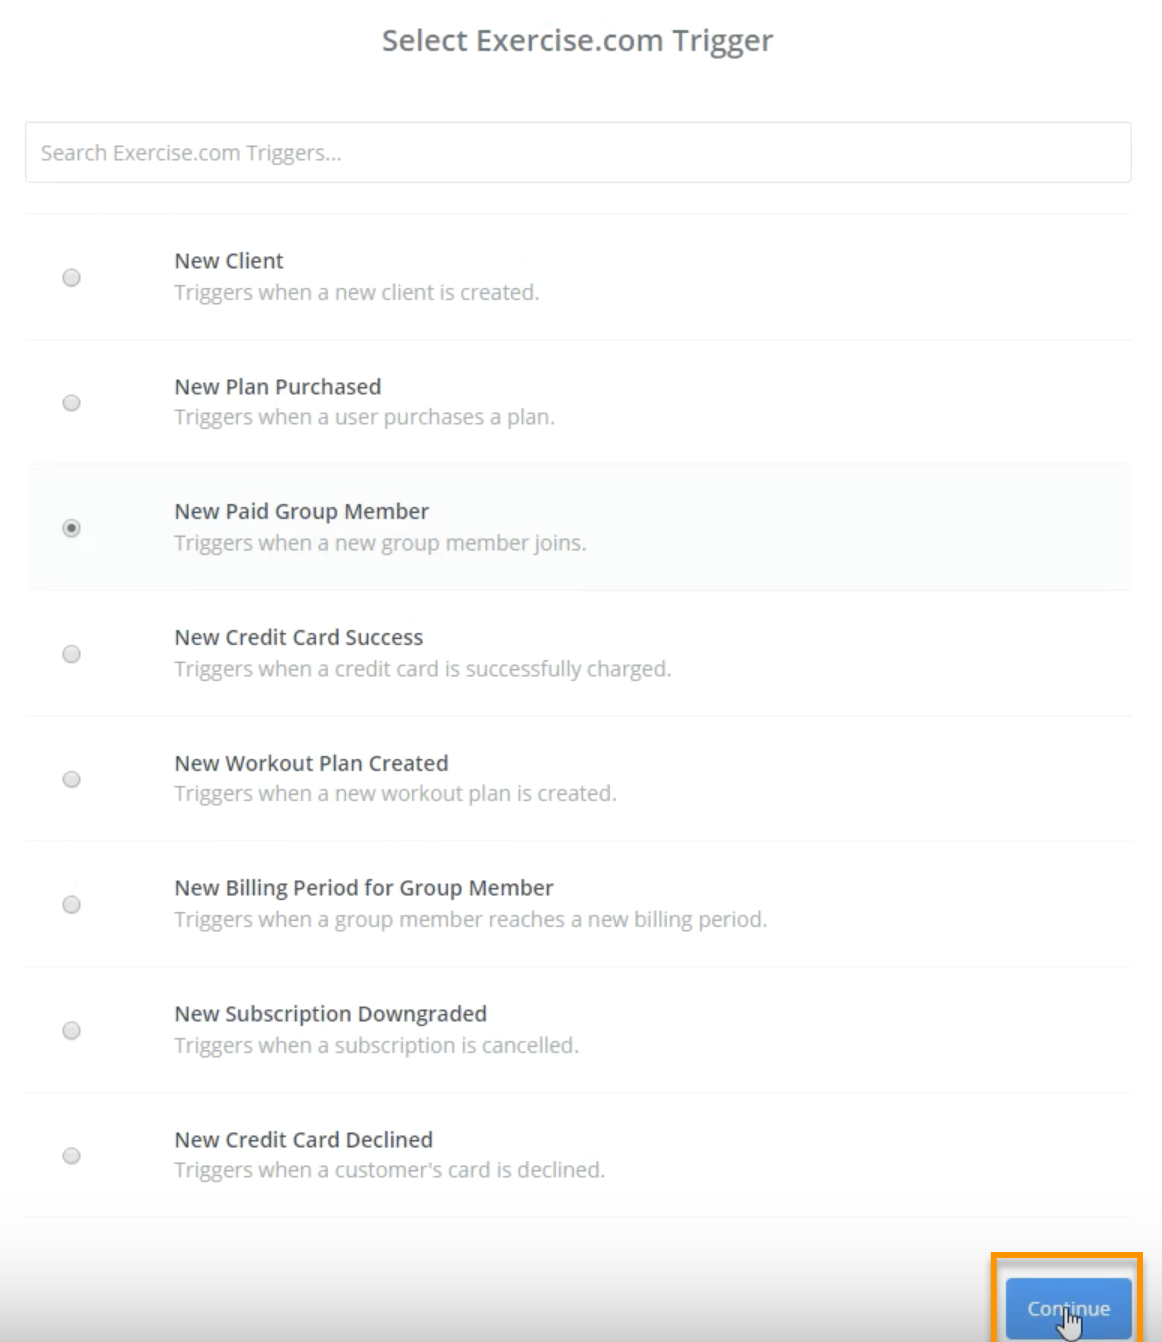
Step 3: Choose the relevant trigger then click “Continue.”
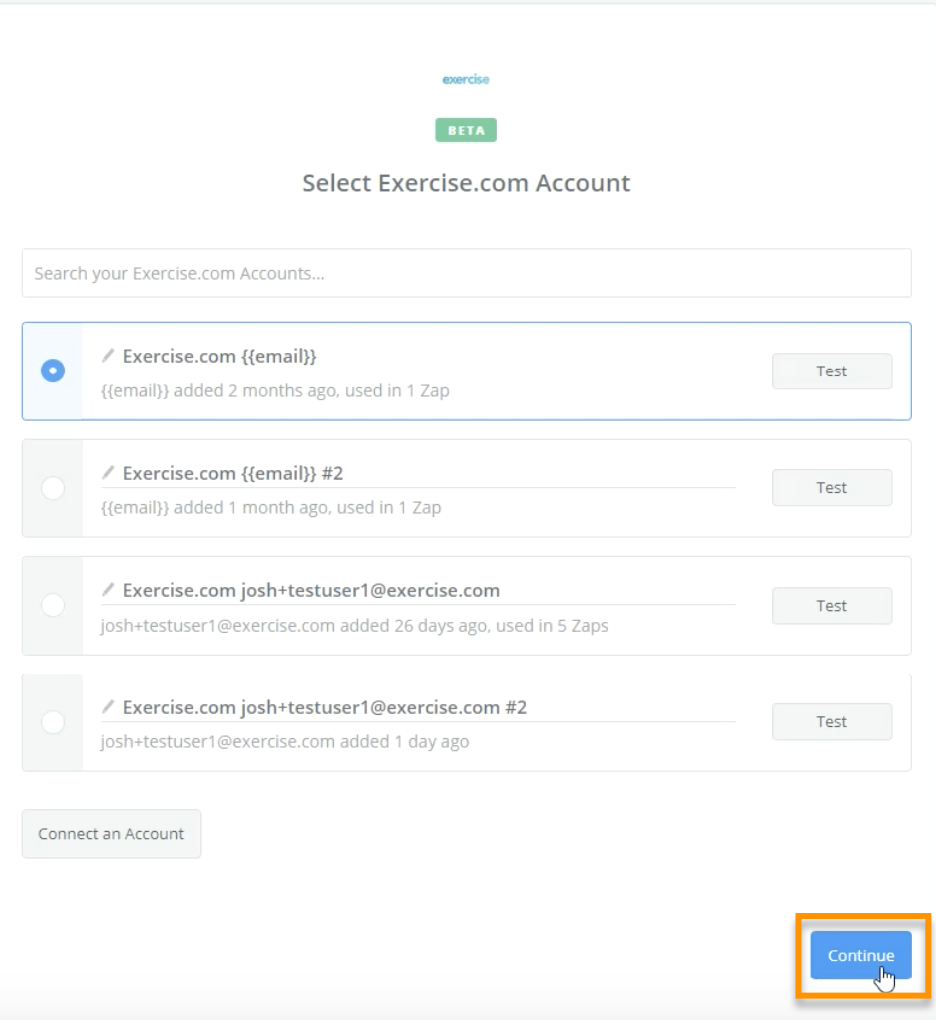
Step 4: Pull data into your account and click “Continue.”
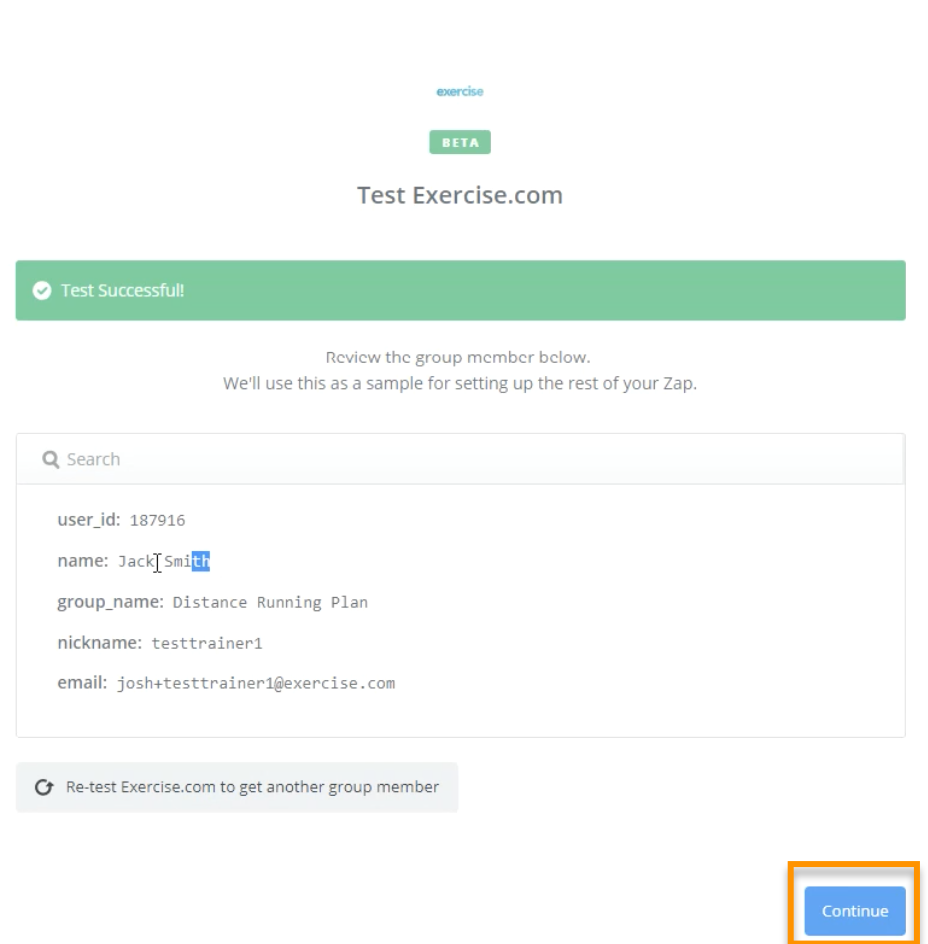
Step 5: Review the sample then click “Continue.”
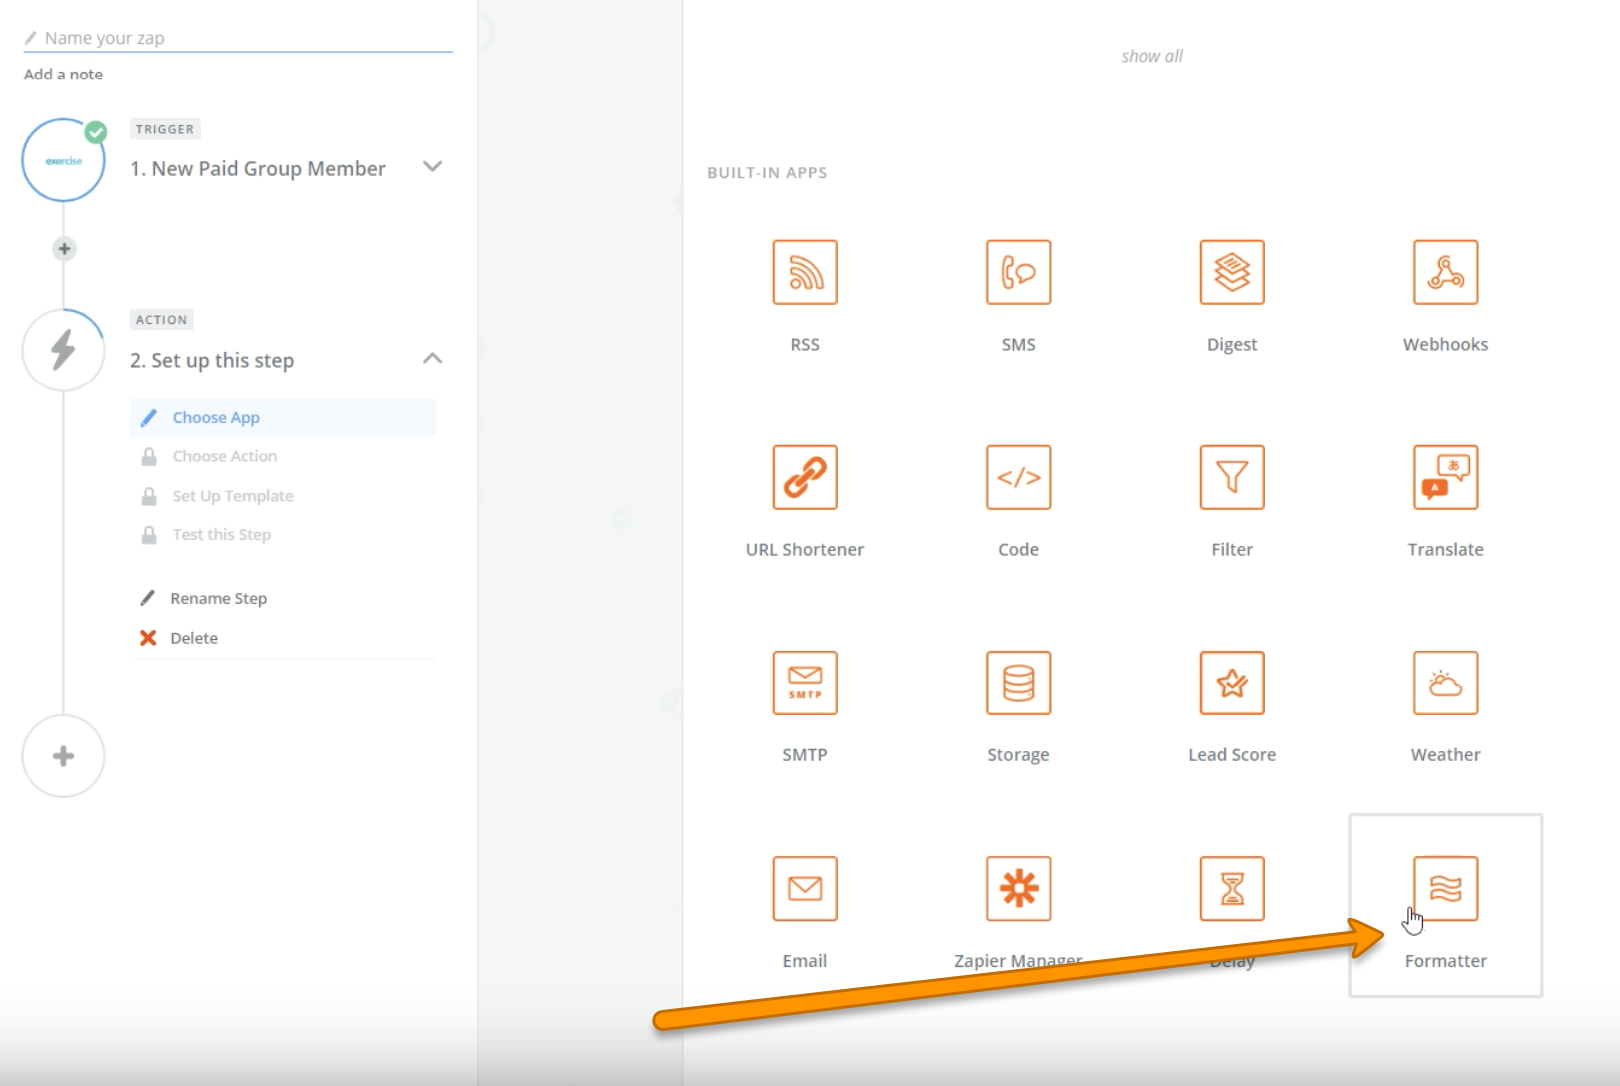
Step 6: Choose the “Formatter” action on your zap dashboard.
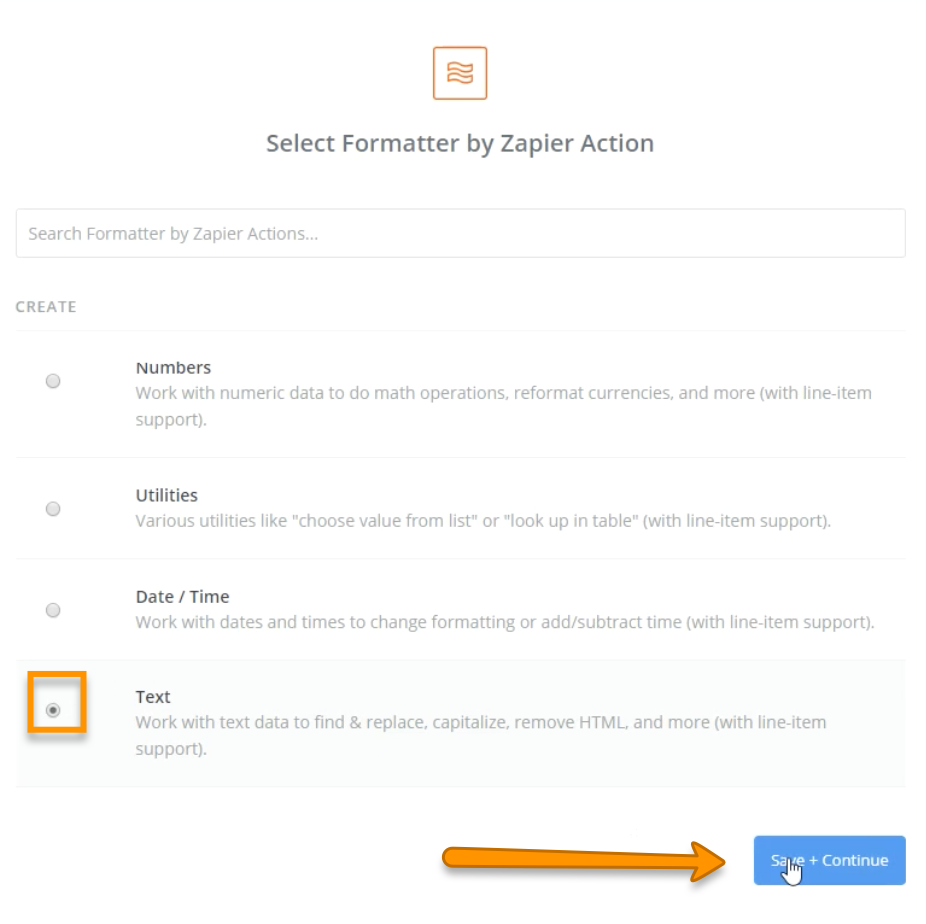
Step 7: Choose “Text” then click “Save + Continue.”
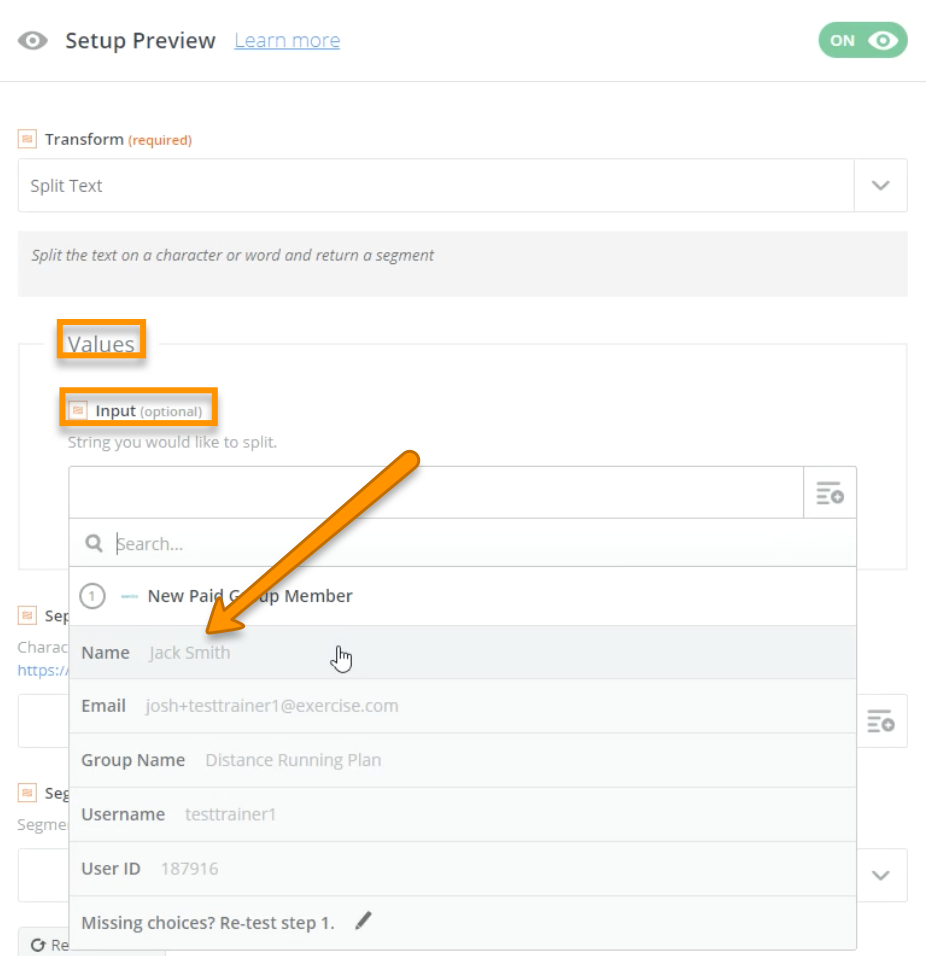
Step 8: Click on the “Tranform” box then choose “Split Text.”

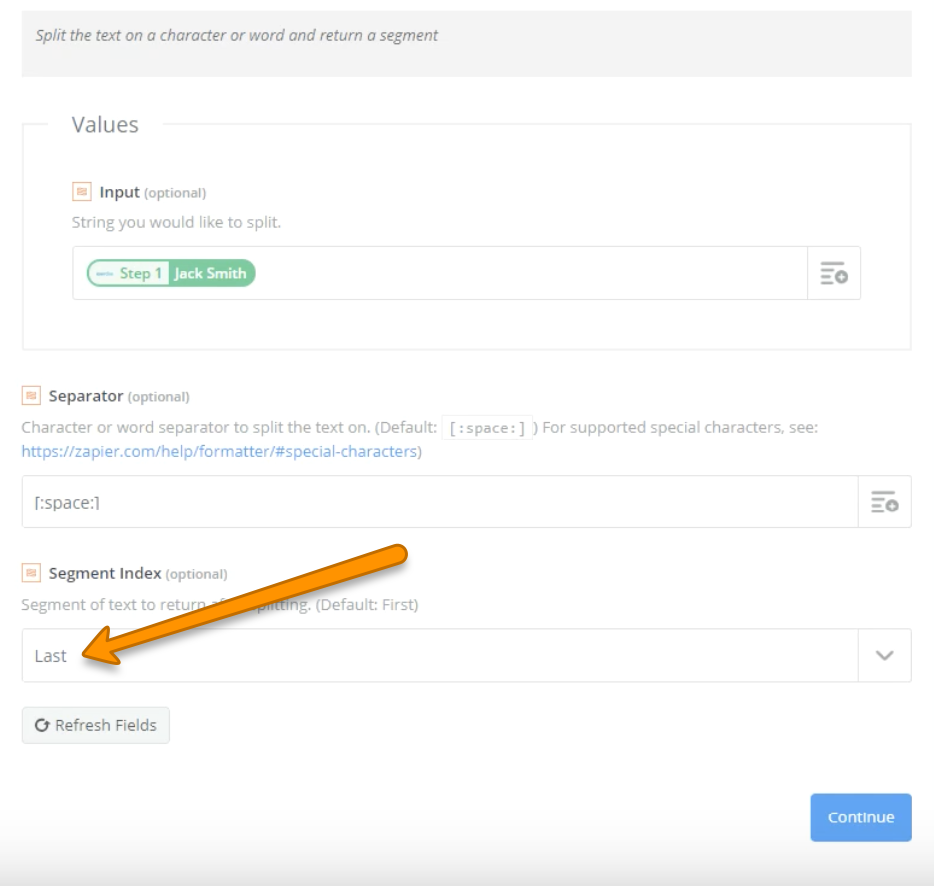
Step 9: Under the “Values” header, click on the “Input” box, and choose “Name.”
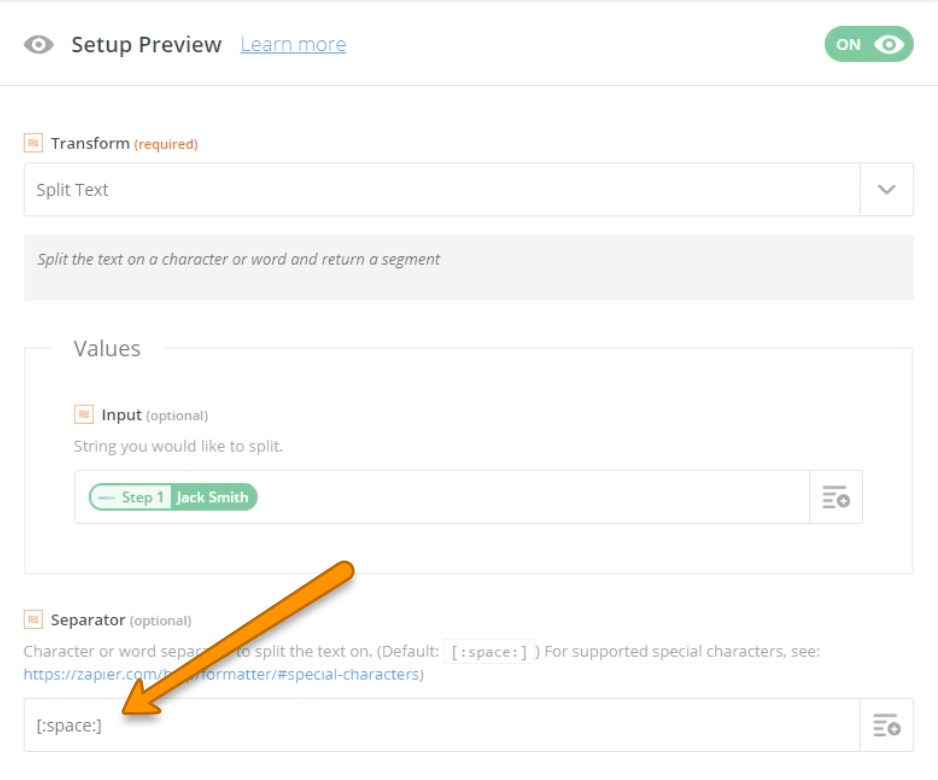
Step 10: Under “Separator” header, paste in [:space:] in the box.
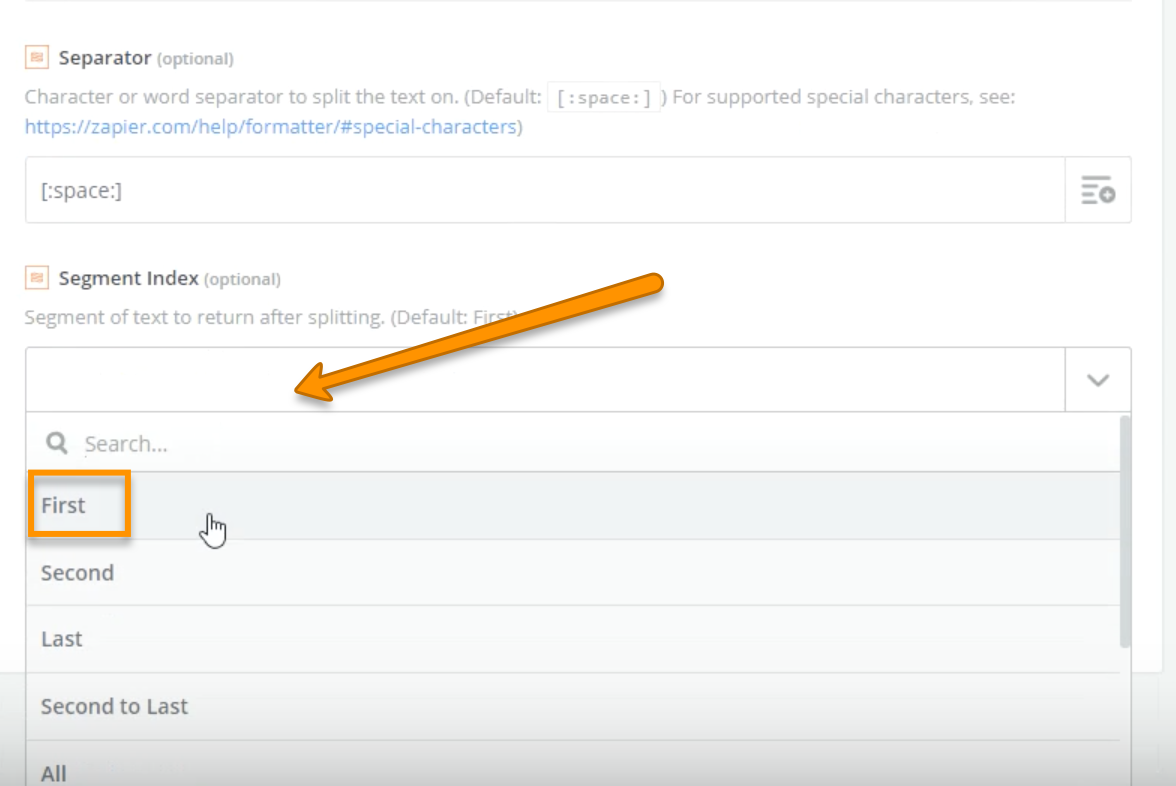
Step 11: Under the “Segment Index,” click on the box and choose “First.”
Step 12: Click “Continue” to finalize all changes on the page.

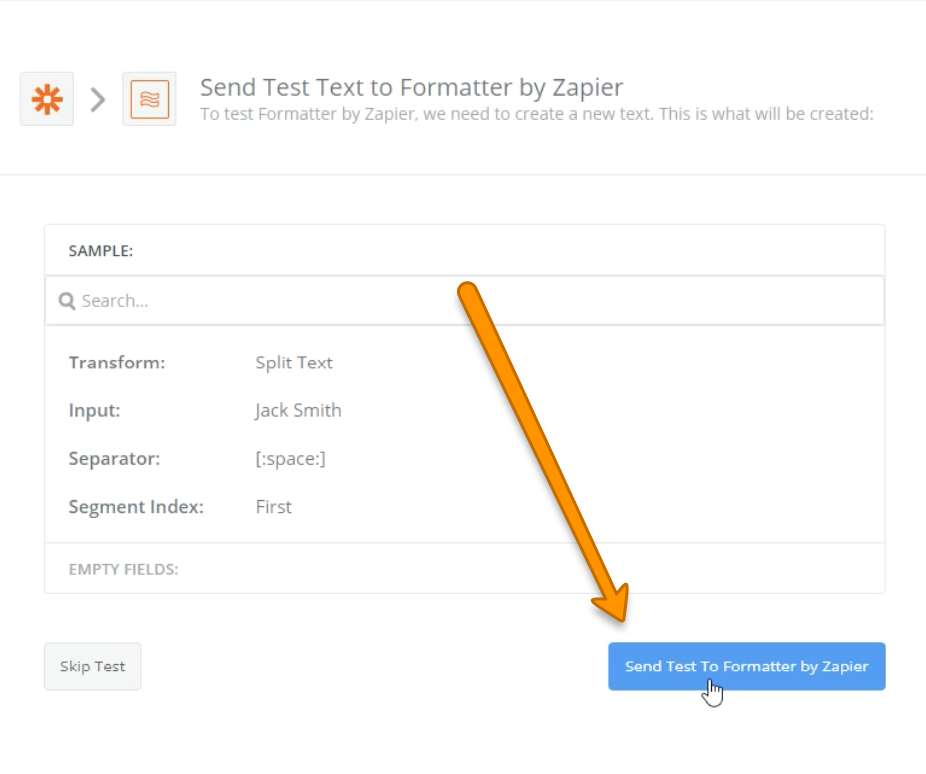
Step 13: Click “Send Test to Formatter” to continue.
Step 14: Verify the trigger worked correctly and click “Finish.” 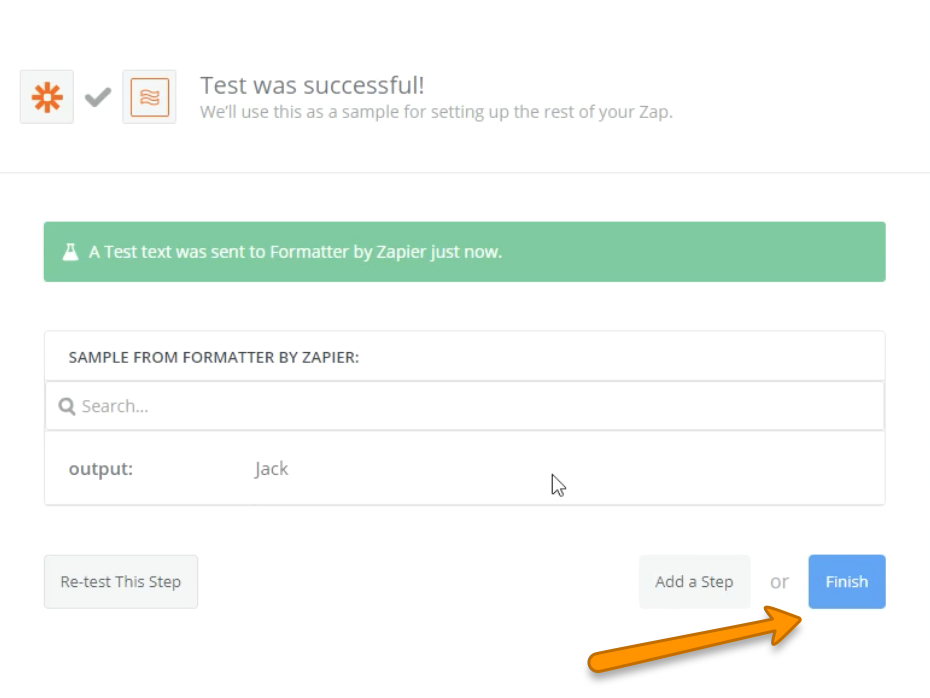
Step 15: Repeat the same steps but instead of “First” (Step 11) choose “Last.”
Depending on your client list, you may want to set up further actions for middle names, or second last name (e.g., Jr.). Repeat the steps above just choose a different option in the drop-down (Step 11).
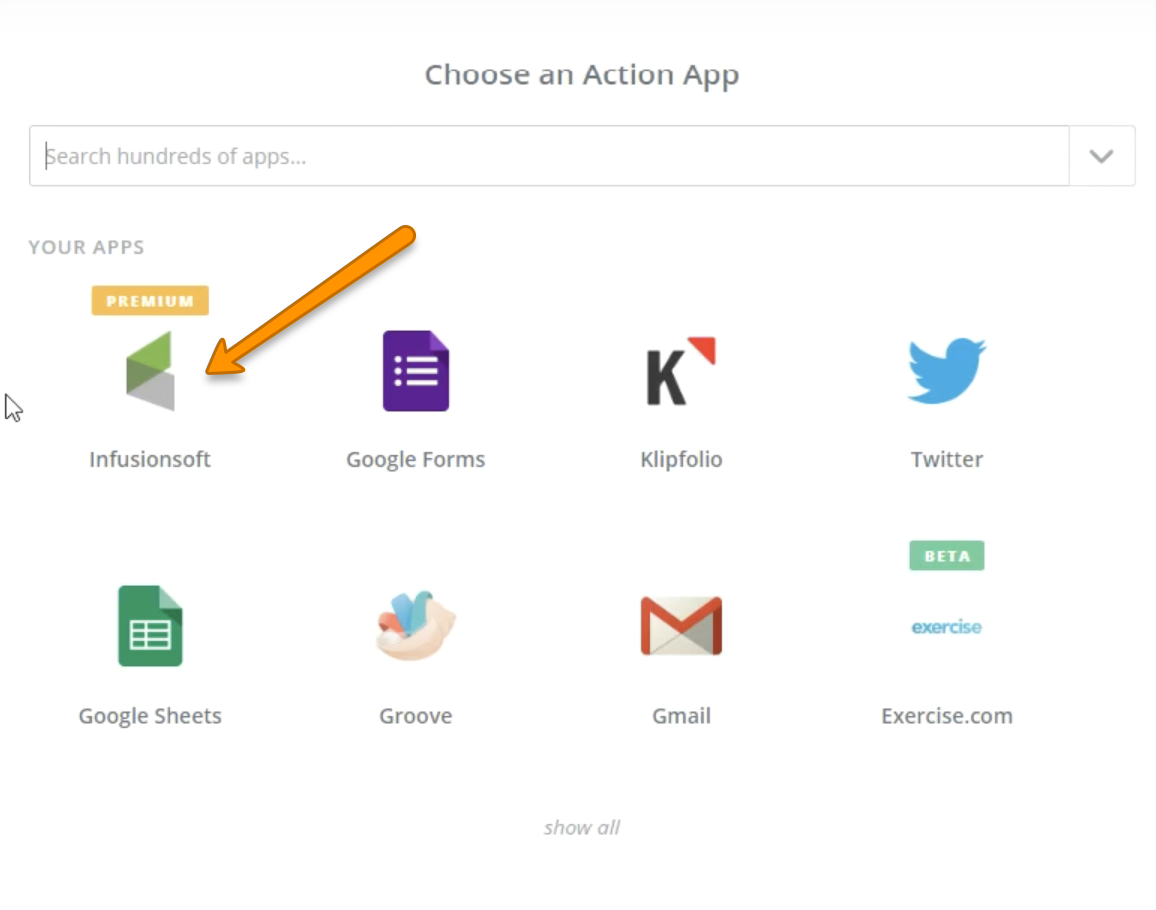
Step 16: Now to add to your client management software — Click + to select an action.

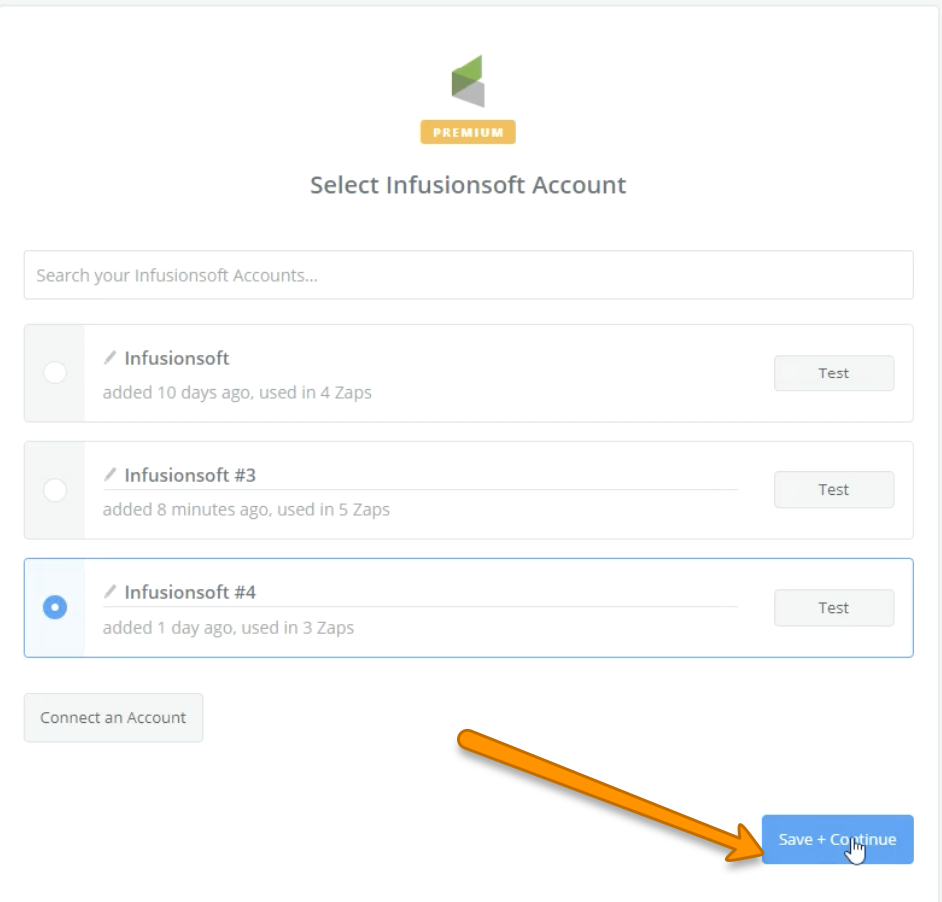
Step 17: Choose your client management software.
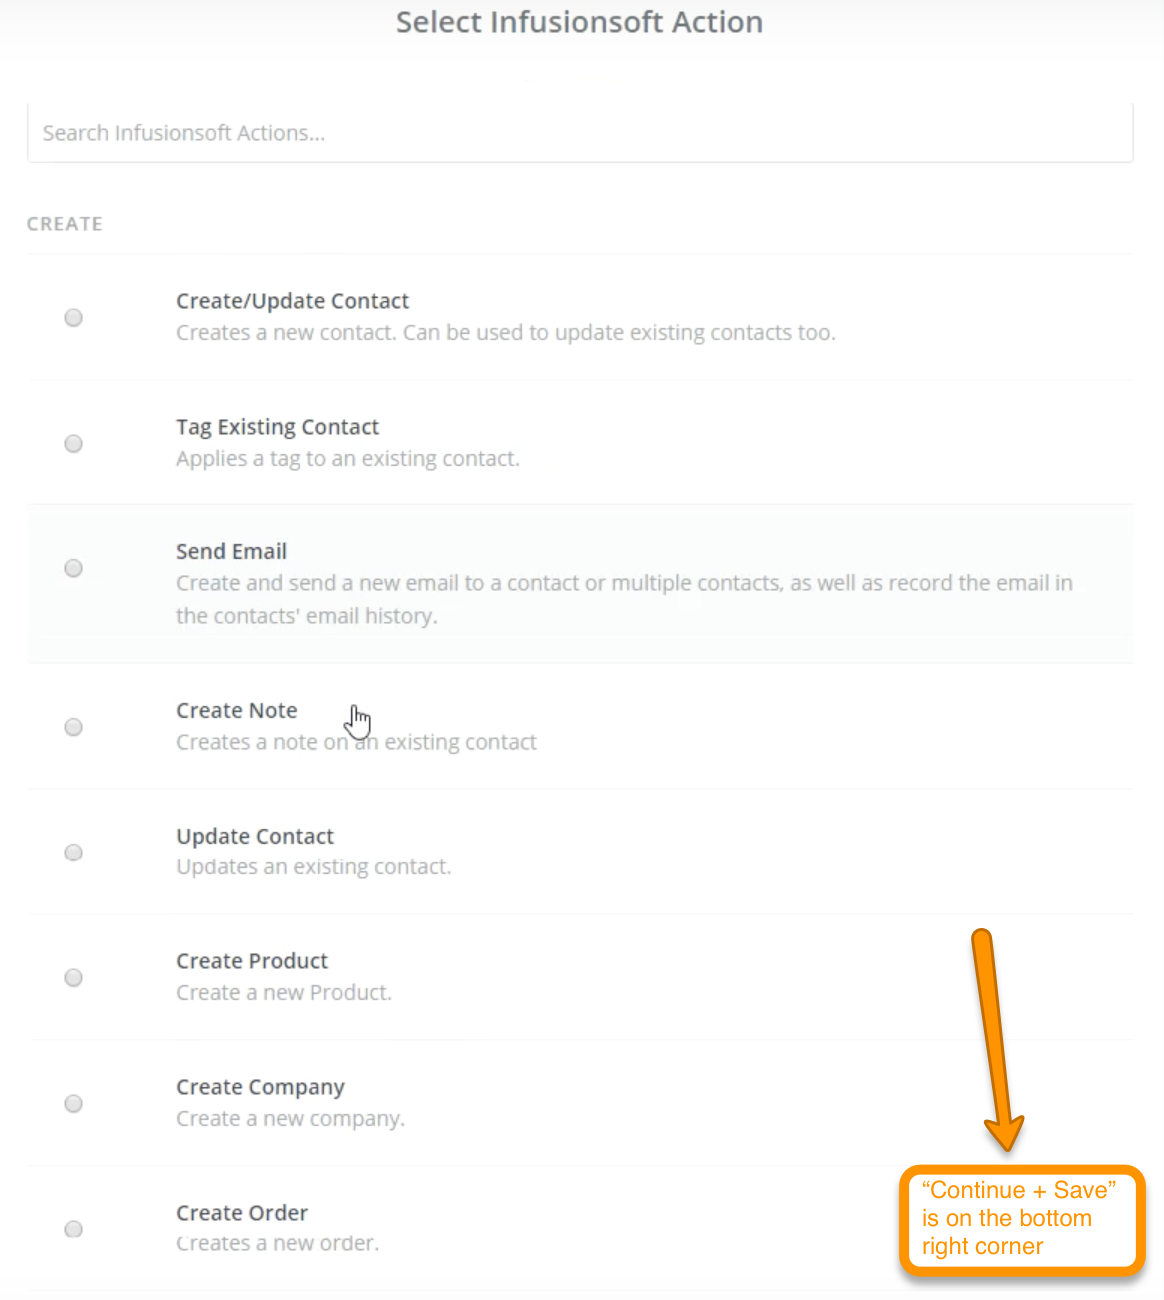
Step 18: Choose the appropriate action then click “Save + Continue.”
Watch our video demo for suggestions based on what you choose in Step 3 as your trigger.
Step 19: Save to your account by clicking “Save + Continue.”
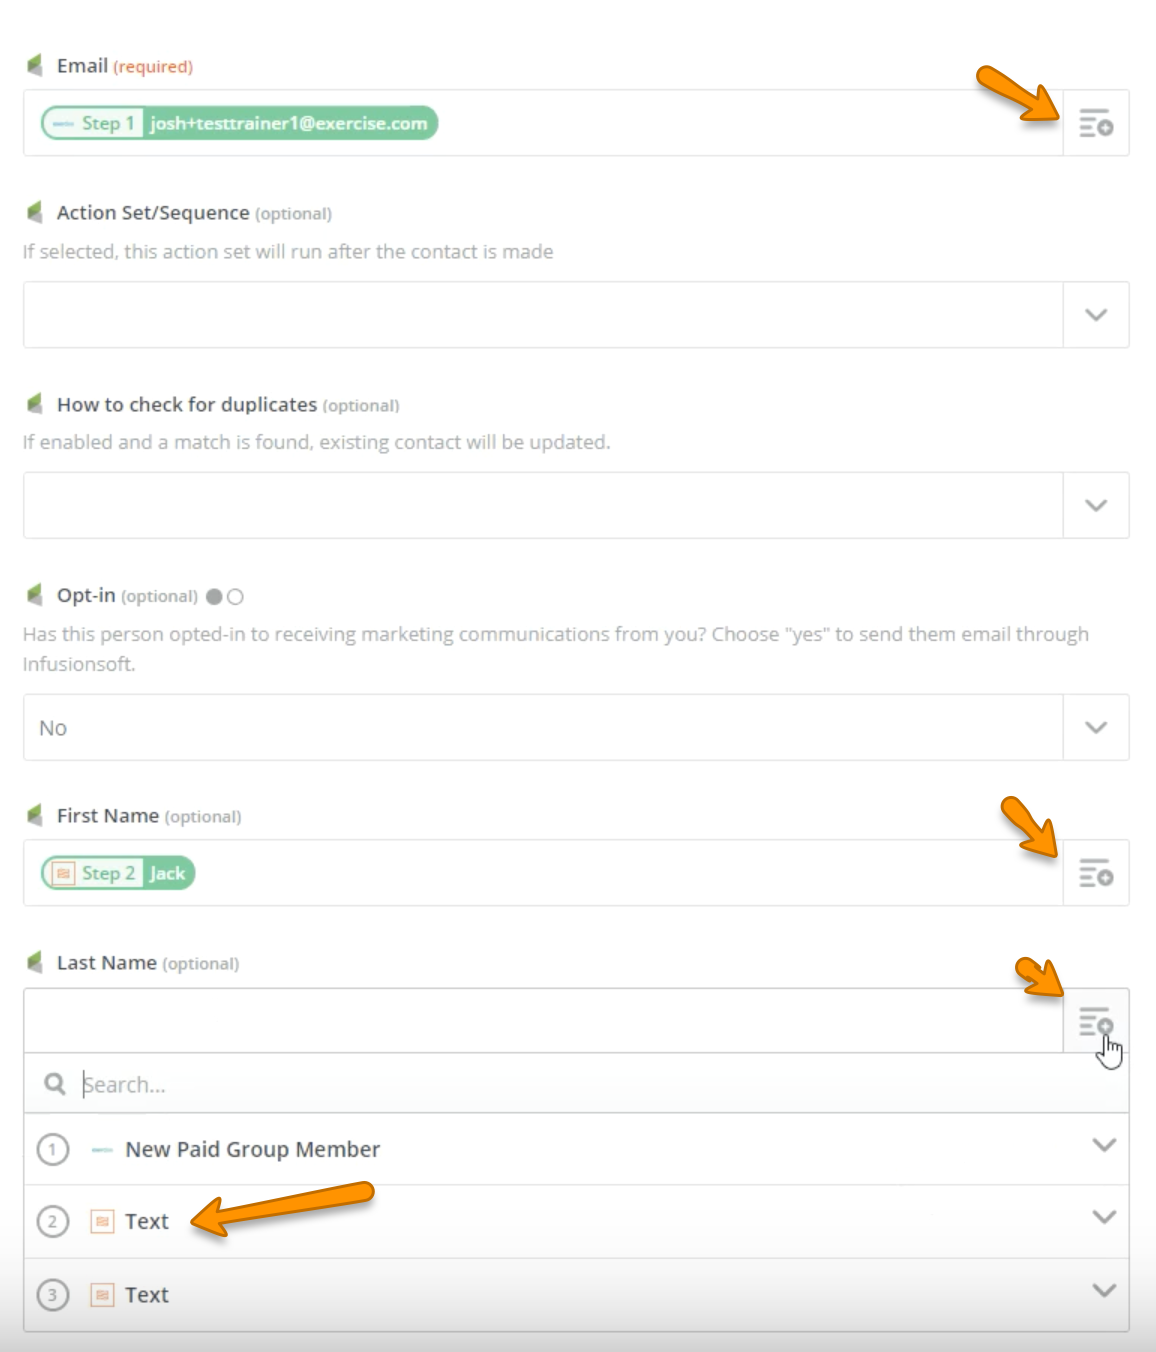
Step 20: Pull in the “Email” first then add “First Name” and “Last Name.” Click text and plus sign icon to the right.
Once you click in the “First Name” box, click “Text” then choose first name. Repeat only with “Last Name” for the “Last Name” field. You’ll display multiple text boxes depending on how many triggers you’ve set, so verify you’re choosing the right option.
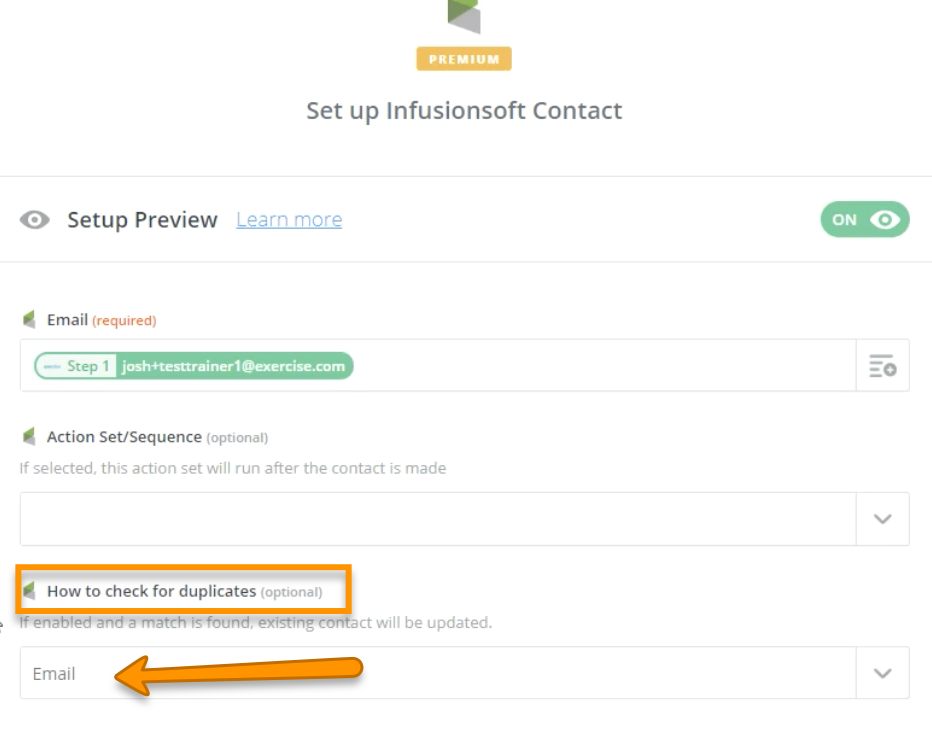
Step 21: We recommend using the “How to check for duplicates” option and choosing email.
Now that you can split a full name into a first and last name, you can easily import your clients into your user management software.
Step 22: Review information on the next page and if it’s correct, click “Finish.”
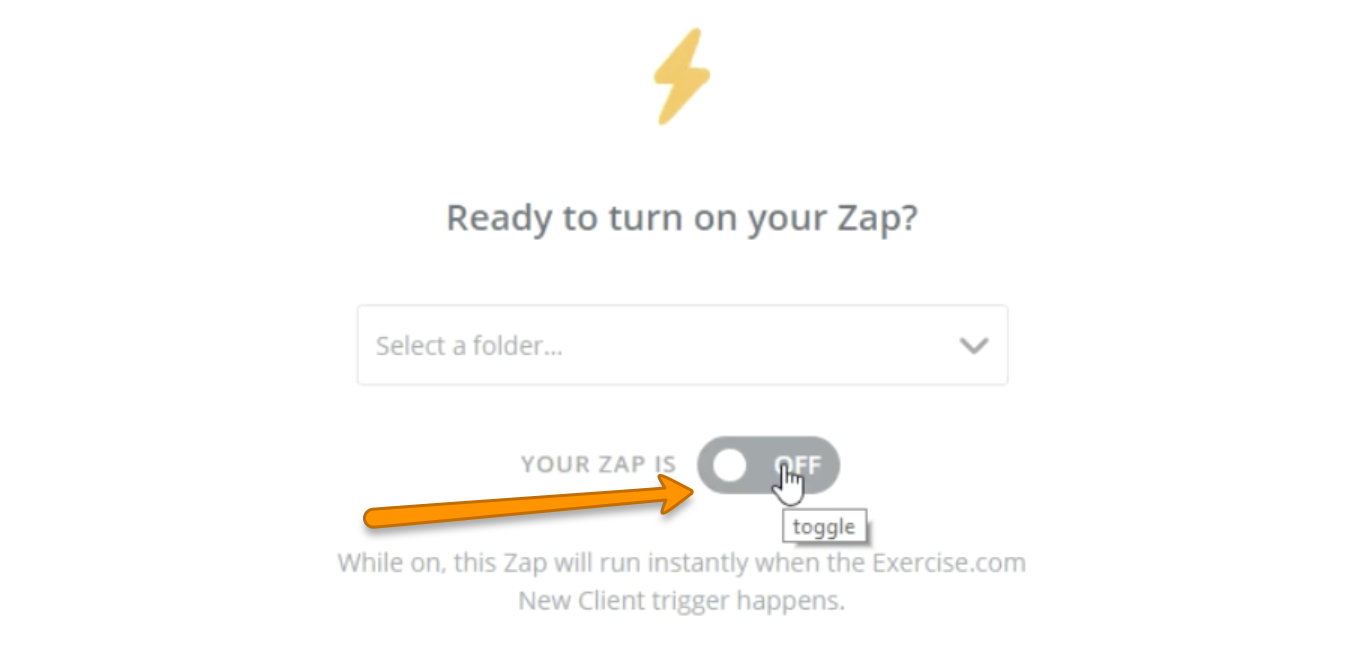
Step 23: Toggle your Zap on