How do I add tags to Clients?
Posted by
Support Team
on
September 10, 2020
— Updated on
July 21, 2024
To add tags to clients within your fitness business management software platform, follow instructions below.
This guide will walk you through how to tag multiple clients at once or tag single clients.
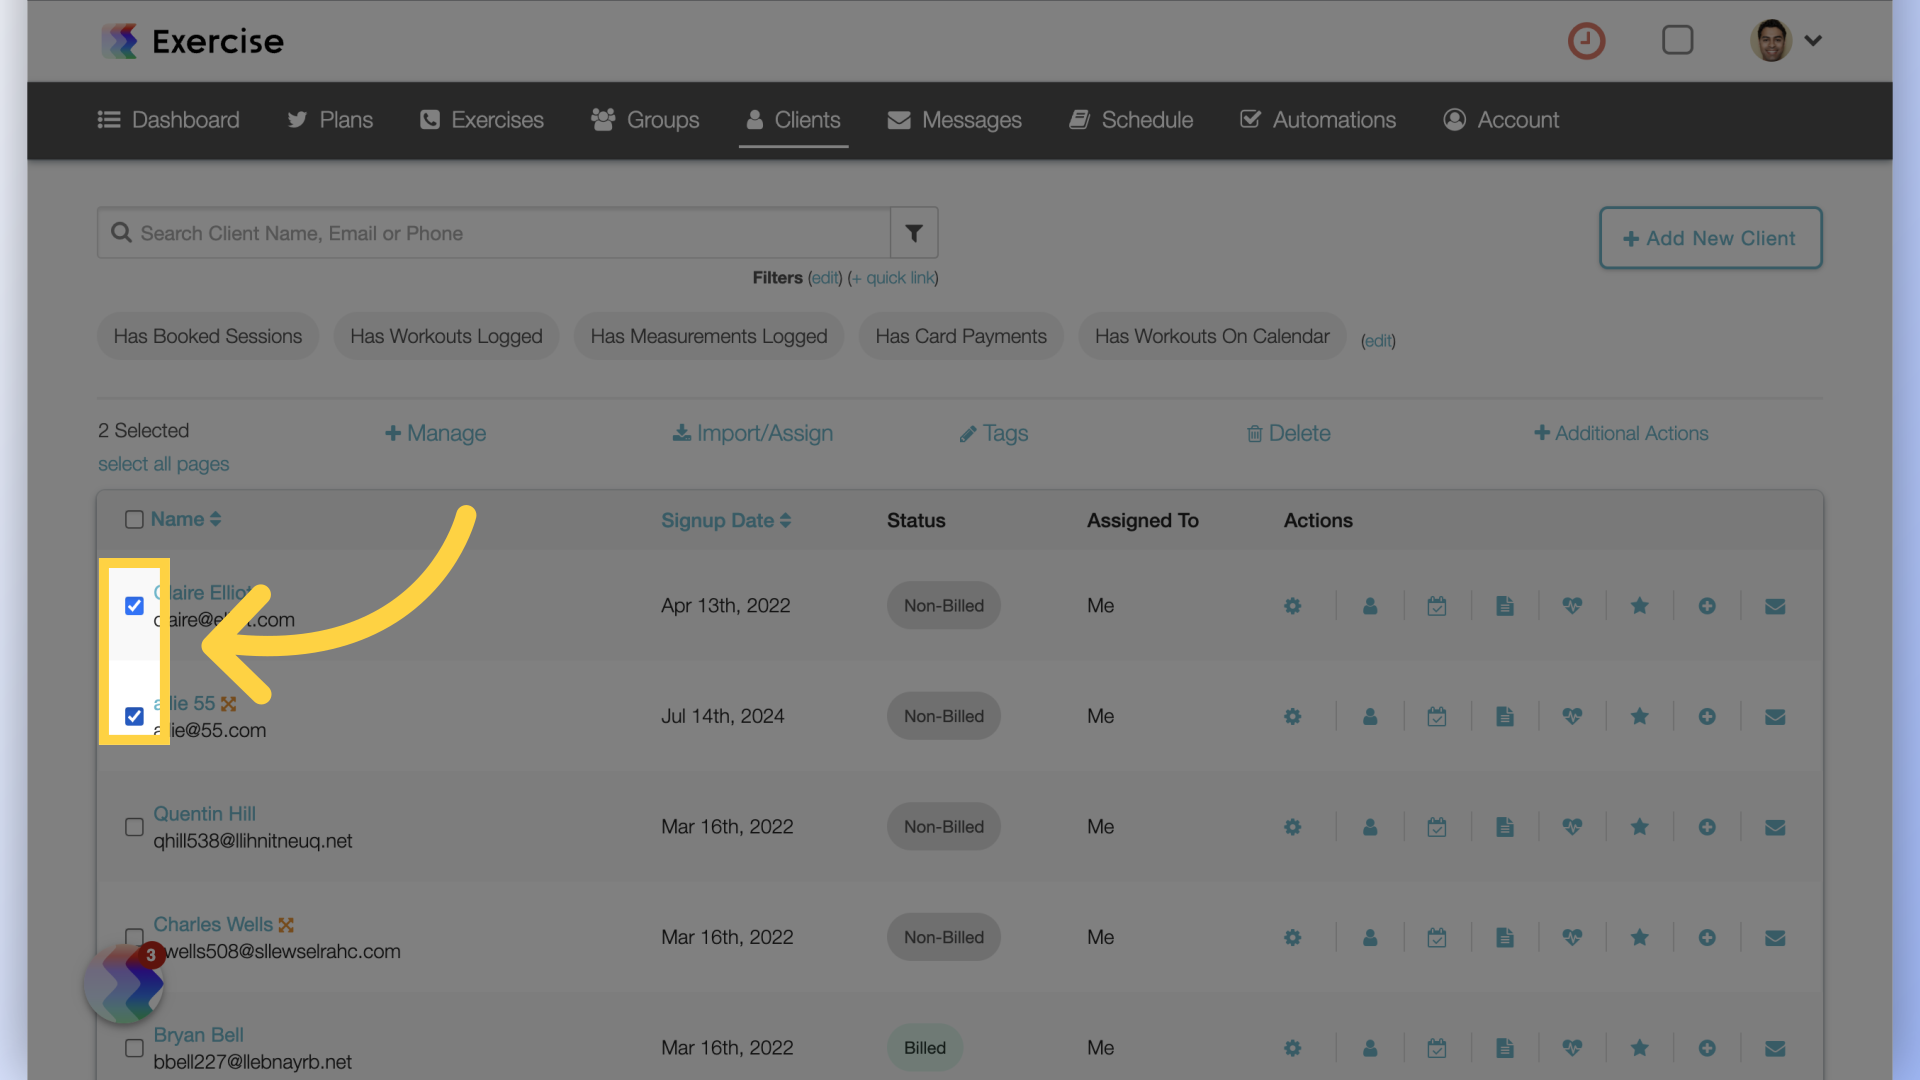
1. Select Clients
Check the boxes next to each of the clients you would like to update tags for.
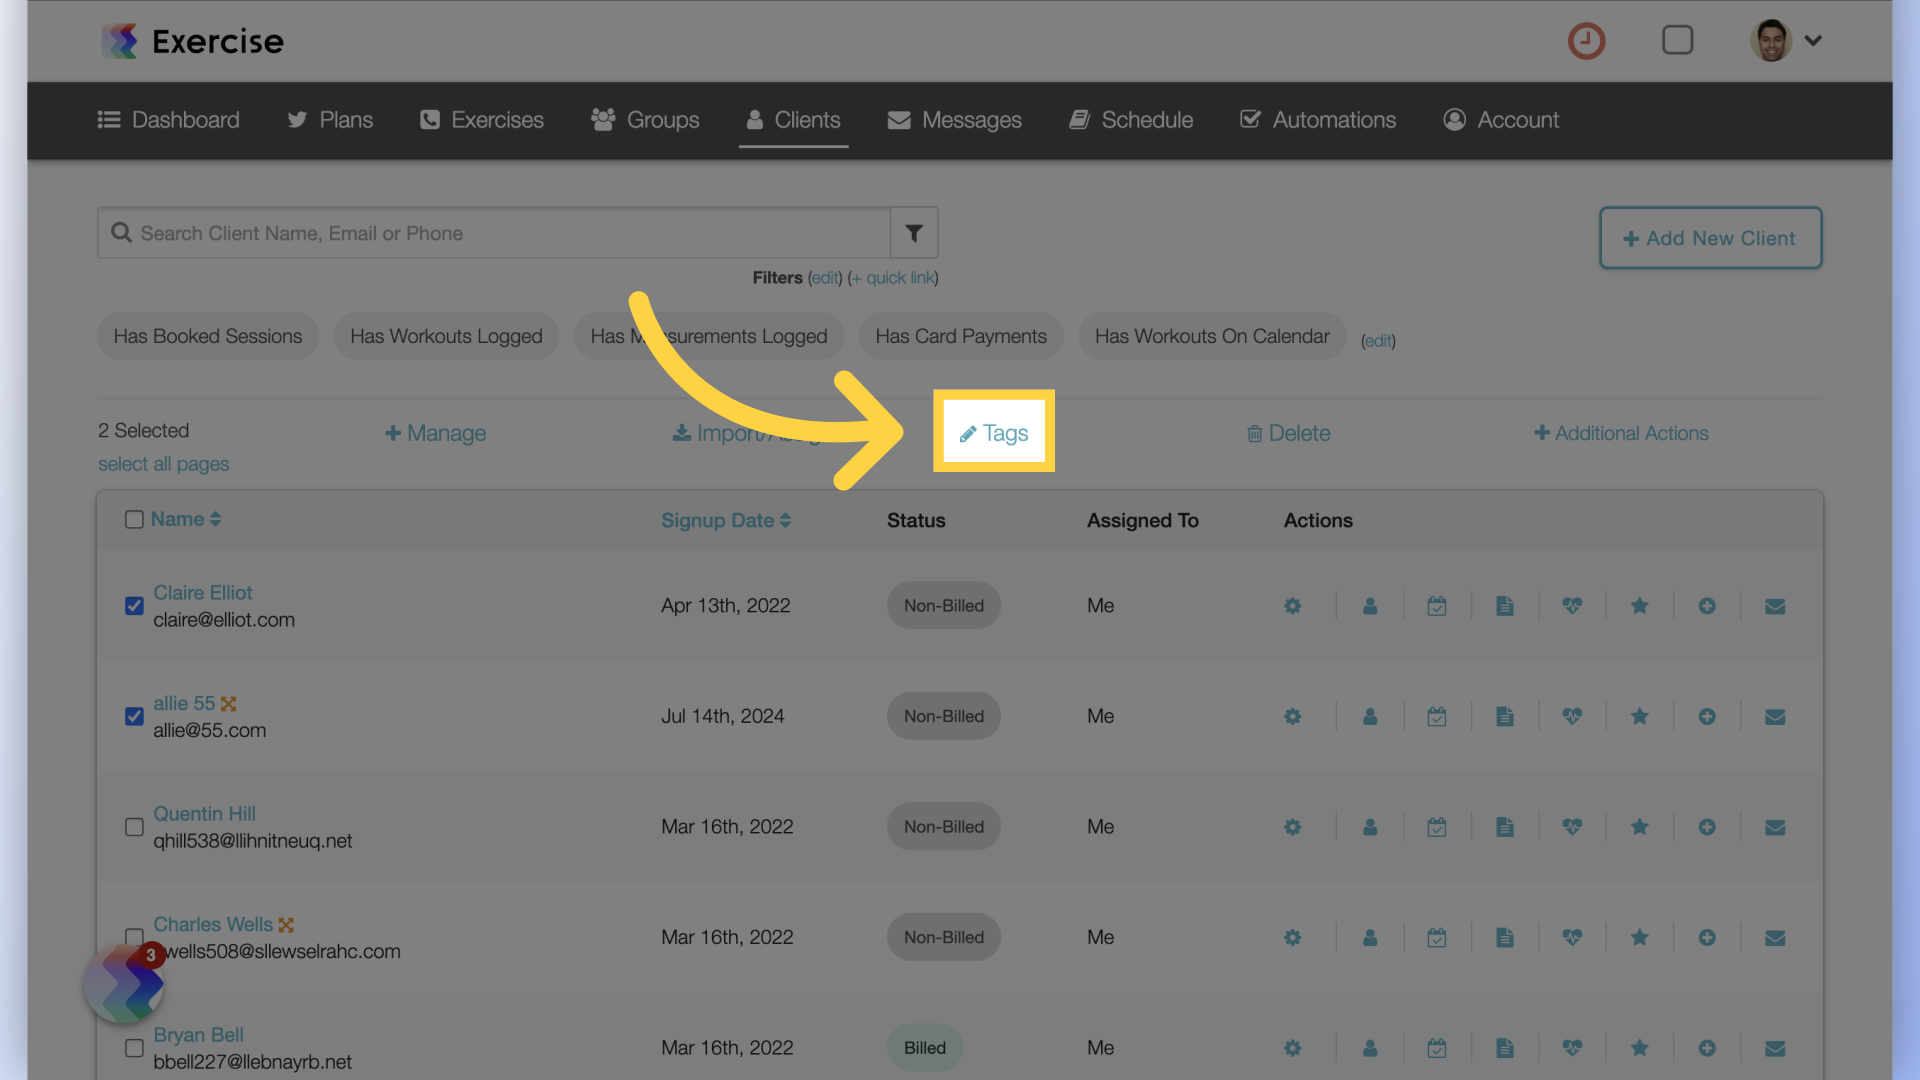
2. Tags
Click on “Tags” at the top of the client list.
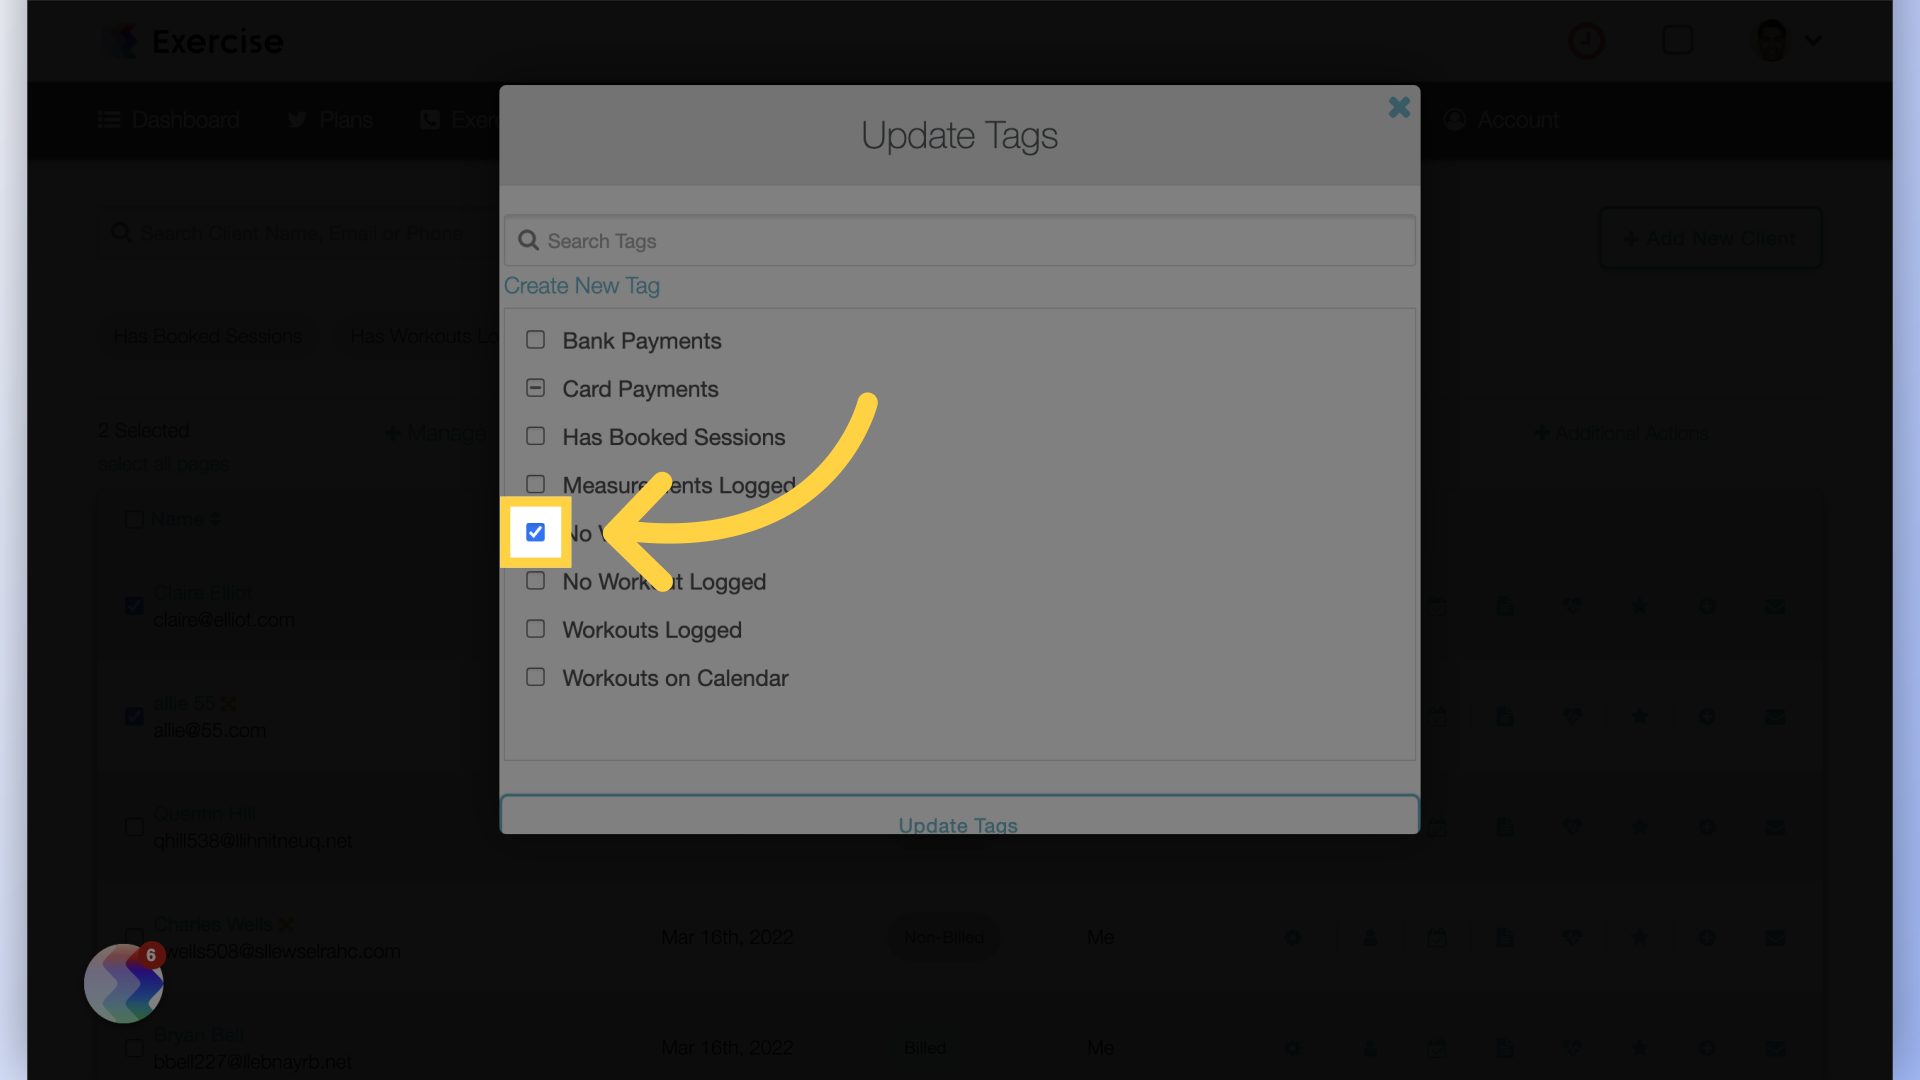
3. Select or Deselect
Select all the tags to add or deselect any tags to remove.
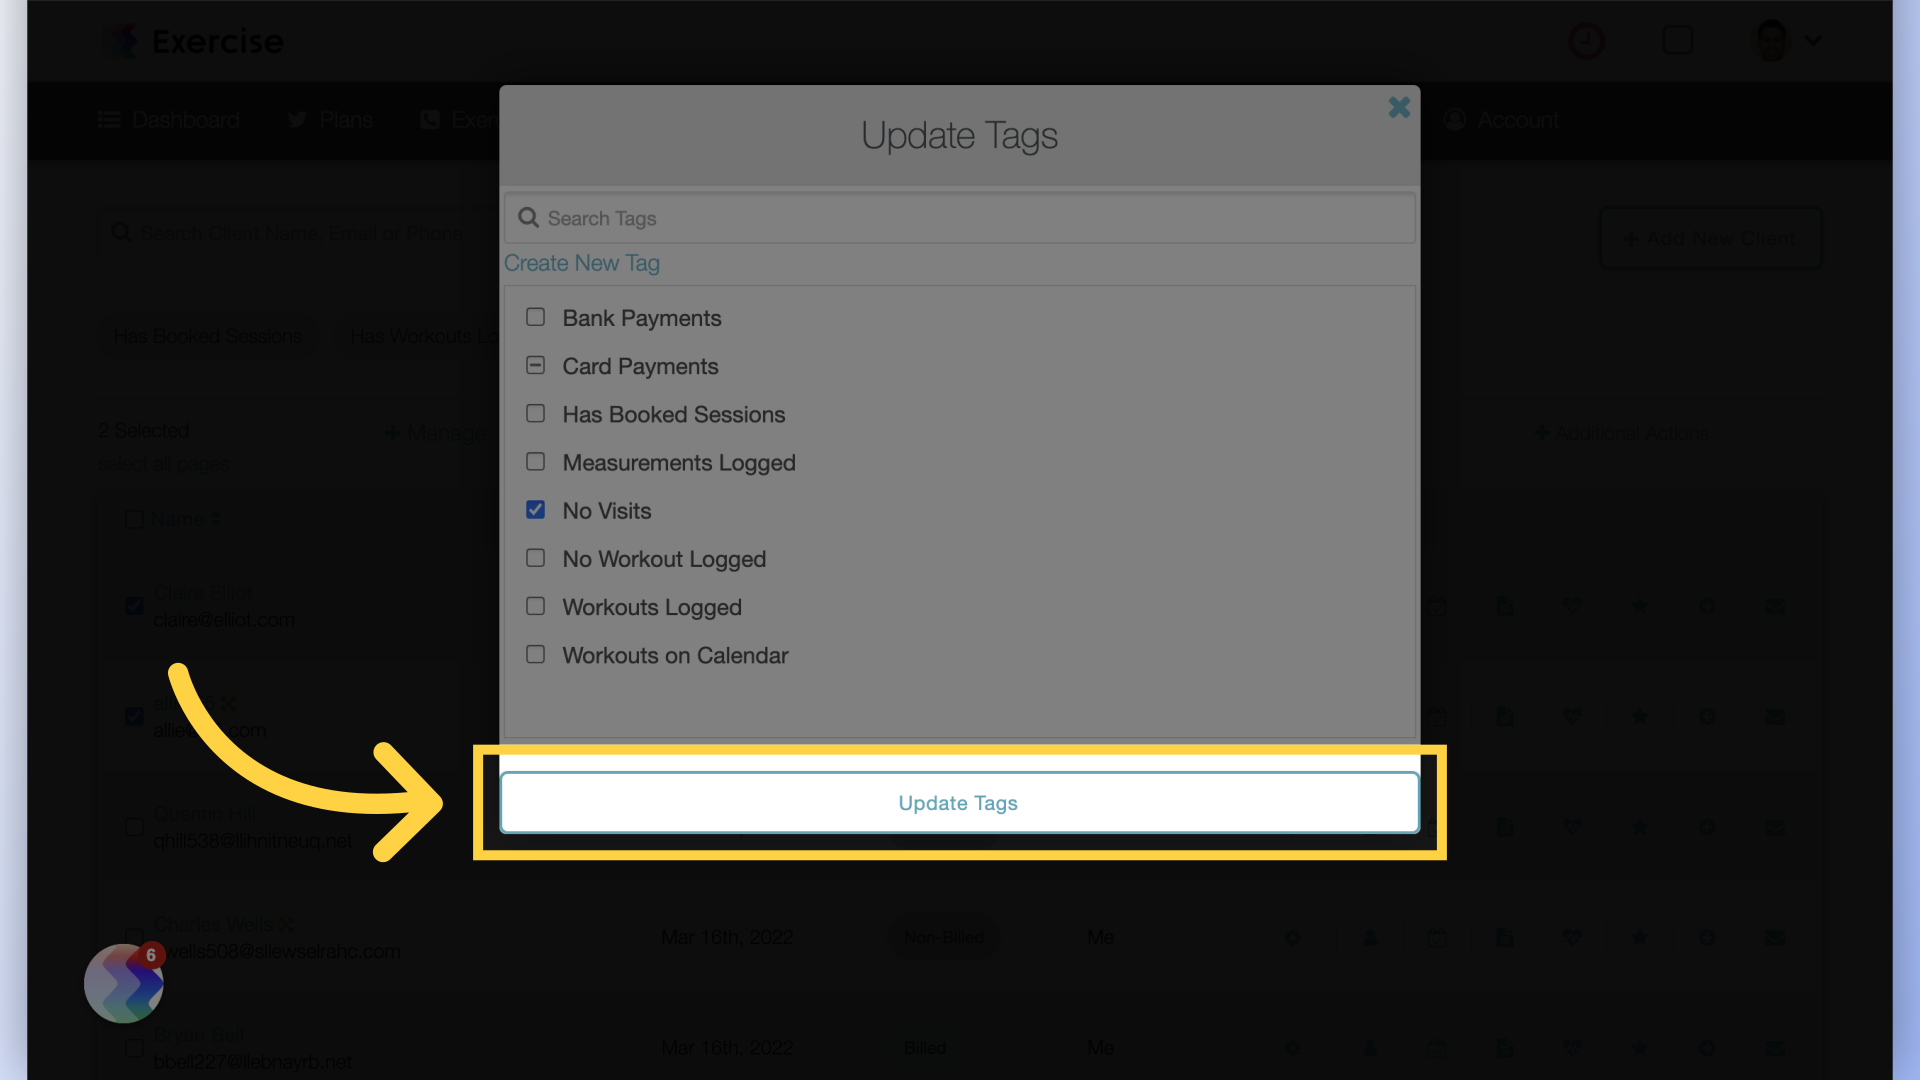
4. Update Tags
Click on “Update Tags” to save.
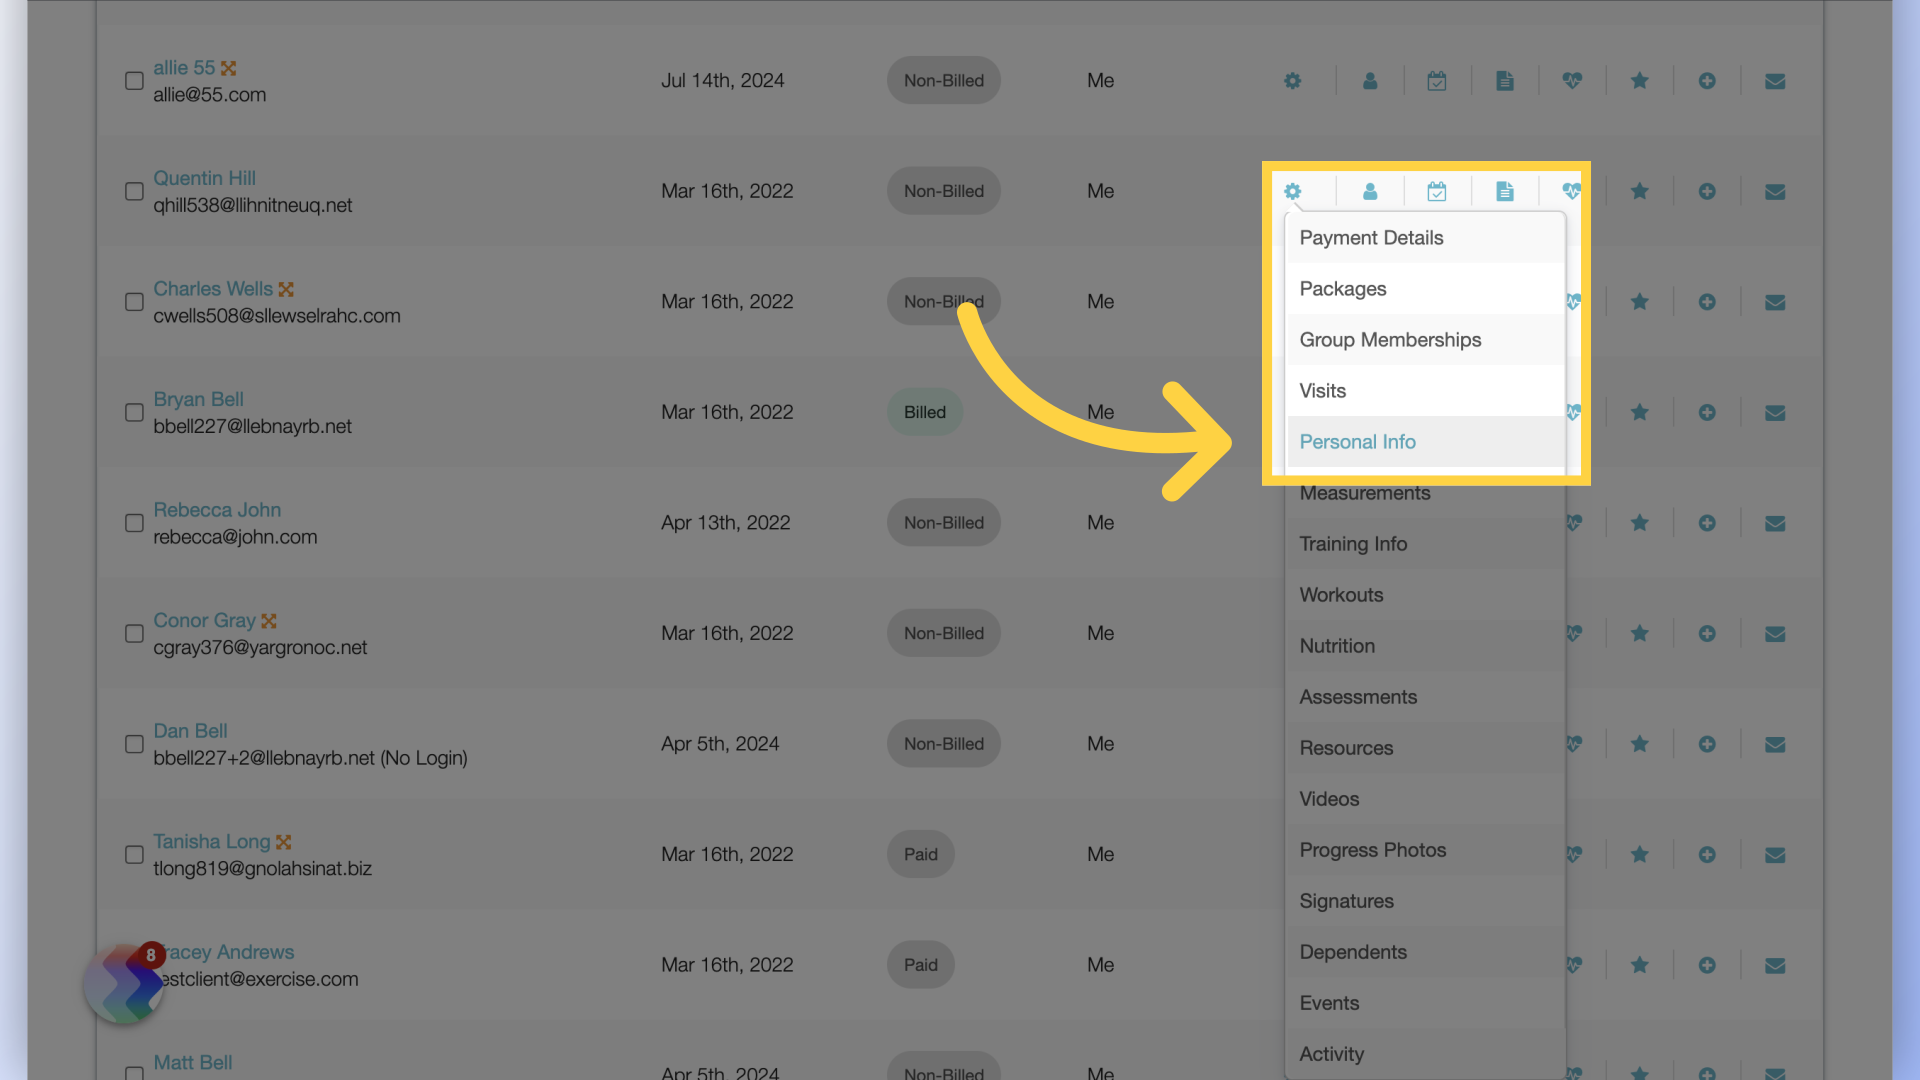
5. Personal Info
To add a tag to a single client, hover over the gear icon next to the client and select the “Personal Info” option from the fly out menu.
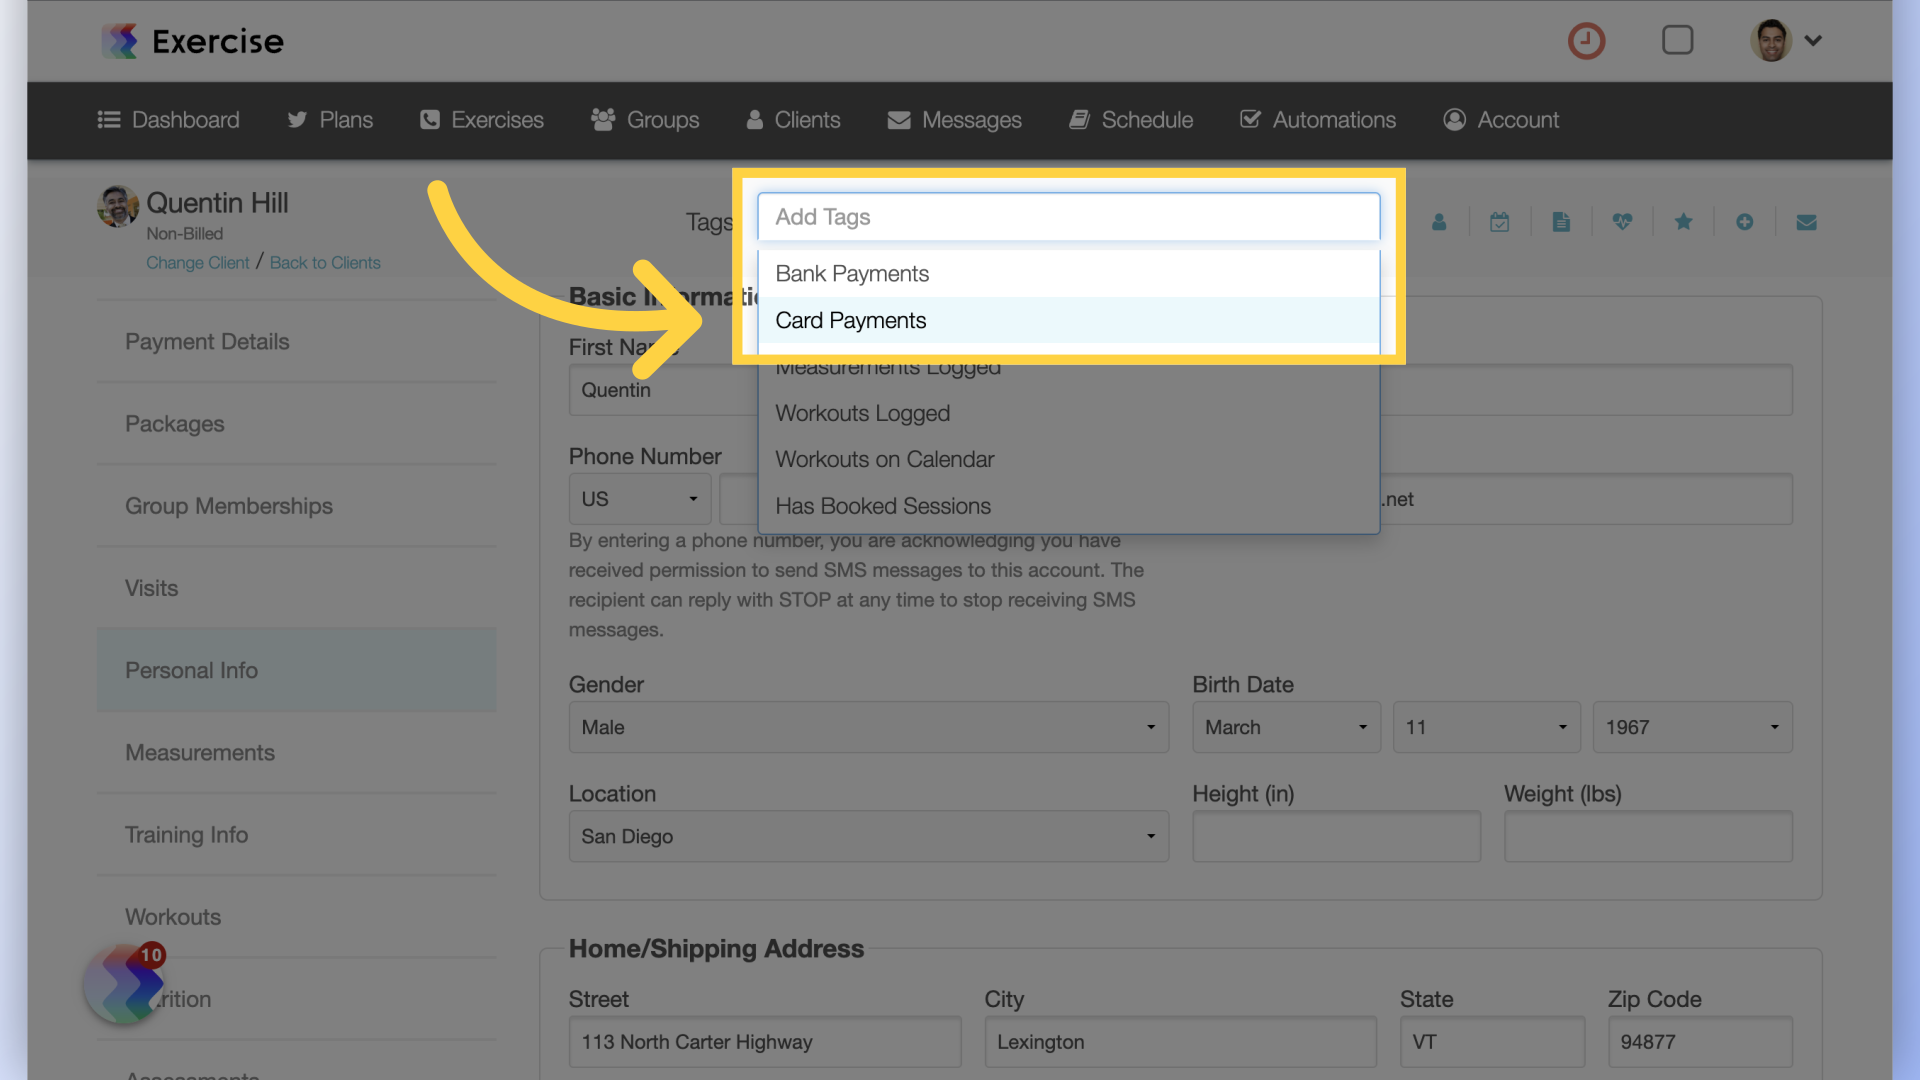
6. Add Tags
In the “Tags” field select tags from the drop down list.
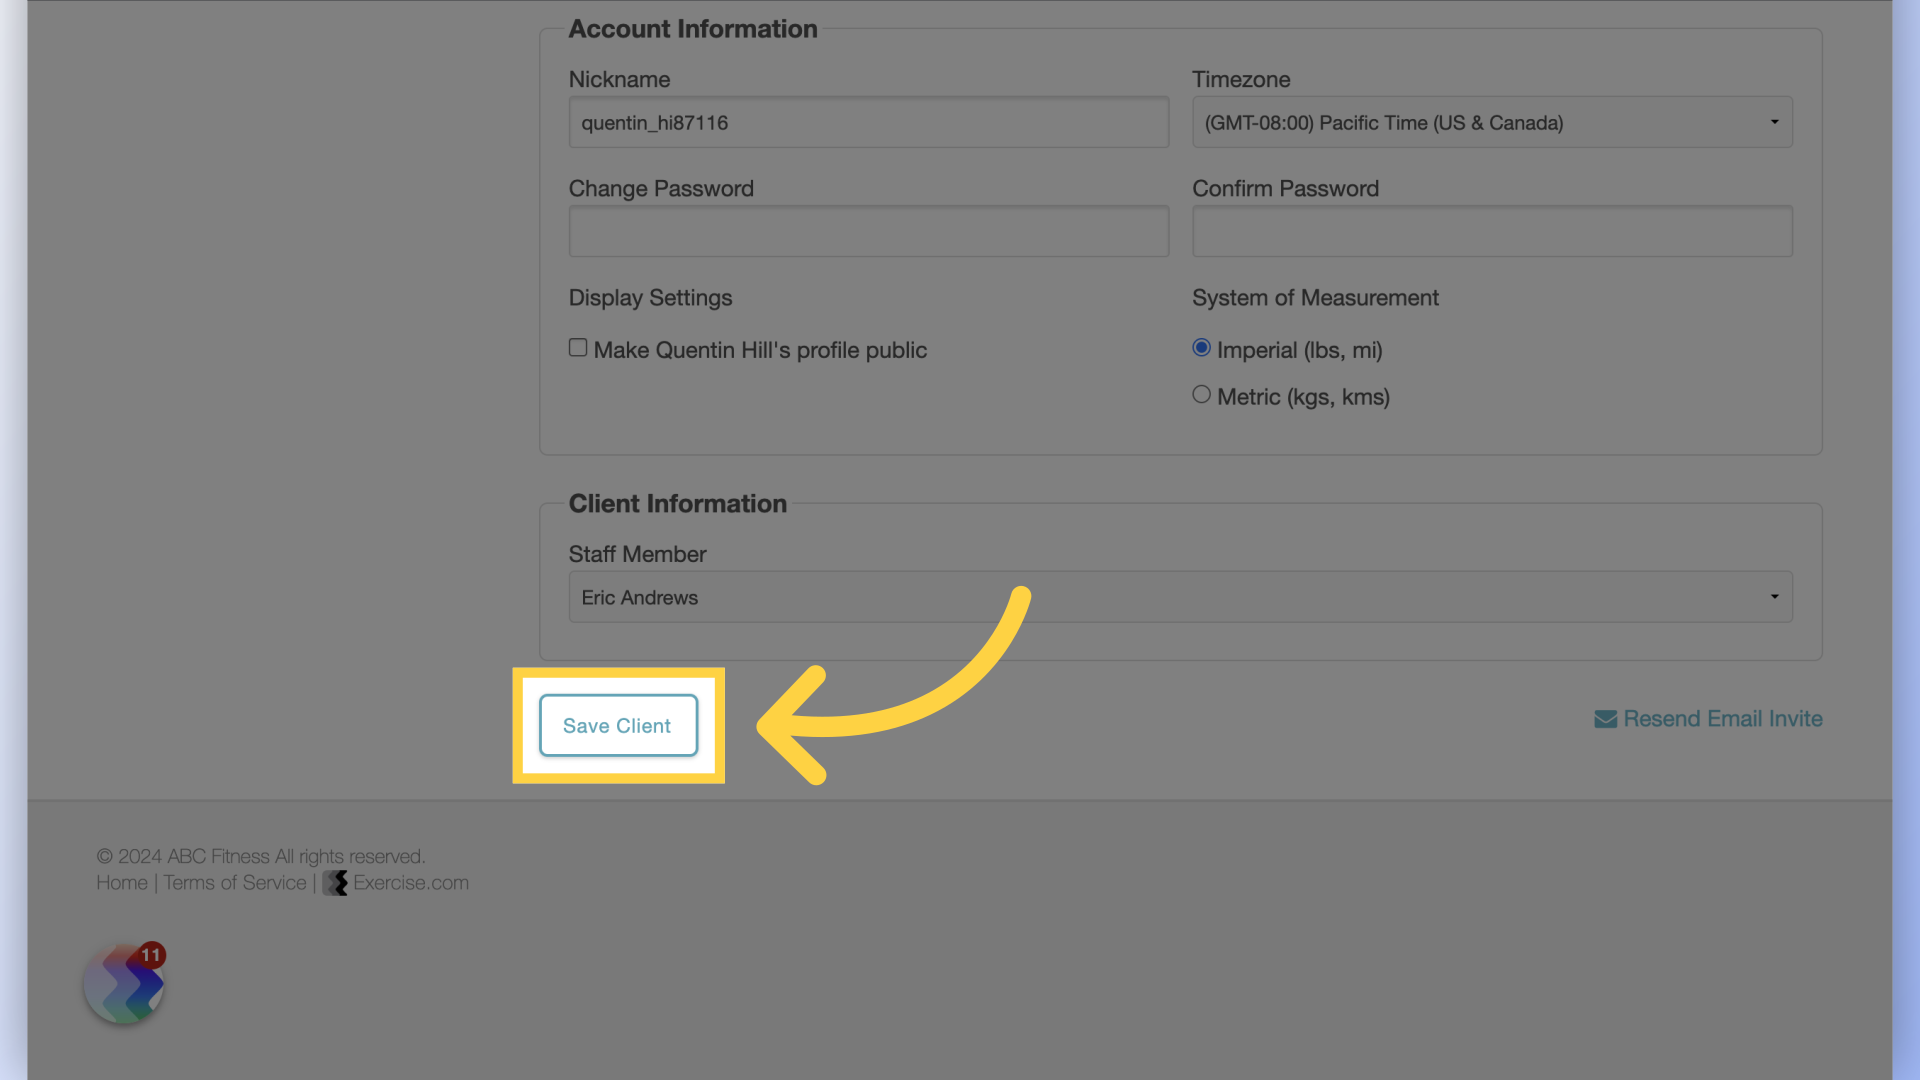
7. Save Client
Save the client’s information.
This guide covered how to add or remove tags to multiple clients and to a single client.


