How do I add Tags to Group Resources so Clients can easily find them on the Group page?

Exercise.com’s Online Fitness Group Software makes it easy to deliver a consistent experience to a large group of people at once.

This guide provides instructions on how to effectively utilize tags to organize resources on a group home page.

By following these steps, you will learn how to set up your group tags, and also add shortcuts for filtering Group resources.

1. Click the  “Groups” tab.

Click on “Groups”

Click the  'Groups' tab.

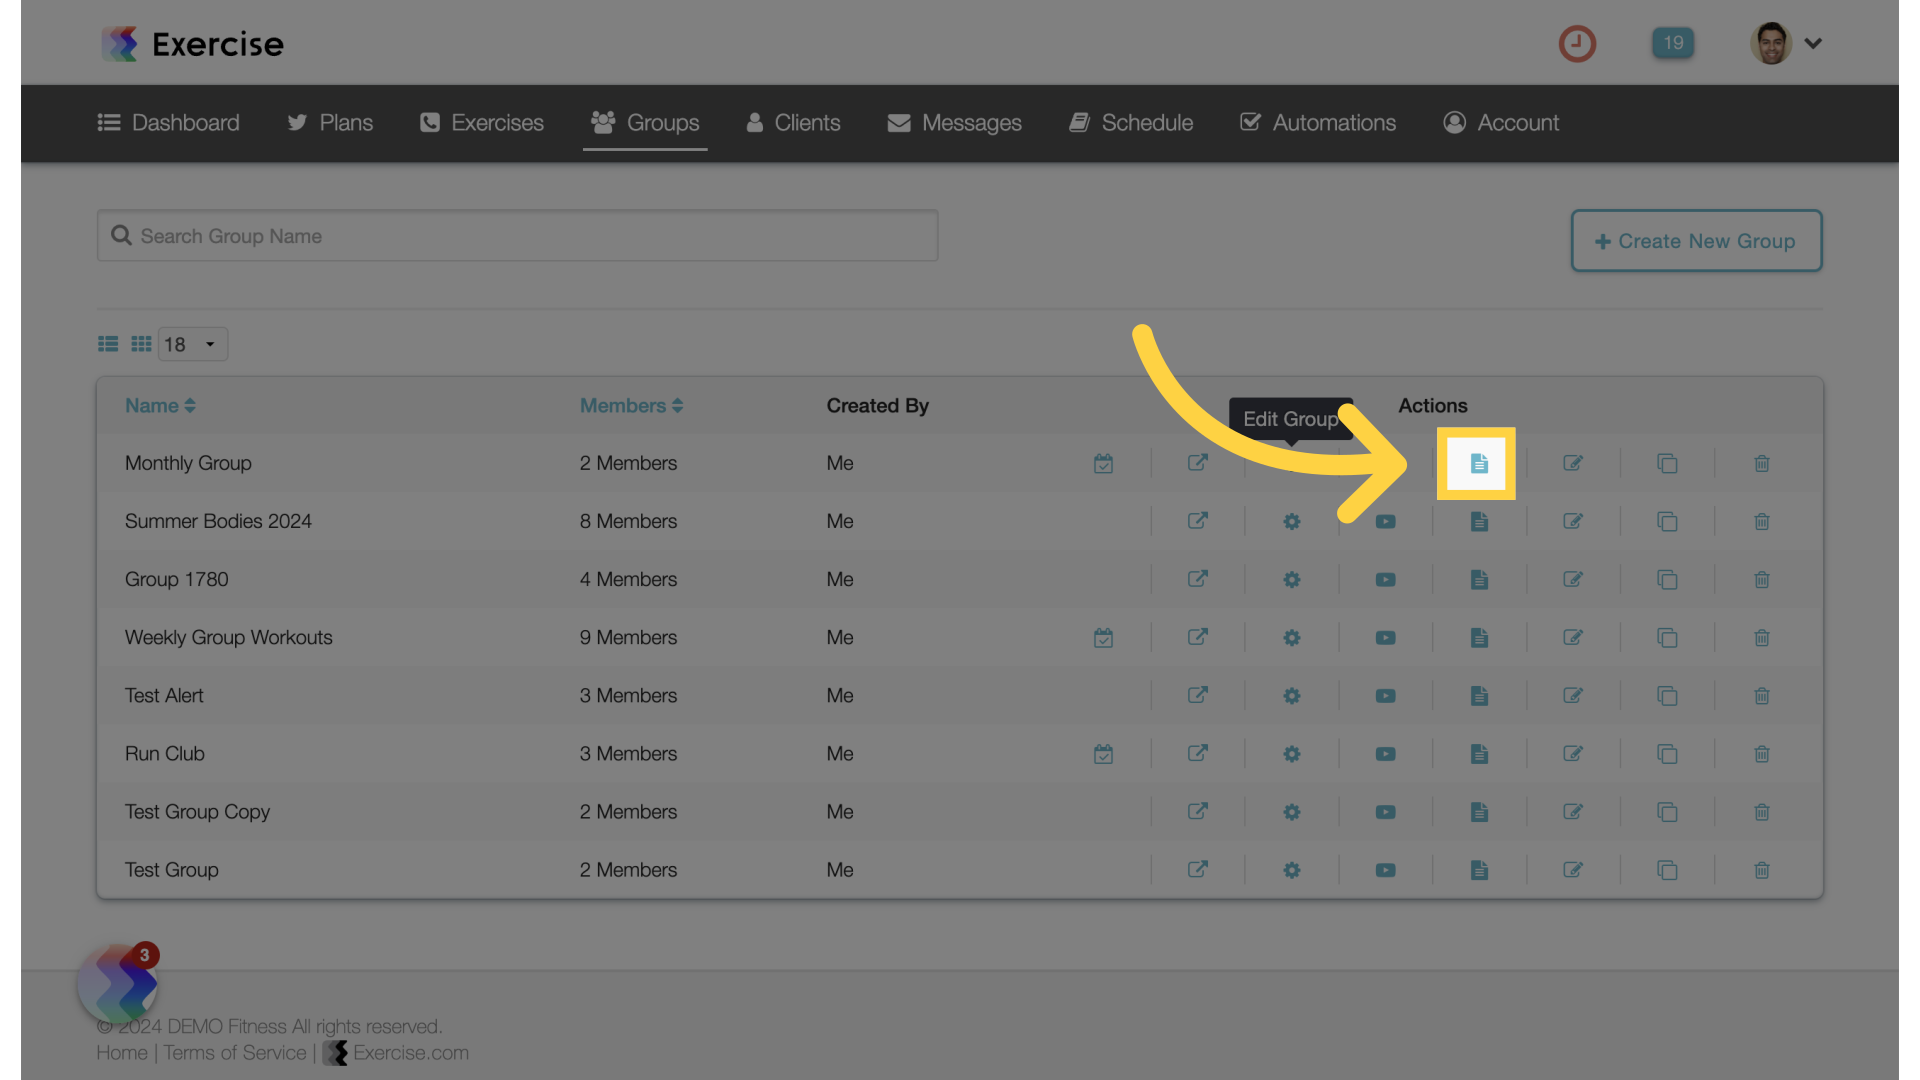
2. Click “Manage Group Resources”.

Click the “Manage group Resources” icon.

Click 'Manage Group Resources'.

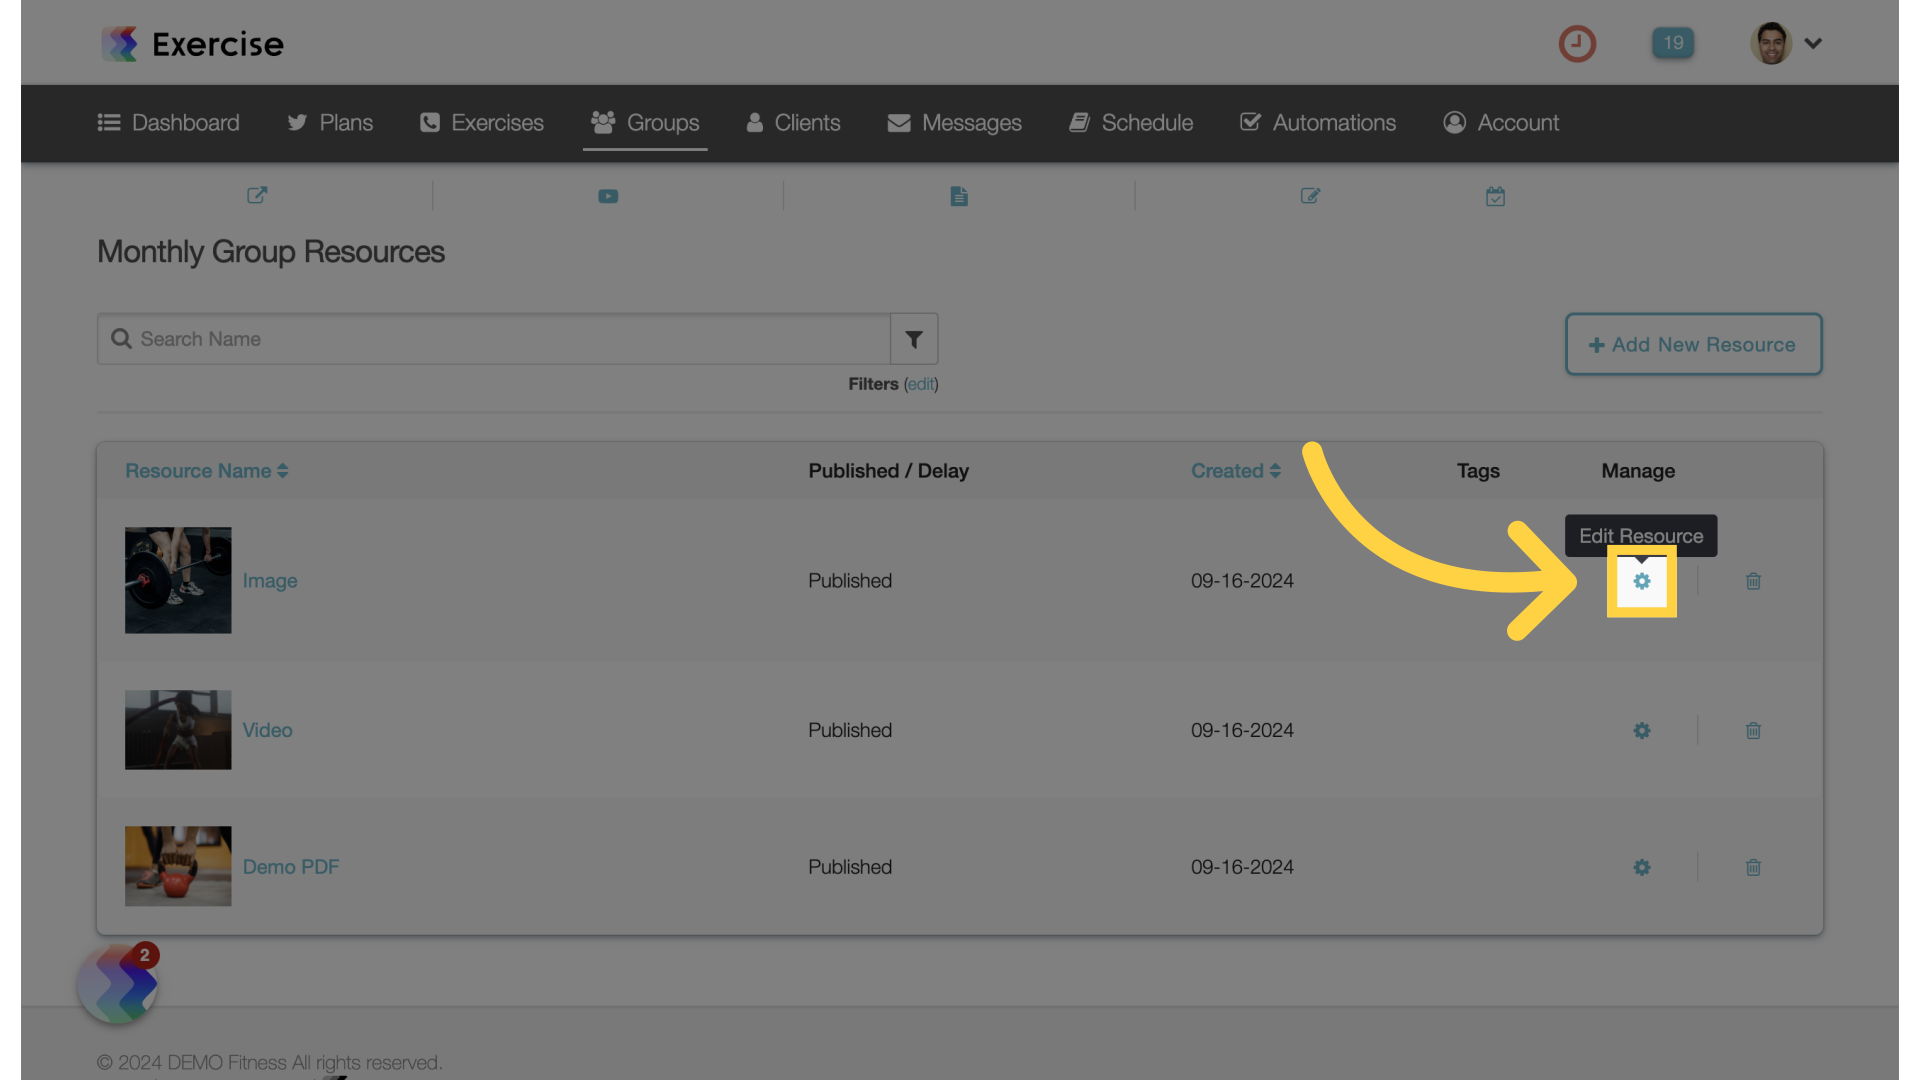
3. Click the “Edit Resource” icon or create a new Resource.

Click the gear icon to edit a group resource, or you can create a new resource.

Click the 'Edit Resource' icon or create a new Resource.

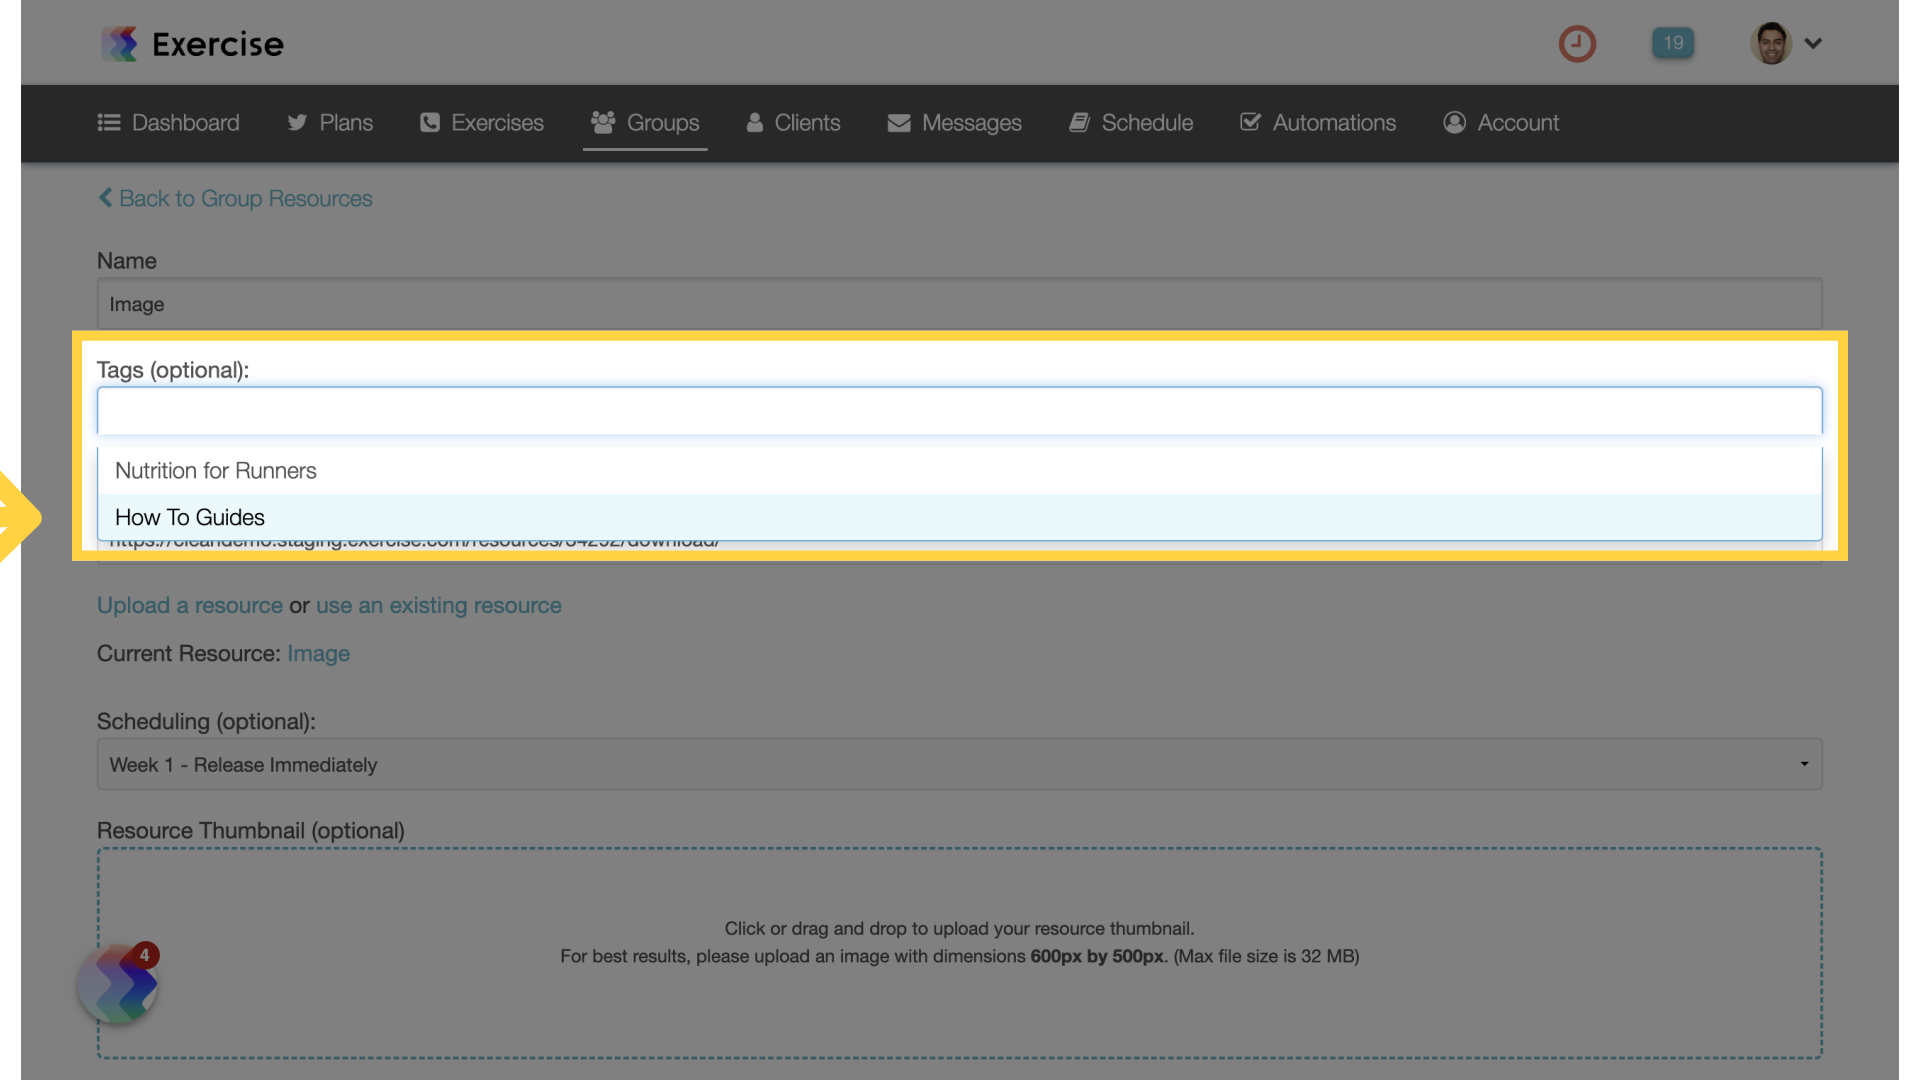
4. Click into the Tags field.

Click into the Tags field.

Click into the Tags field.

5. Select the tag(s) to add to this Resource.

Click the tag you want to add to this resource.

Select the tag(s) to add to this Resource.

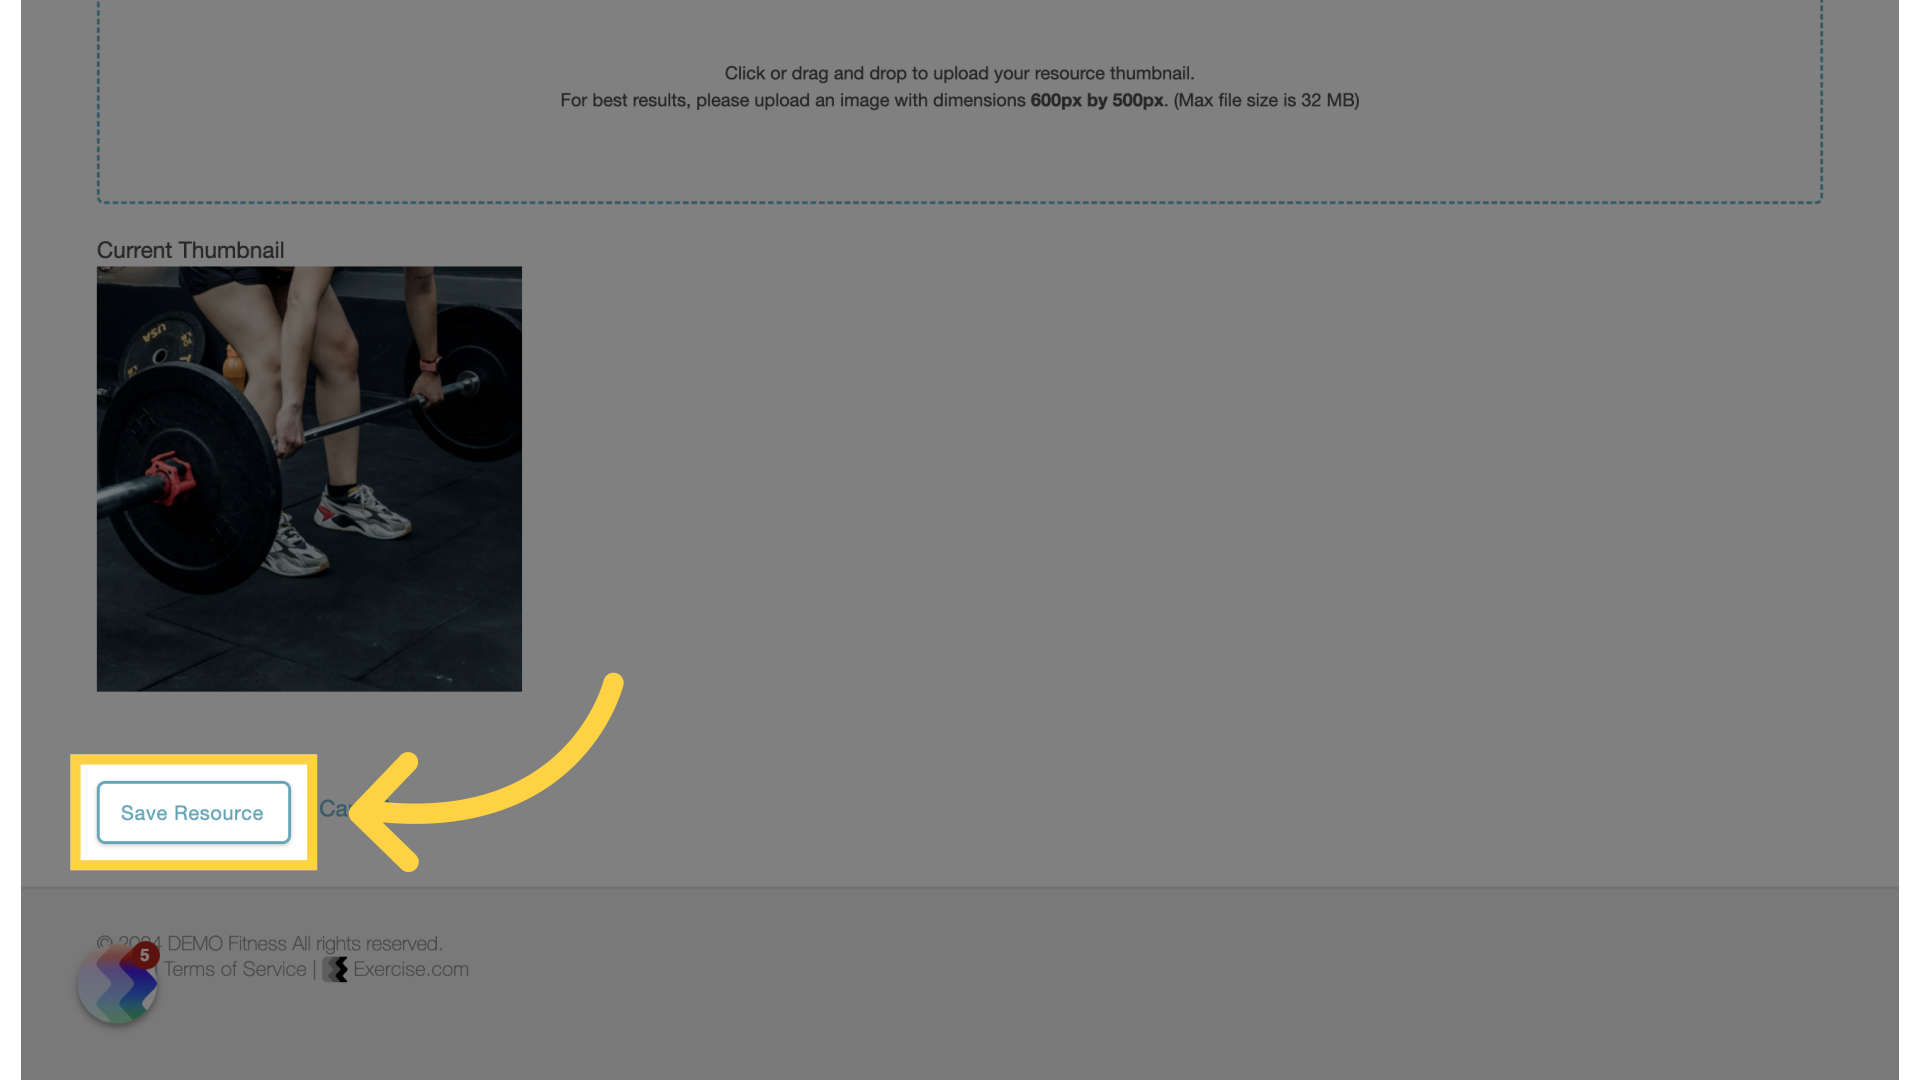
6. Click the “Save Resource” button.

Select the “Save Resource” option.

Click the 'Save Resource' button.

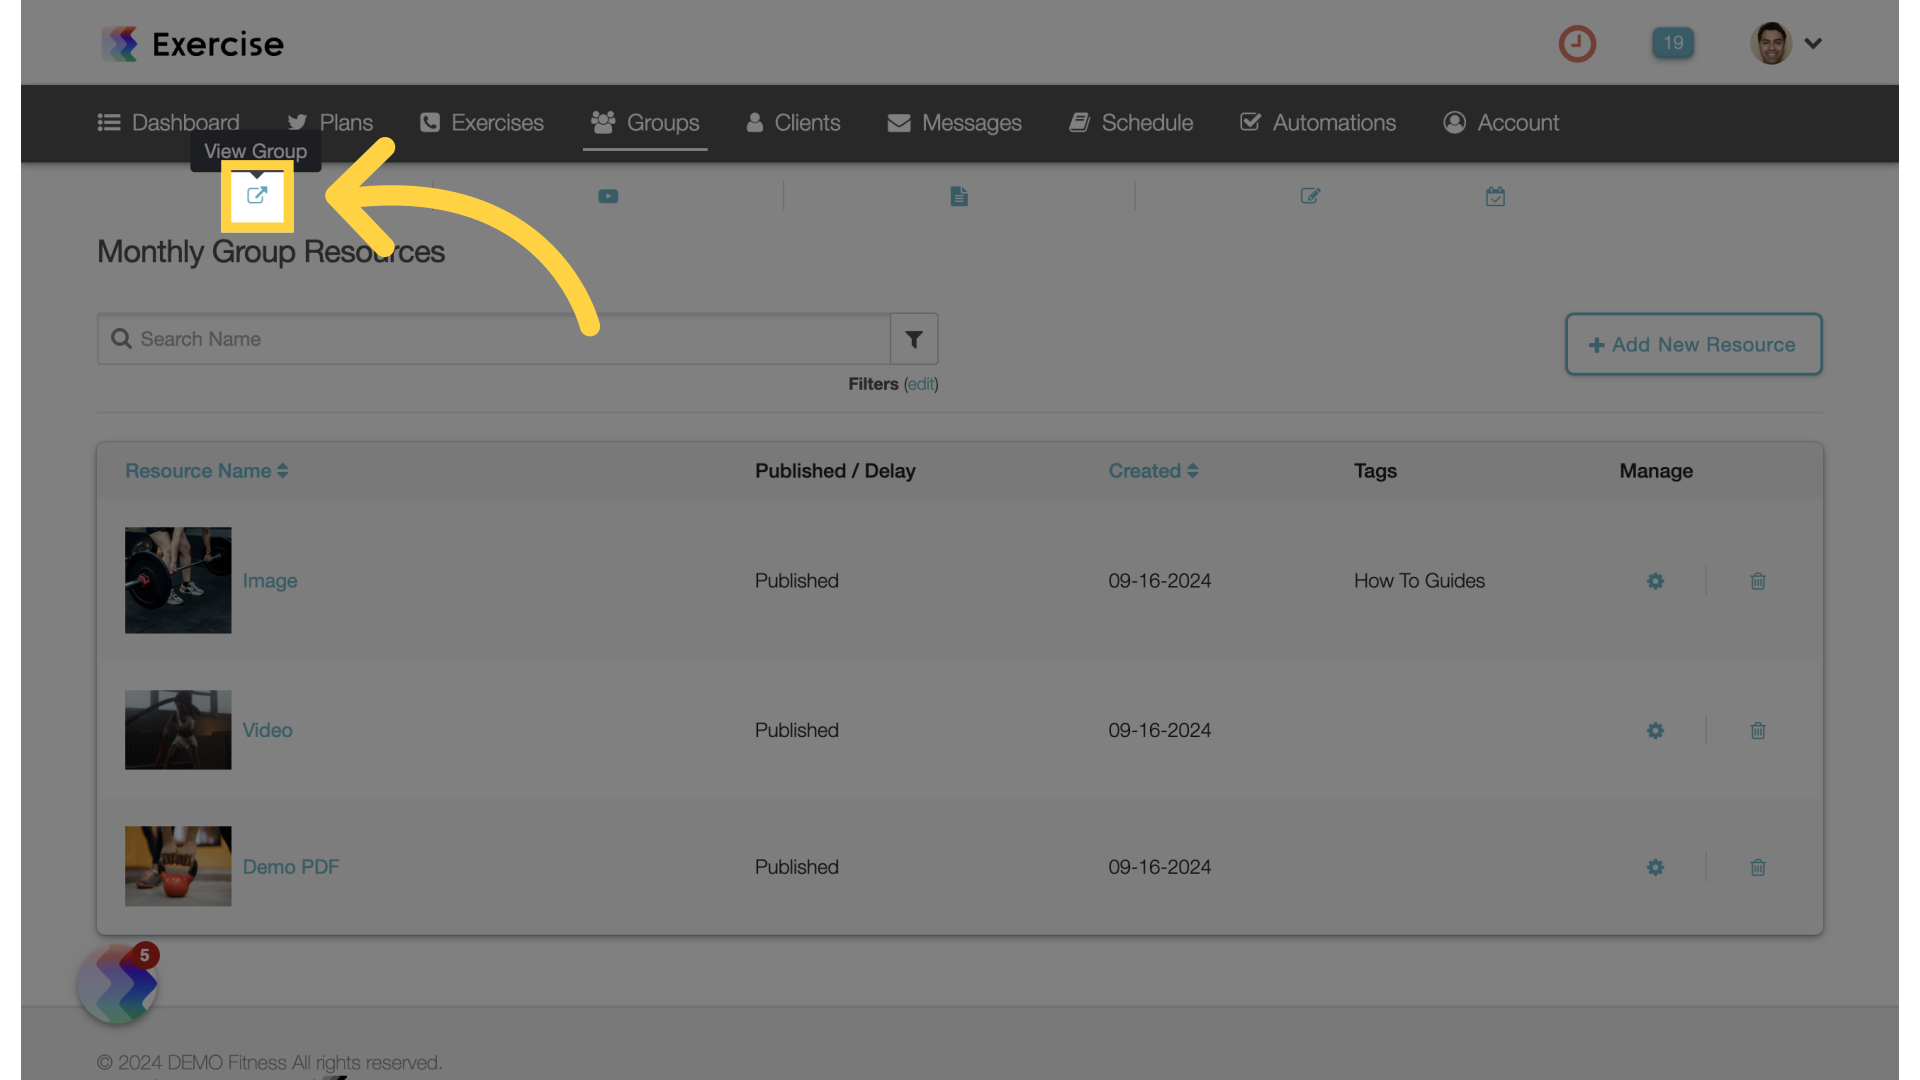
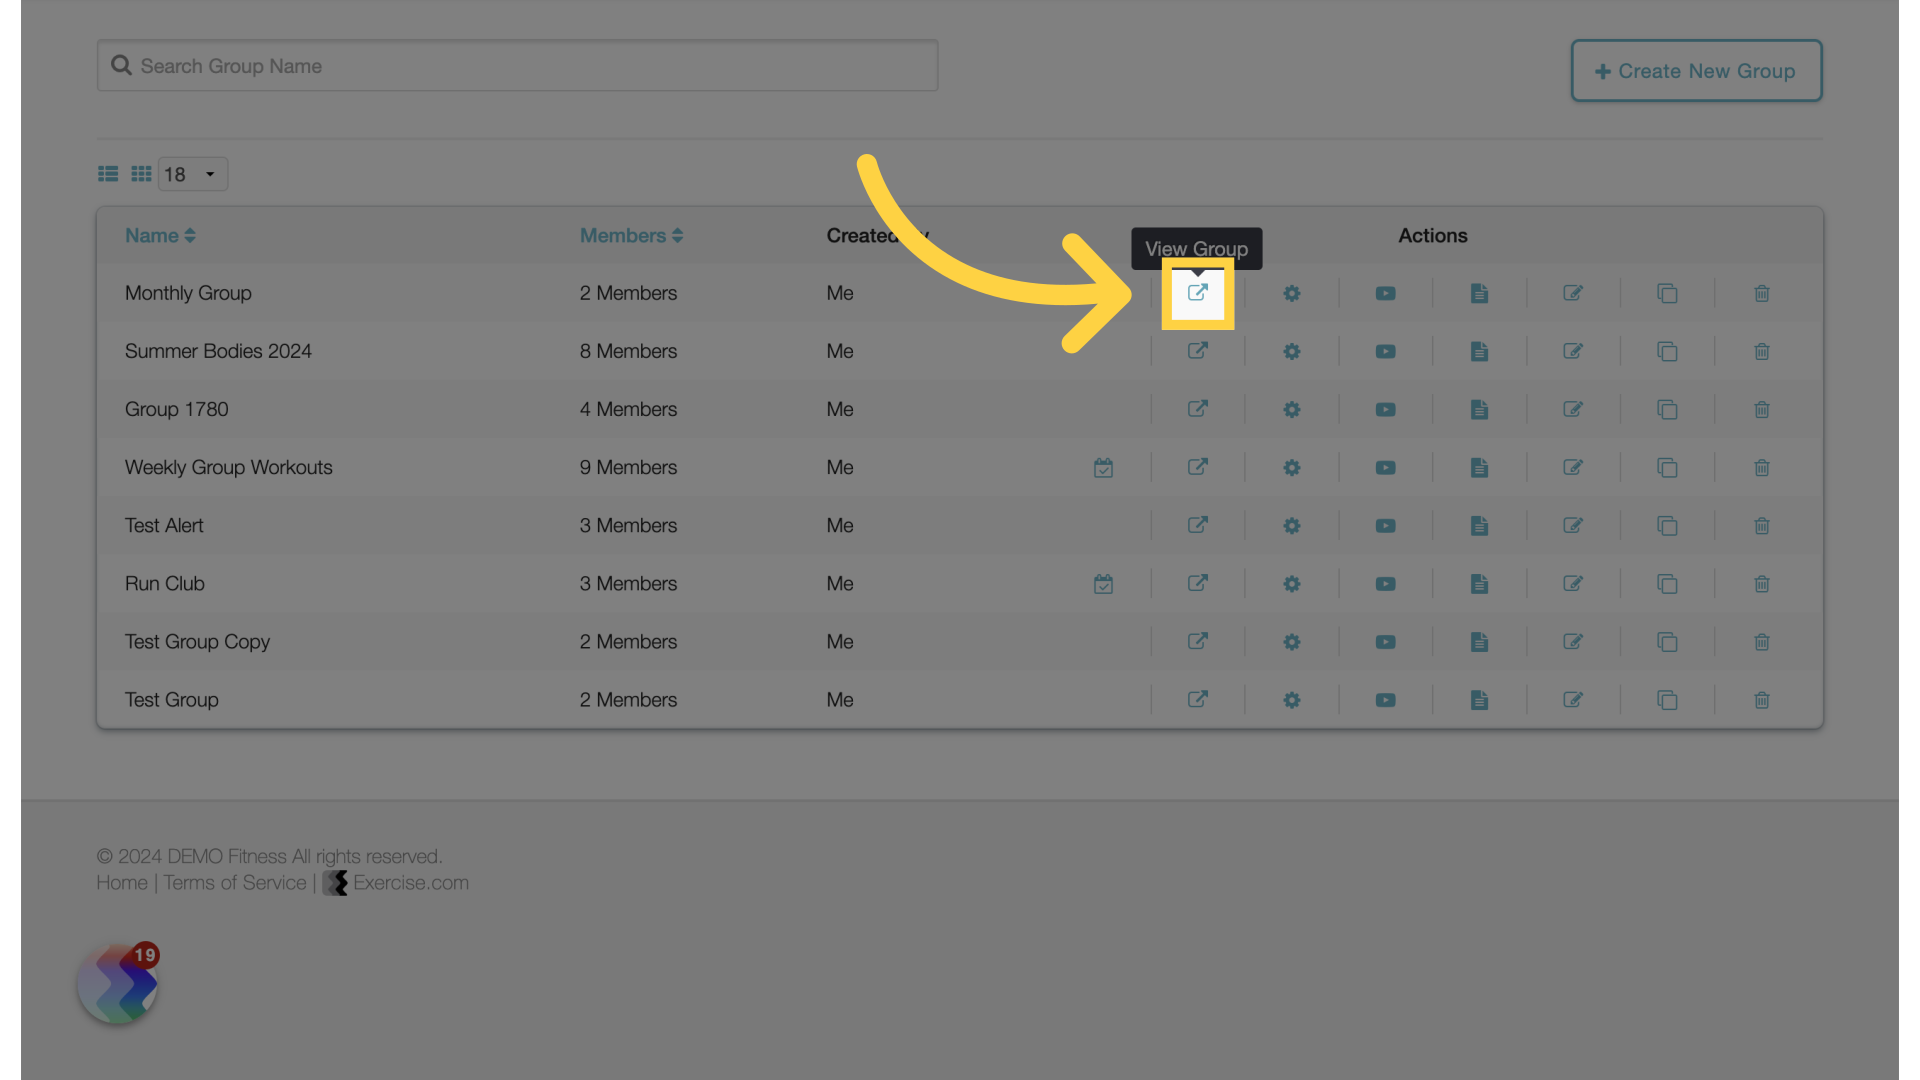
7. Click the “View Group” icon.

Select this field

Click the 'View Group' icon.

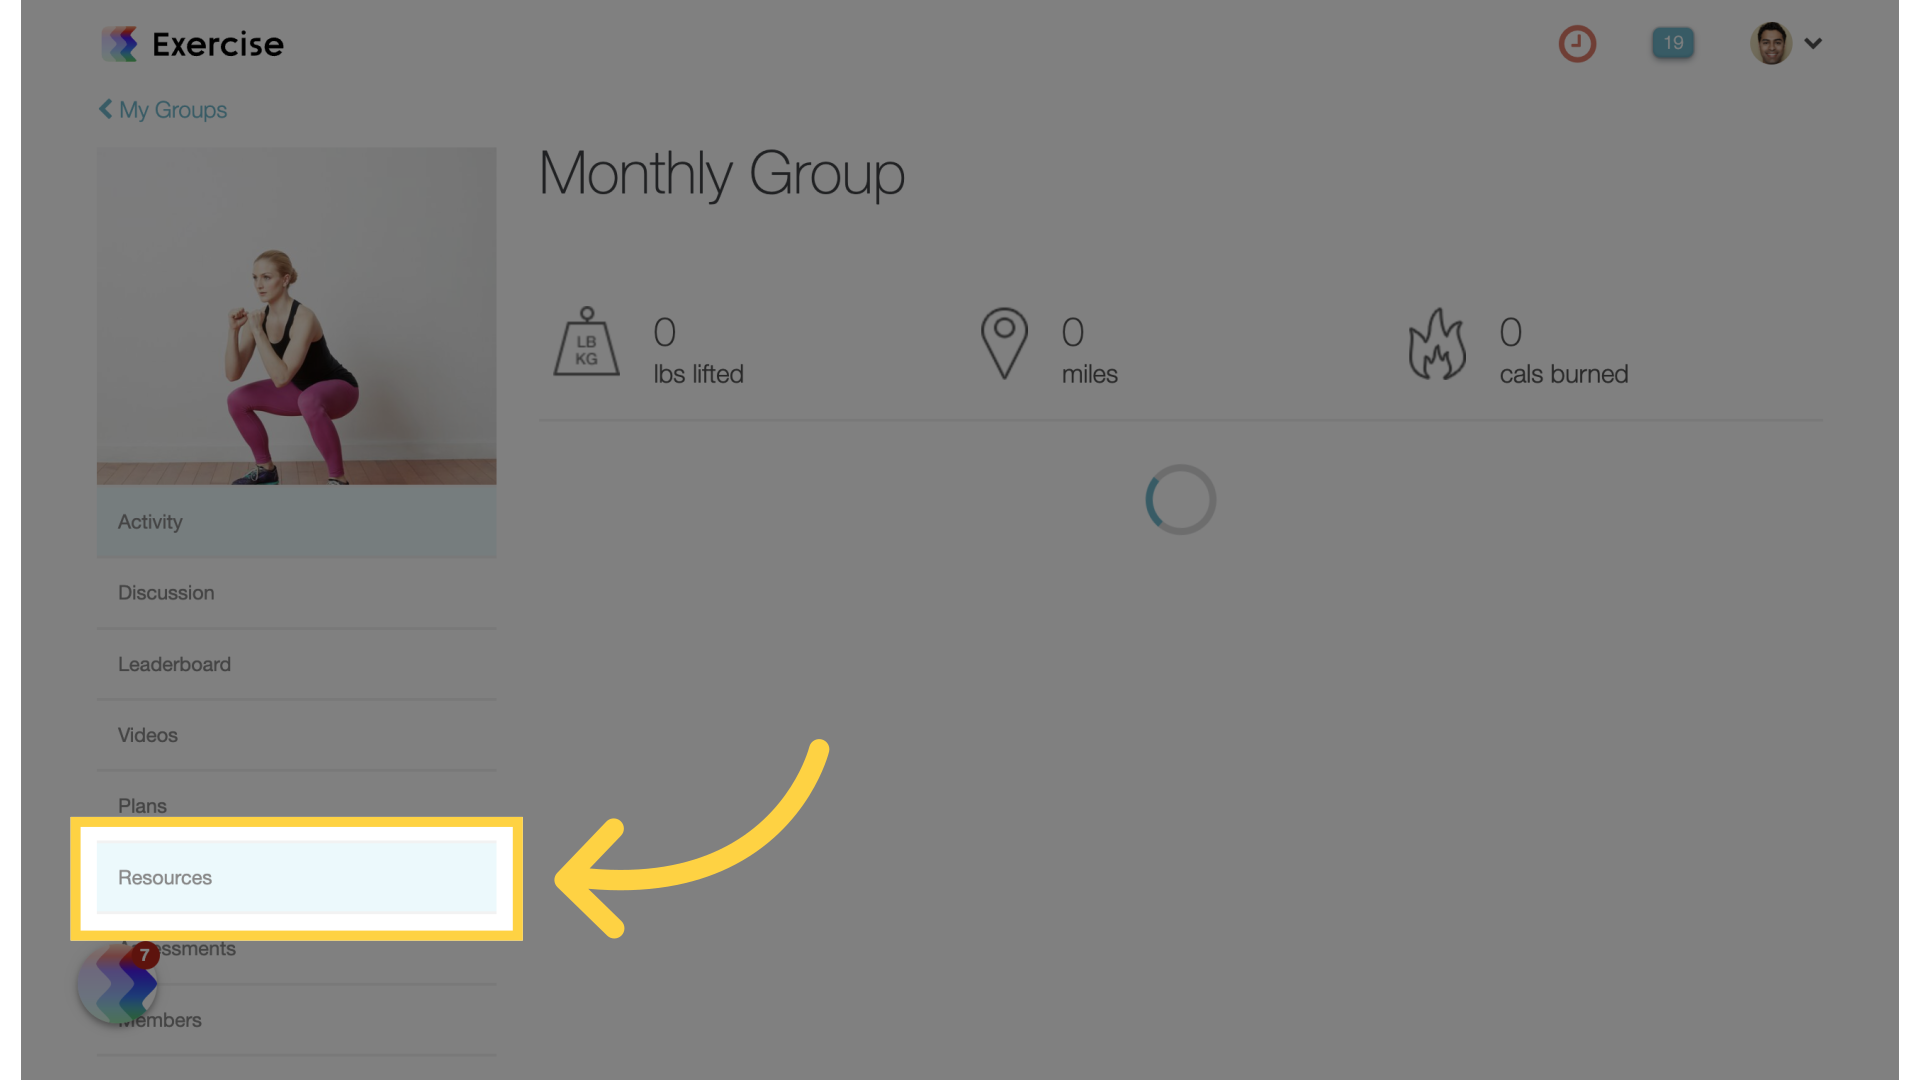
8. Click “Resources” tab on the group home page.

Choose the “Resources” option.

Click 'Resources' tab on the group home page.

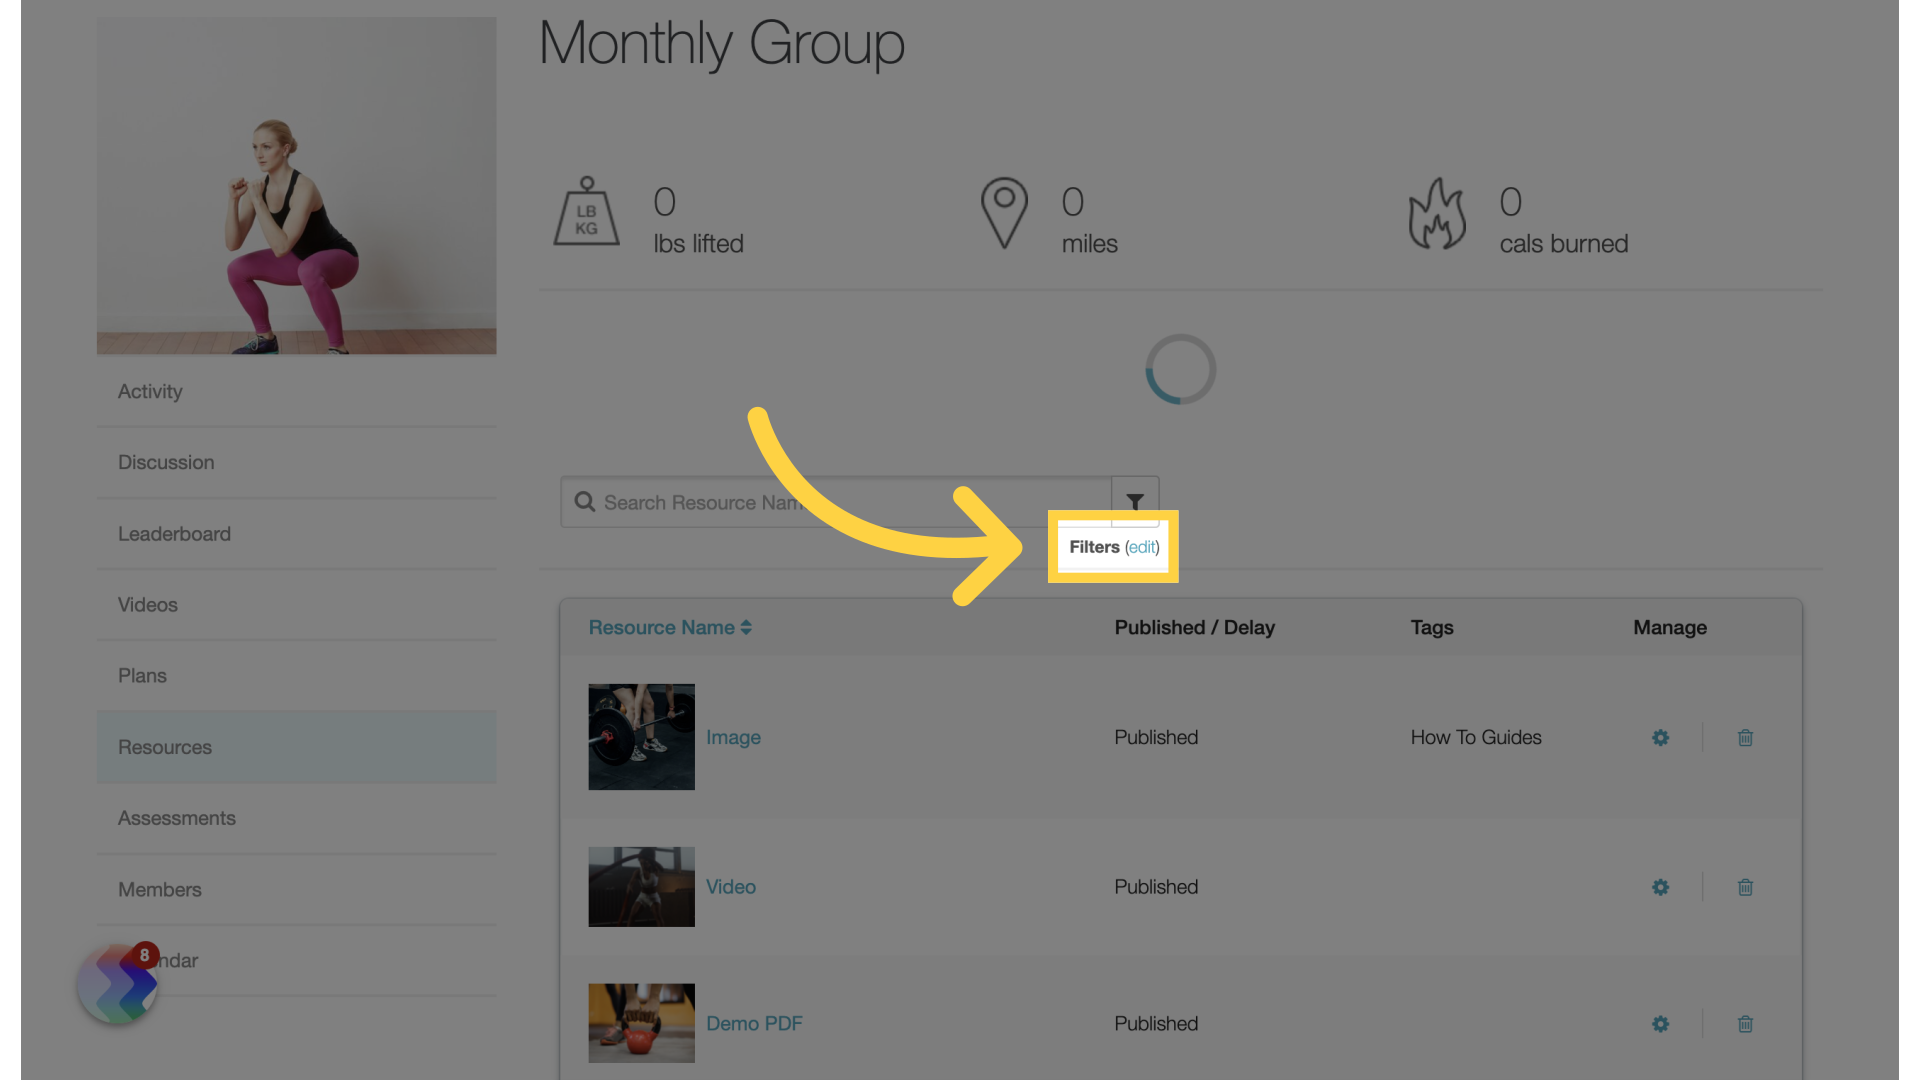
9. Click “edit” to update the filters on the Resources view.

Click on the “edit” link.

Click 'edit' to update the filters on the Resources view.

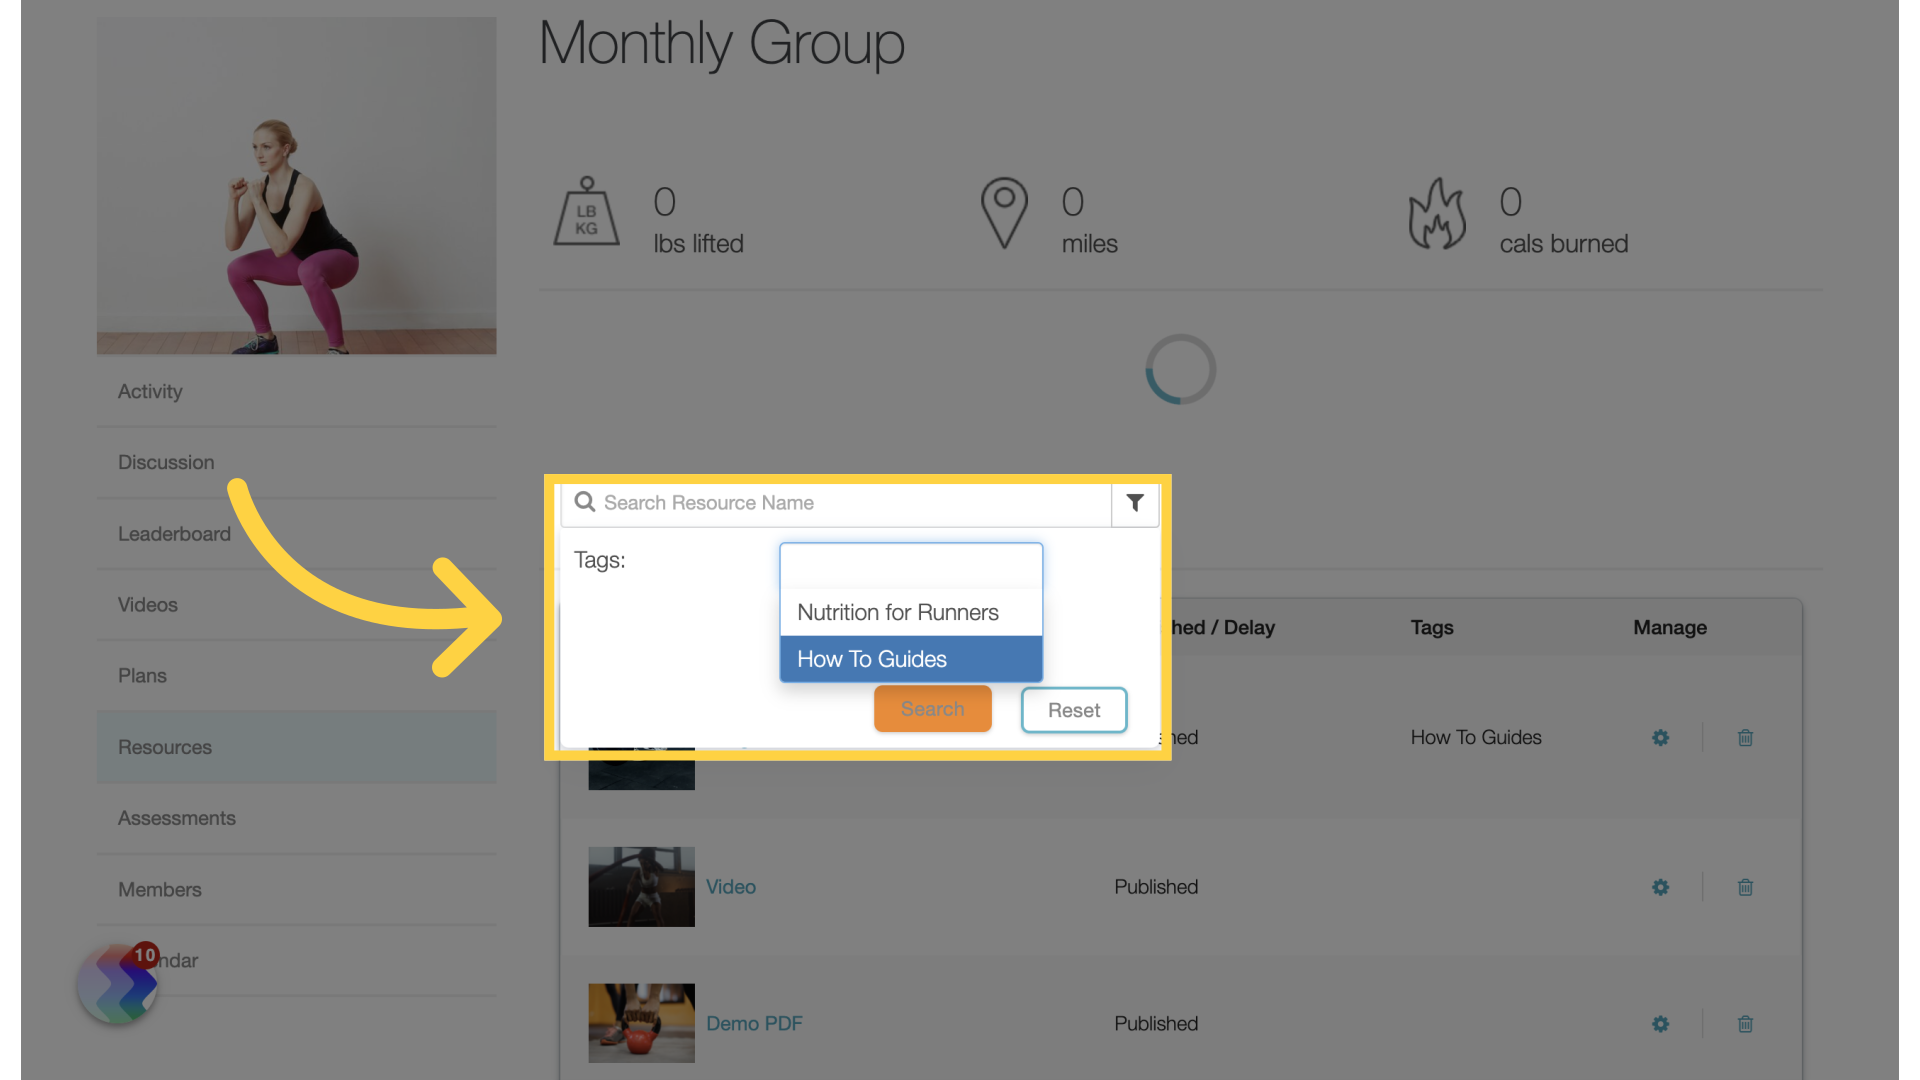
10. Select the tag(s) you want to use to filter the list of Resources.

Start typing the tag you want to use to filter the list of Resources.

Select the tag(s) you want to use to filter the list of Resources.

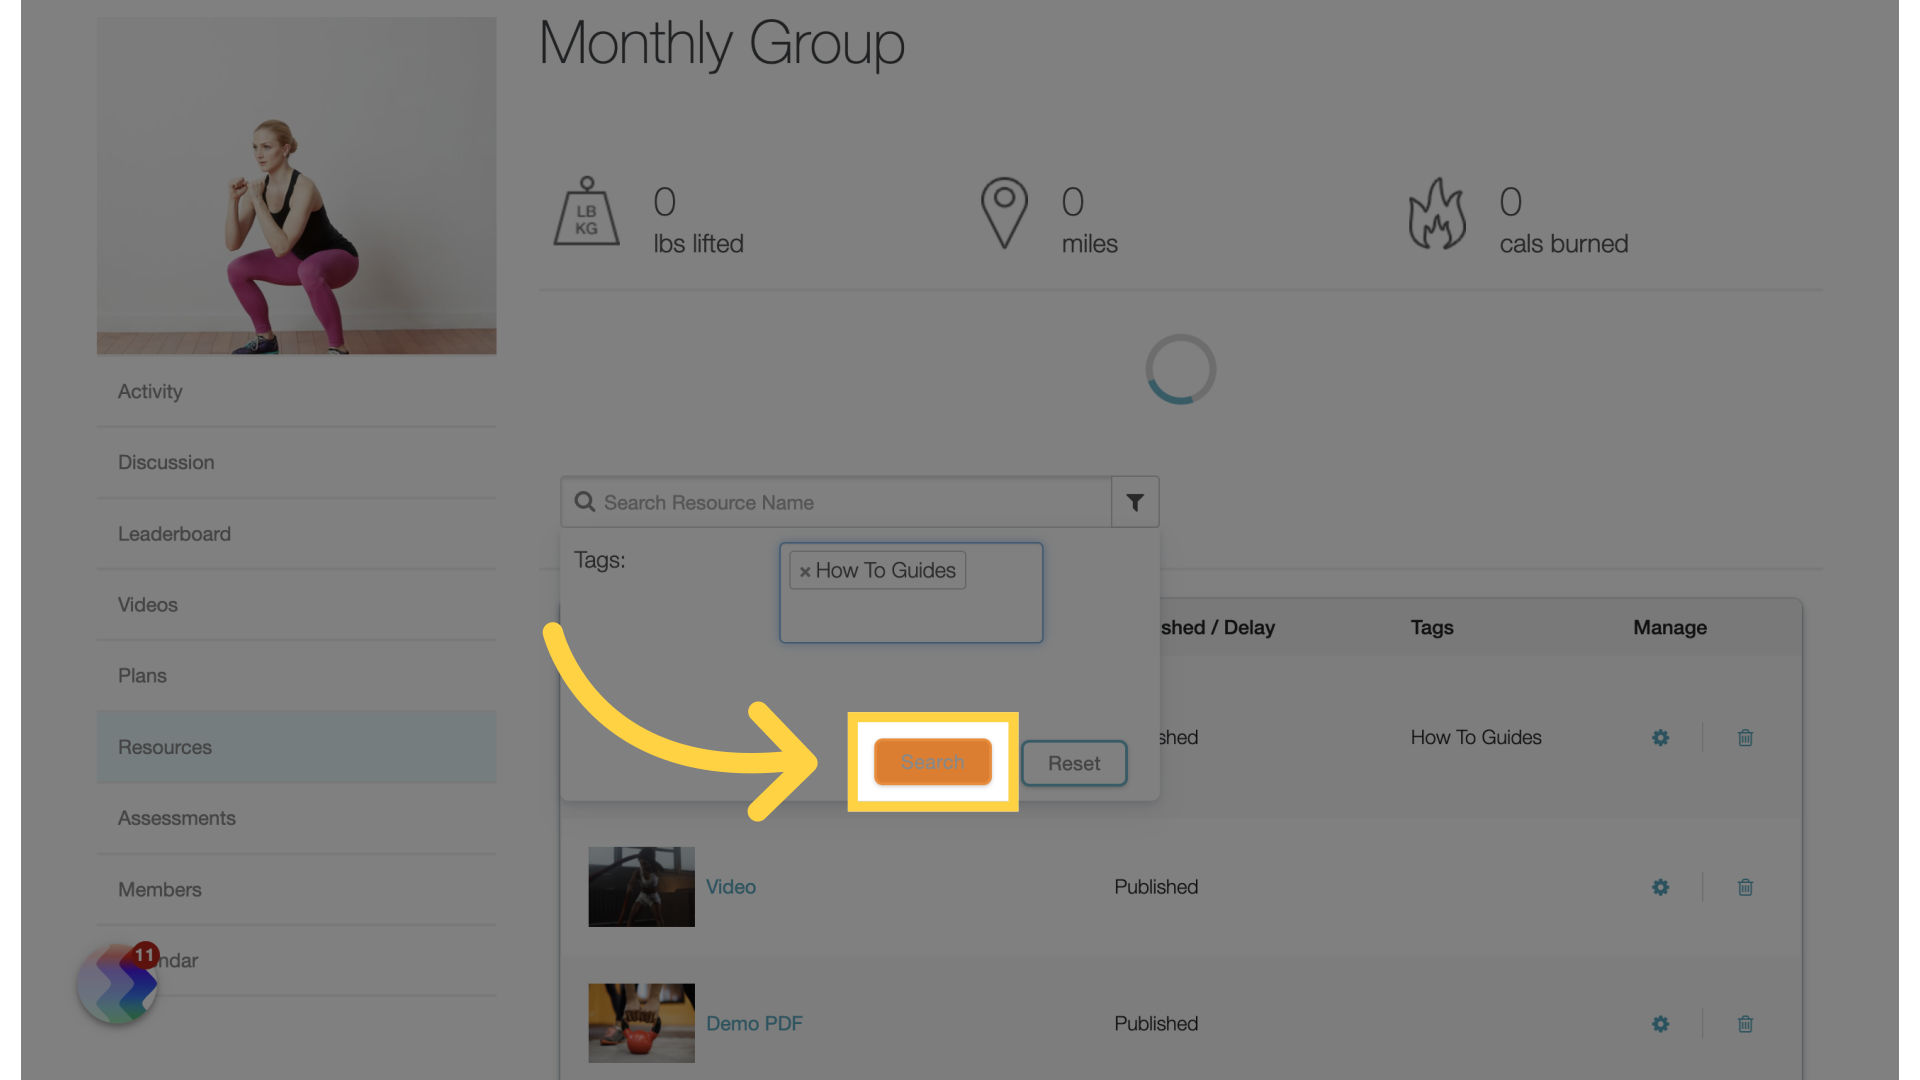
11. Click “Search” to filter by your selected tag(s).

Click on the “Search” button.

Click 'Search' to filter by your selected tag(s).

12. Now let’s add a quick filter button!

Now let’s add a quick filter button!

Now let's add a quick filter button!

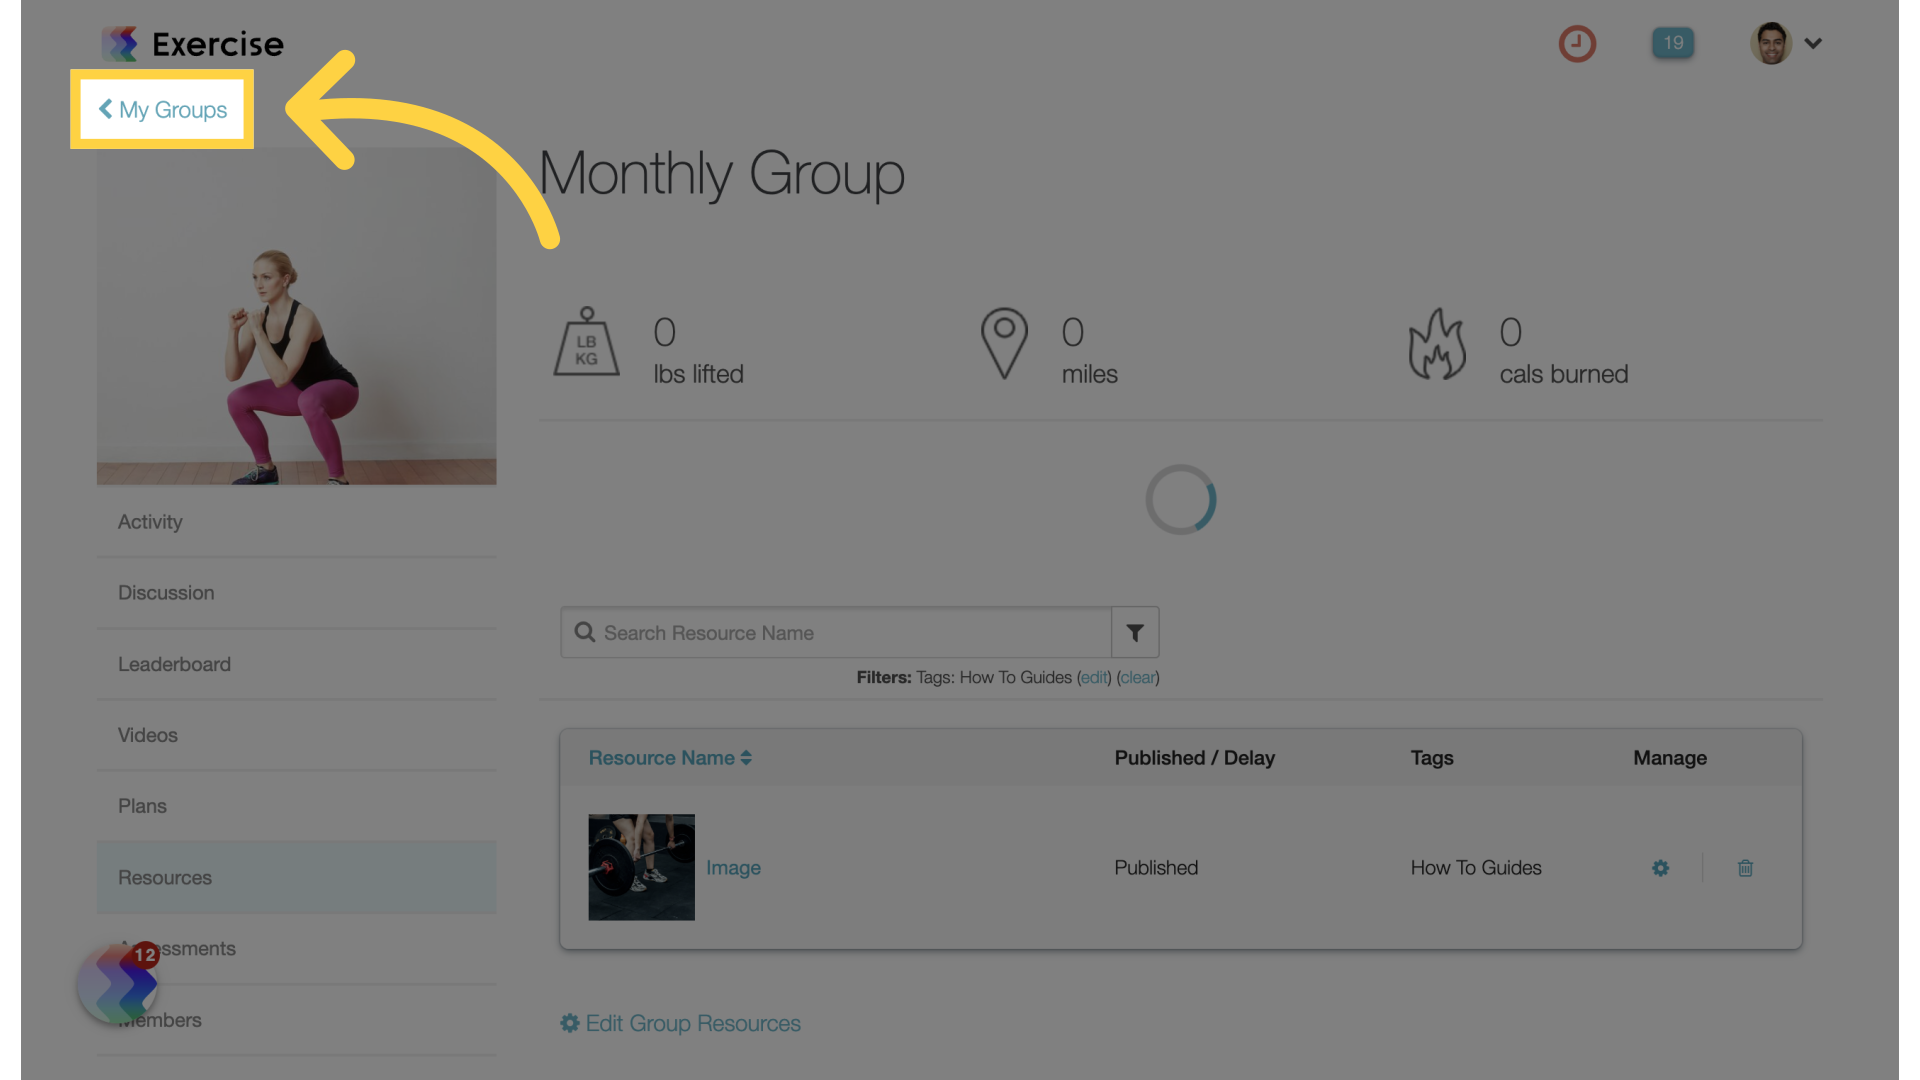
13. Click “My Groups”

Click on the “My Groups” option.

Click 'My Groups'

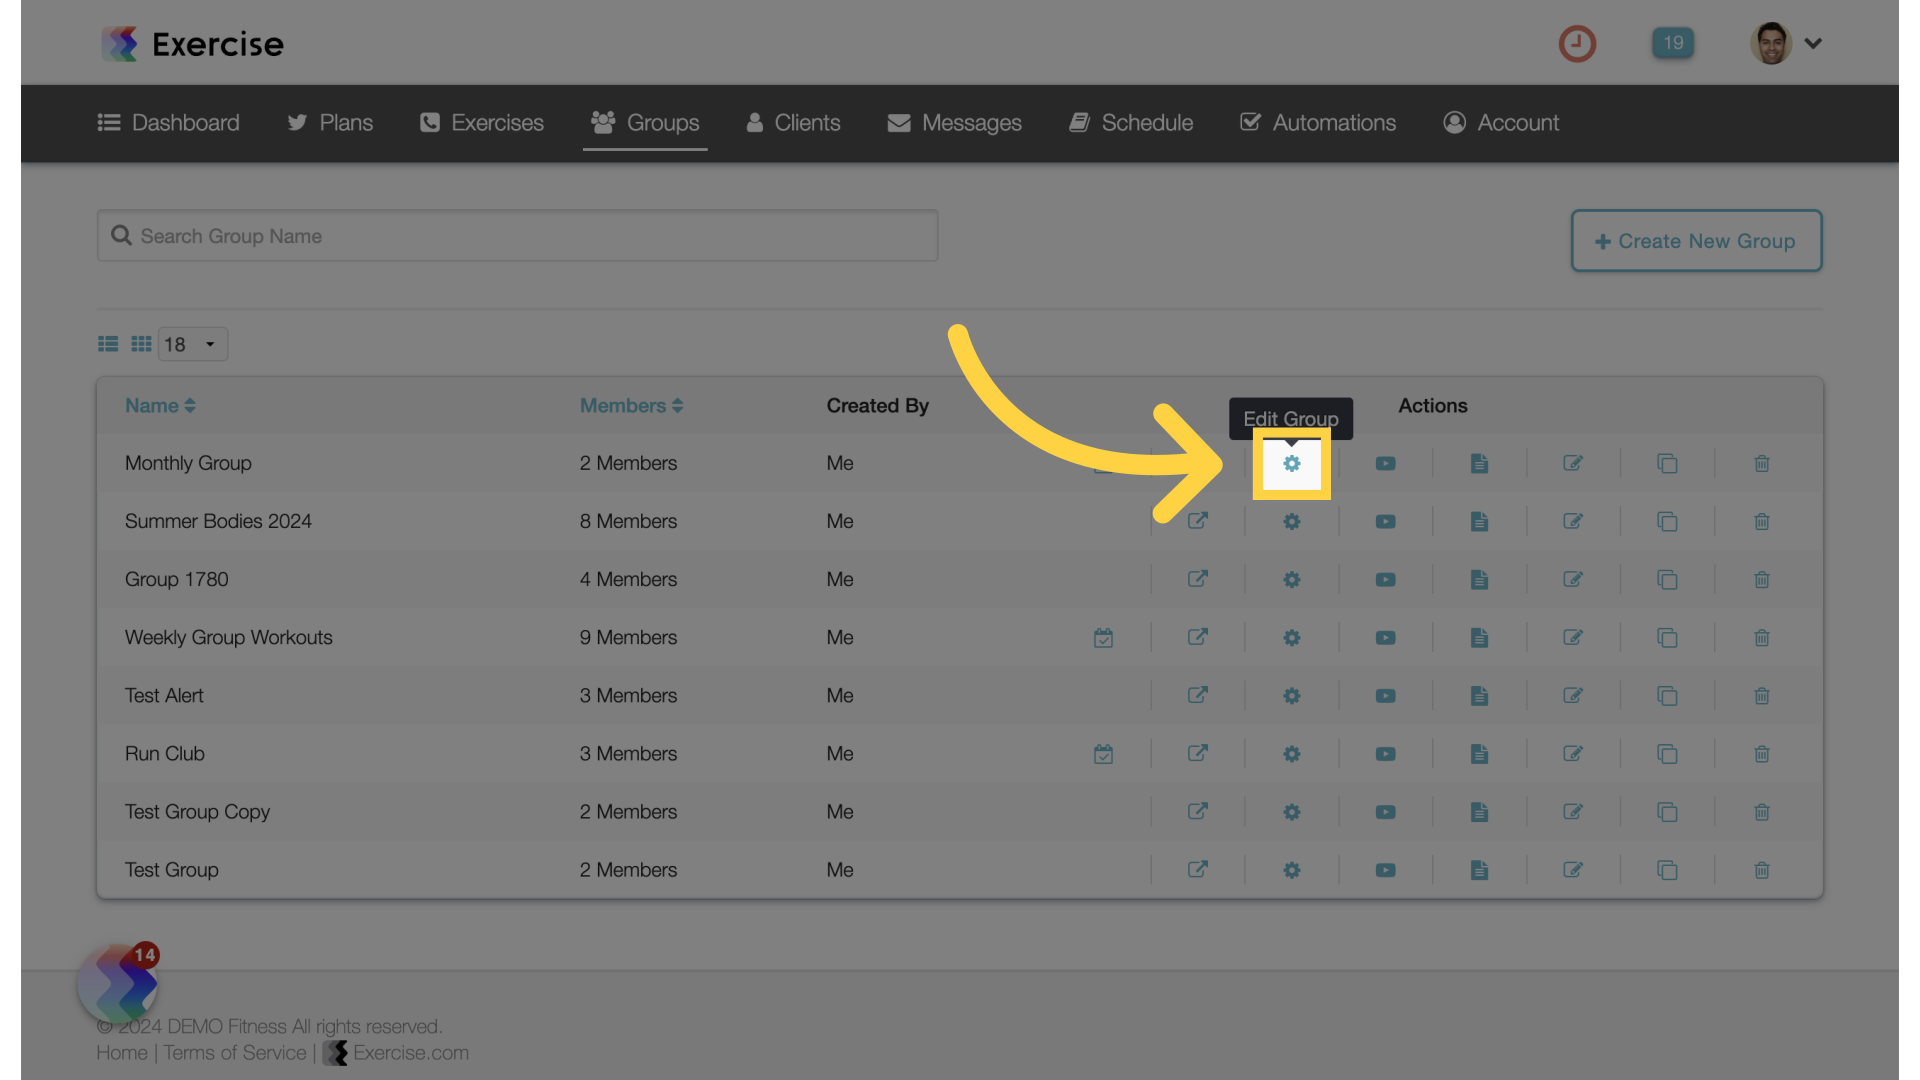
14. Click the gear icon for the group you want to edit.

Click here

Click the gear icon for the group you want to edit.

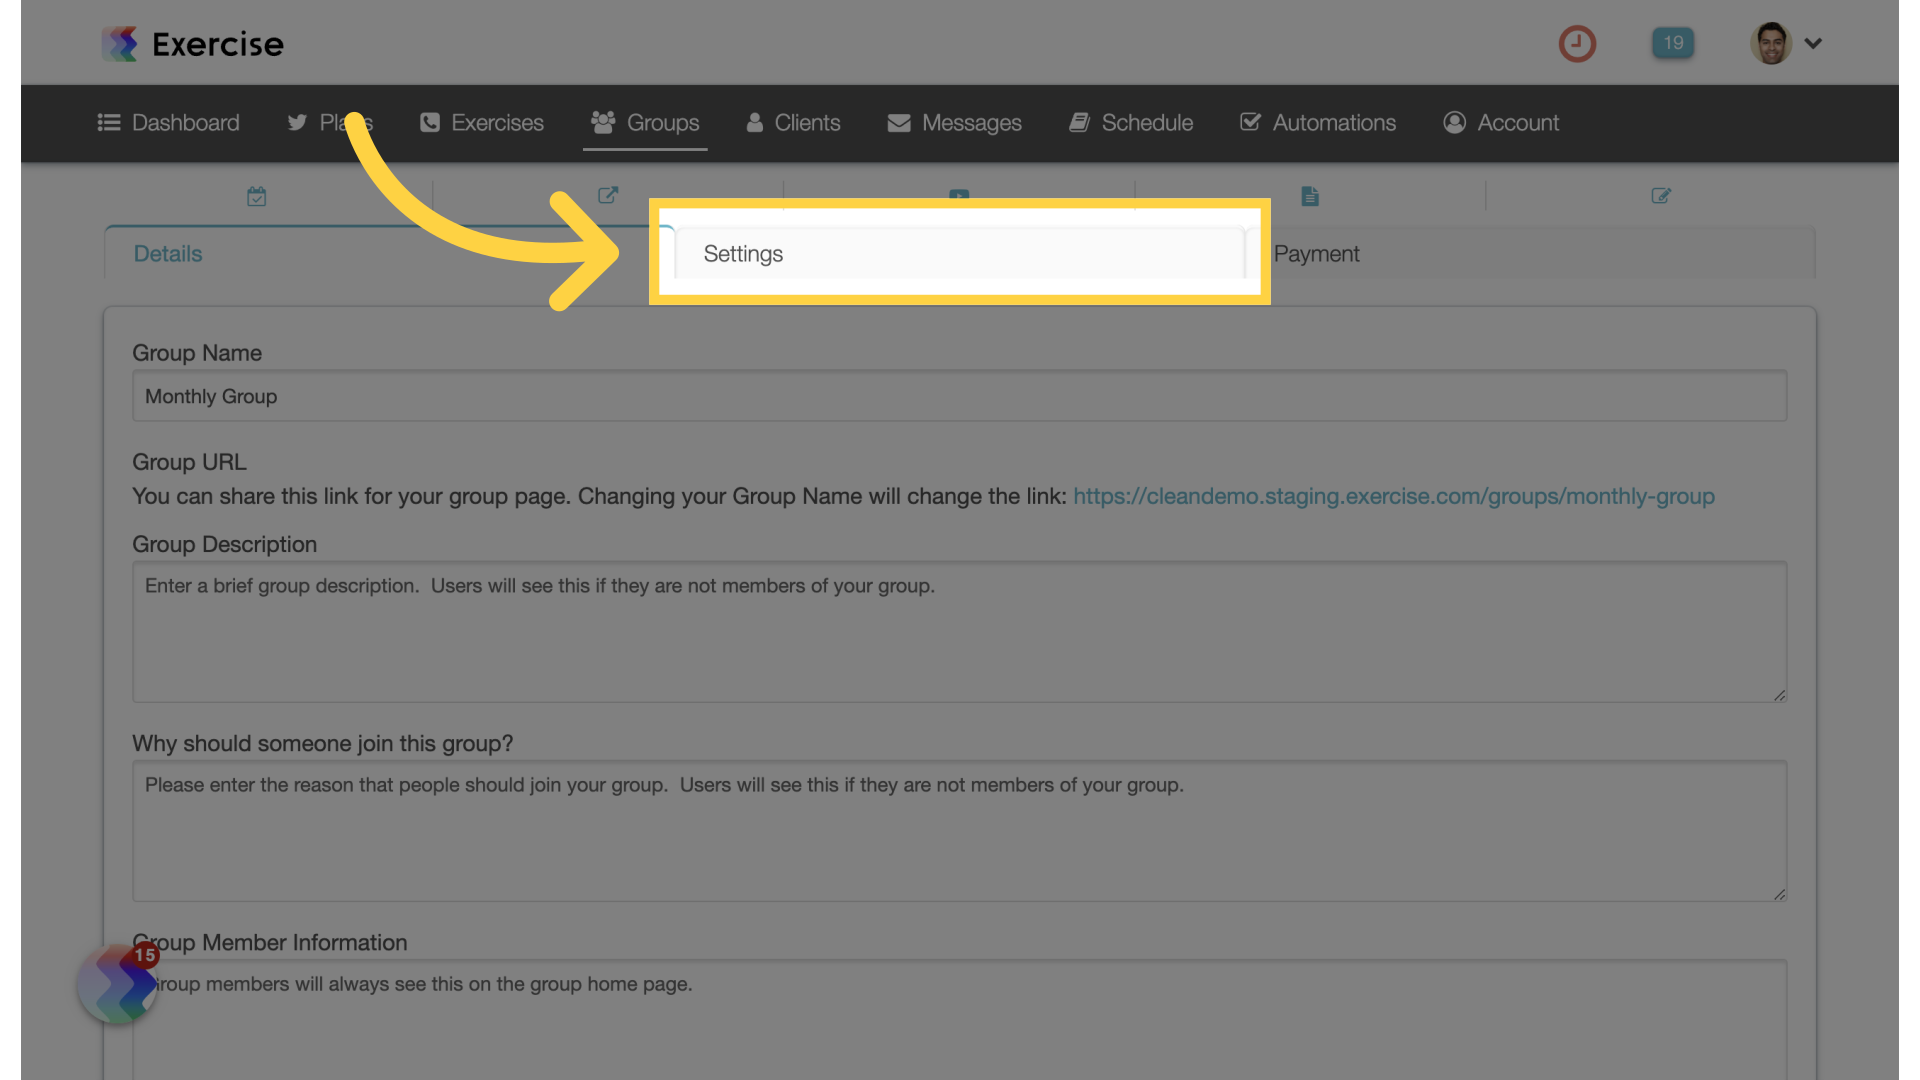
15. Click “Settings”

Click on the “Settings” option.

Click 'Settings'

16. Click into the Resource Tag Headers field.

Click the selected button

Click into the Resource Tag Headers field.

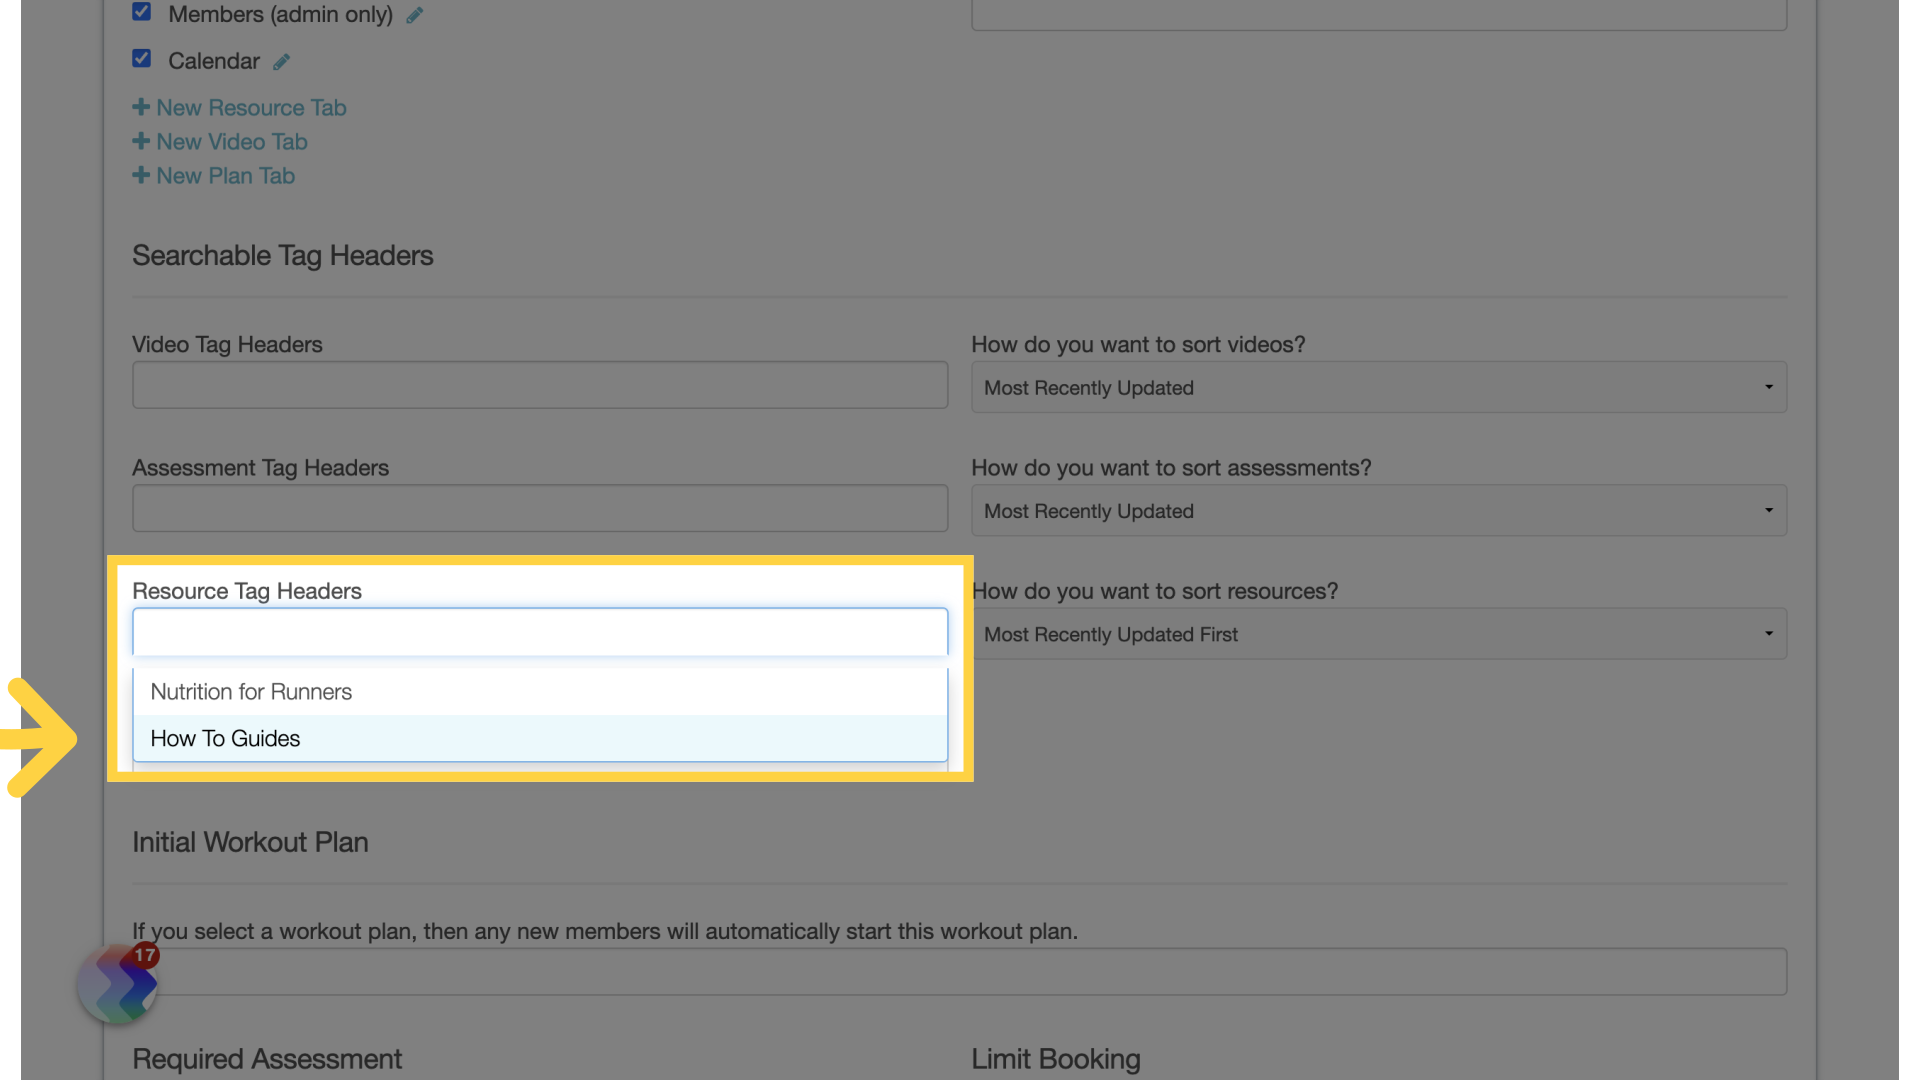
17. Click to add the Tags you want to enable shortcuts for.

Click on the “How To Guides” option.

Click to add the Tags you want to enable shortcuts for.

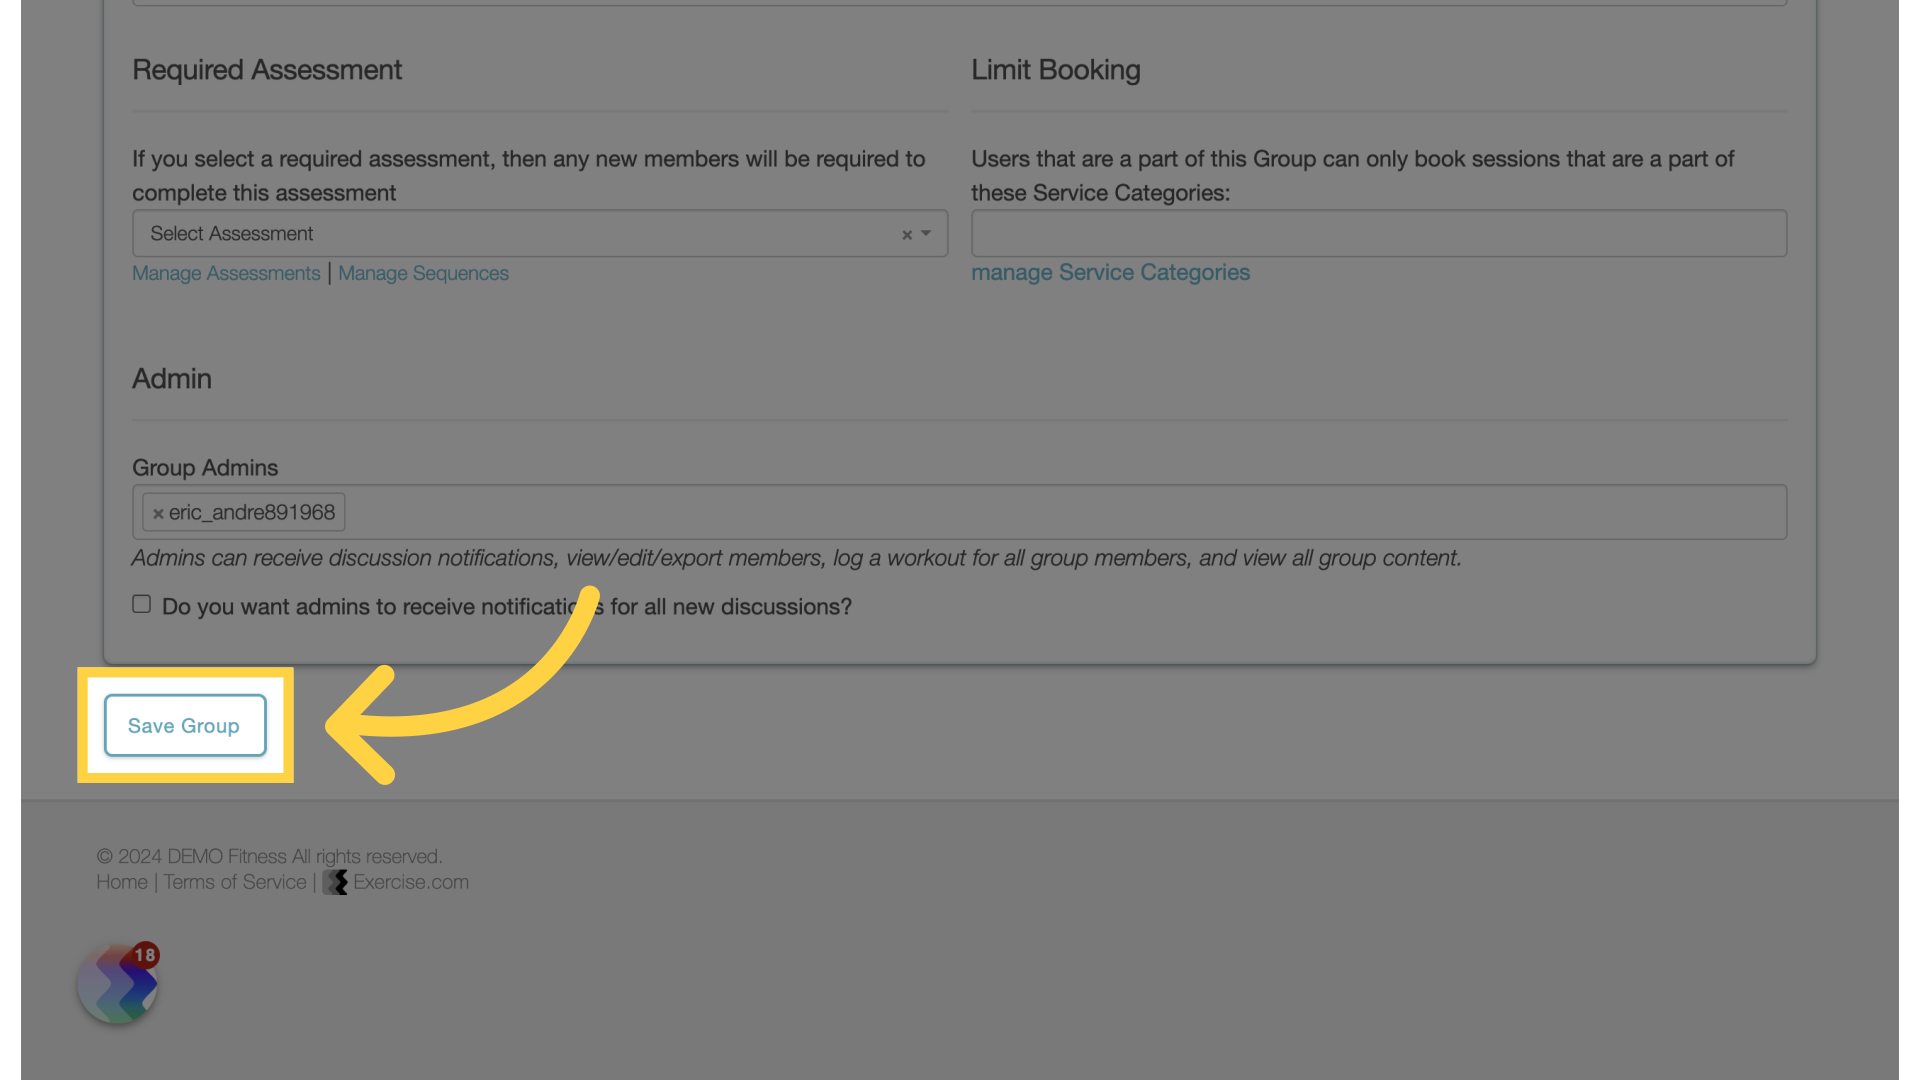
18. Click “Save Group”

Click on the “Save Group” option.

Click 'Save Group'

19. Click the View Group icon.

Click the selected option

Click the View Group icon.

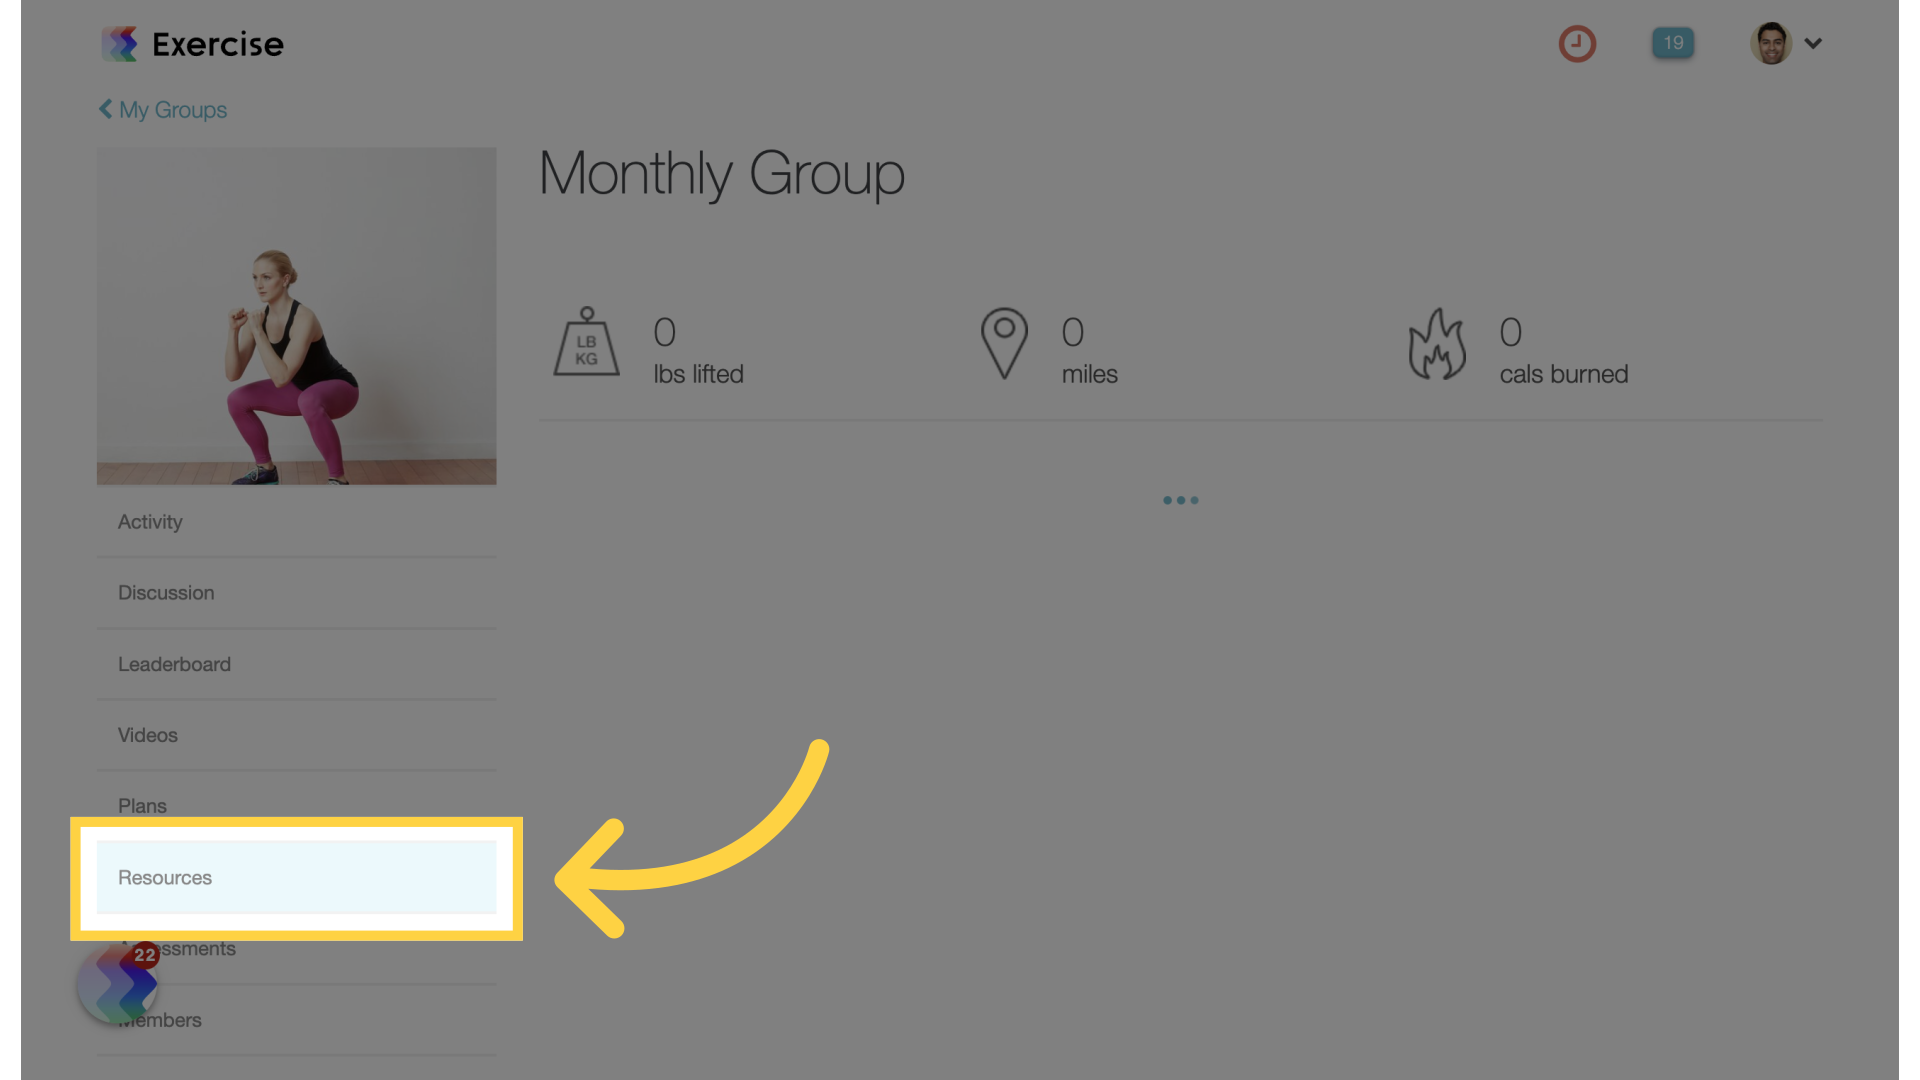
20. Click “Resources”

Click on the “Resources” option.

Click 'Resources'

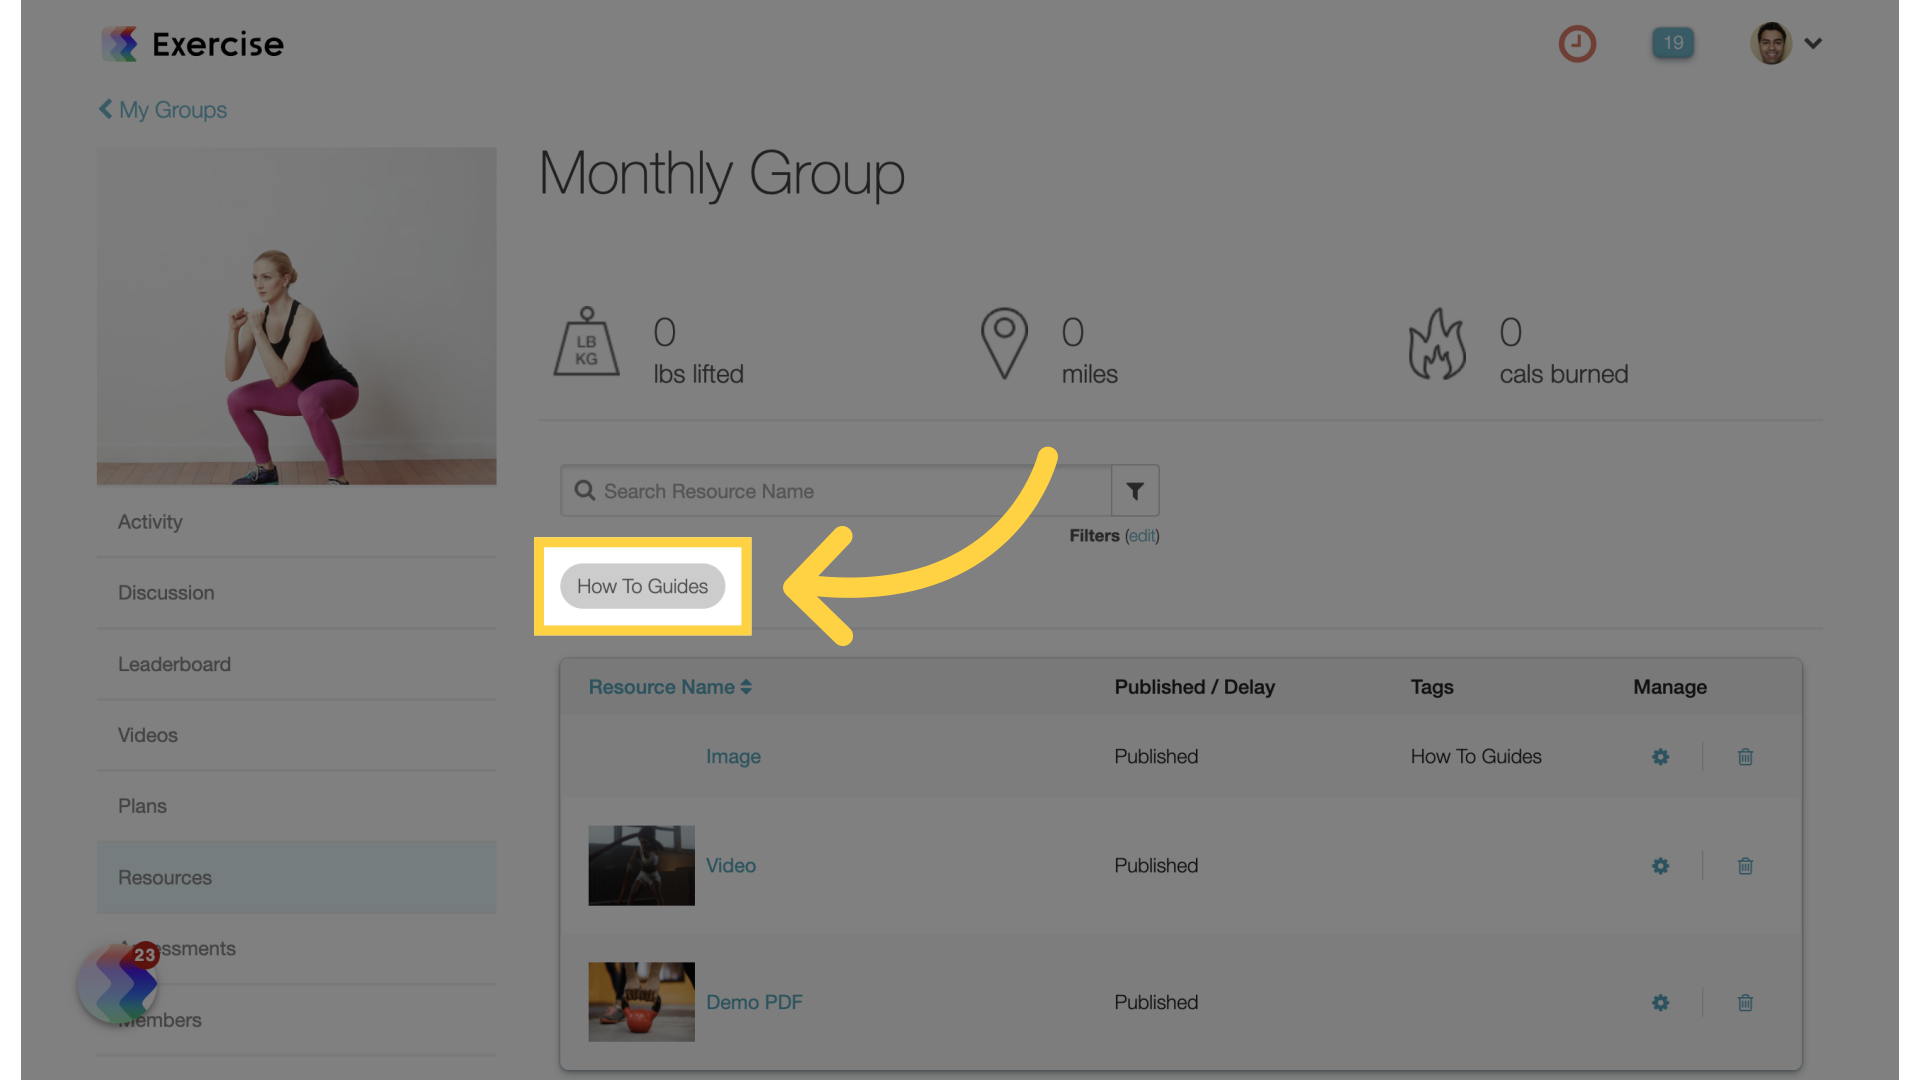
21. Click your new shortcut button to filter the list of Resources by that tag!

Click on the “How To Guides” option.

Click your new shortcut button to filter the list of Resources by that tag!

In this guide, we covered the process of adding tags to Group Resources, and also setting up shortcuts to make it easy for your clients to filter Resources on the Group home page.

Leave a Comment