How to Connect to Gantner and Set Up a Device
In this guide, we will walk you through the steps to Connect to Gantner and set up a device for Door Access on your Exercise.com for Business account.
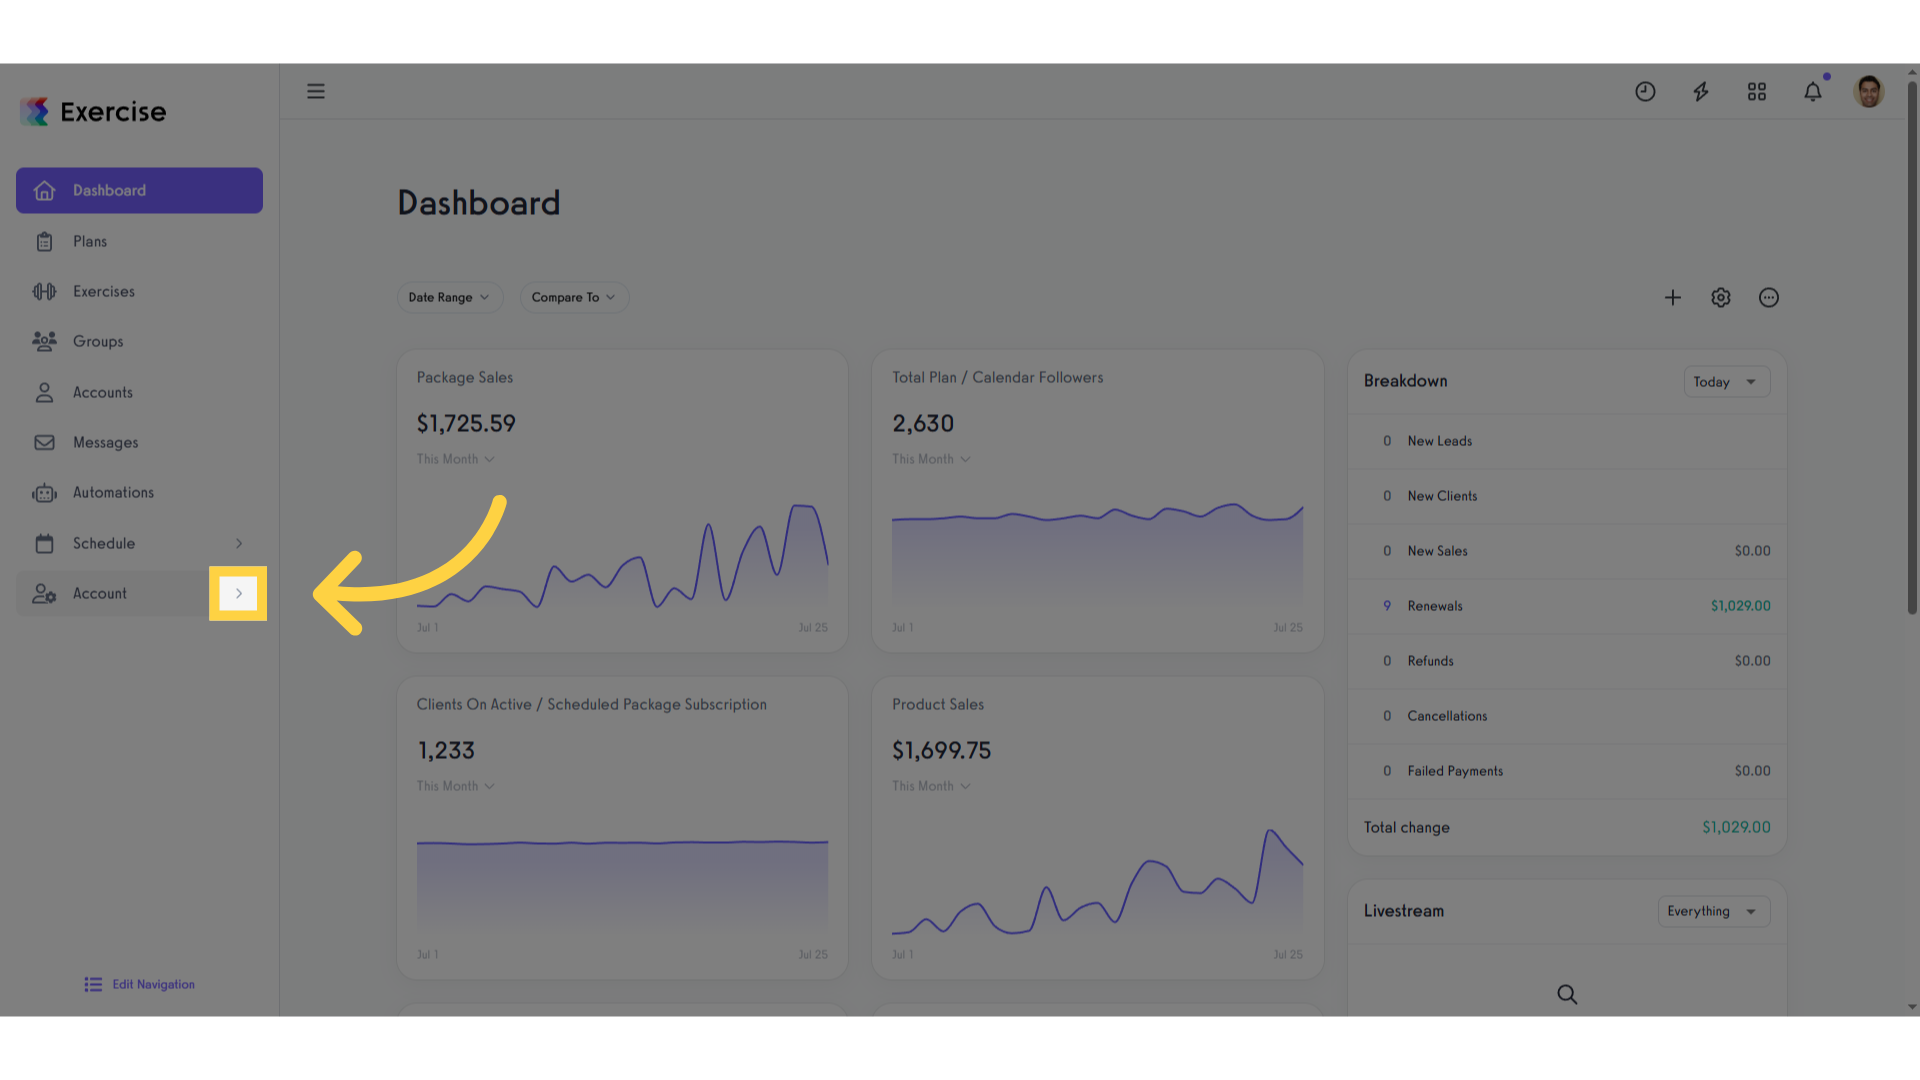
1. Click the Arrow to expand the “Account” menu.
Start by clicking the Arrow to expand the “Account” menu on your Dashboard.
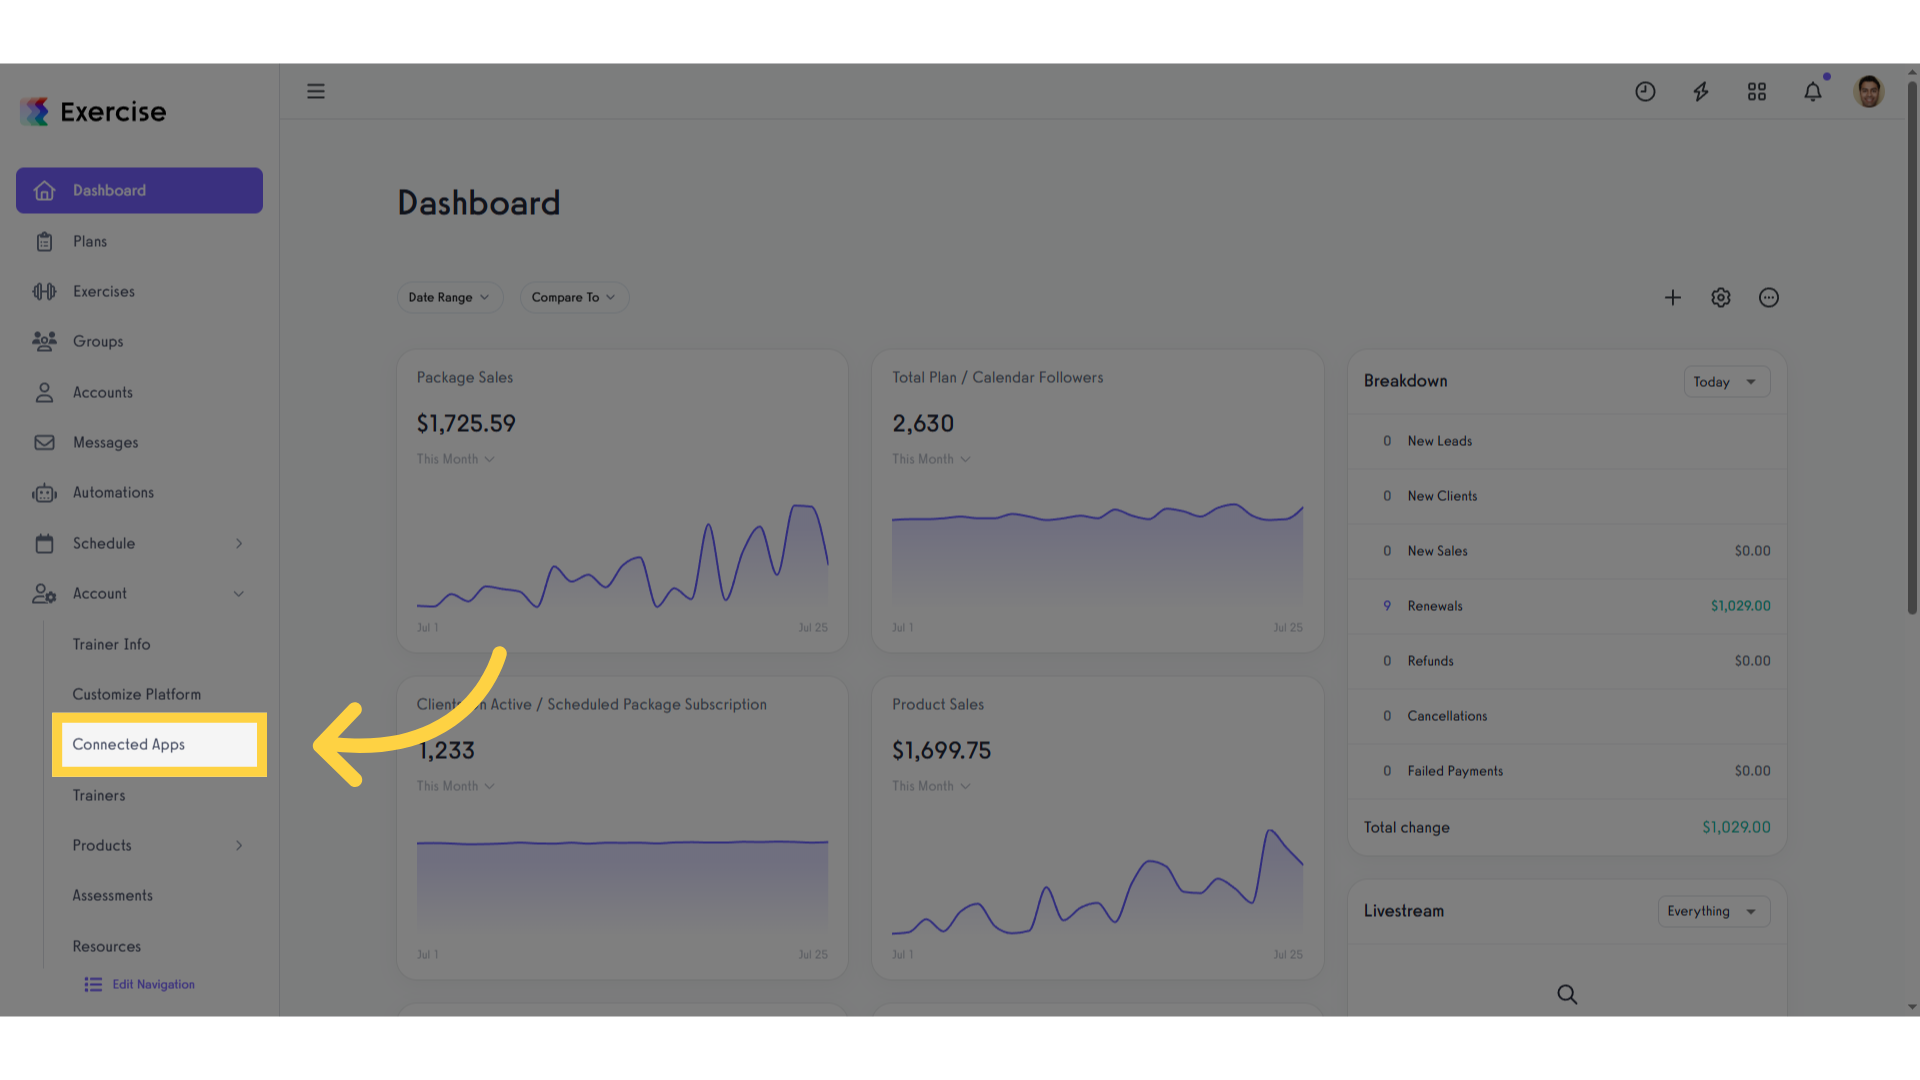
2. Click “Connected Apps”.
Select the “Connected Apps” option in the side menu.
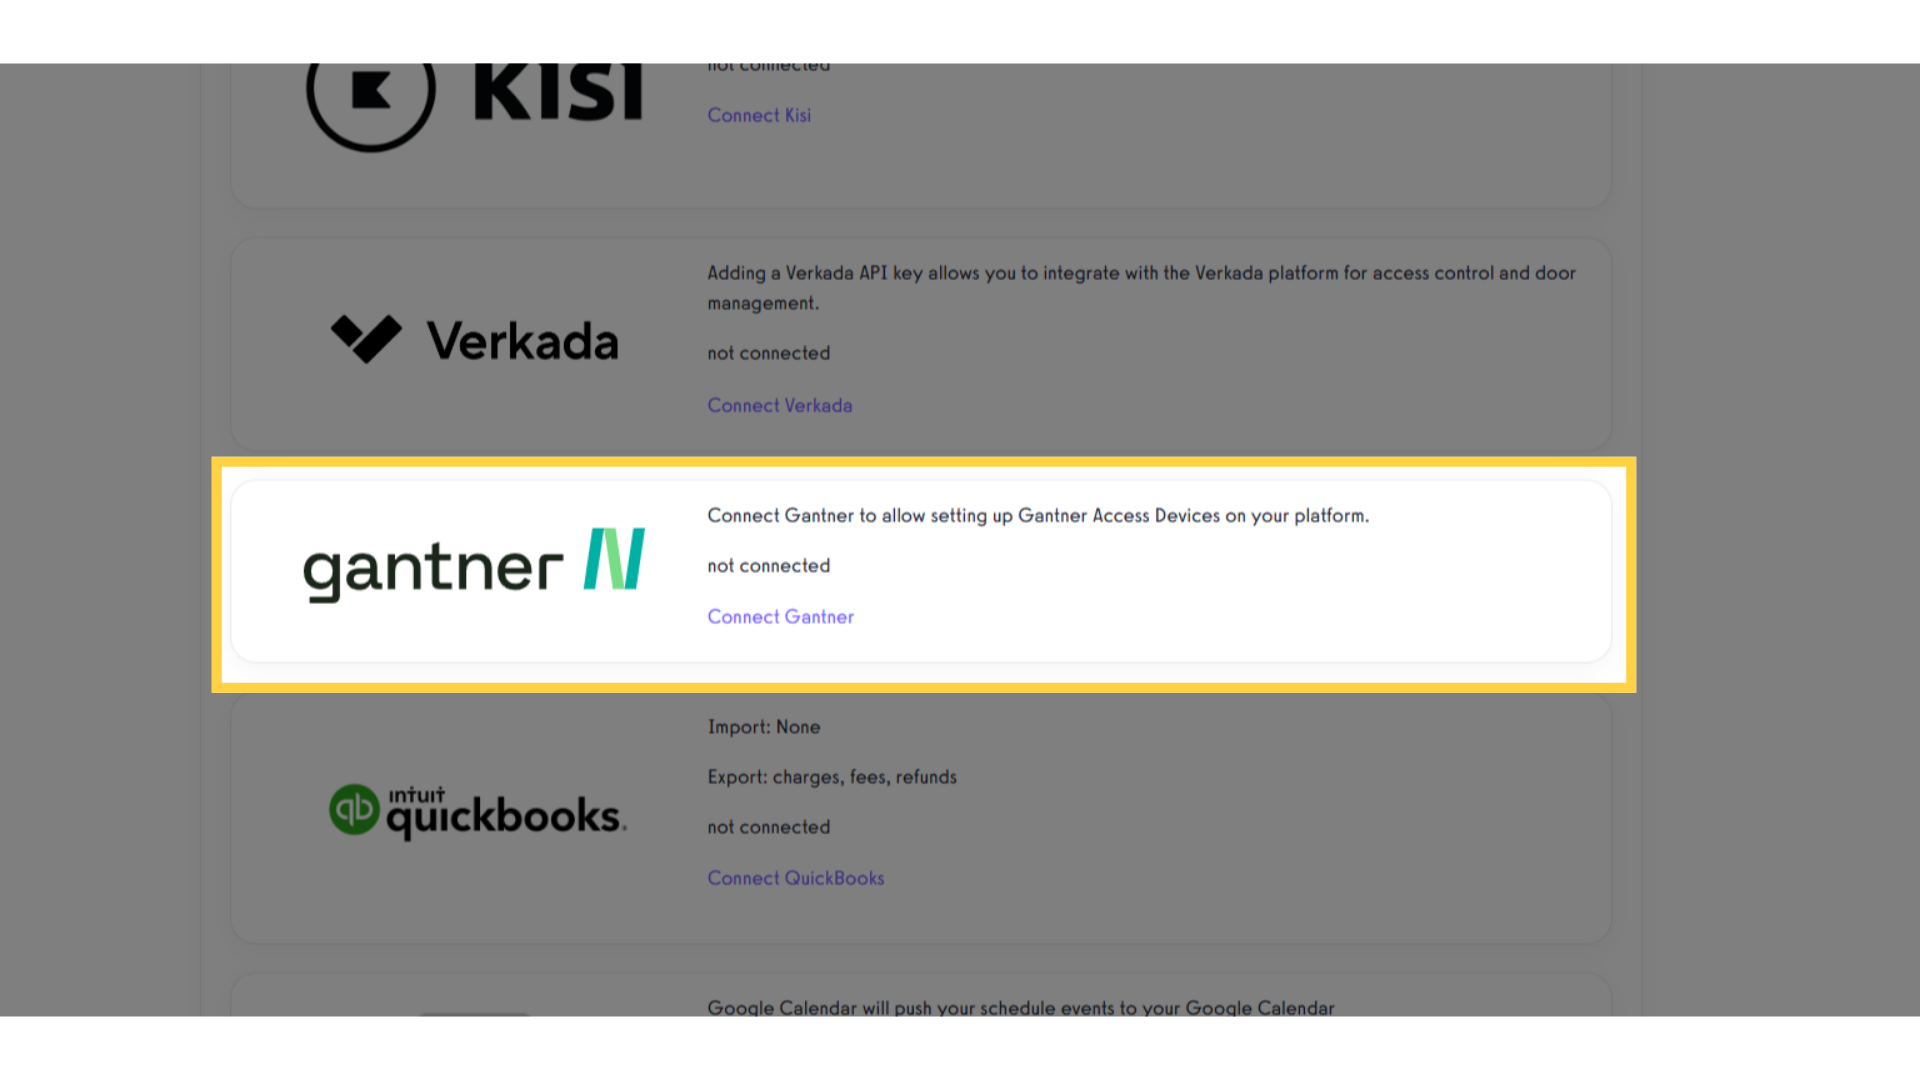
3. Find gantner on the list of Connected Apps.
Scroll to find the gantner app on the list of available Connected Apps.
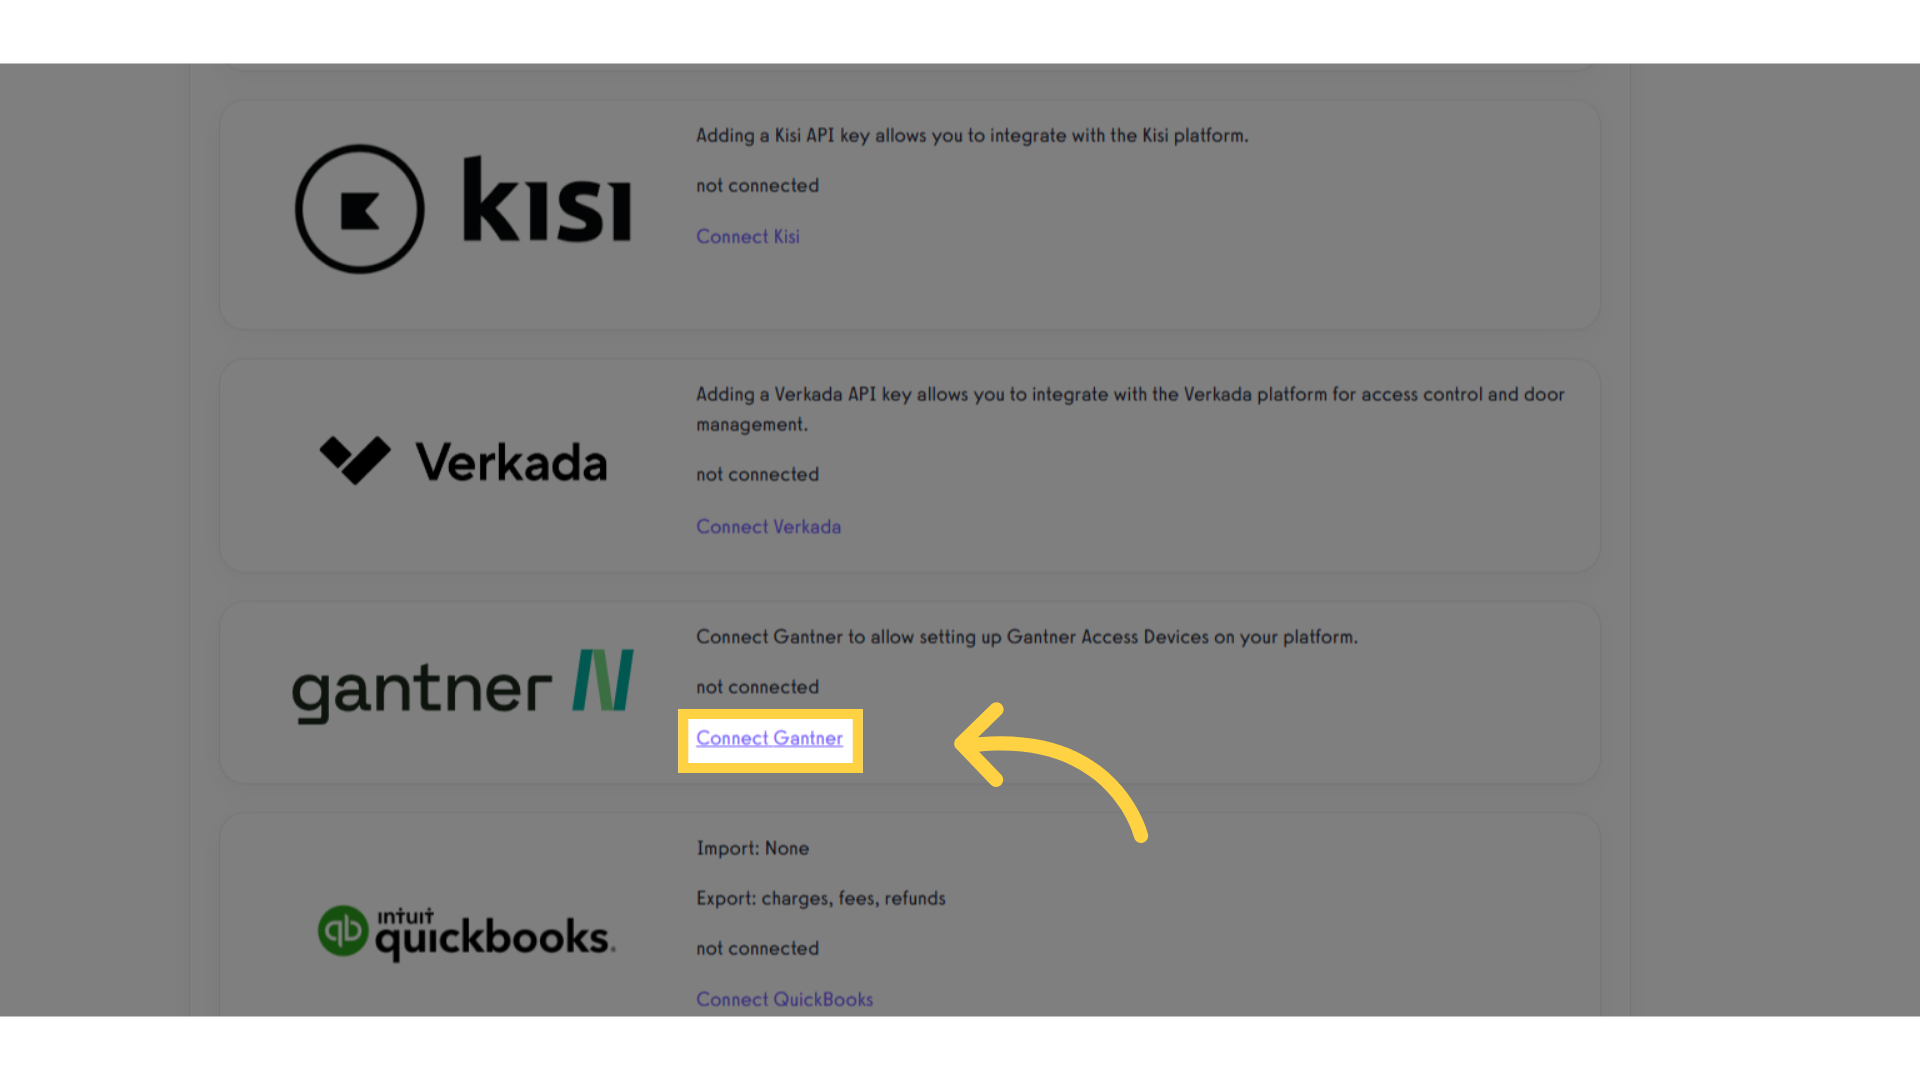
4. Click the “Connect Gantner” link.
Click on the “Connect Gantner” link to get started.
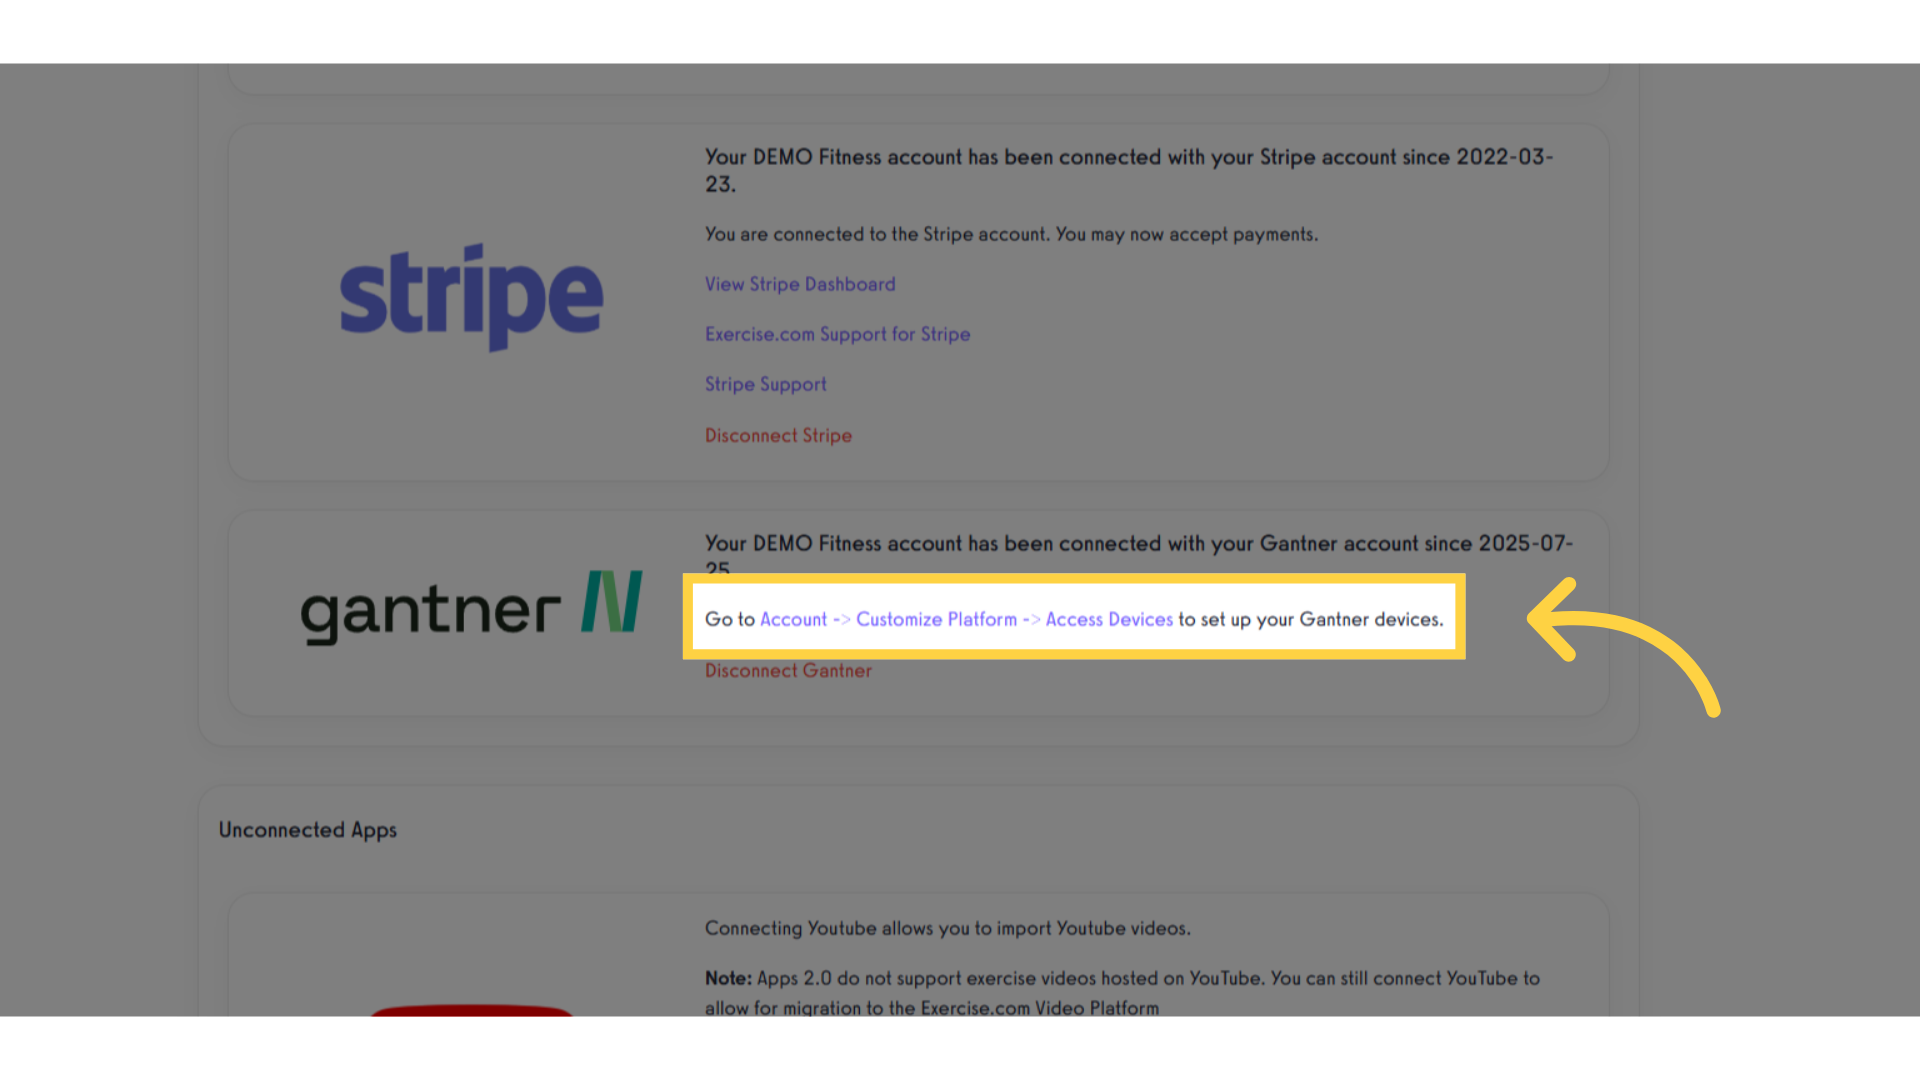
5. Click the link to set up your Access Devices.
Once you’re connected, you’ll see a link to set up your devices. Click that link to navigate to your Access Devices page.
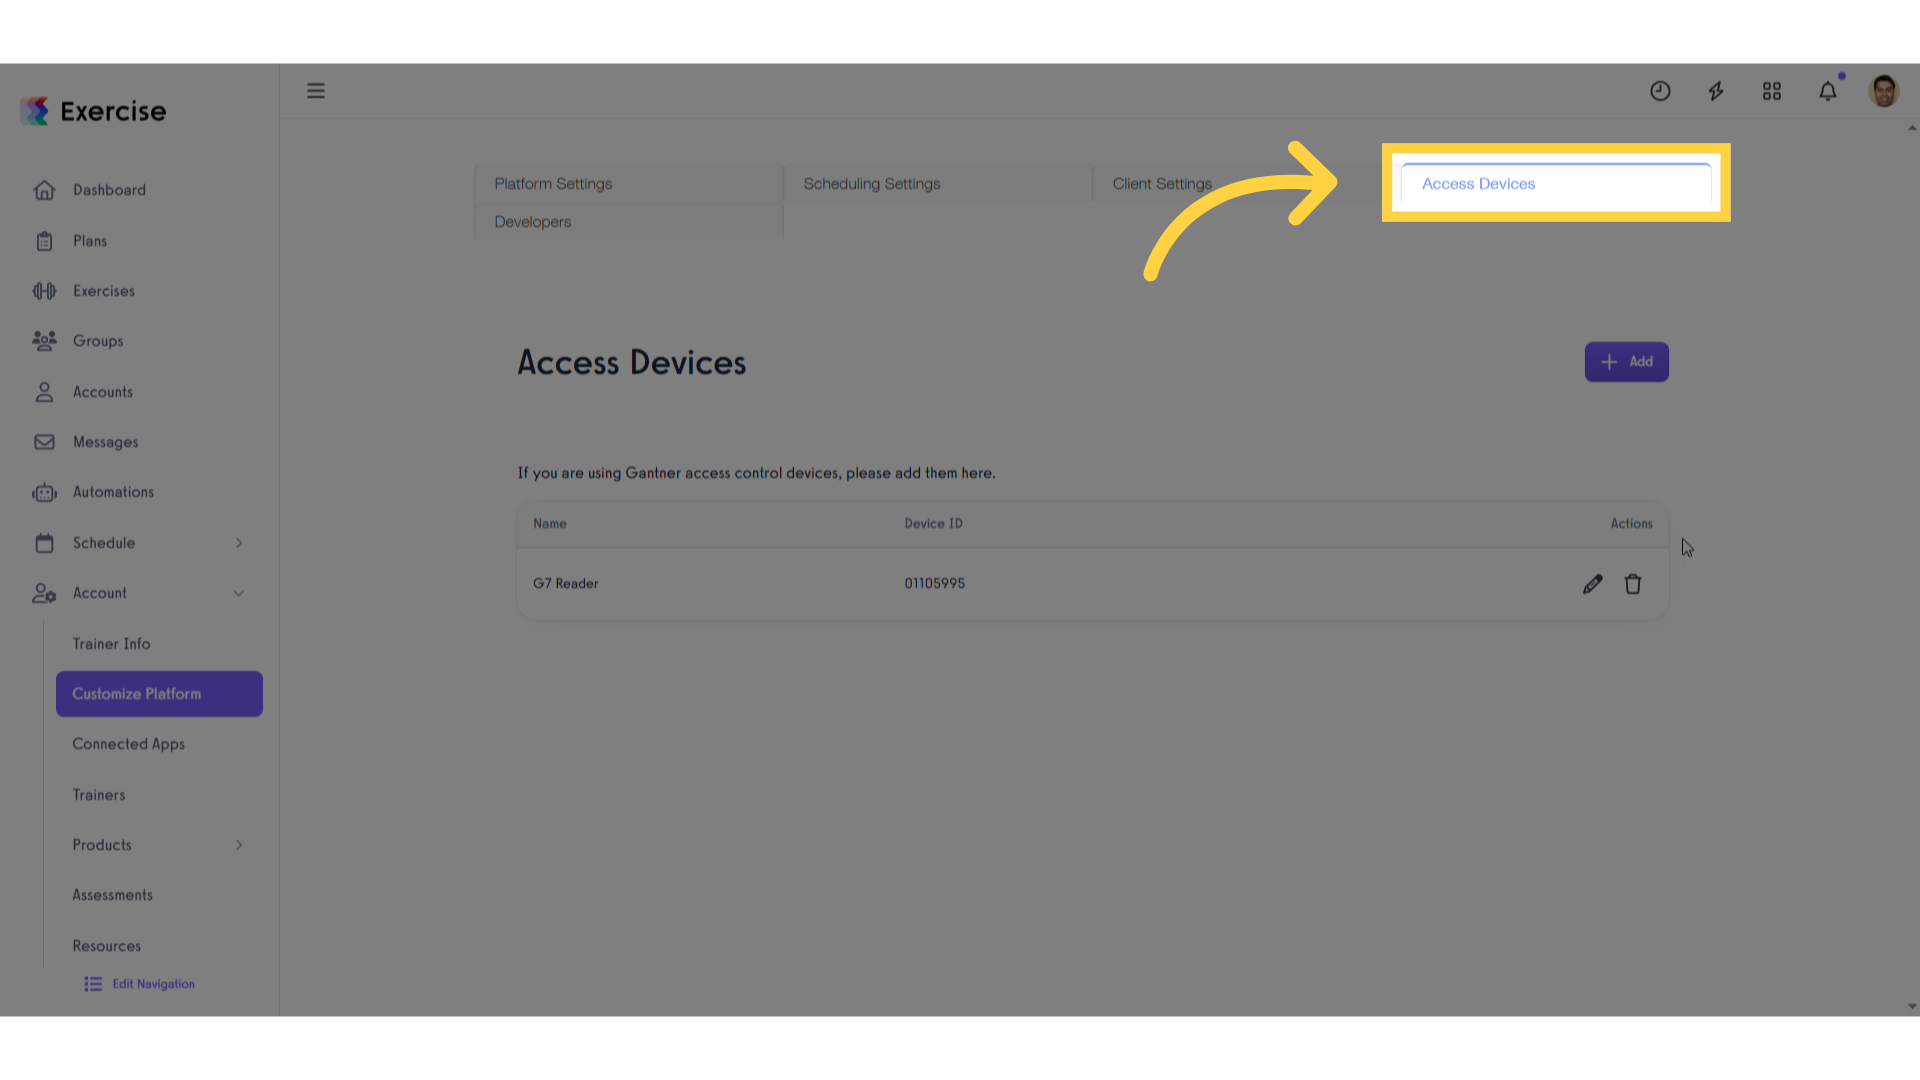
6. Click “Access Devices”.
You can return to this page any time by clicking on the “Access Devices” tab on the Customize Platform page.
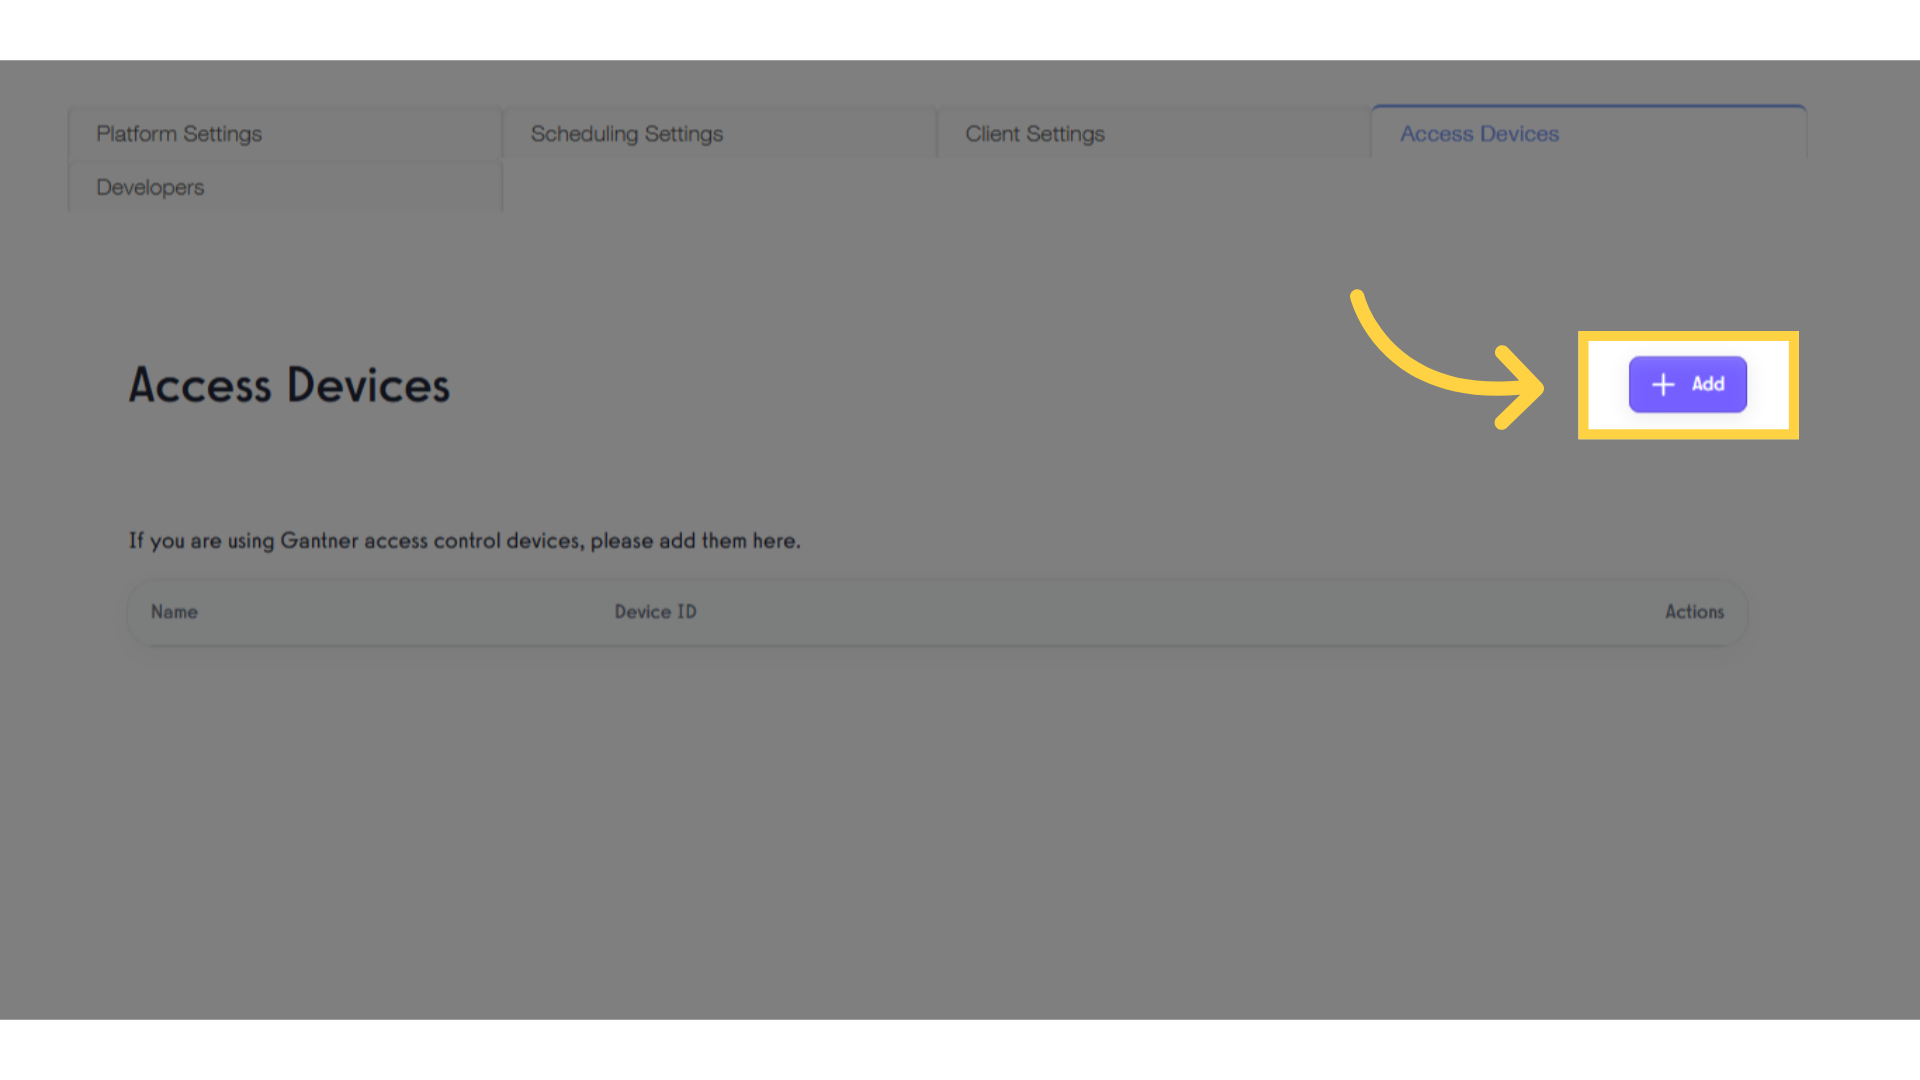
7. Click the Add button.
Click the Add button to set up a new device, or you can edit an existing device.
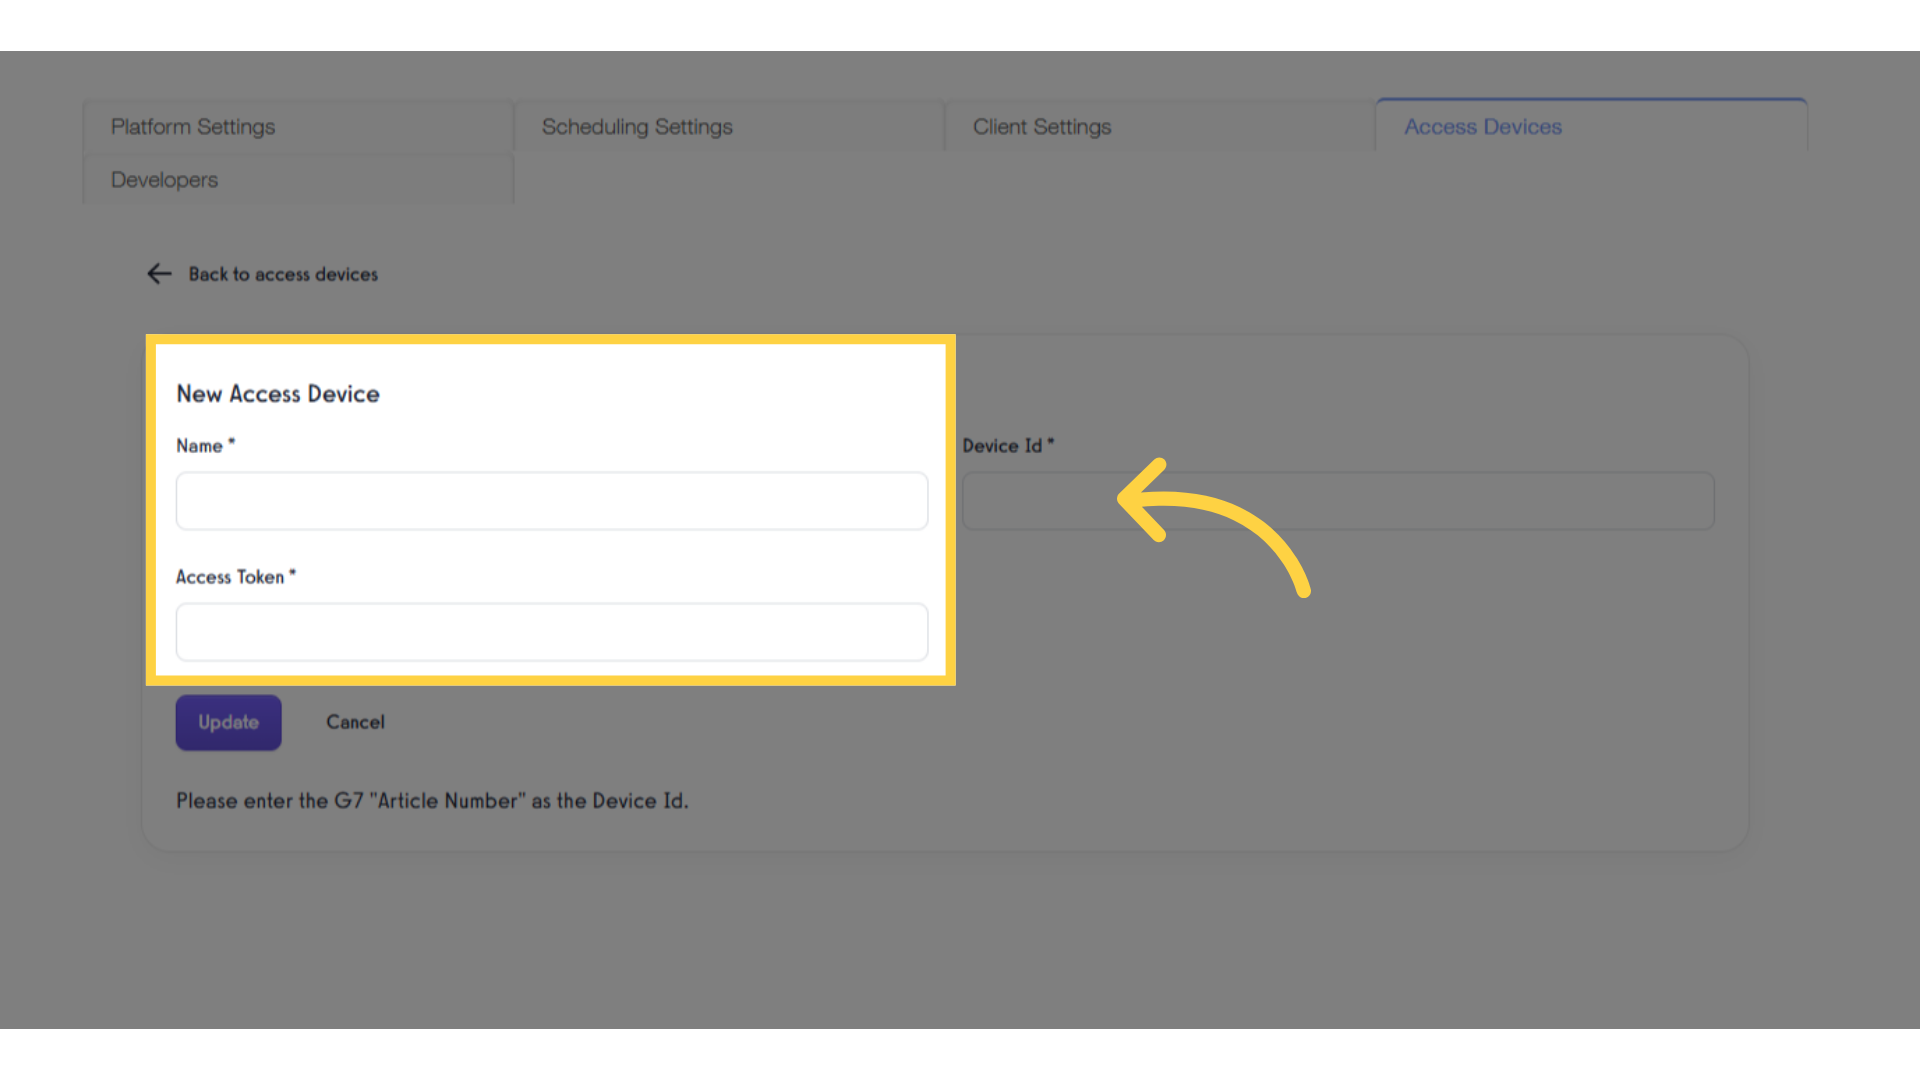
8. Set up your device name and access token.
You can give your device a name, and set the Access Token here.
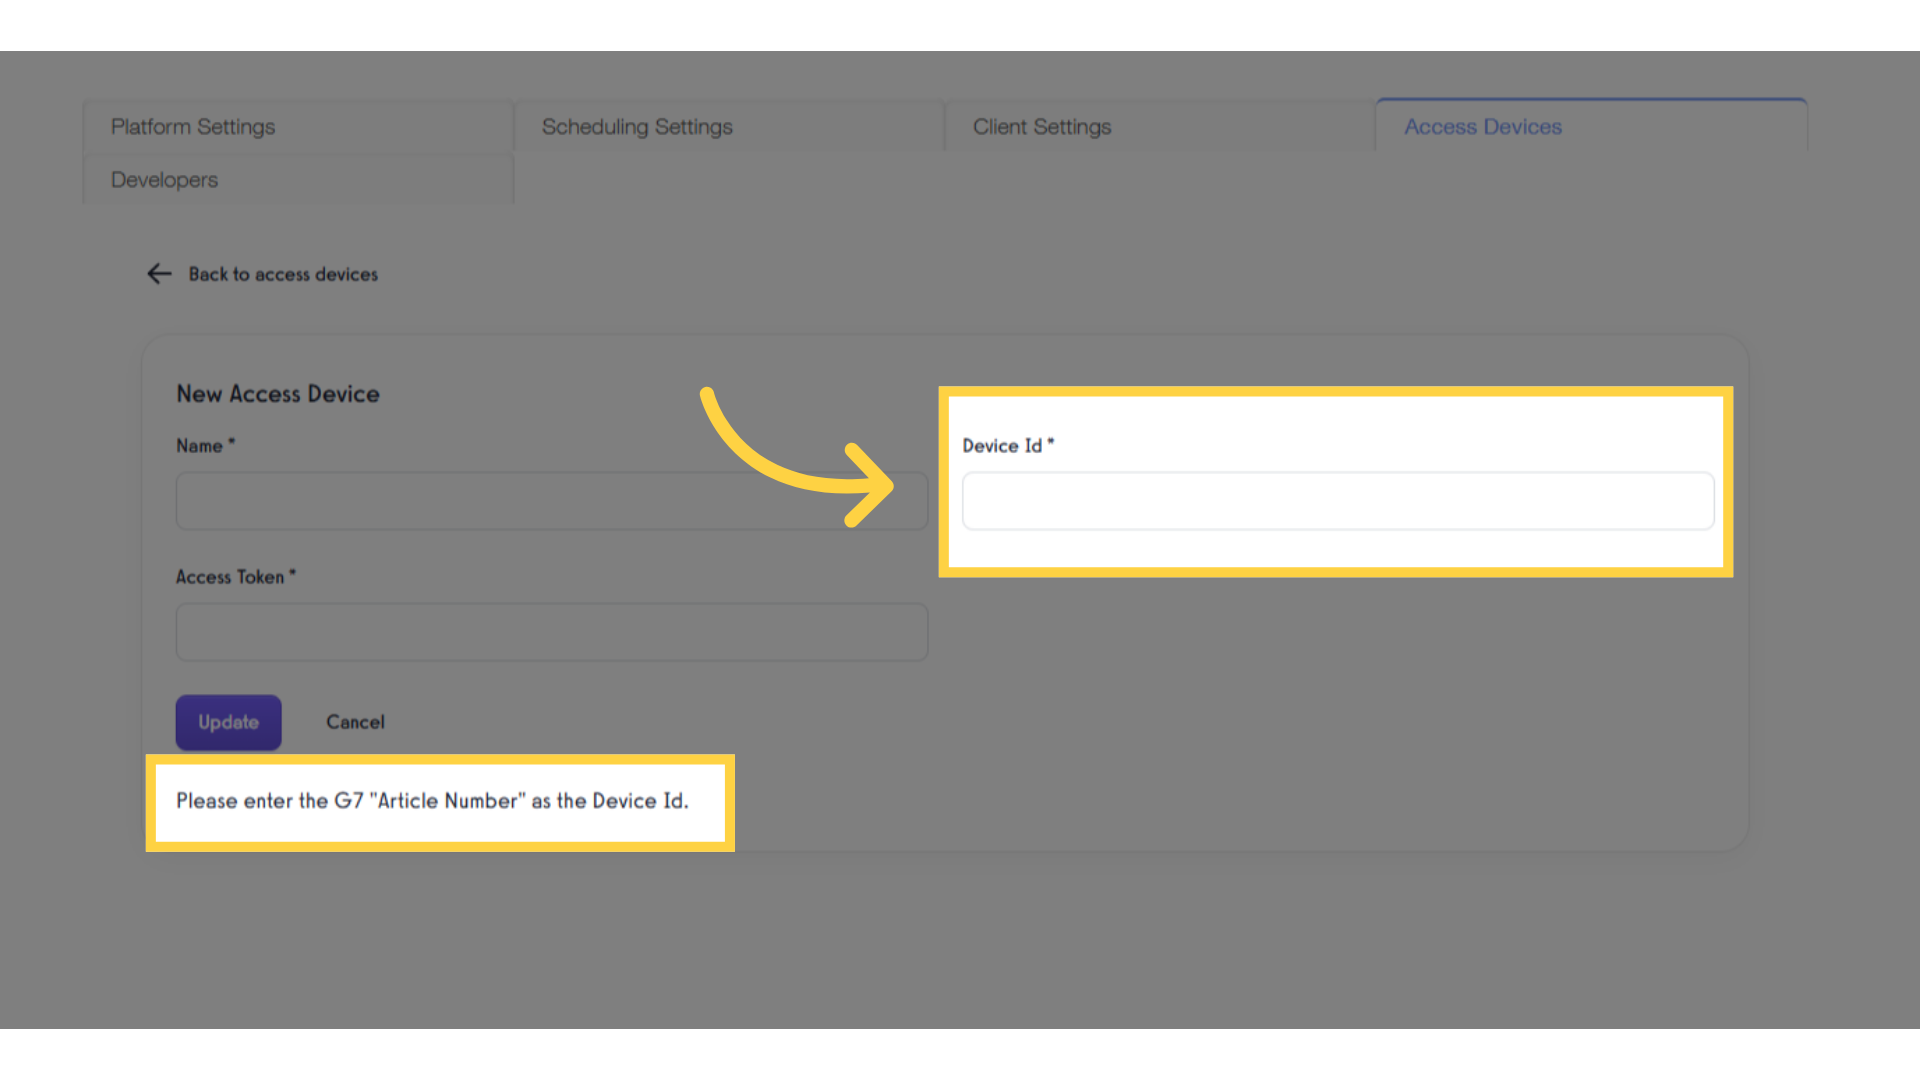
9. Plug in the Article Number from your device as the Device ID.
Next, you will need to plug in the Article number for your device as the Device ID
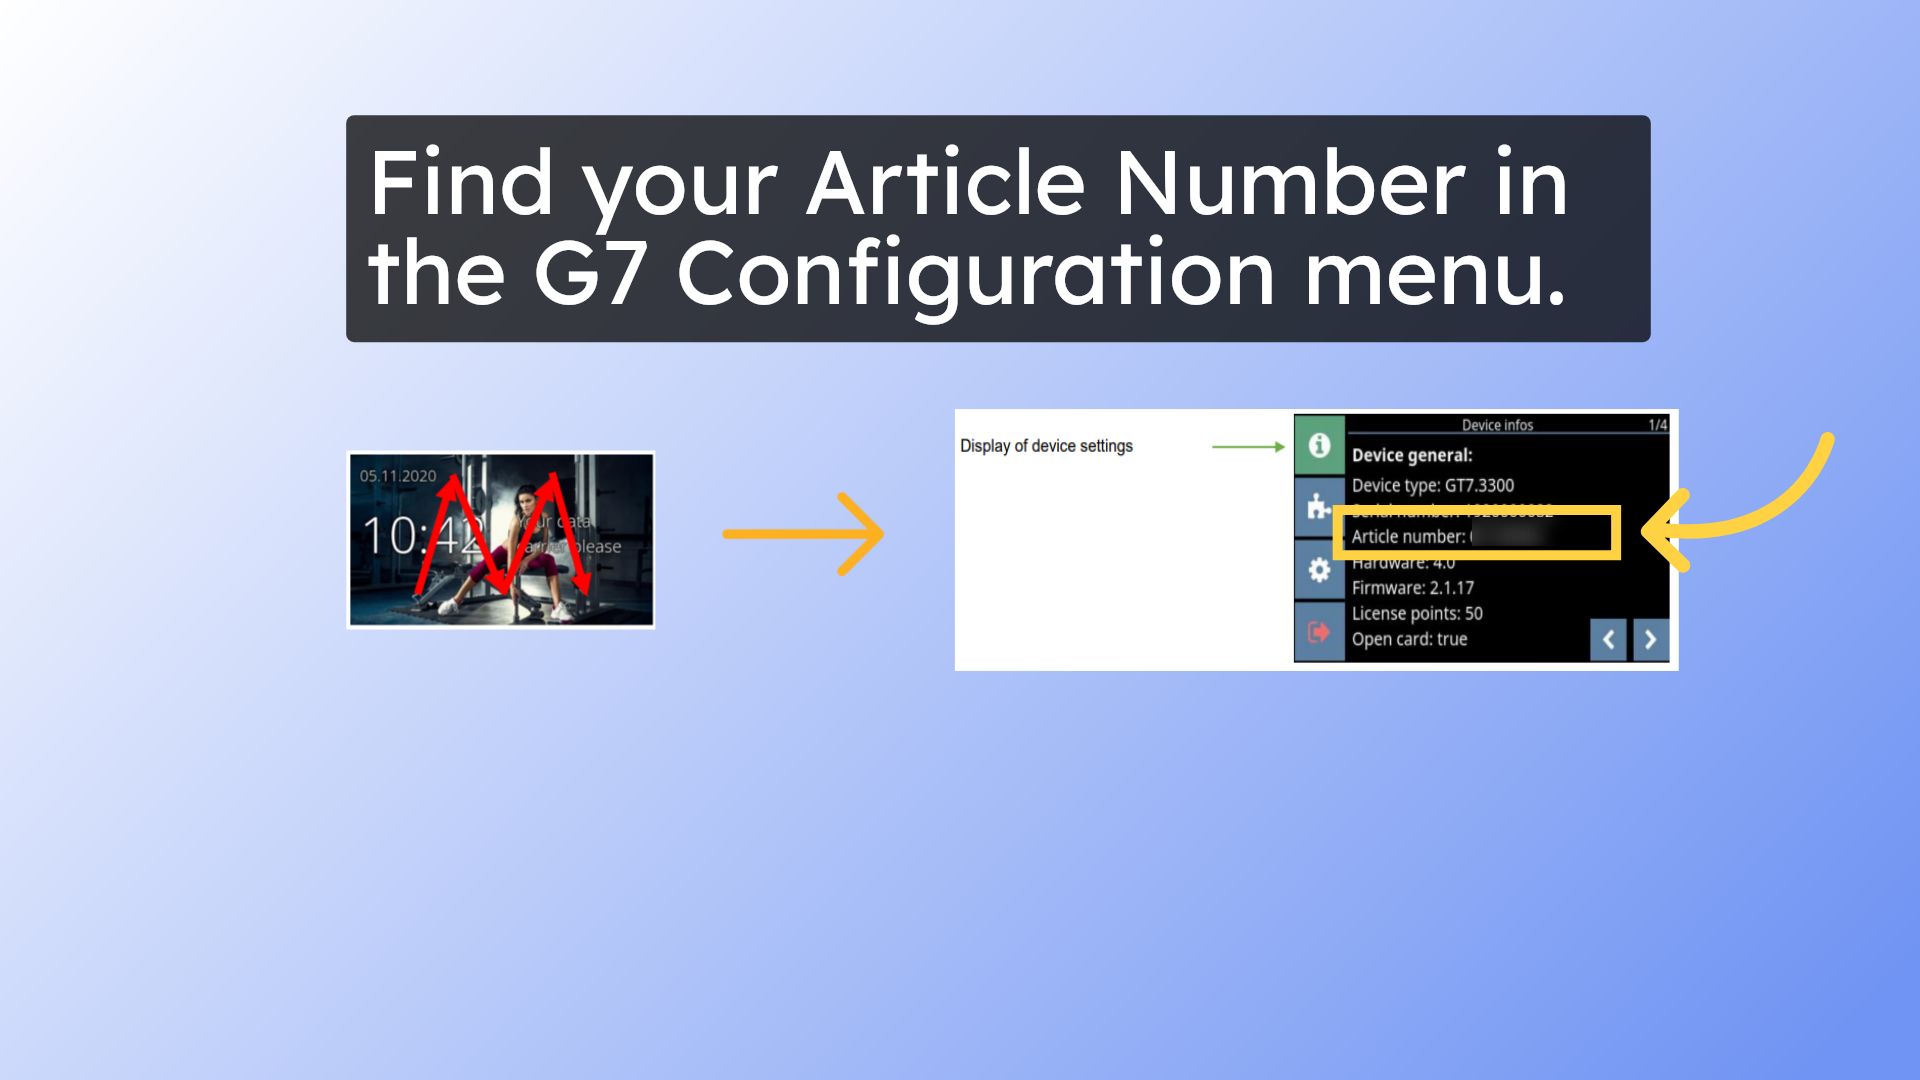
10. Find your Article Number in the G7 Configuration menu.
To find the Article Number on your G7 device, open the configuration menu by swiping the letter “M” on the screen and then entering your PIN. Look for the Article number on the device info page.
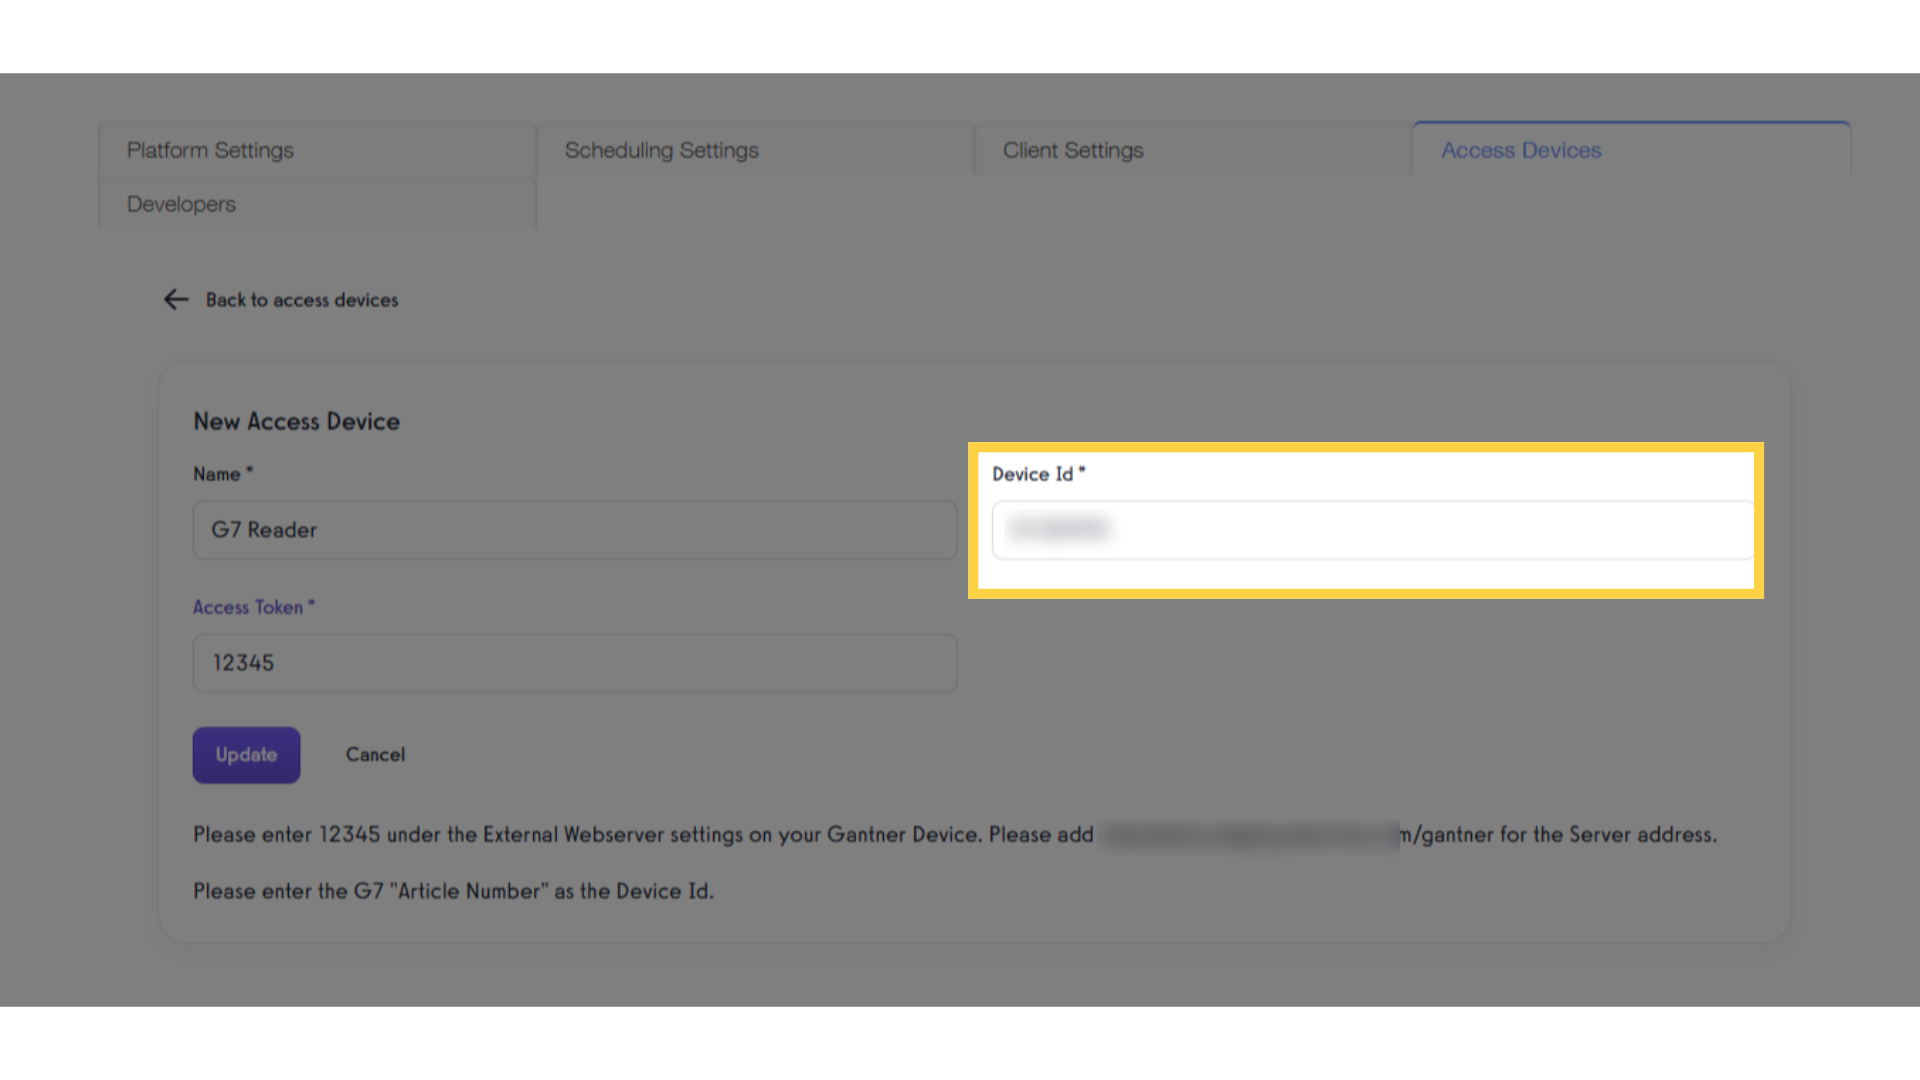
11. Enter the Article Number in the “Device ID” field, and save your settings.
Enter the Article Number in the “Device ID” field, and save your settings.
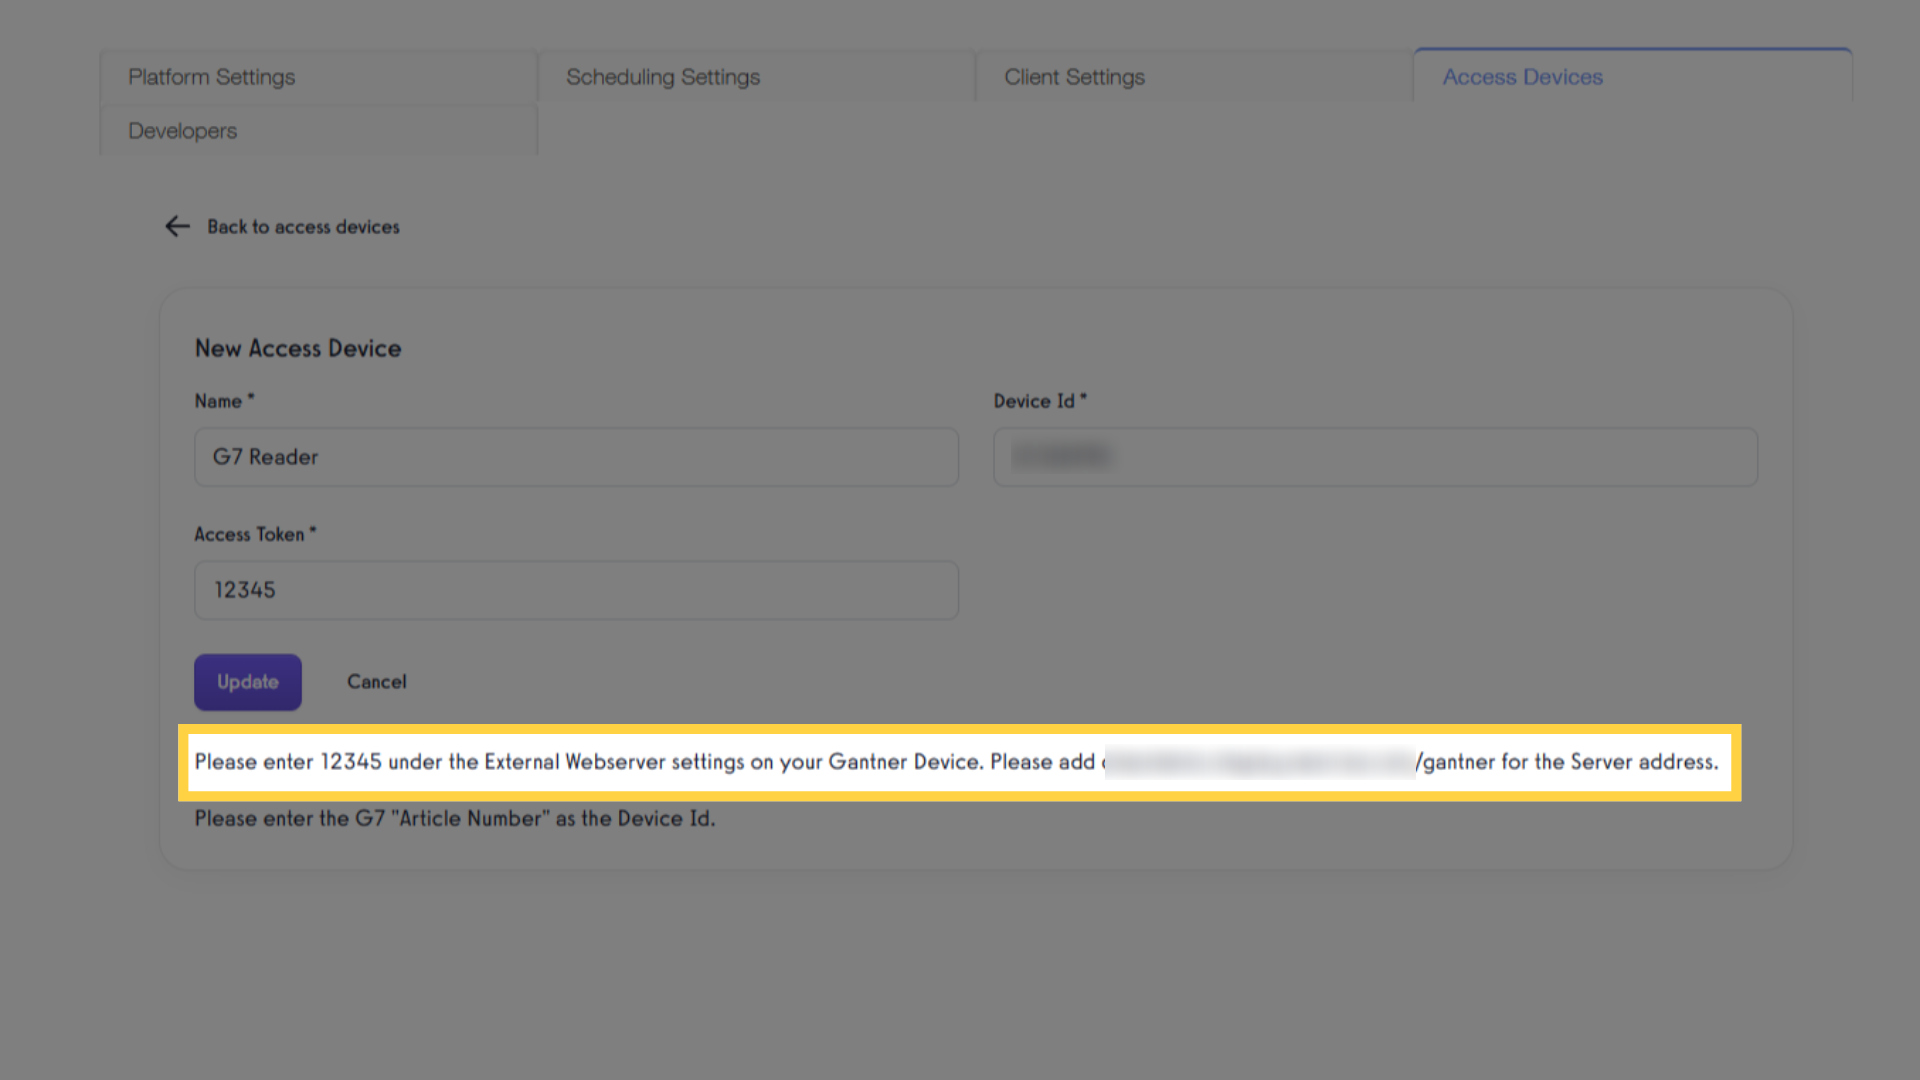
12. Note your Access Token and Server address link.
Once you’ve saved your settings, you will need your Access Token and the Server address link displayed on this page to finish your setup.
Your Server address link will look like this: example.yourwebsite.com/gantner
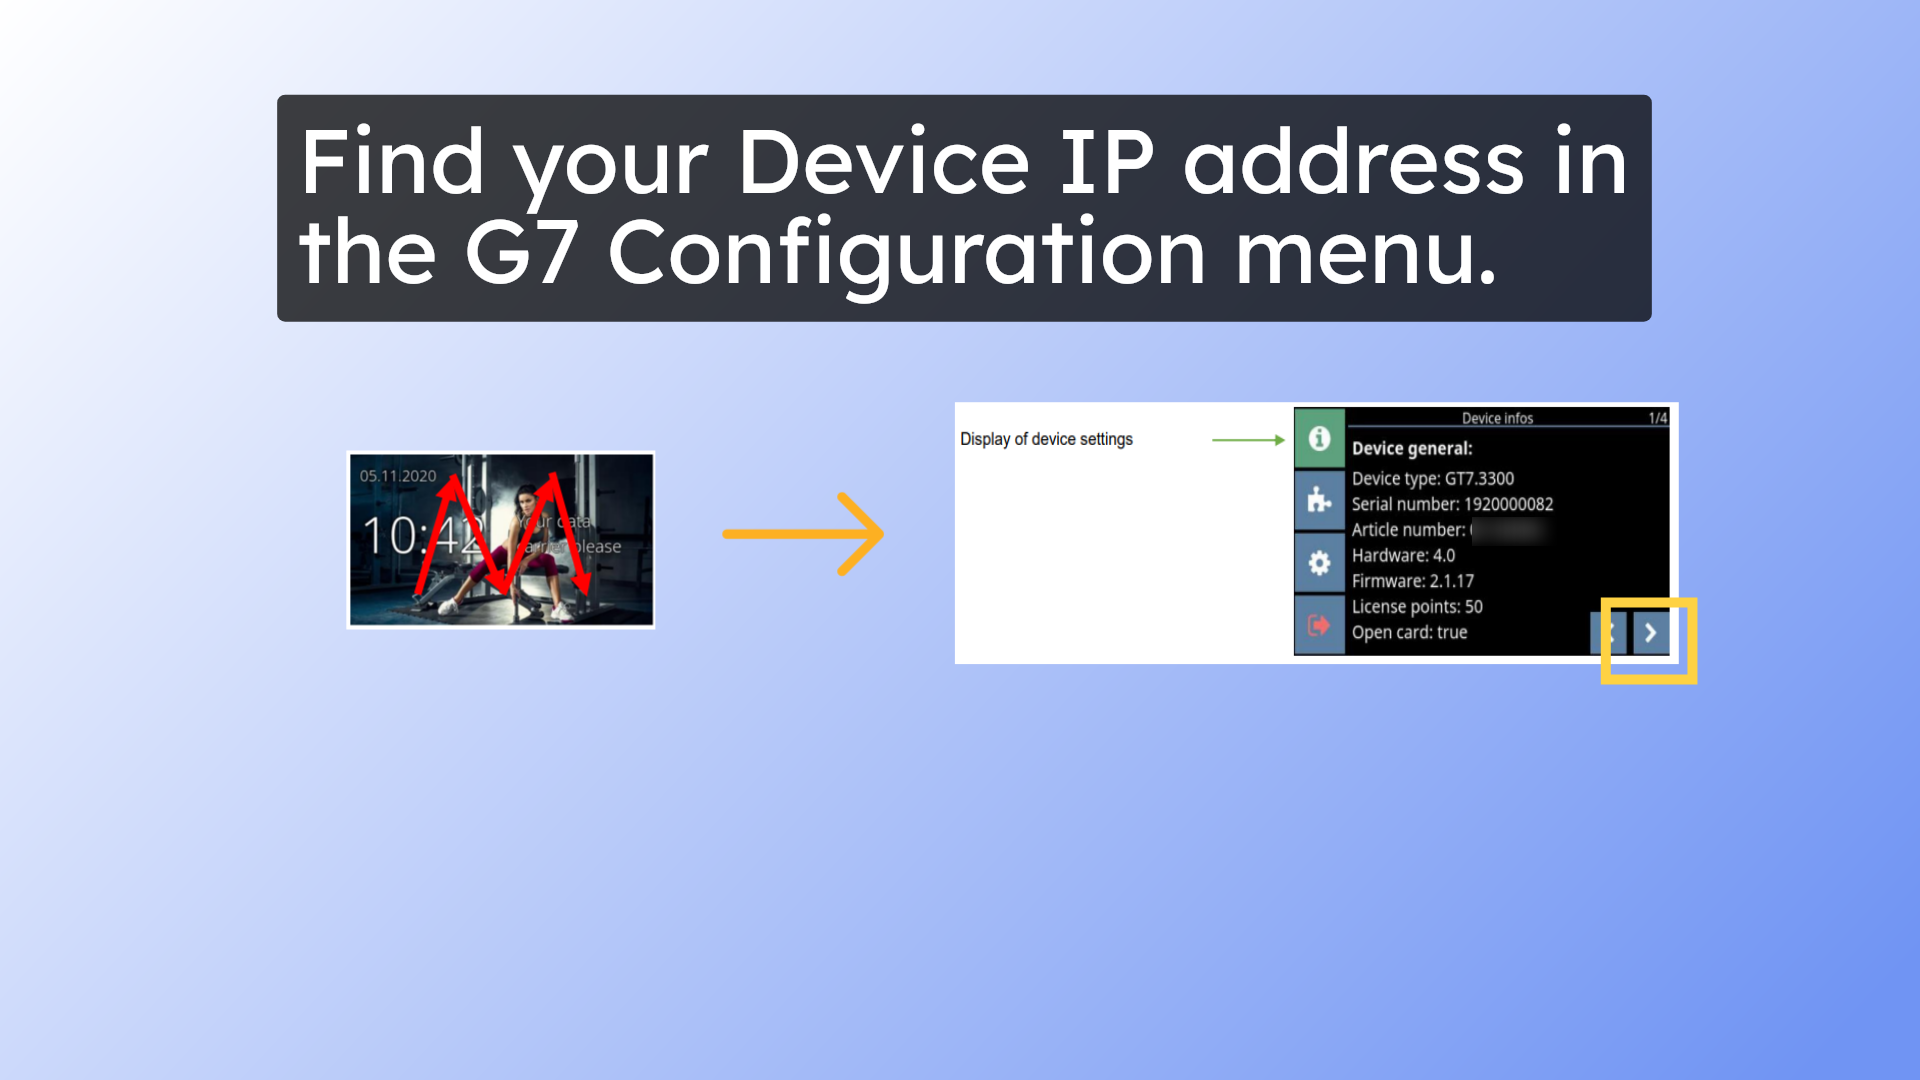
13. Find the device IP Address in the G7 Configuration menu.
To find the IP address for your G7 device, open the configuration menu by swiping the letter “M” on the screen and then entering your PIN. Then tap to the arrow to page 2 of the Device Info.
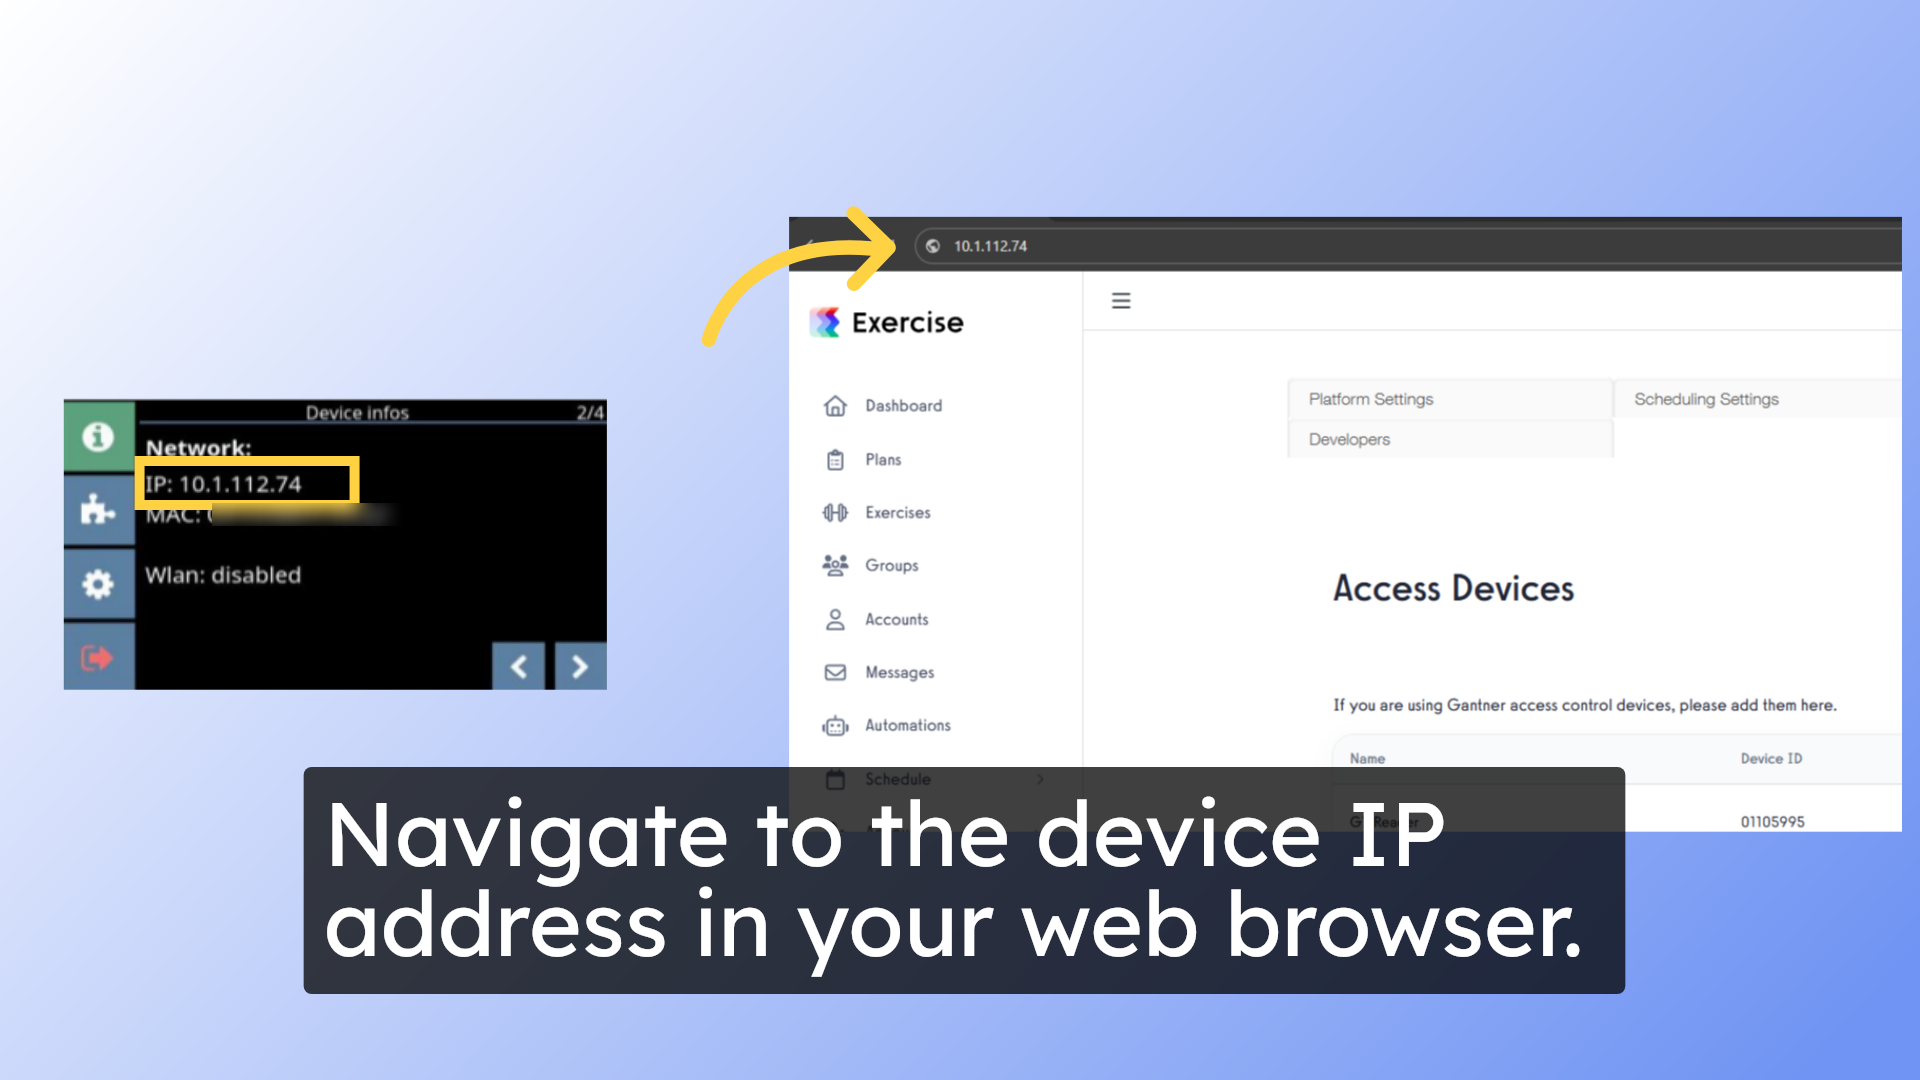
14. Navigate to the device IP address in your web browser.
Navigate to the device IP address in your web browser, making sure your gantner device is on the same network as the browser you are using.
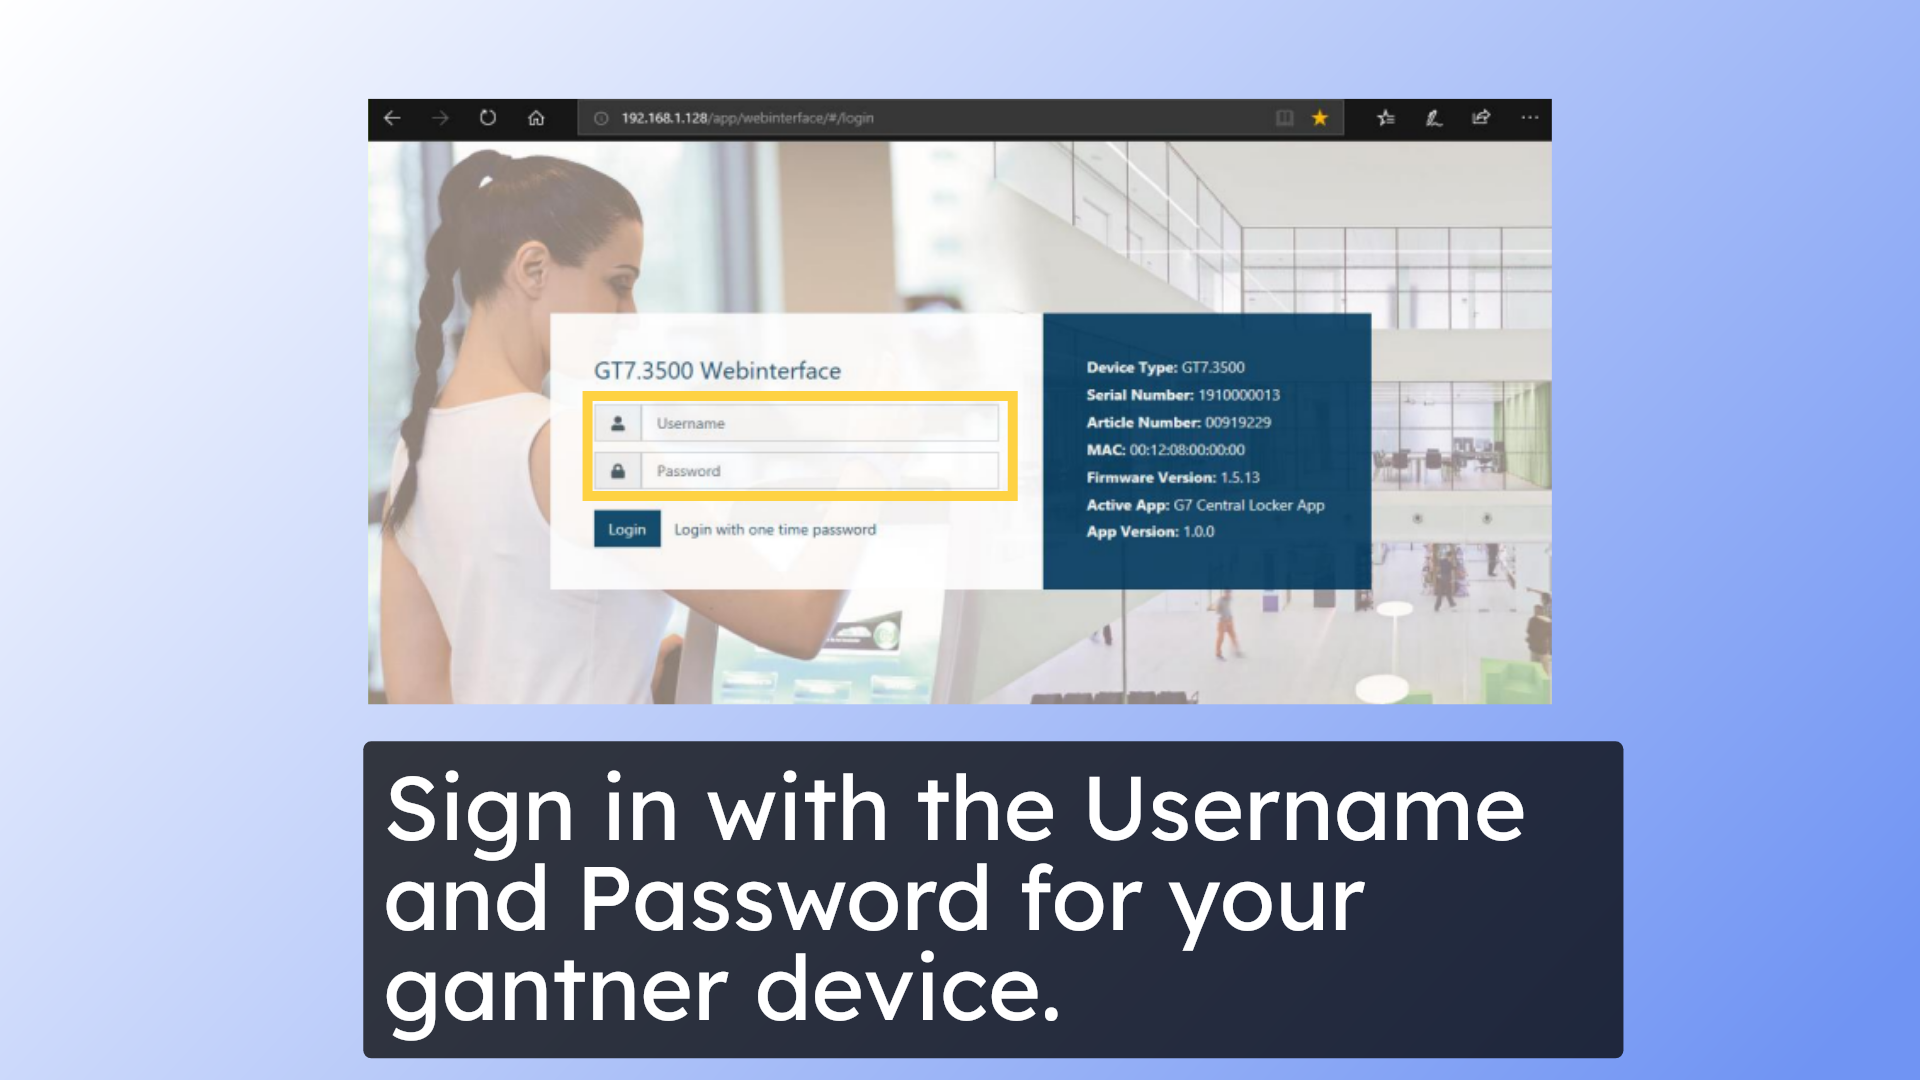
15. Sign in with the Username and Password for your gantner device.
This IP address will take you to the Gantner web interface, where you can sign in with the Username and Password for your gantner device.
The default Username and Password are in your Gantner setup guide. Please make sure to update the Username and Password for security.
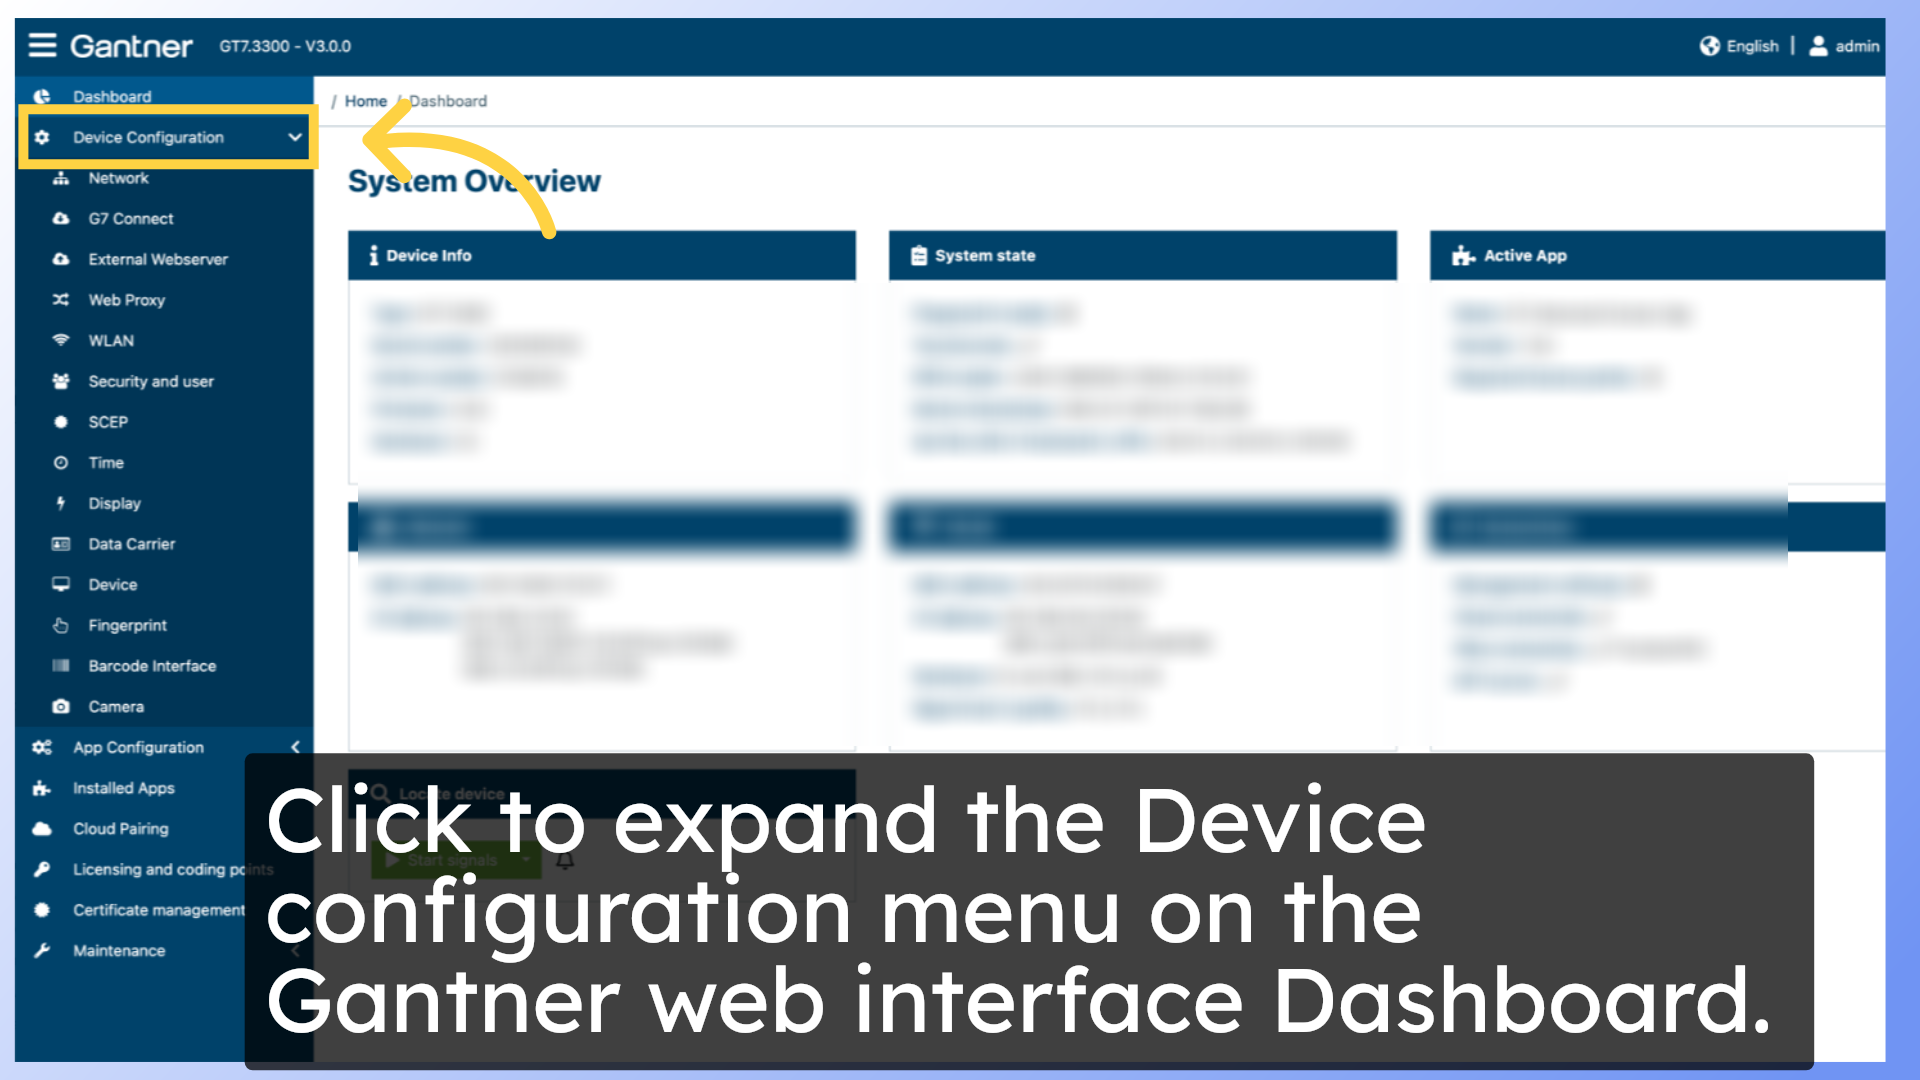
16. Click on “Device Configuration”.
Click to expand the Device configuration menu on the Gantner web interface Dashboard.
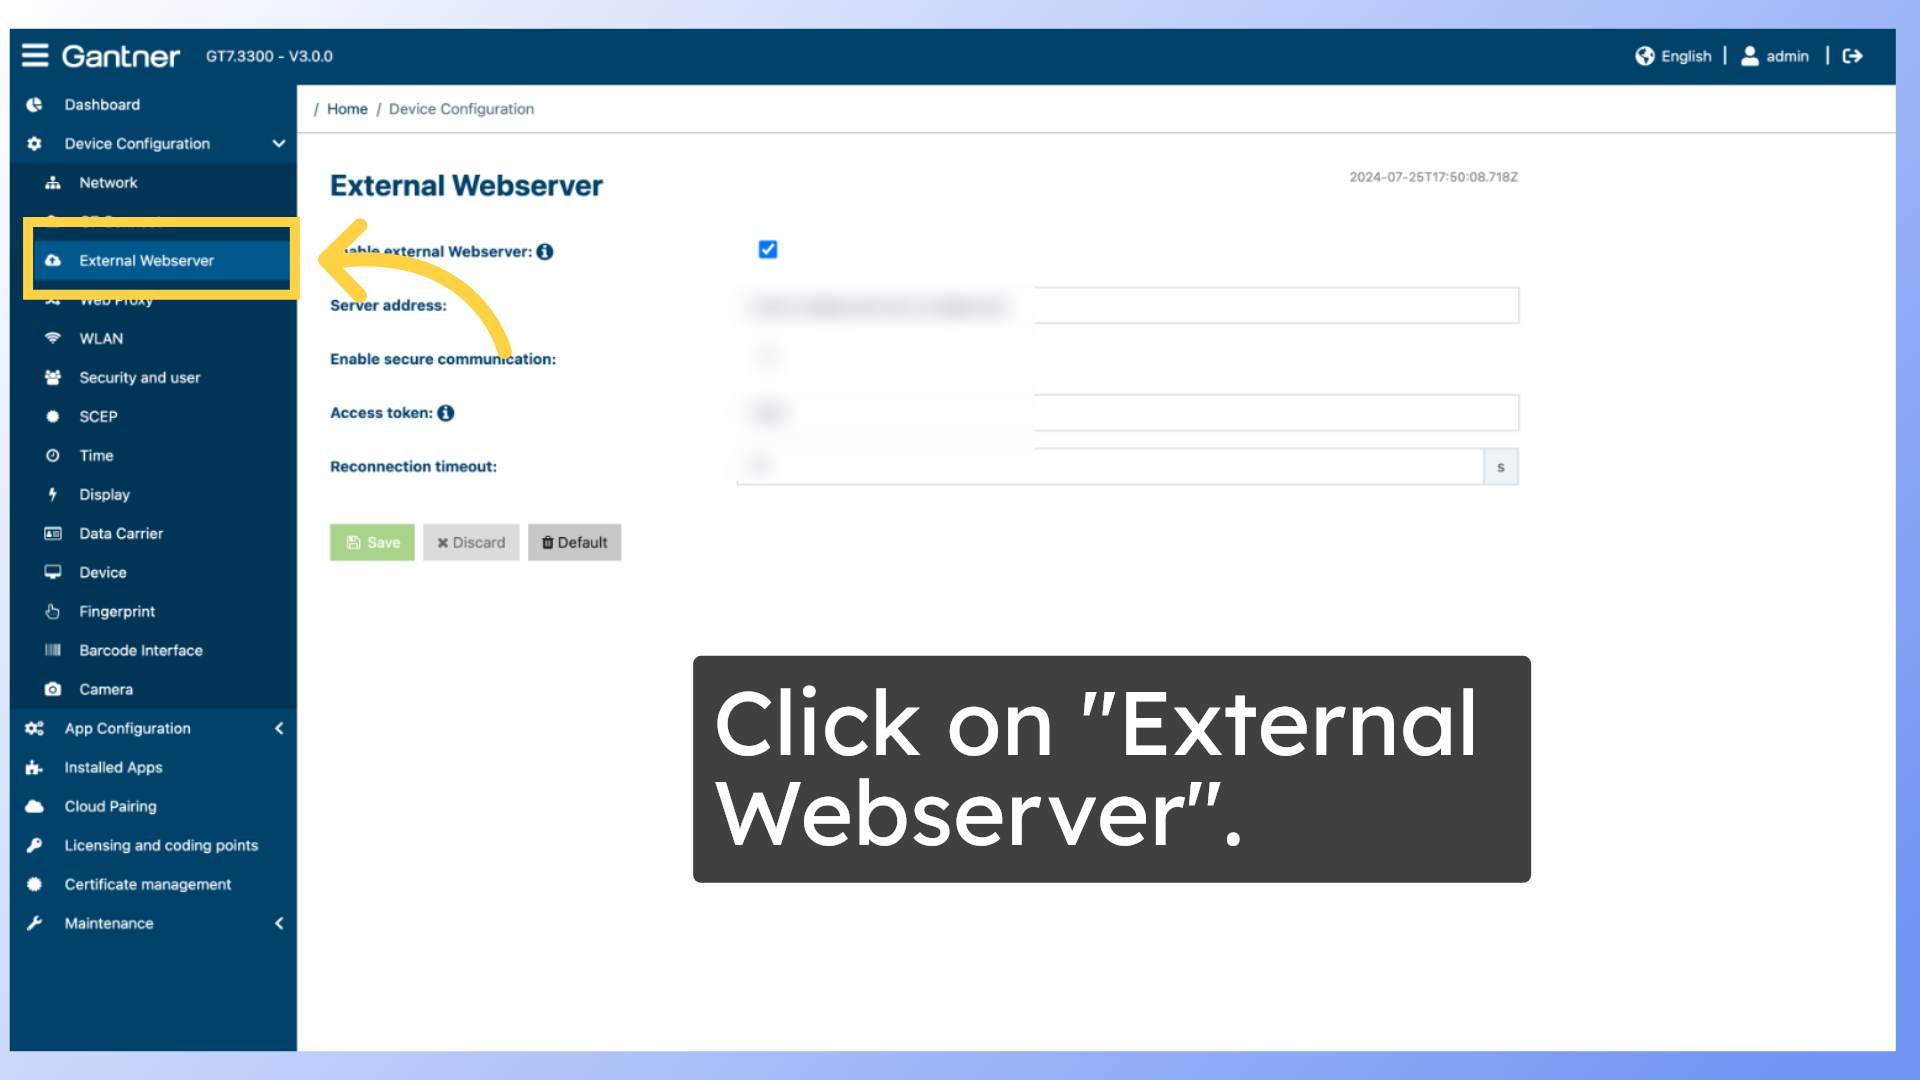
17. Click on “External Webserver”.
Click on the “External Webserver” menu item.
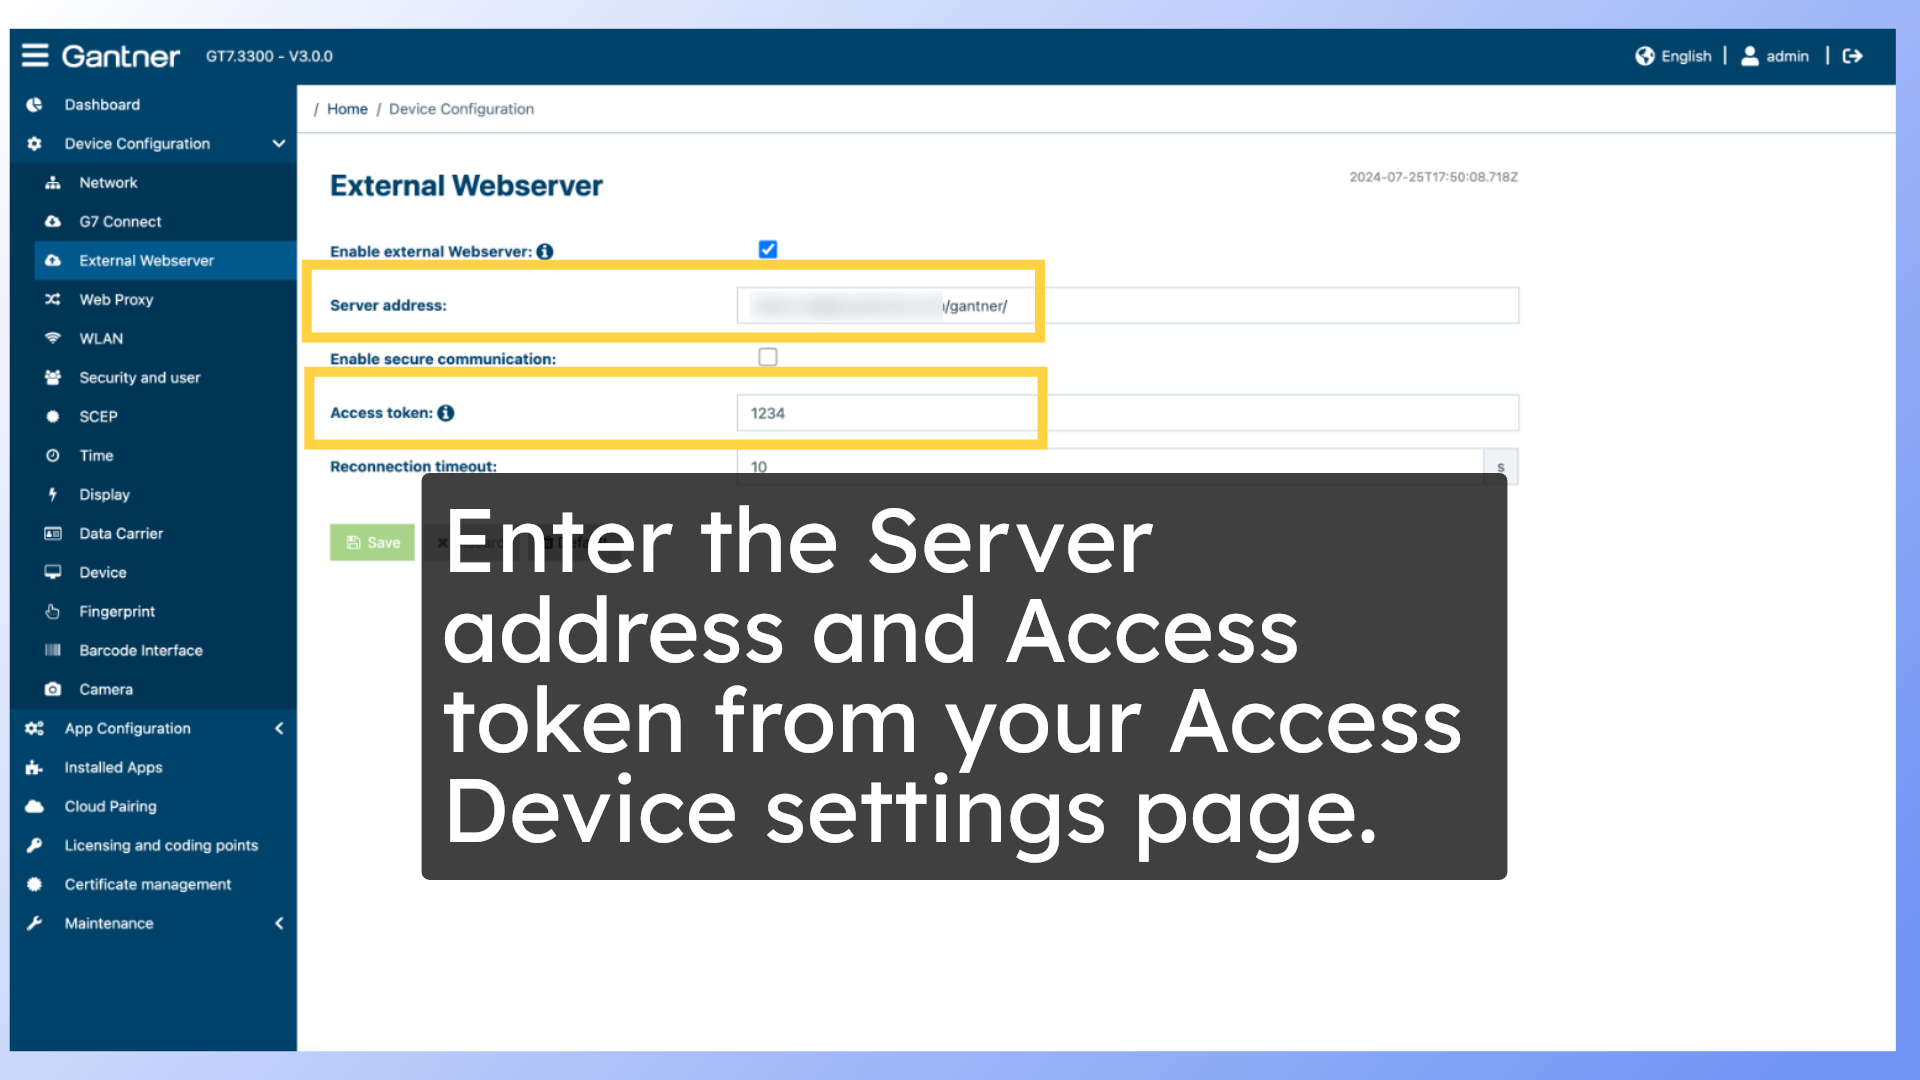
18. Save your Server address and Access token.
Enter the Server address and Access token from your Access Device settings page, and make sure to save your changes.
19. Test a barcode scan.
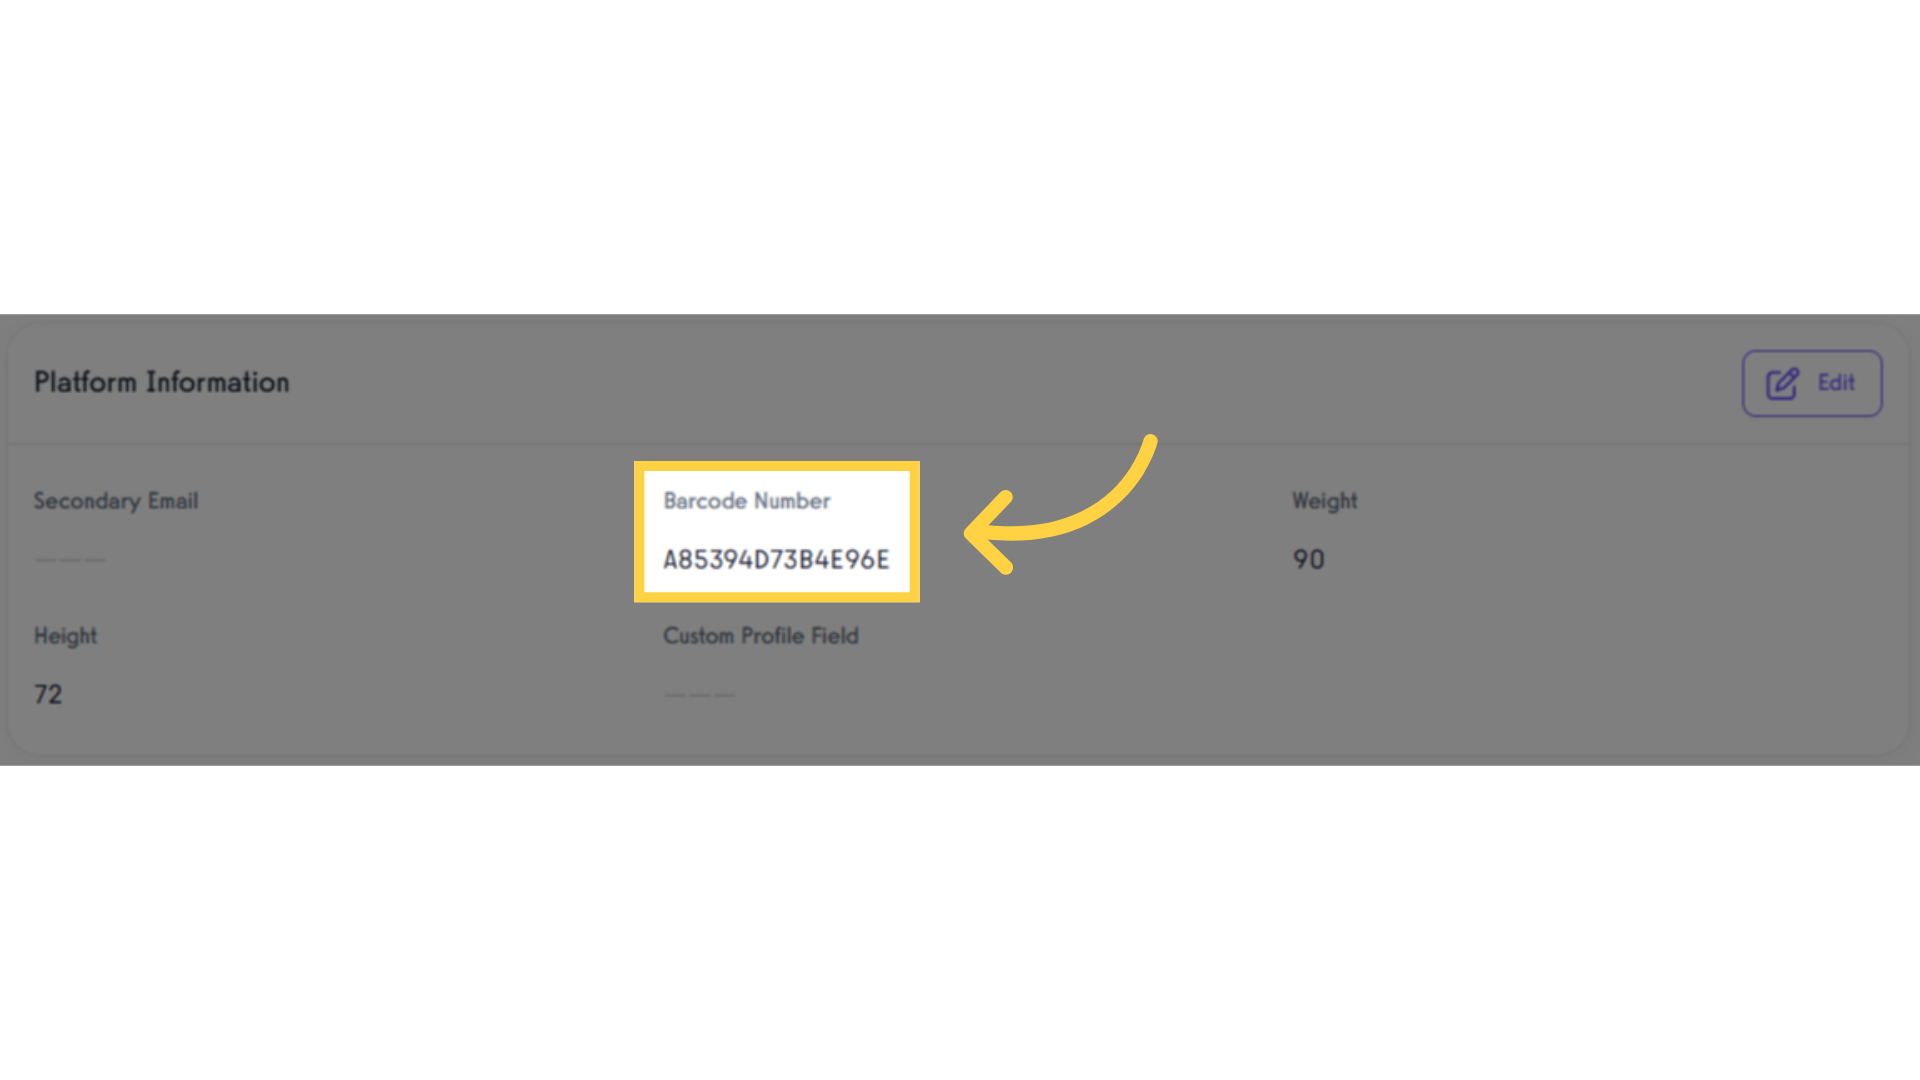
Now your Gantner device is ready to scan barcodes! Each client has a Barcode Number assigned to their profile, and they can scan their barcode from the app to unlock your device. Their scan activity will be recorded in the Events tab on their client profile.
Make sure the client has unlock privileges via a Gantner-enabled package before scanning.
This guide covered the steps for connecting a Gantner device for door access in the Exercise.com for Business platform.


