How do I create an assessment?
Within our Assessment Software, you have the ability to create an assessment!
To create an assessment, head to the “Account” tab of your dashboard and follow the instructions below.
This guide will walk you through the process of creating an assessment.
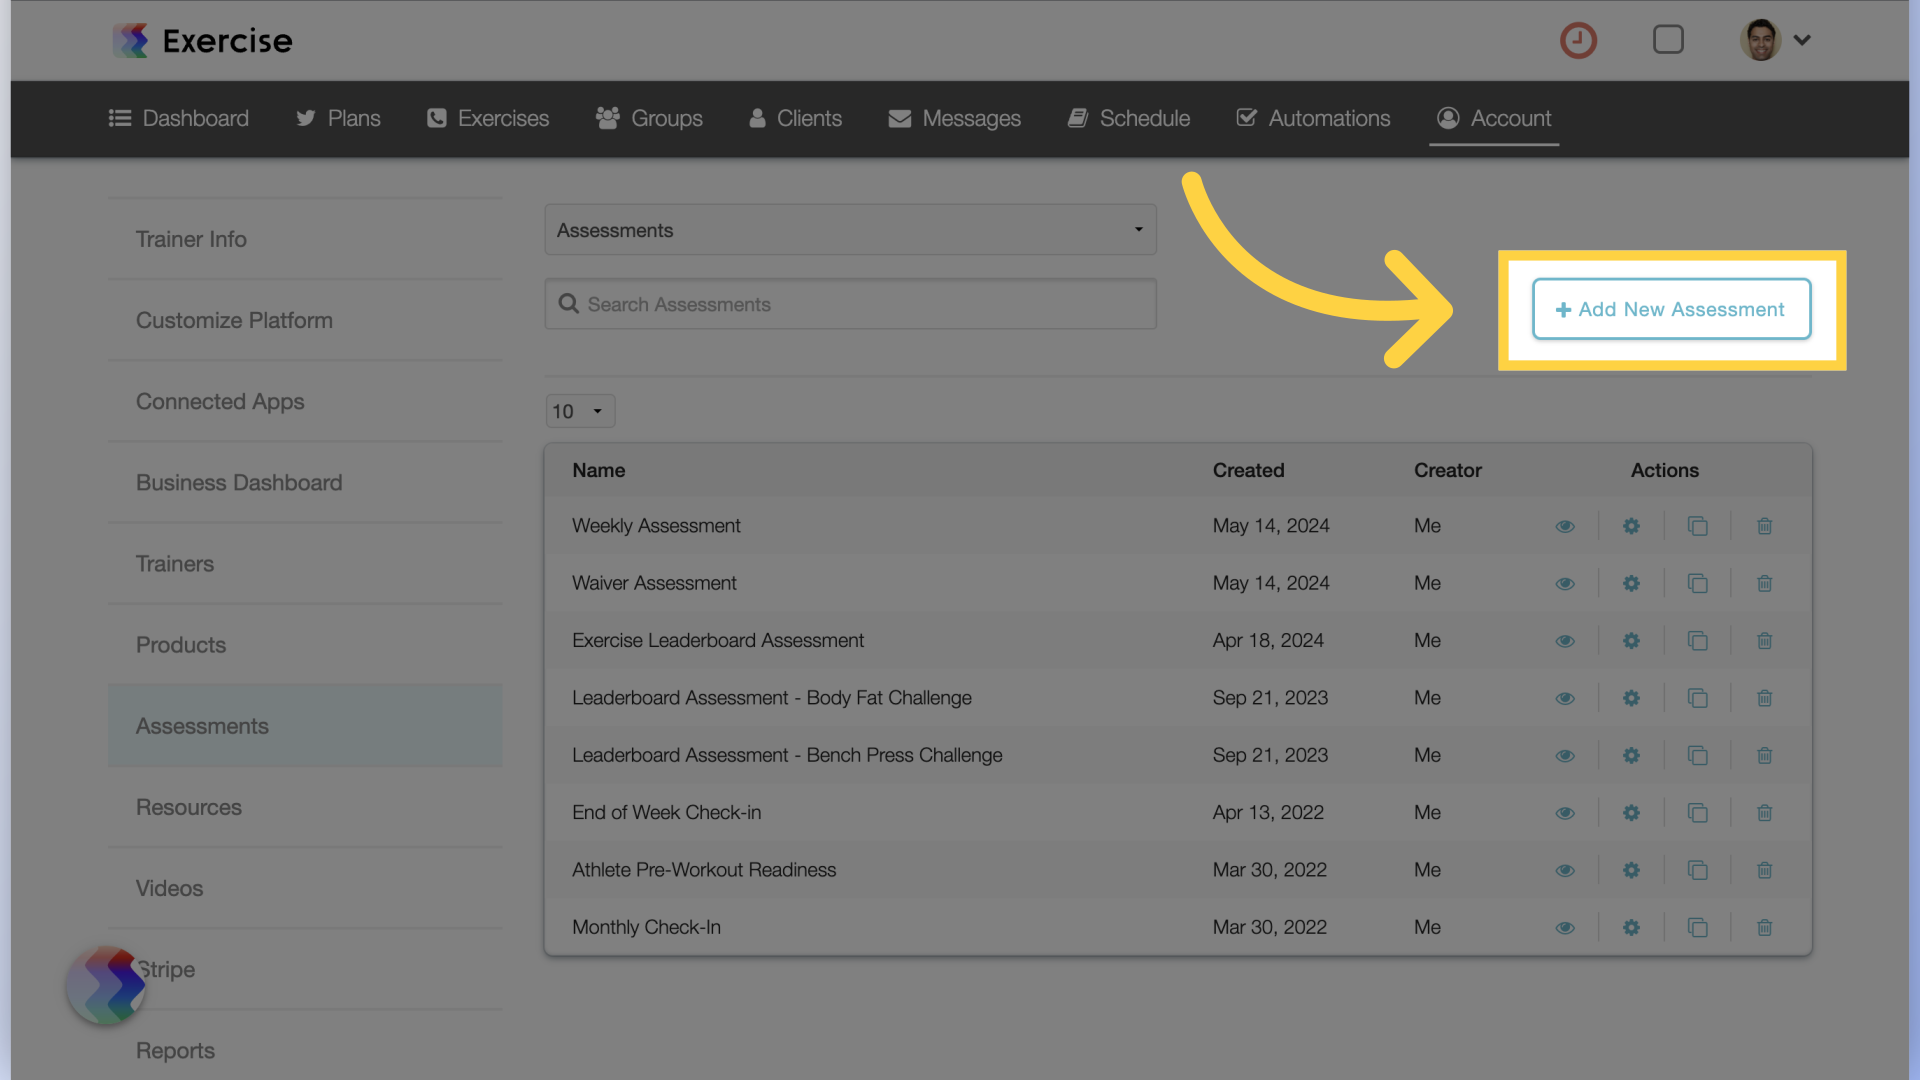
1. Click Add New Assessment
Start by clicking on the “Add New Assessment” button.
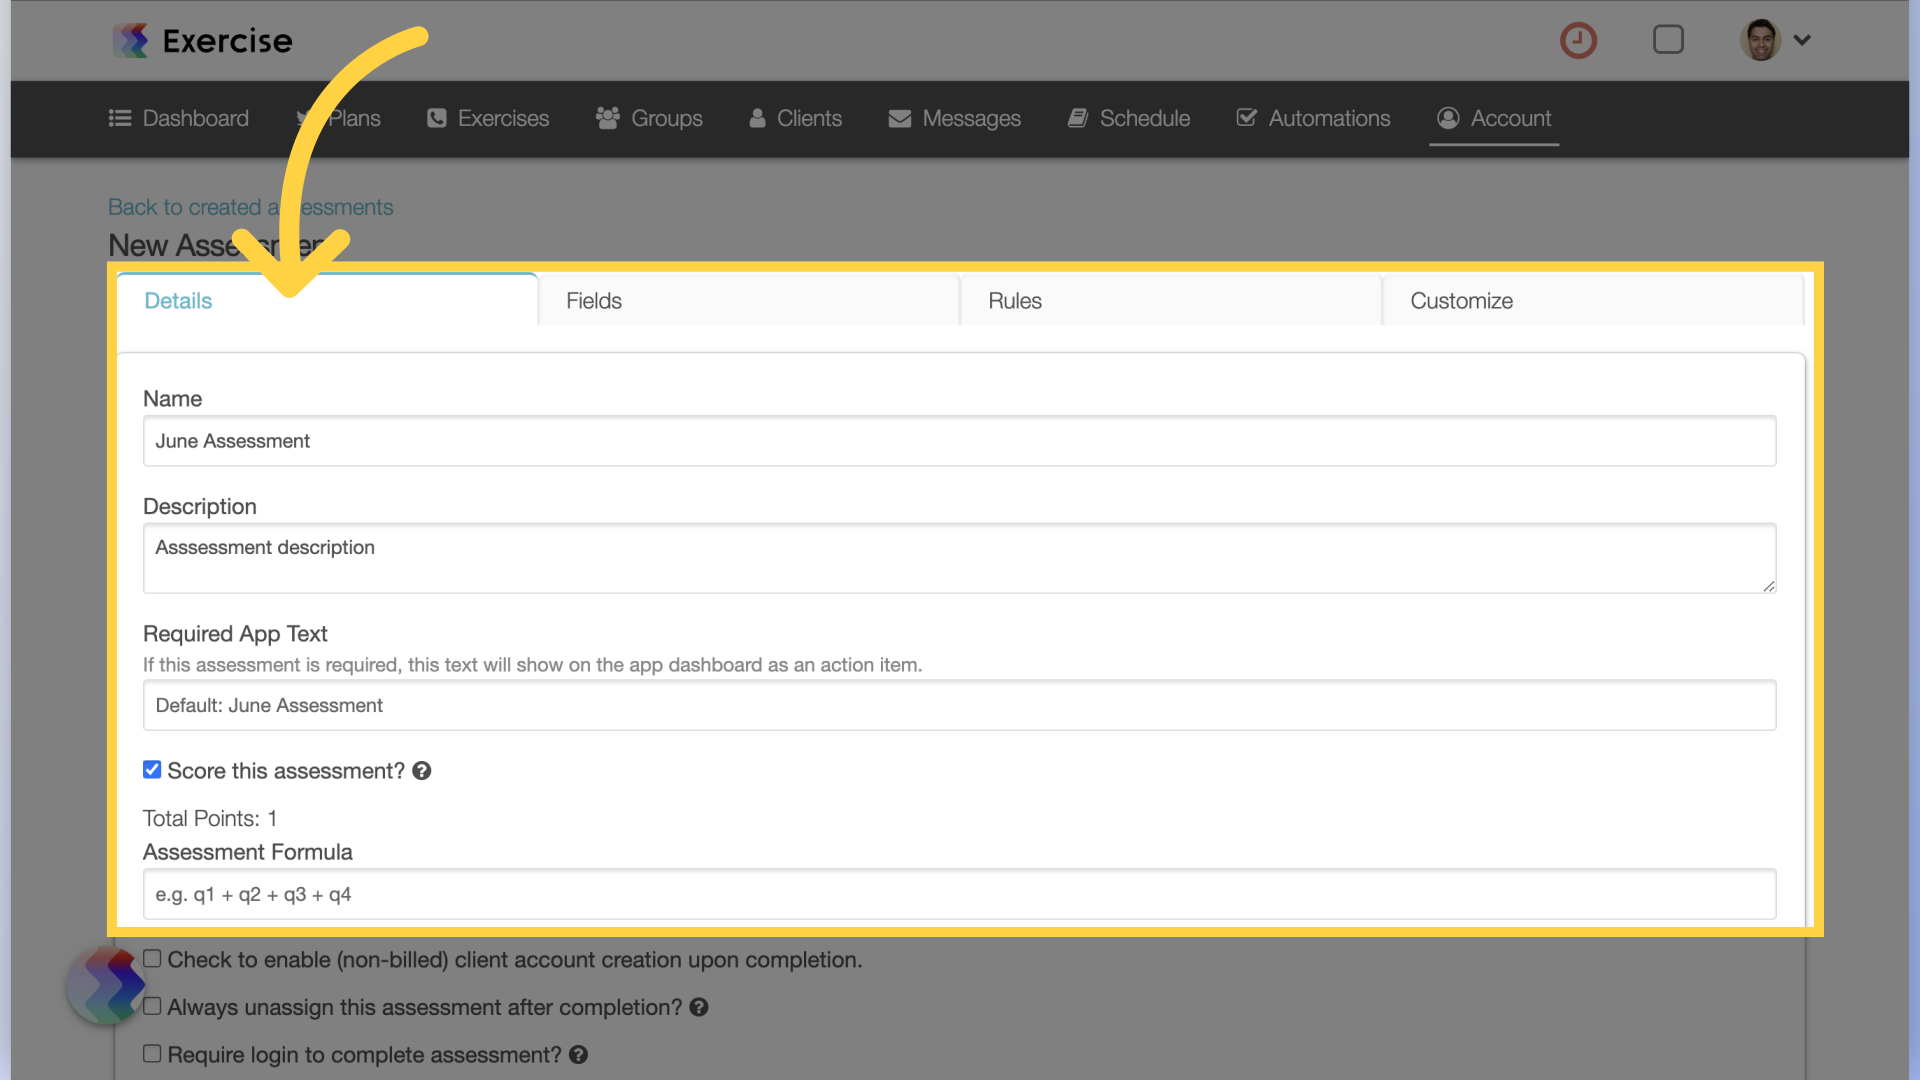
2. Enter the Details
On the Details tab fill in the assessment name and description.
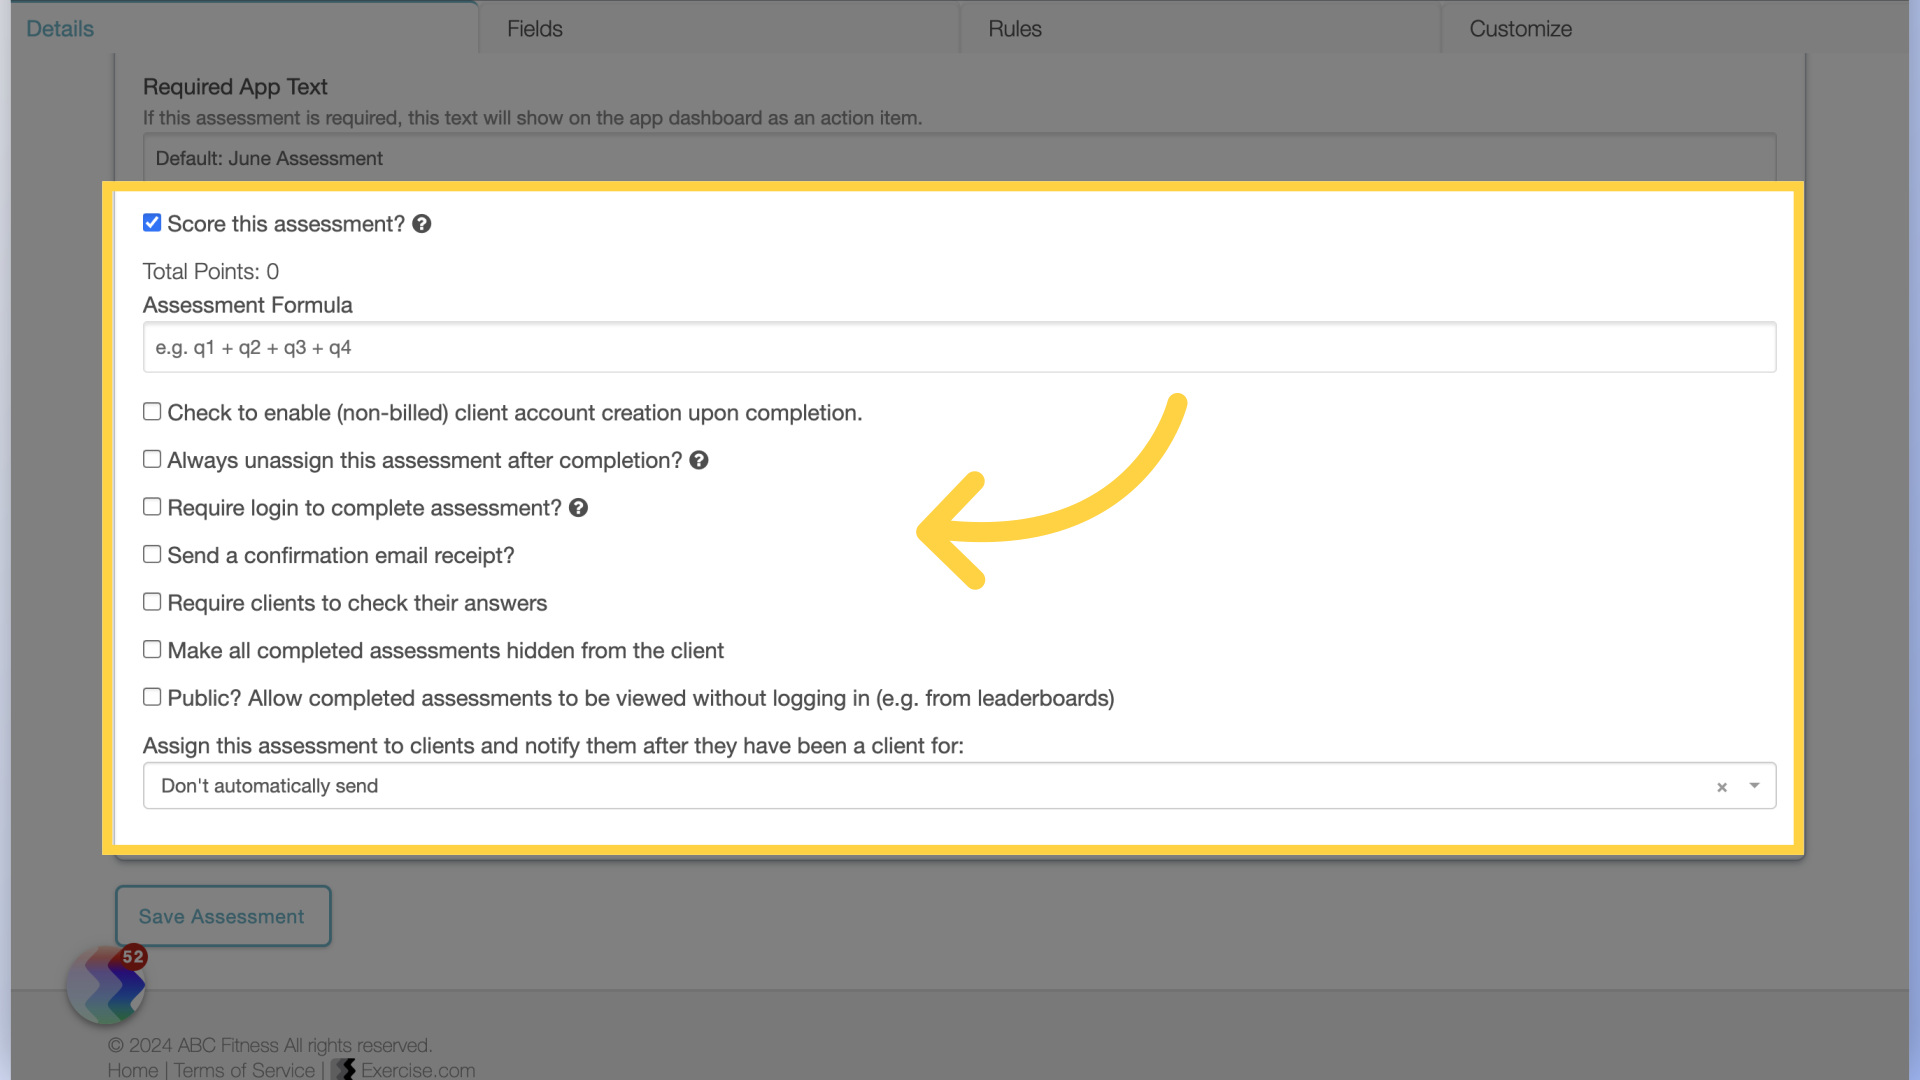
3. Enable Settings
Scroll down and enable any other applicable settings.
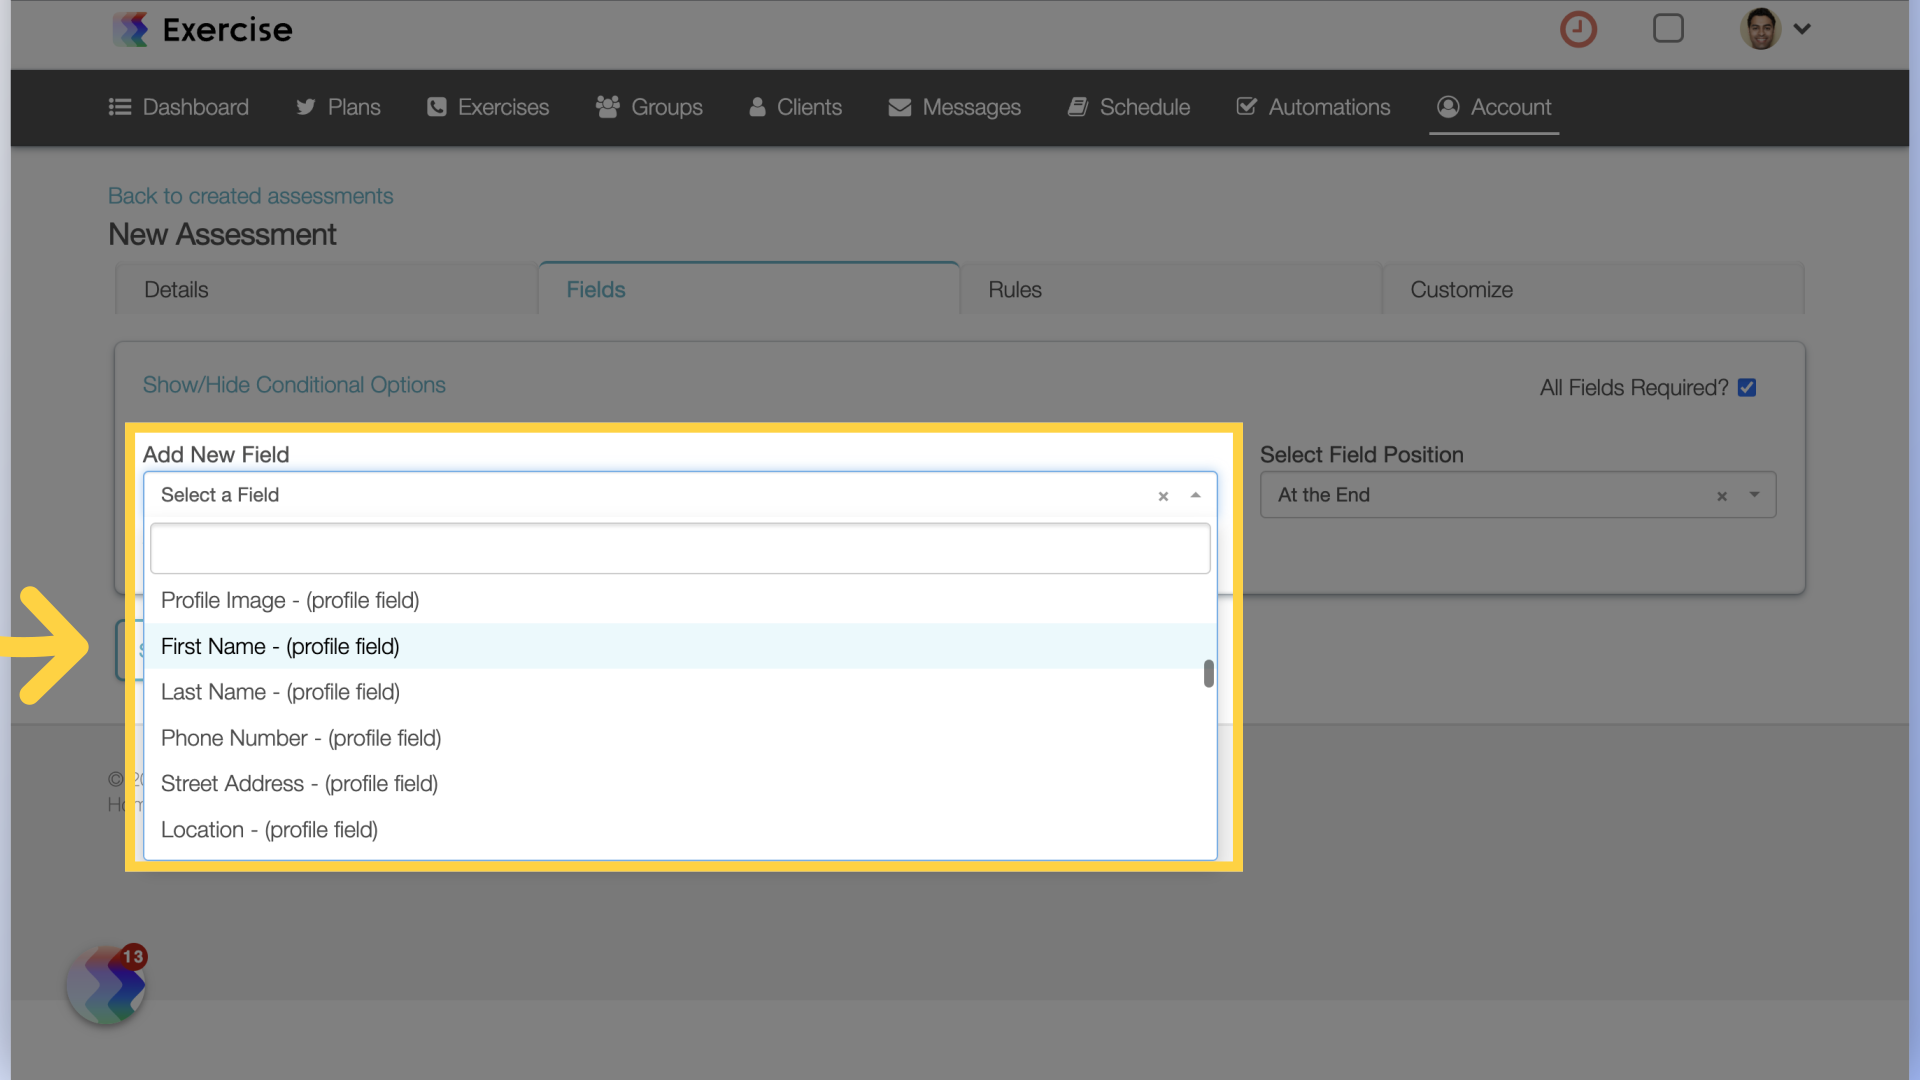
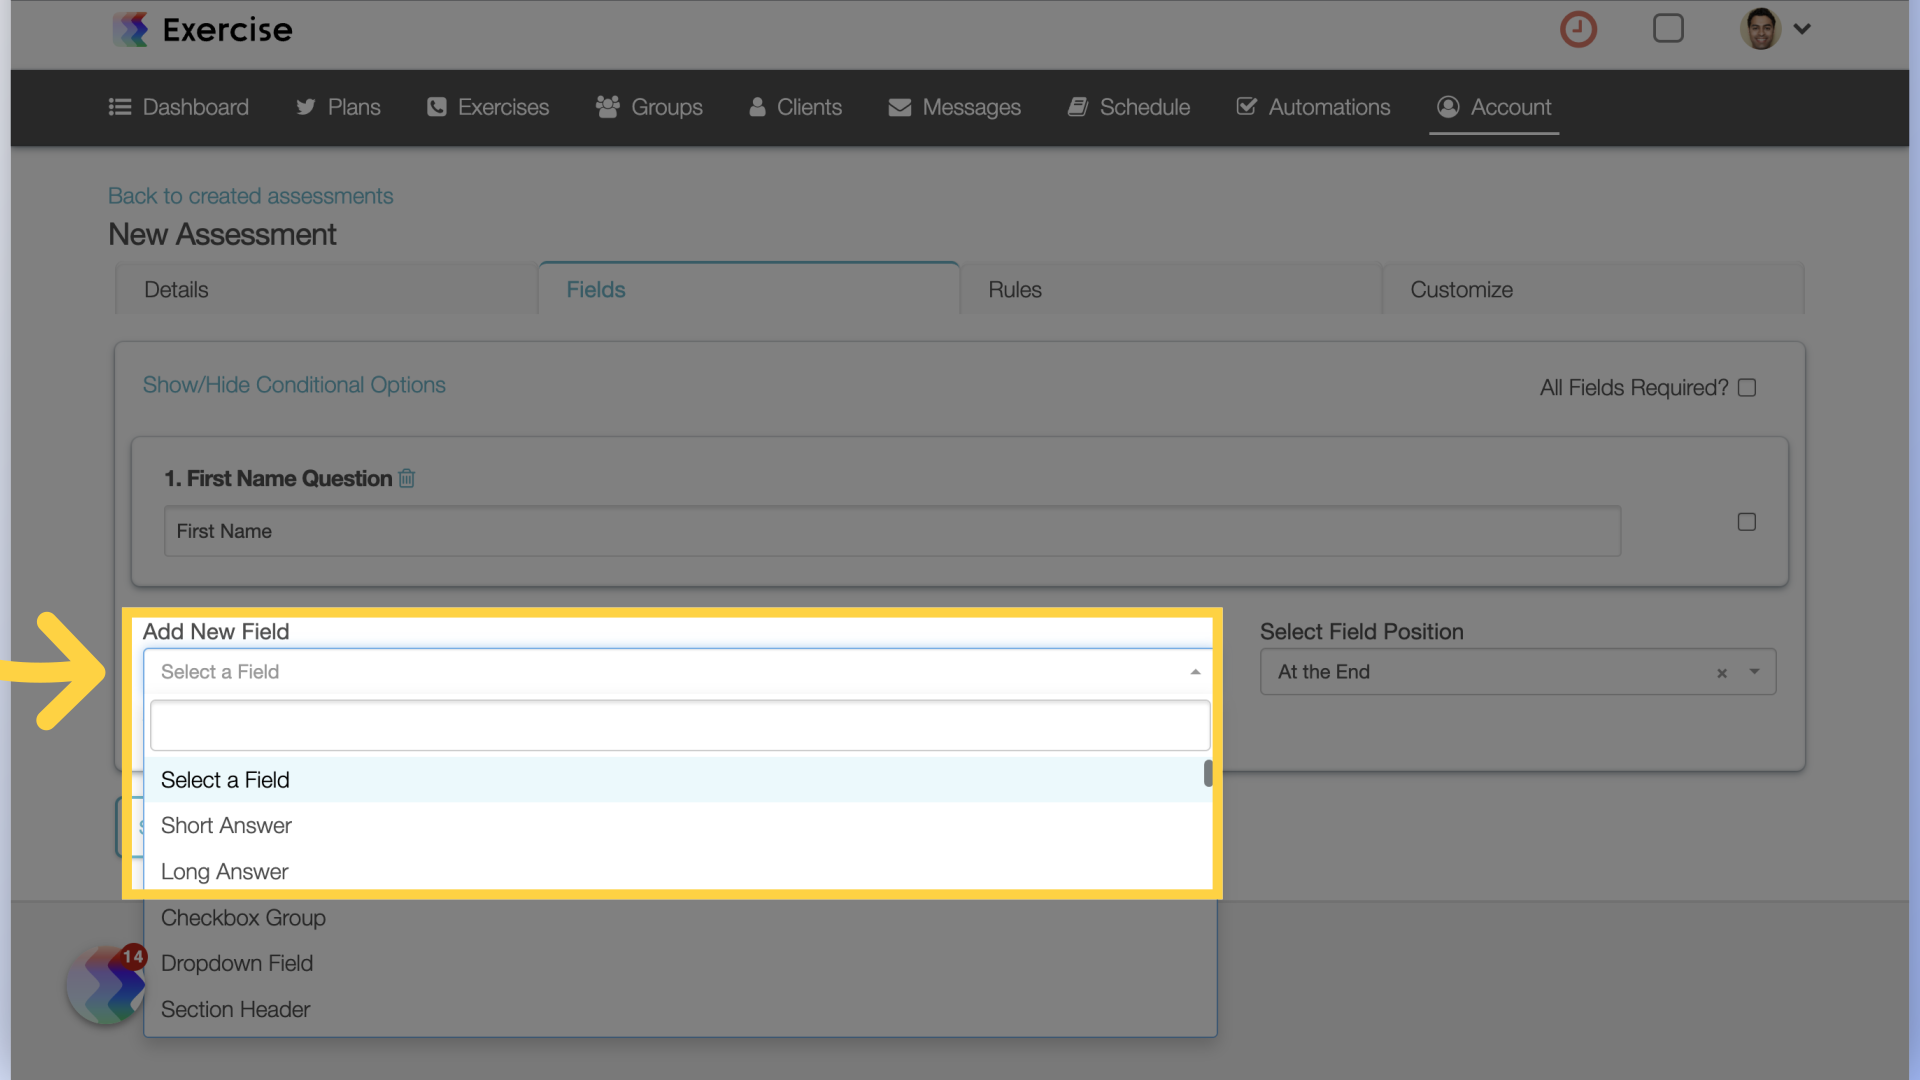
4. Add Fields
On the fields tab, use the “Add New Field” search box to add fields to your assessment.
- Short Answer — This field is for simple questions that can be answered with a few words.
- Long Answer — This field is for more in-depth questions that might require multiple paragraphs to answer.
- Checkbox Group — This field is for allowing clients to choose multiple pre-defined answers.
- Dropdown Field — This field is for allowing the client to choose ONE answer from a few pre-defined answers.
- Section Header — This field is for adding a header to your assessment form.
- Add Instructions / Embed Content — This field is for adding an explanatory paragraph or embedding an instructional video.
- Formula Field — This field is for custom scoring for your assessment.
- Password Field — This field is for requiring a password to complete the assessment.
- Progress Photos — This field is for allowing clients to upload progress photos / videos.
- Date of Birth — This field is for requesting the client to enter their birthday.
- Height — This field is for requesting the client to enter their height.
- Gender — This field is for requesting the client to enter their gender.
- Notes — This field is for requesting the client to add notes that will save to their profile.
- Goals — This field is for requesting the client to add goals that will save to their profile.
- Injuries / Limitations — This field is for requesting the client to add injuries/limitations that will save to their profile.
- Equipment — This field is for requesting the client to select from a list of equipment in the database.
- Phone Number — This field is for requesting the client to enter their phone number to be saved to their profile.
- Default Health Measurements — Multiple fields that allow the client to log measurements to their profile (Weight, BMI, Blood pressure, Body Fat %, Resting Heart Rate, Waist Size, Thigh Size, Bicep Size).
- City and State — This field is for requesting the client to enter their location information.
- Waiver — This field is for requesting the client to sign a waiver as part of this assessment.
- Toggle — This field is for adding a yes / no type of question.
- Rep Max — This field is for requesting the client to enter their rep max for a given exercise you select.
- Custom Measurements — You can add custom fields for your platform that allow the client to log measurements to their profile.
5. Continue Adding Fields
Continue adding all the fields for the assessment.
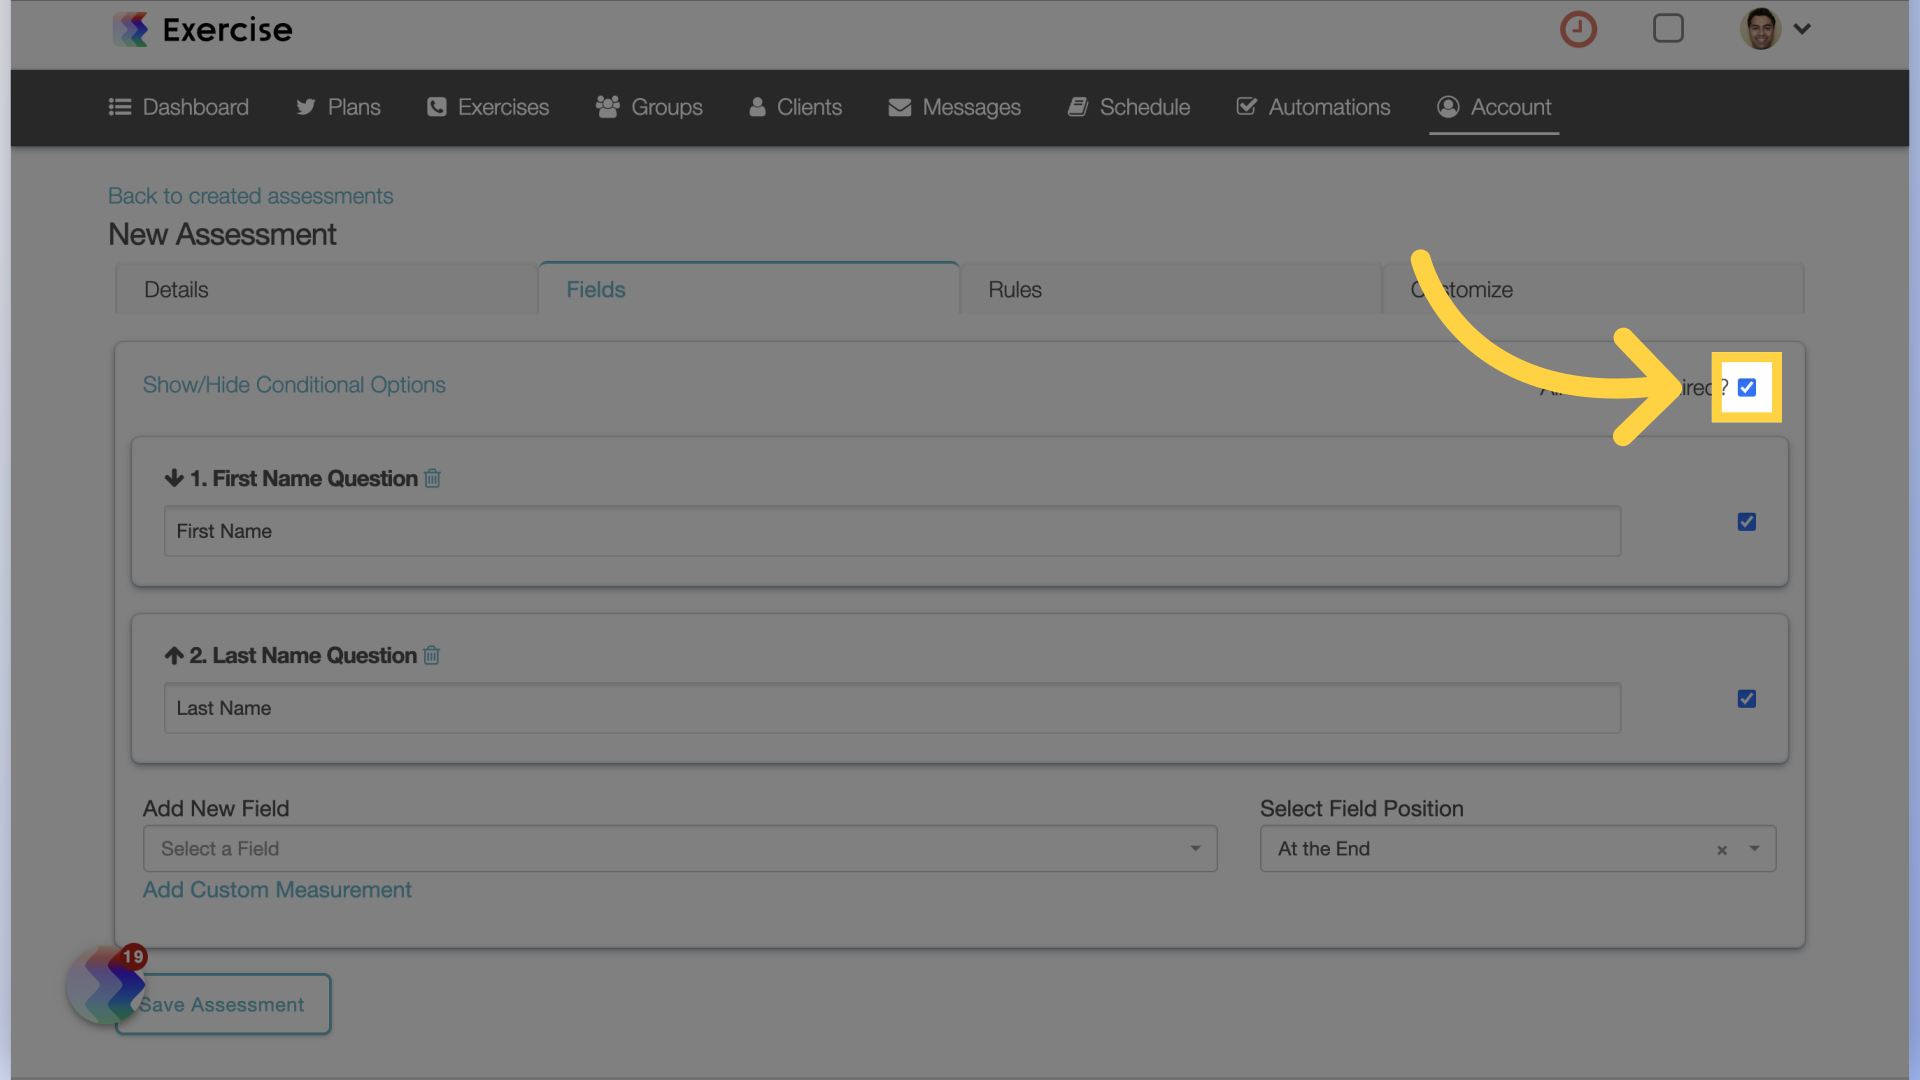
6. Enable Field Required Option
Choose your required questions for the assessment (if any).

7. Make All Fields Required
You can also enable all the fields to be required.
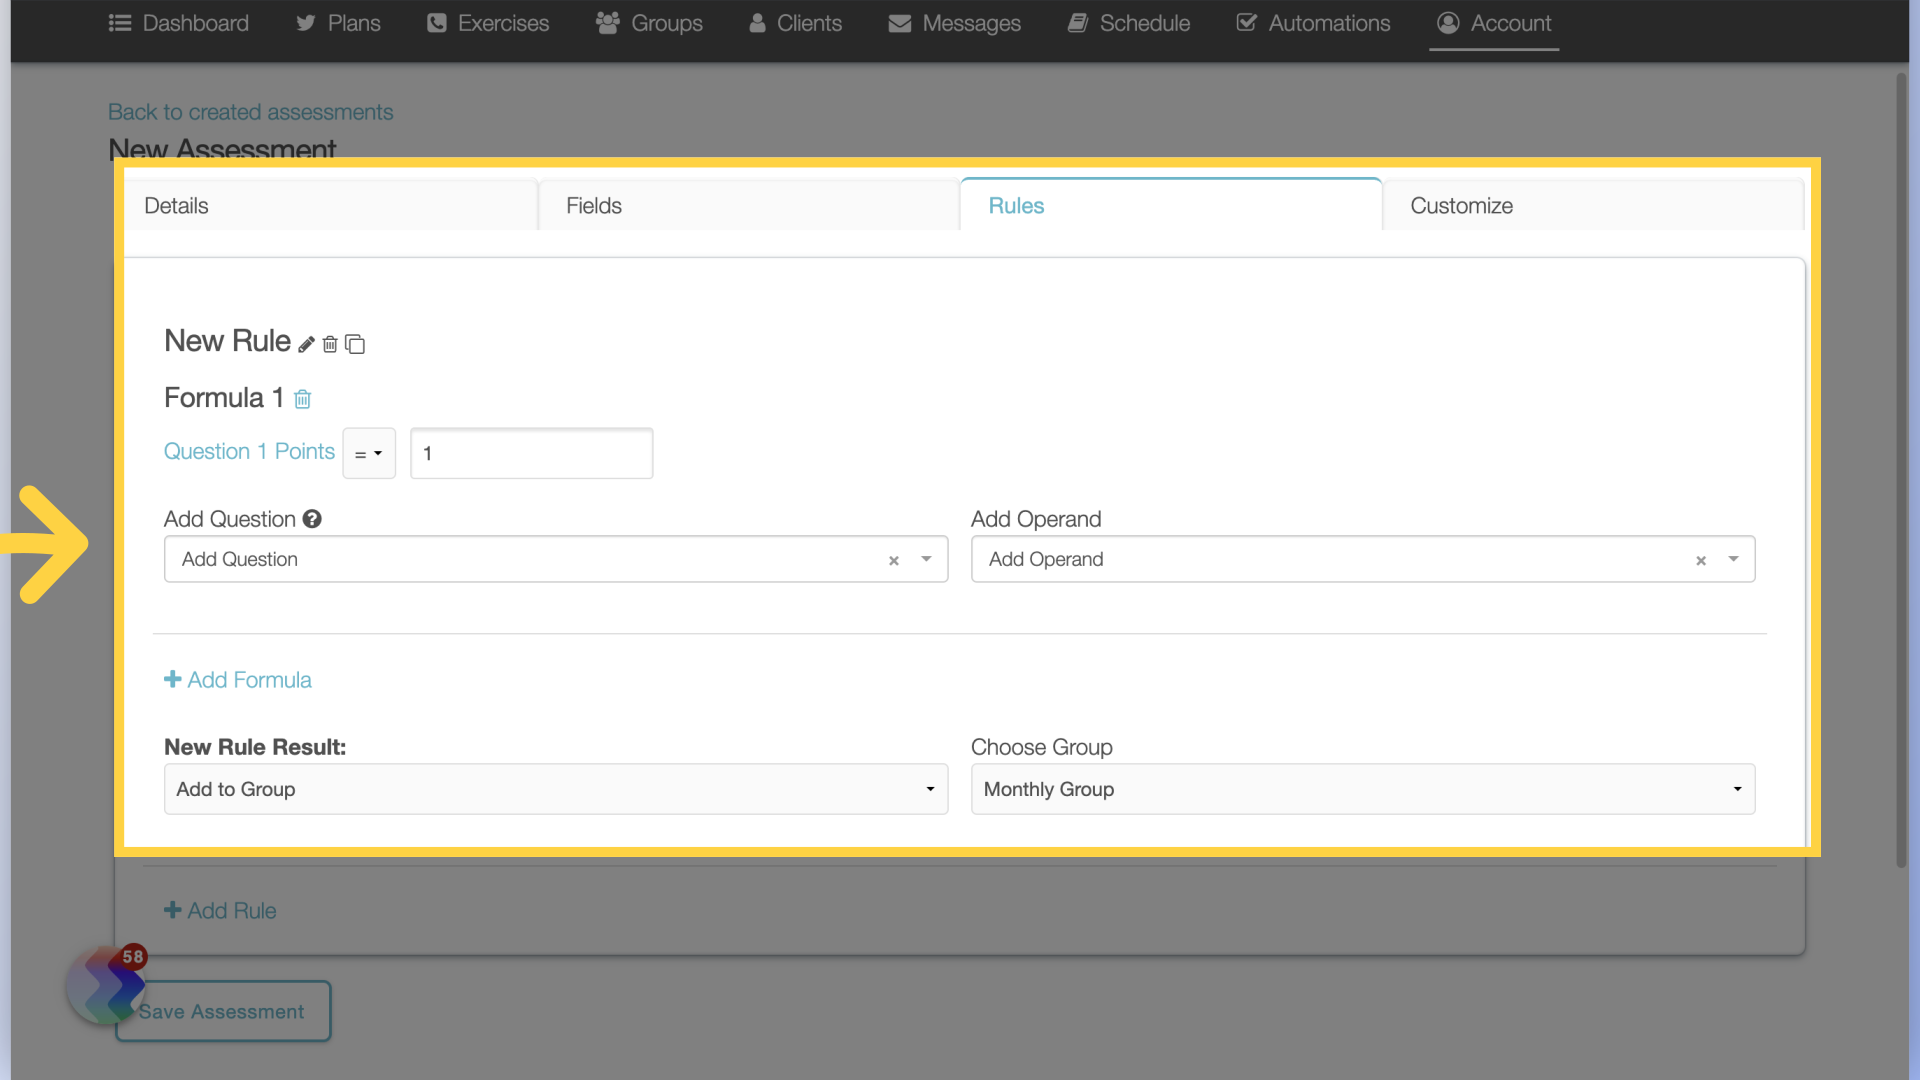
8. Optional: Add Custom Rules
If applicable, add custom rules to your assessment on the “Rules” tab.
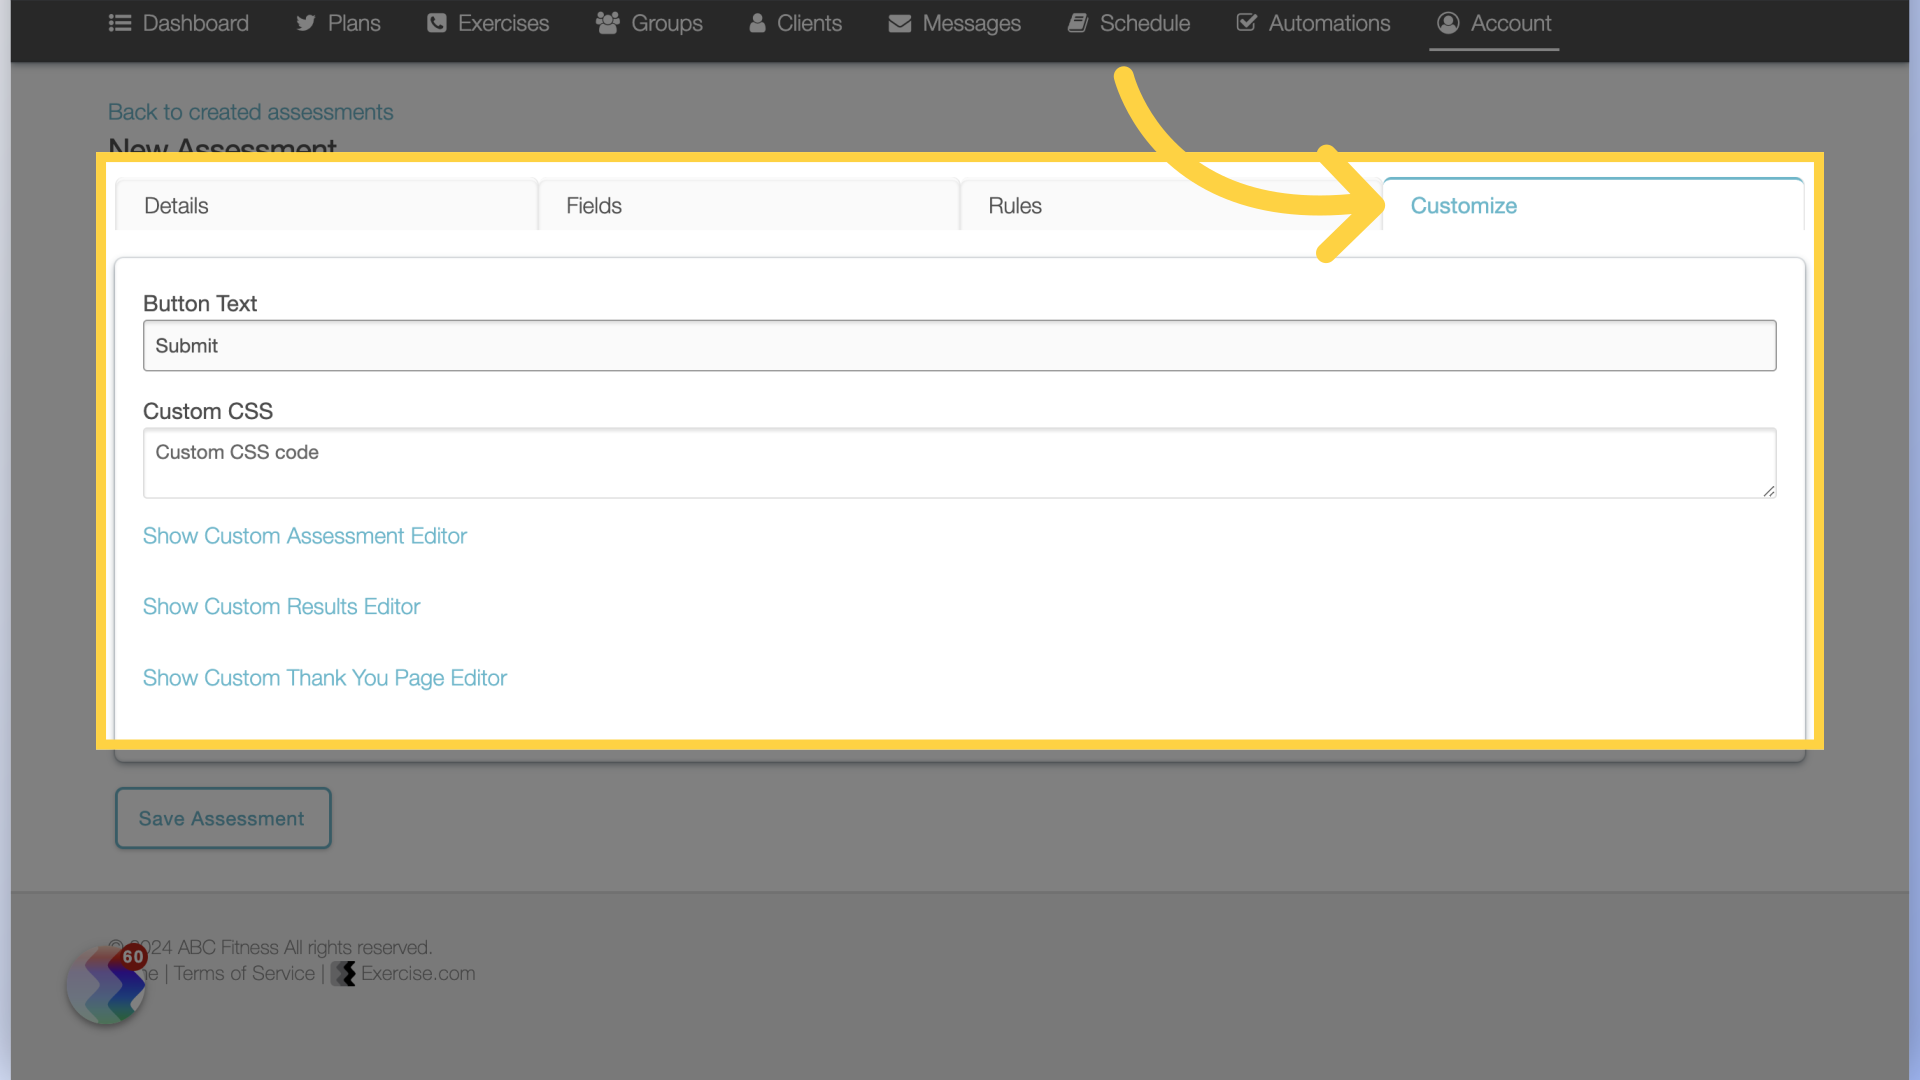
9. Optional: Customize Tab
Customize your button text, CSS, editor, results, and thank you page on the “Customize” tab as needed.
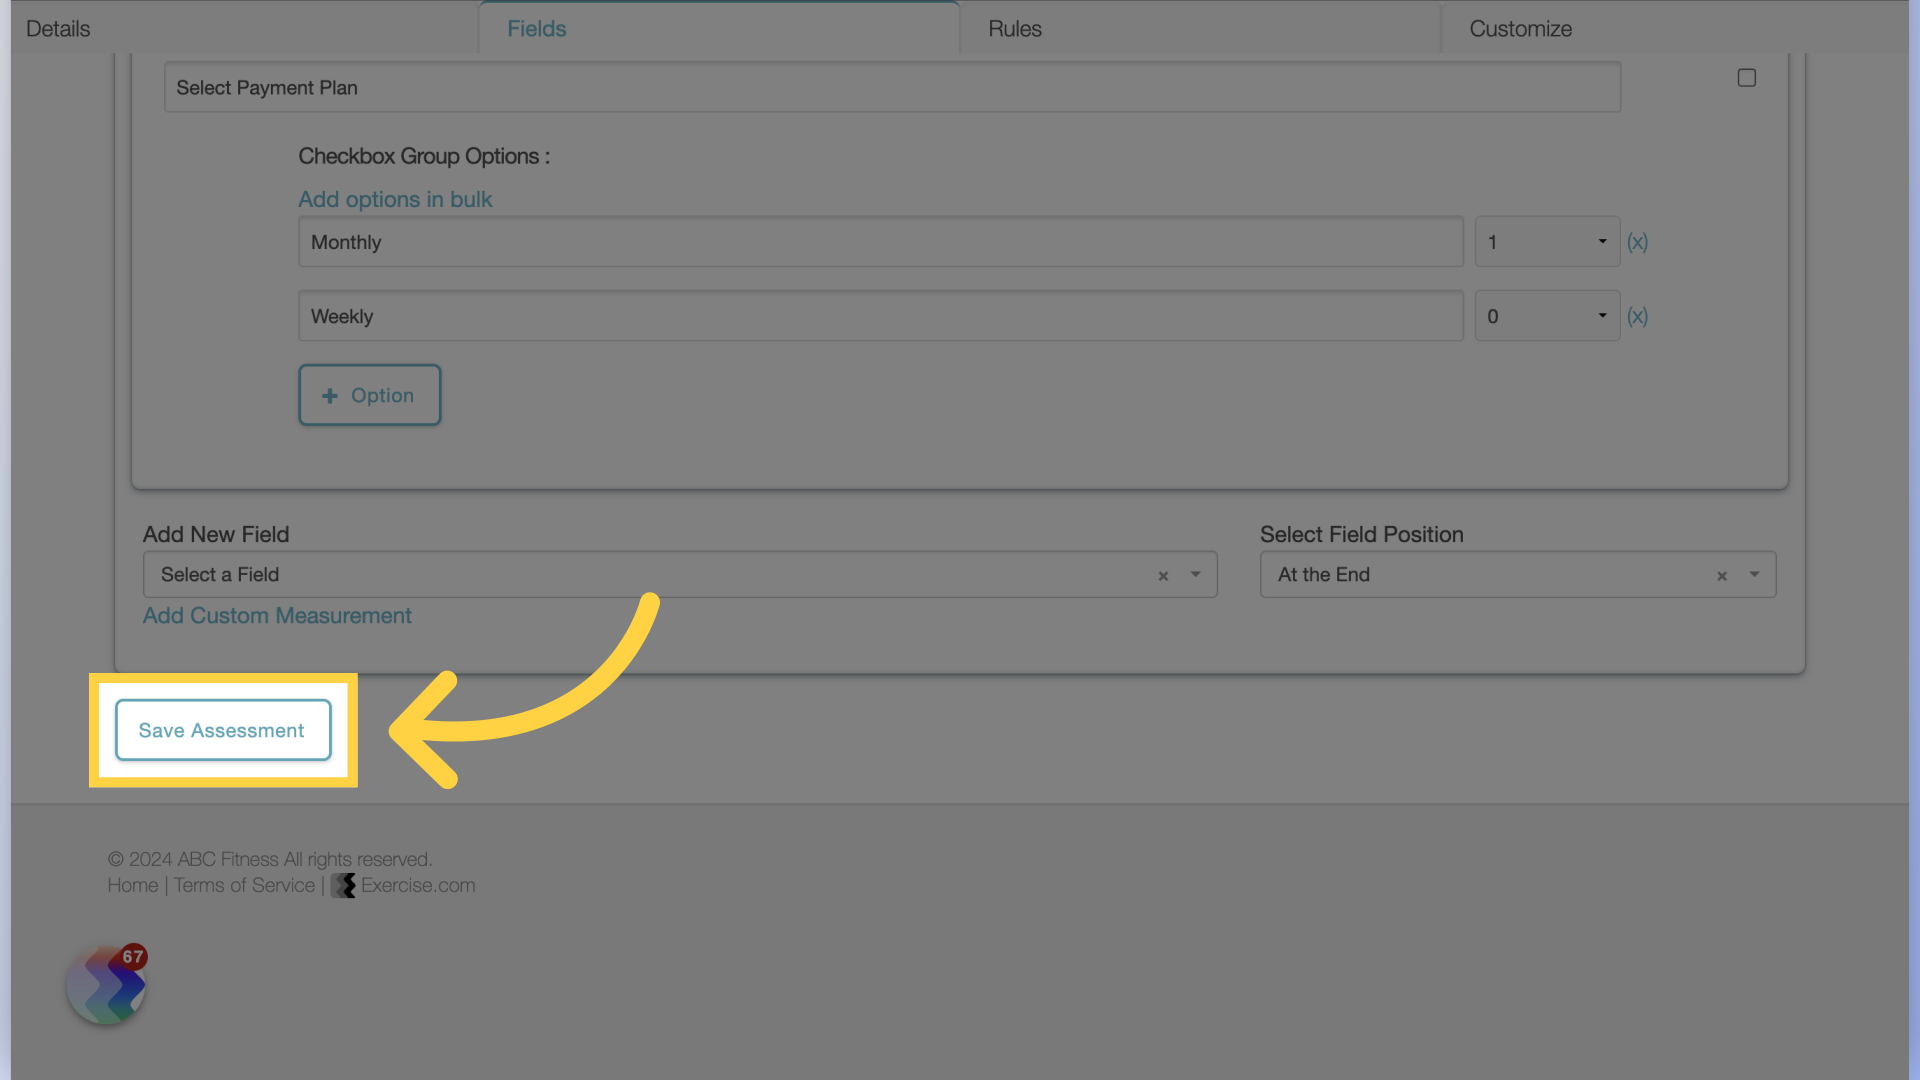
10. Save Assessment
Save the assessment.
This guide covered creating an assessment.


