How Do I Customize the Thank You Page Shown After Someone Completes an Assessment?
Here’s how to customize the Thank You page shown after clients complete an assessment, starting from the “Account” tab on your Dashboard.
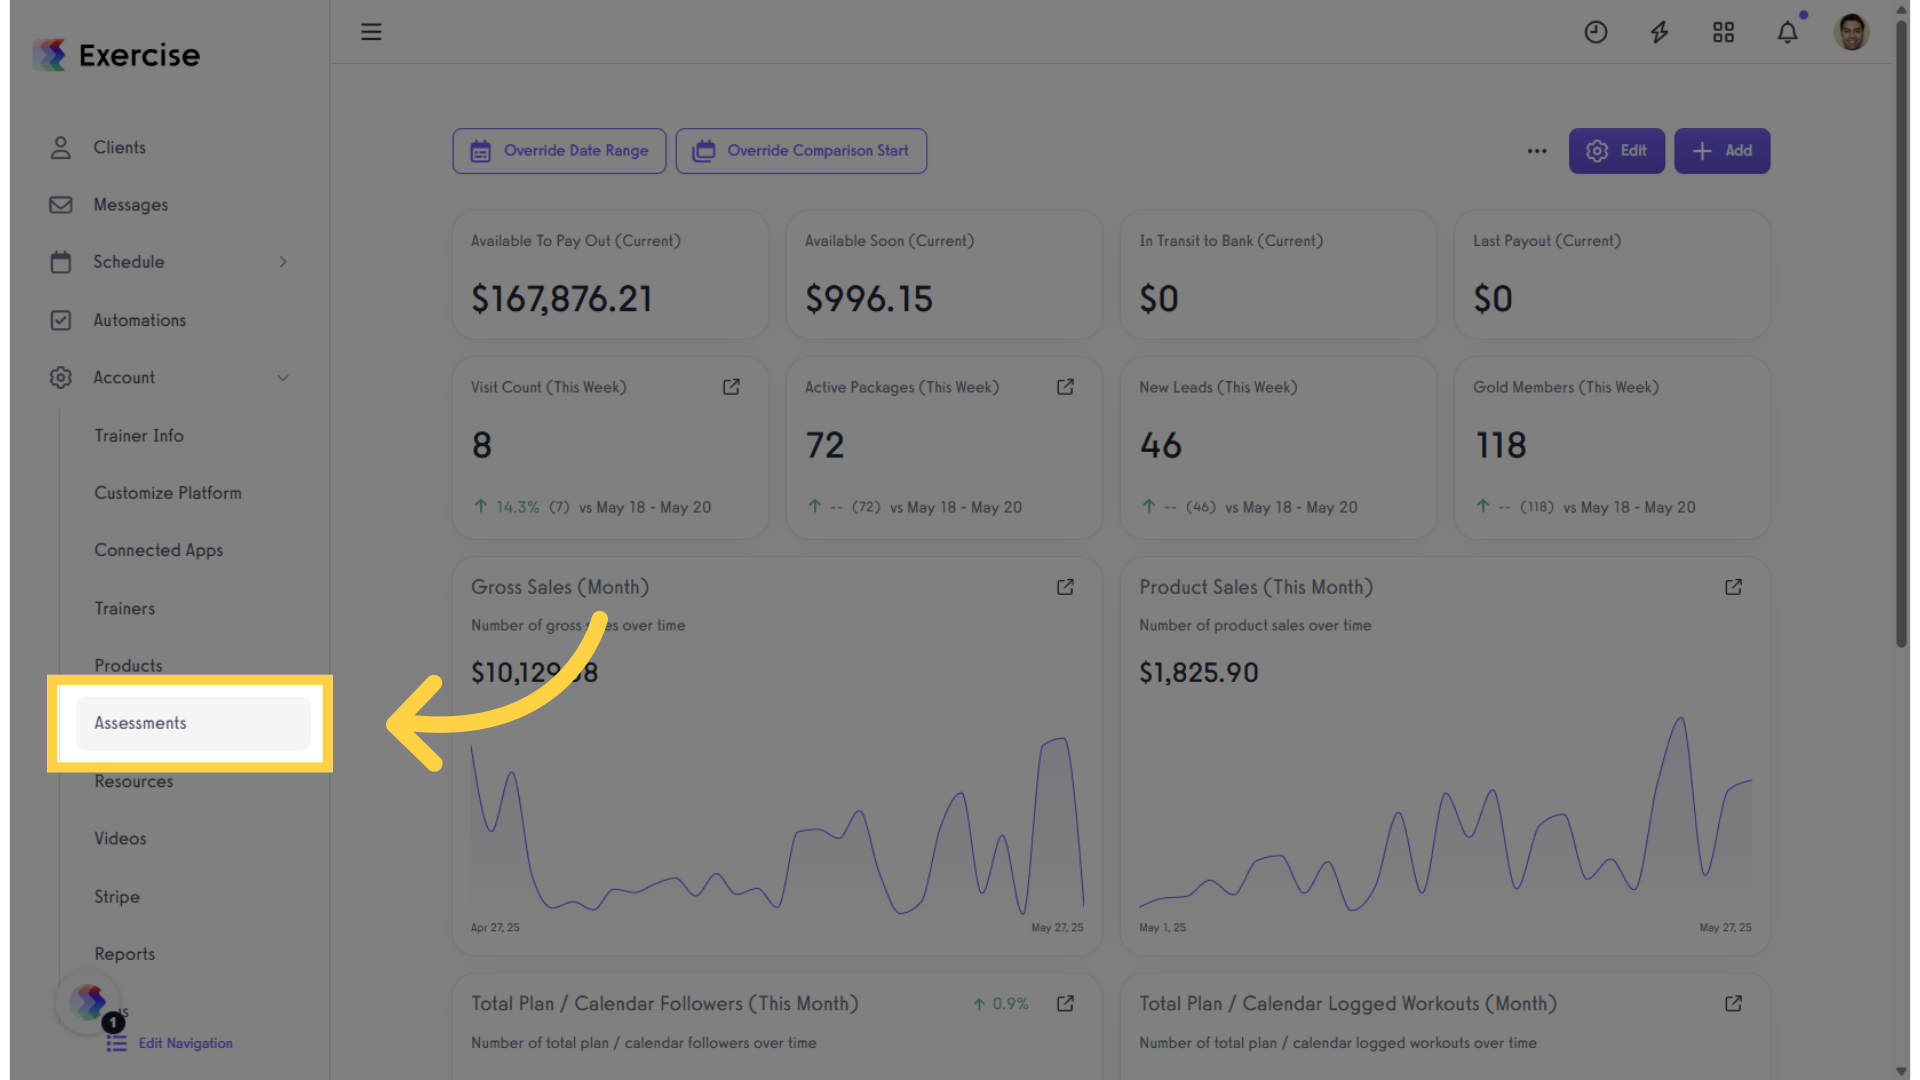
1. In the Account tab, click on the “Assessments” option in the left sidebar.
Go to Assessments to set up and customize the Thank You page shown after someone completes an assessment.
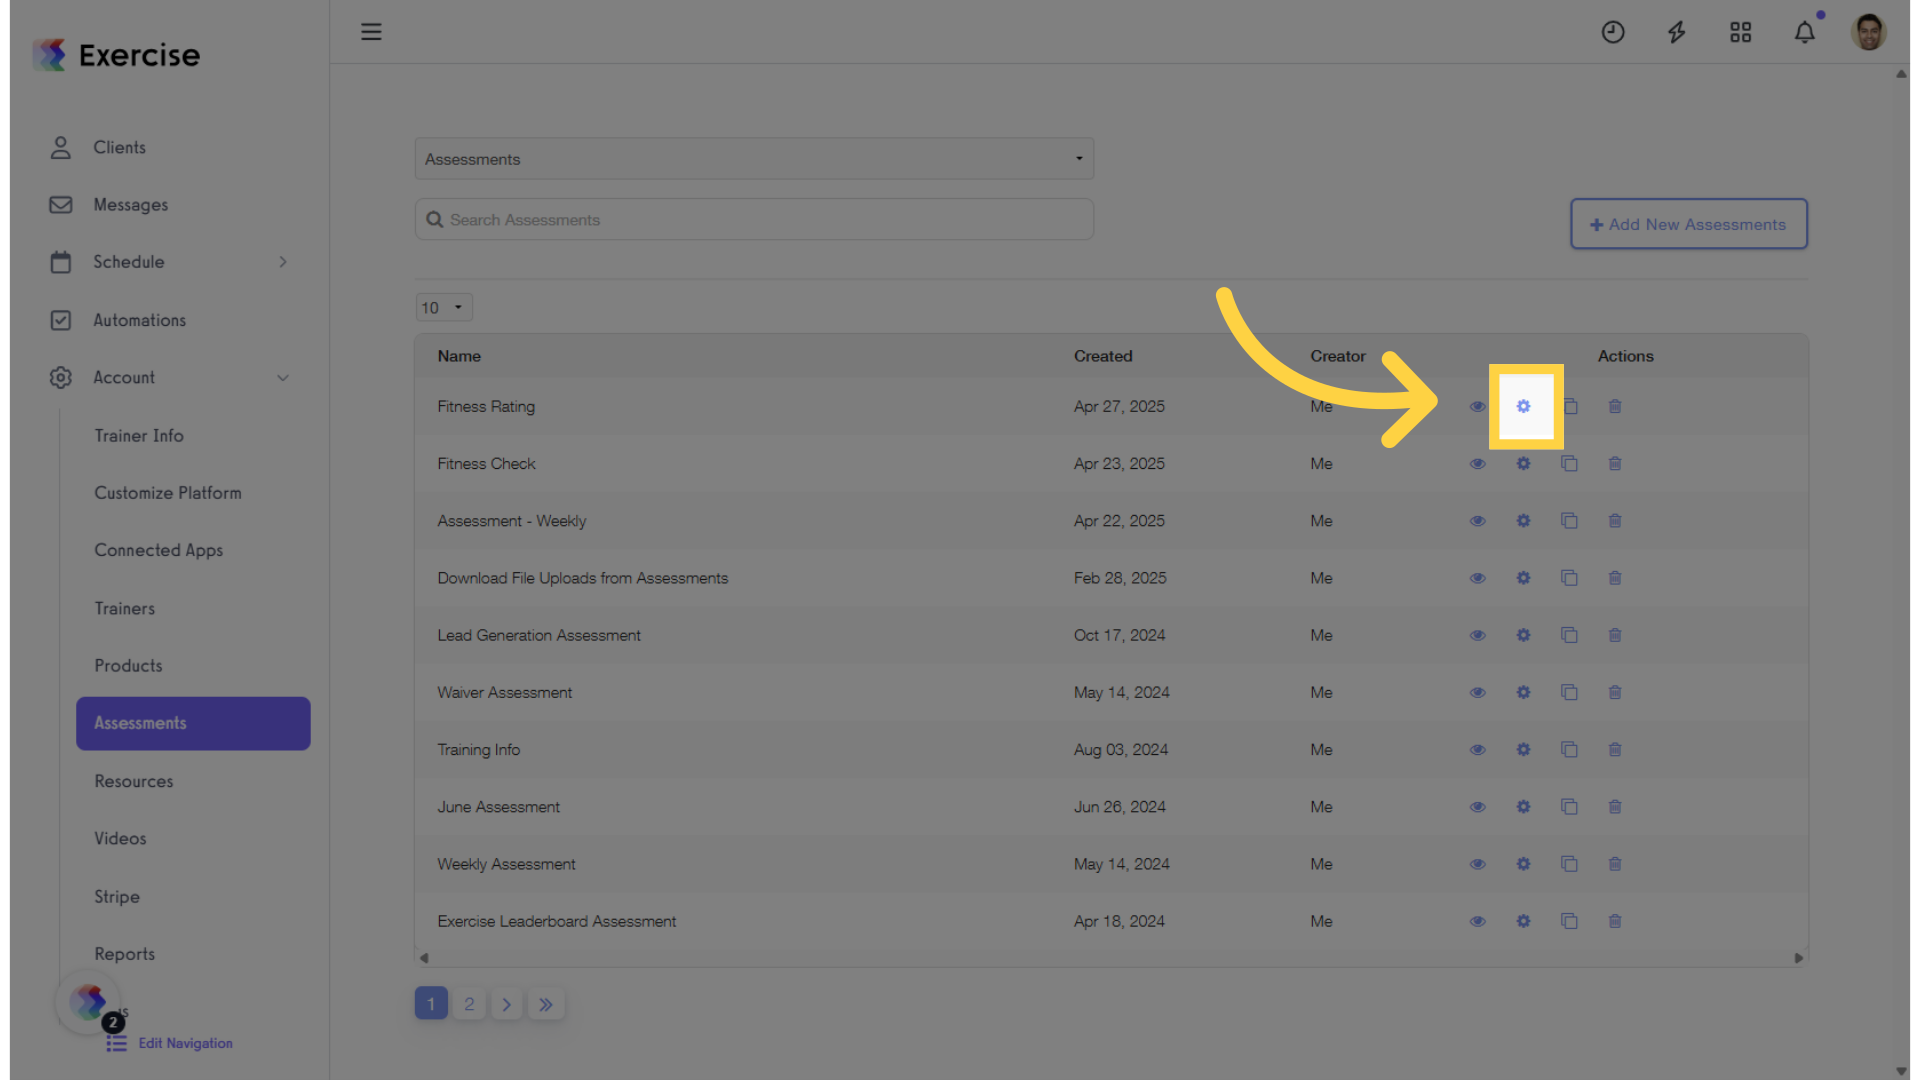
2. Create a new assessment or select an existing one.
In the Assessments tab, select an existing assessment or create a new one, then click “Edit” in the Actions column.
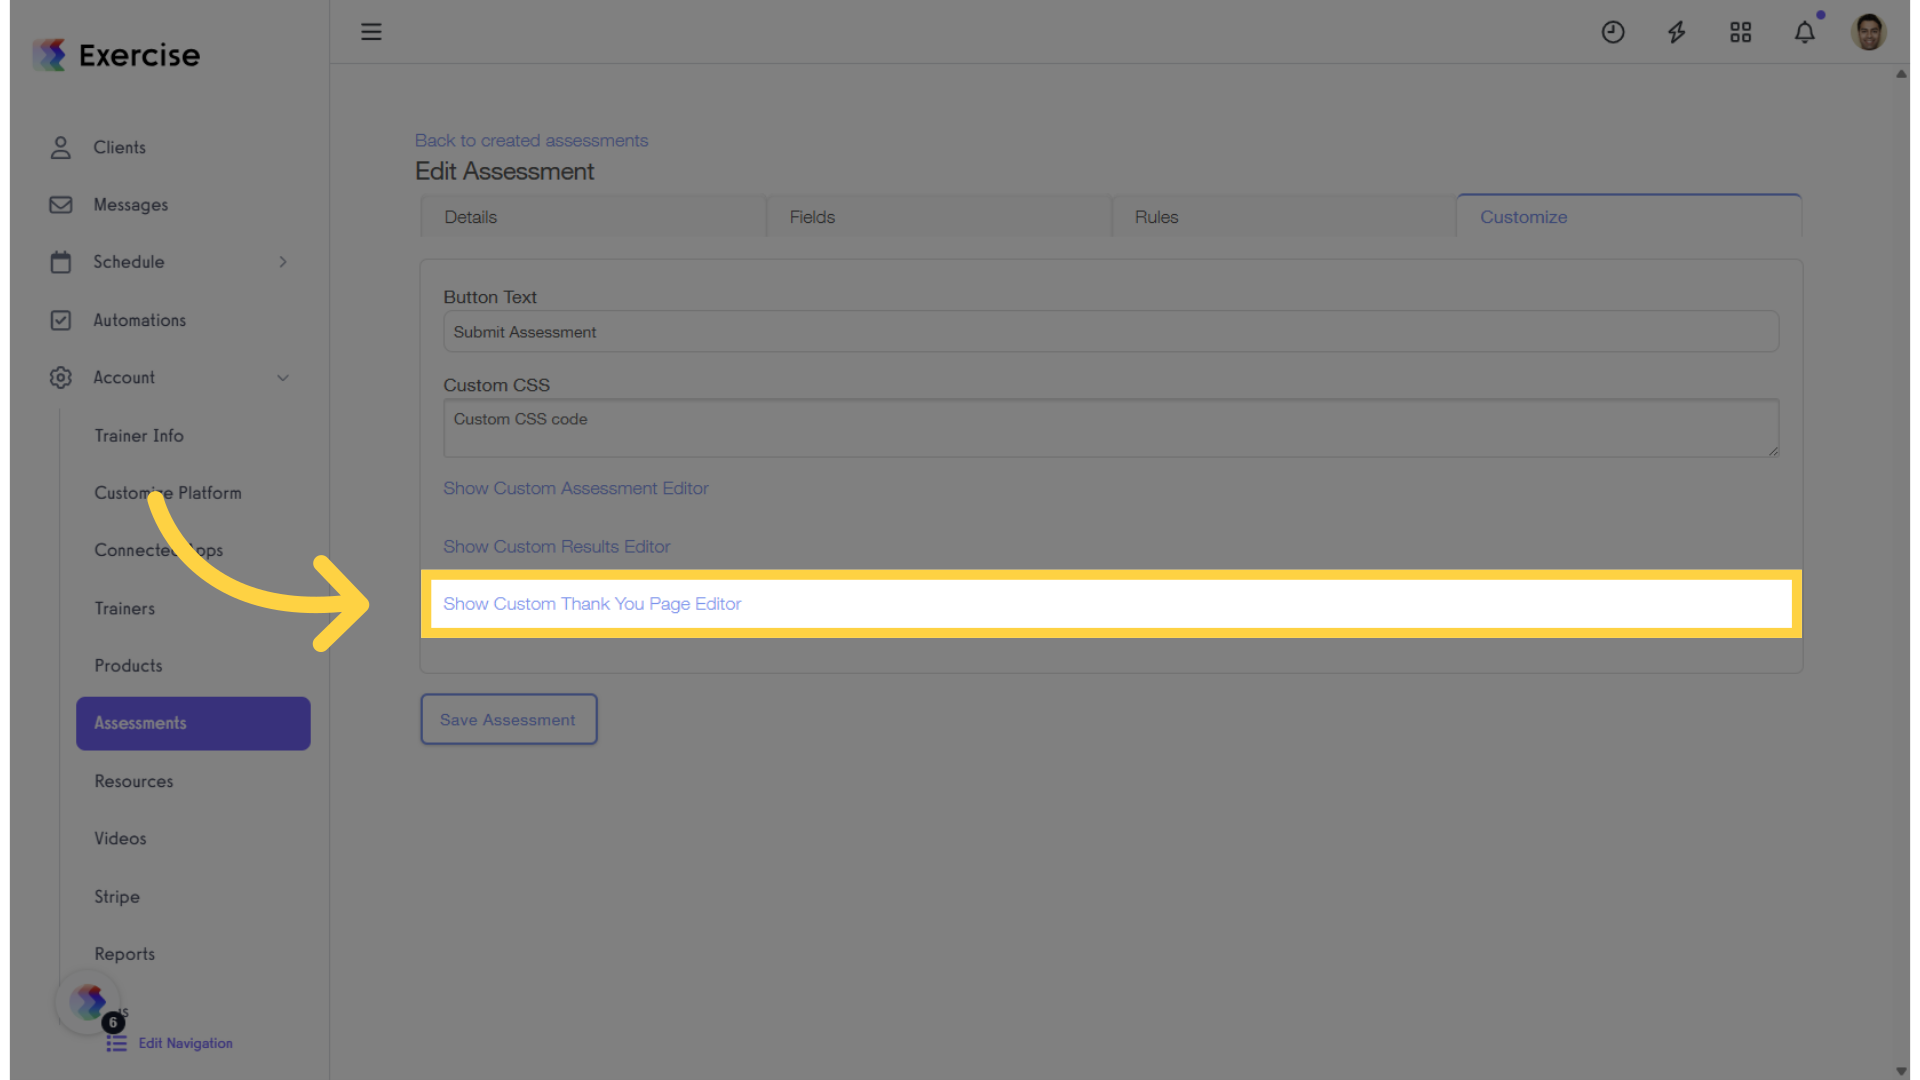
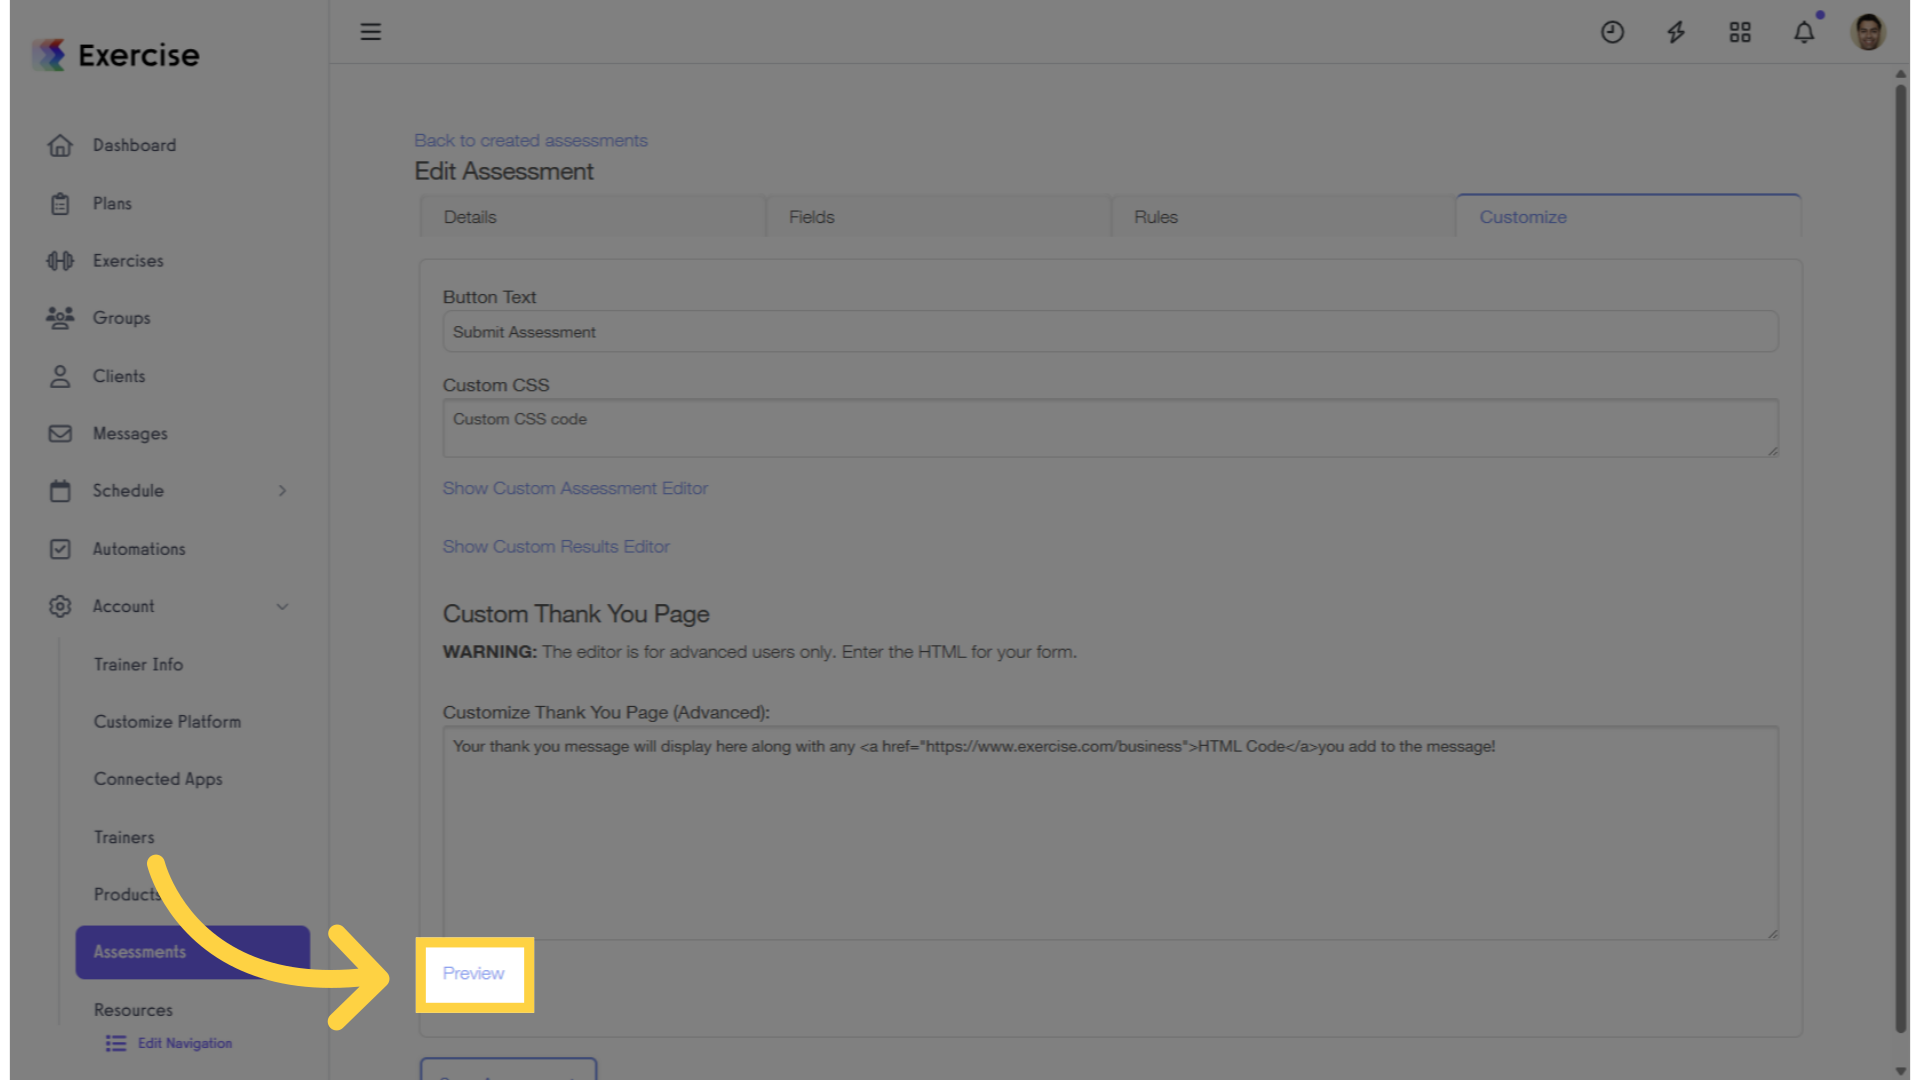
3. Click “Customize” tab.
When you’re editing an assessment, click the “Customize” tab to modify the Thank You page shown after someone completes the assessment.

4. Click “Show Custom Thank You Page Editor.”
While you’re on the Customize tab, click “Show Custom Thank You Page Editor.”
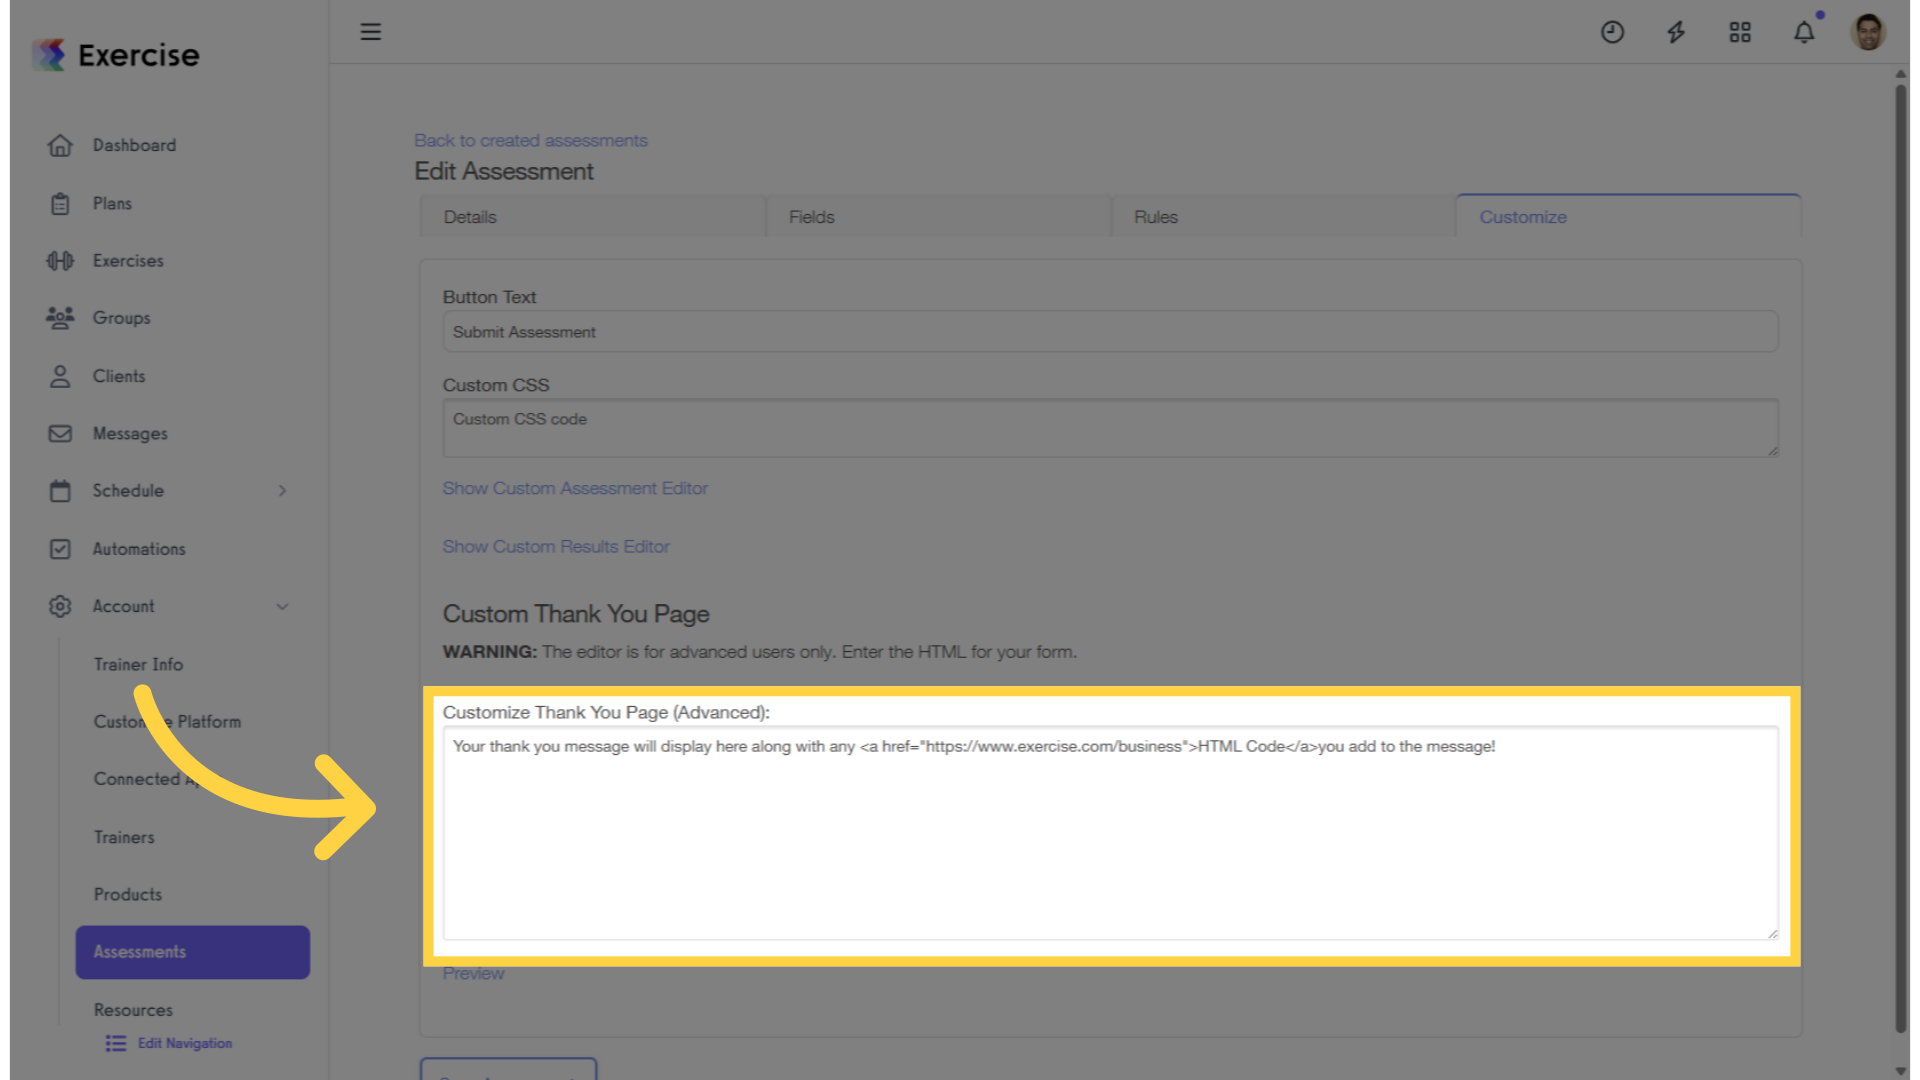
5. Enter your customize message.
Enter your updates, keeping in mind that HTML code is supported if needed.
6. Click “Preview.”
Use the preview to ensure everything is correct—open any links you’ve added and double-check your HTML.
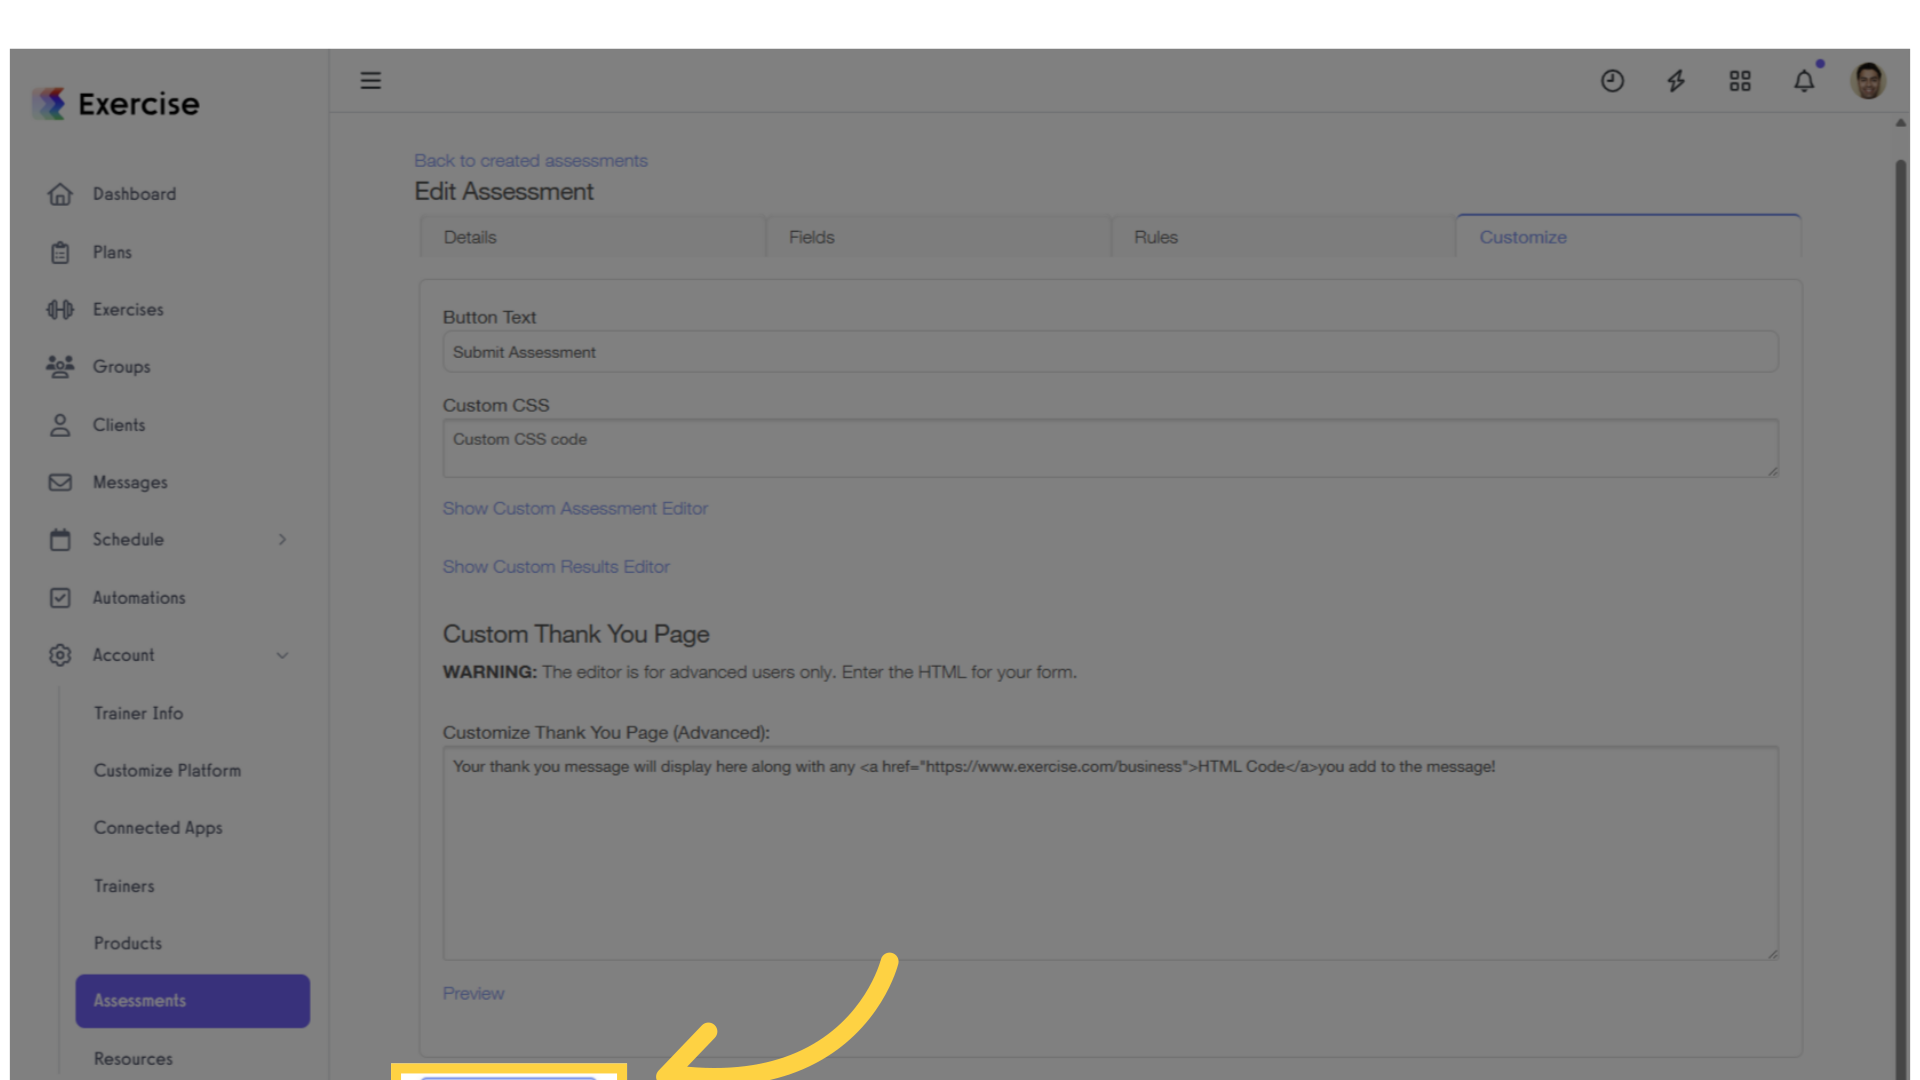
7. Click “Save Assessment.”
Once you’ve customized your Thank You page, click “Save Assessment” to apply the changes.
Now that you can customize the Thank You page shown after your client completes an assessment, you’re ready to build your brand and client engagement.


