How do I change a Client’s starting date?
Posted by
Support Team
on
September 10, 2020
— Updated on
May 29, 2025
This guide will walk you through changing a Client’s starting date.
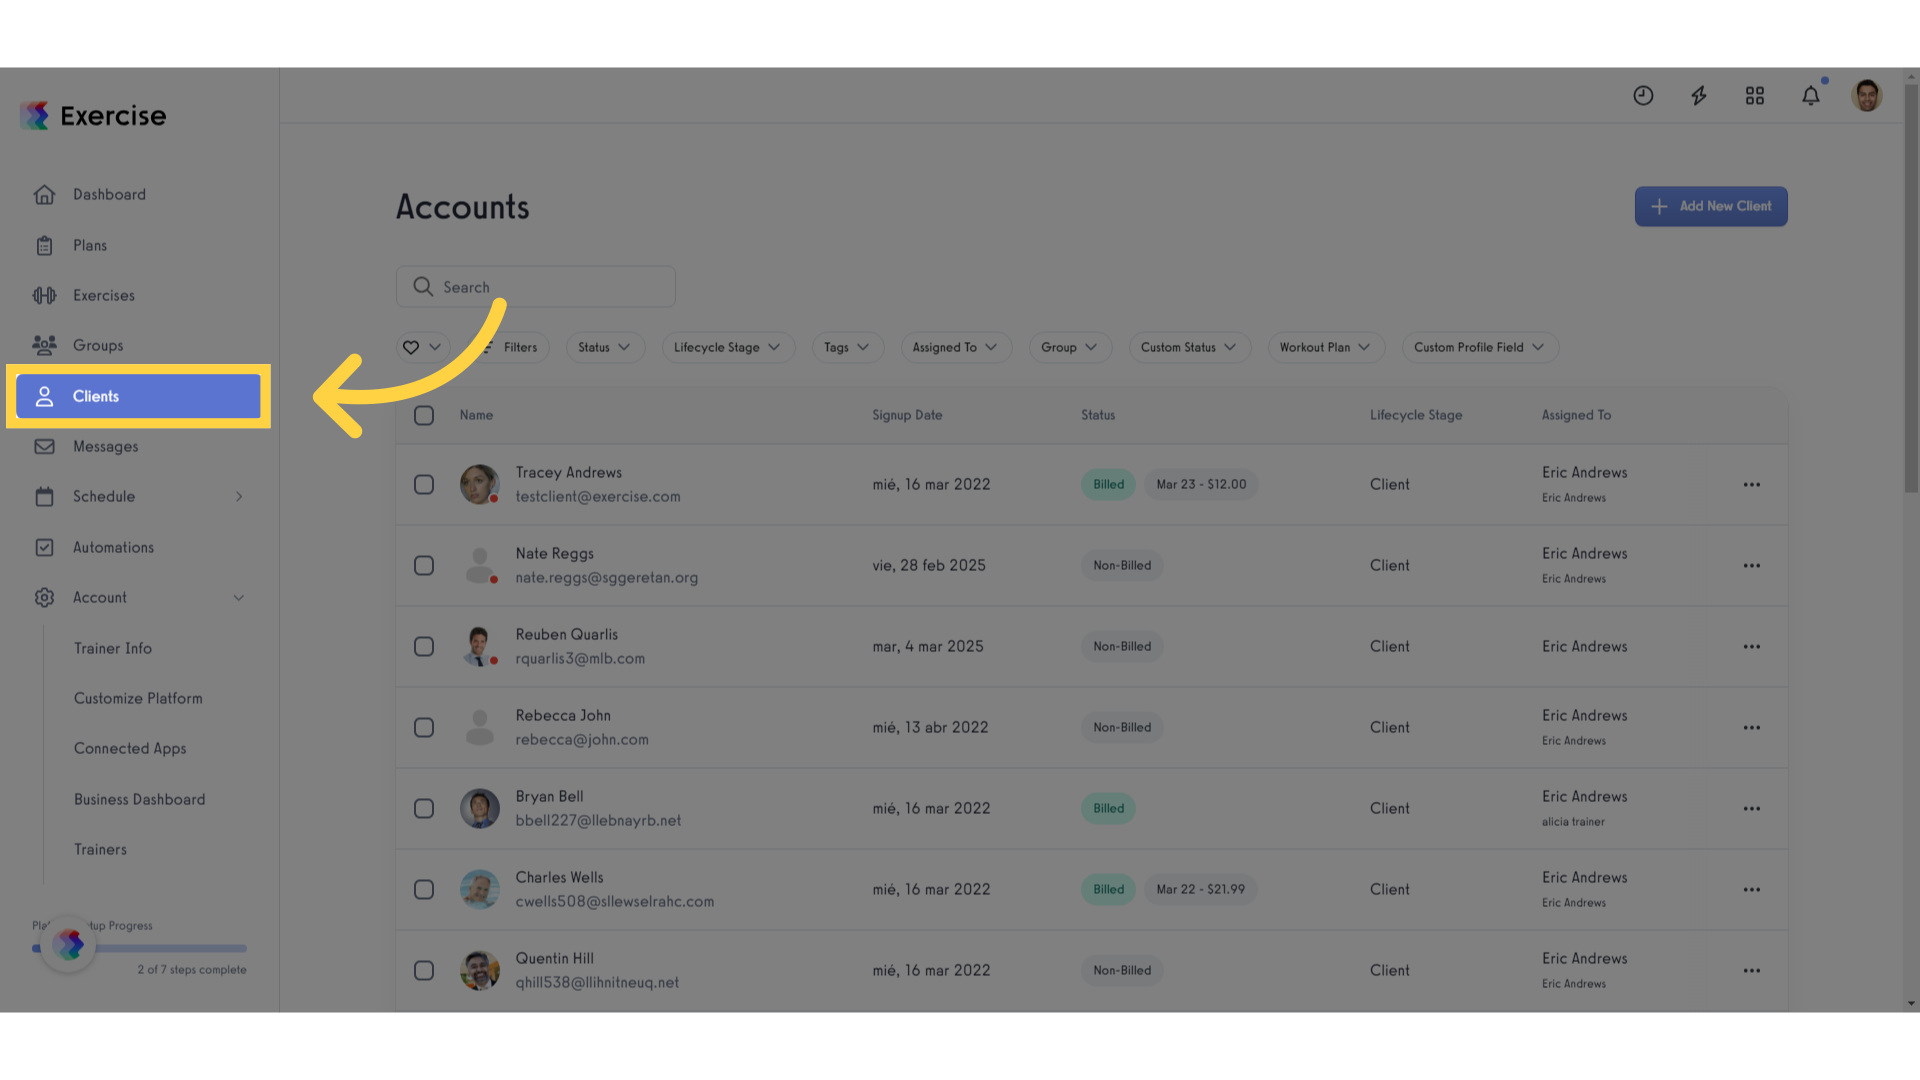
1. Click “Clients”.
Navigate to the Clients section.
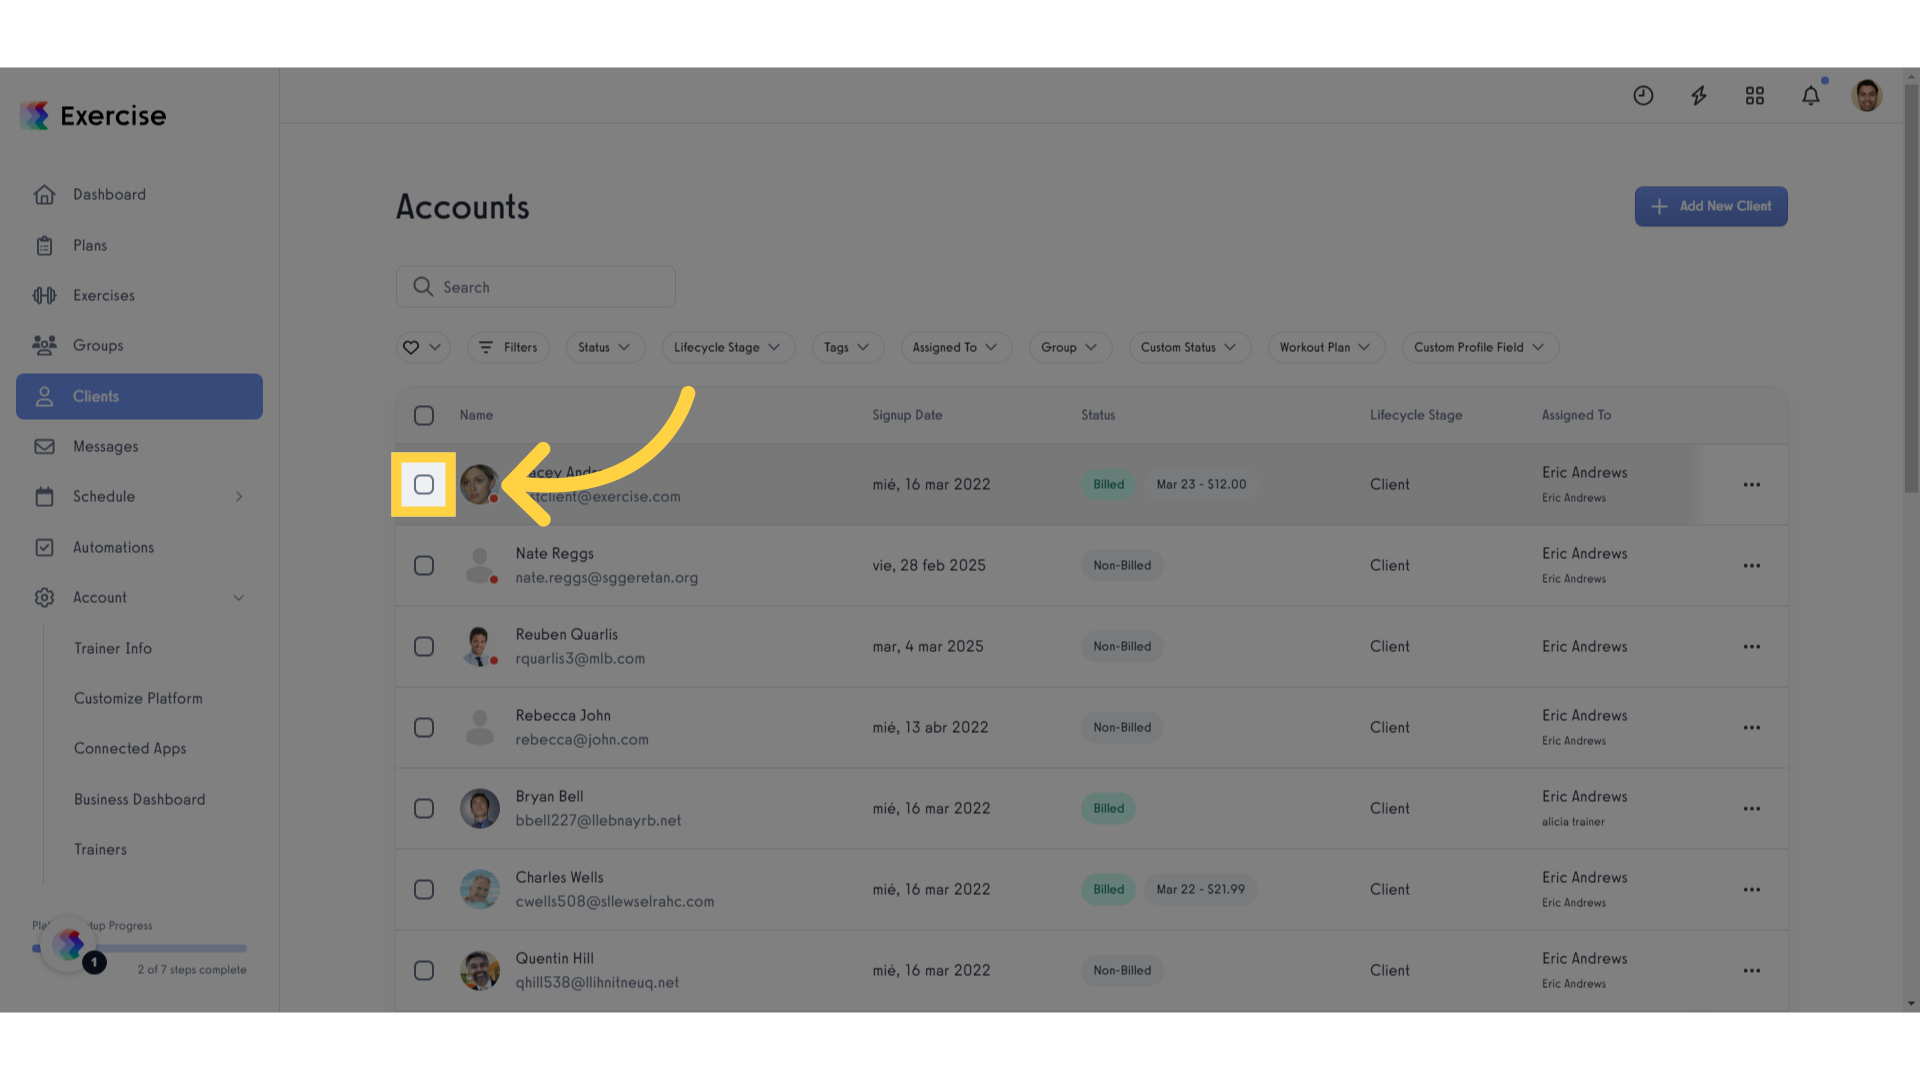
2. Select the client.
Select the specific Client.
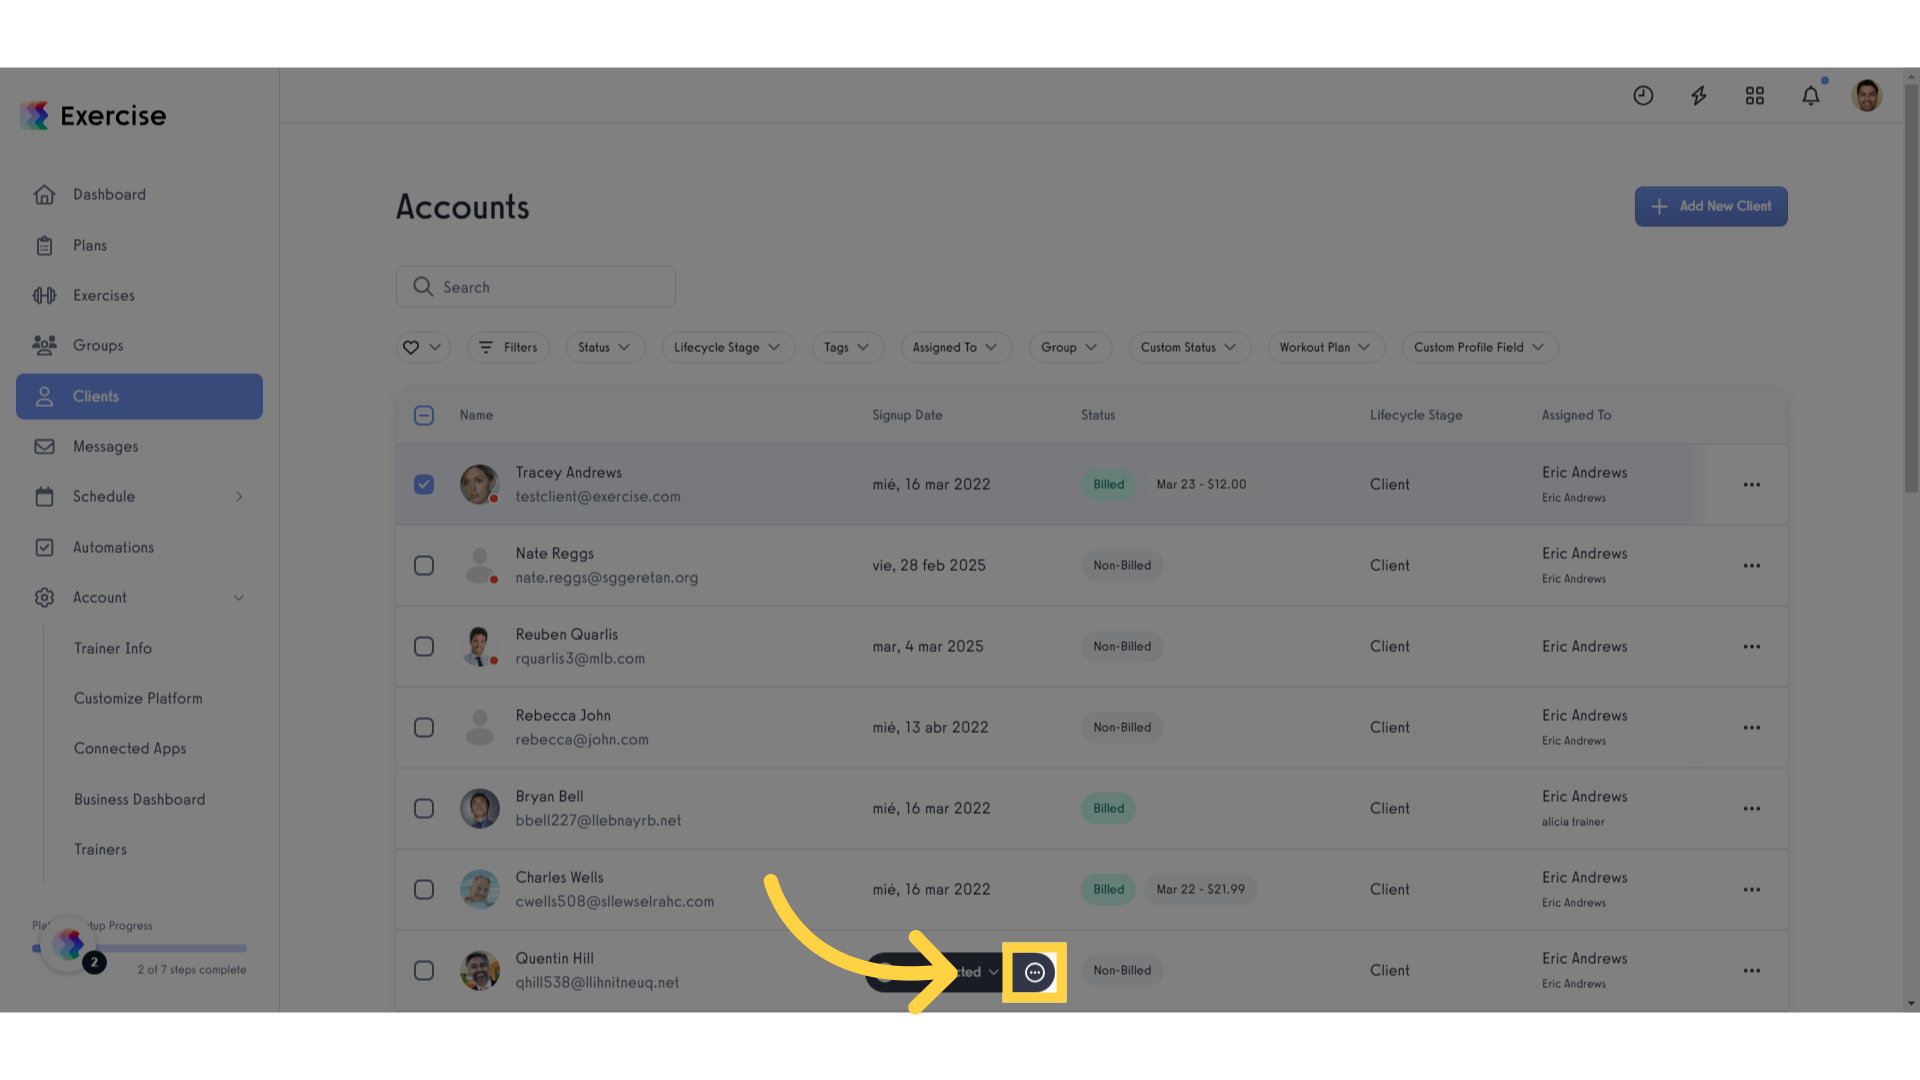
3. Click the “…” button.
Access the client’s account details by clicking the button at the bottom of the page.
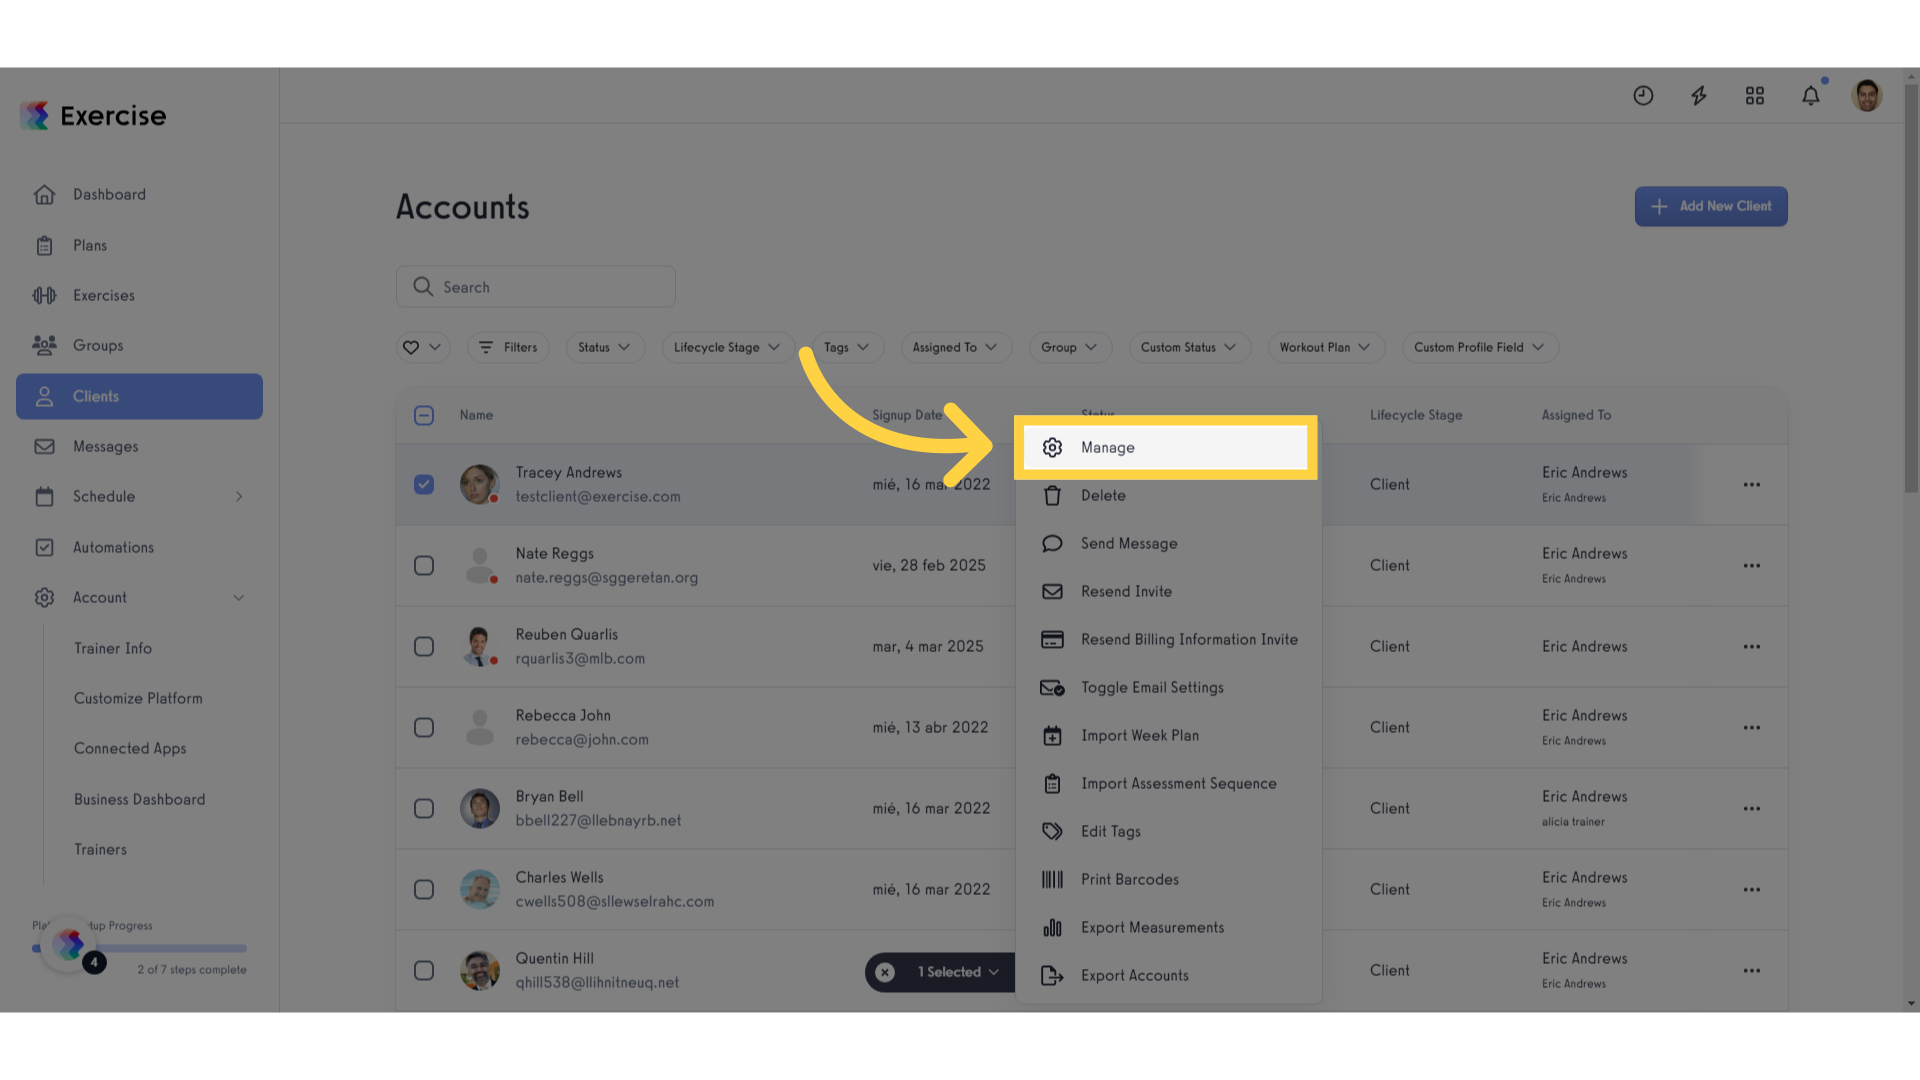
4. Click “Manage”
Access the Client’s management options.
5. Search for the “Update Starting Date” section.
Search for the “Update Starting Date” section
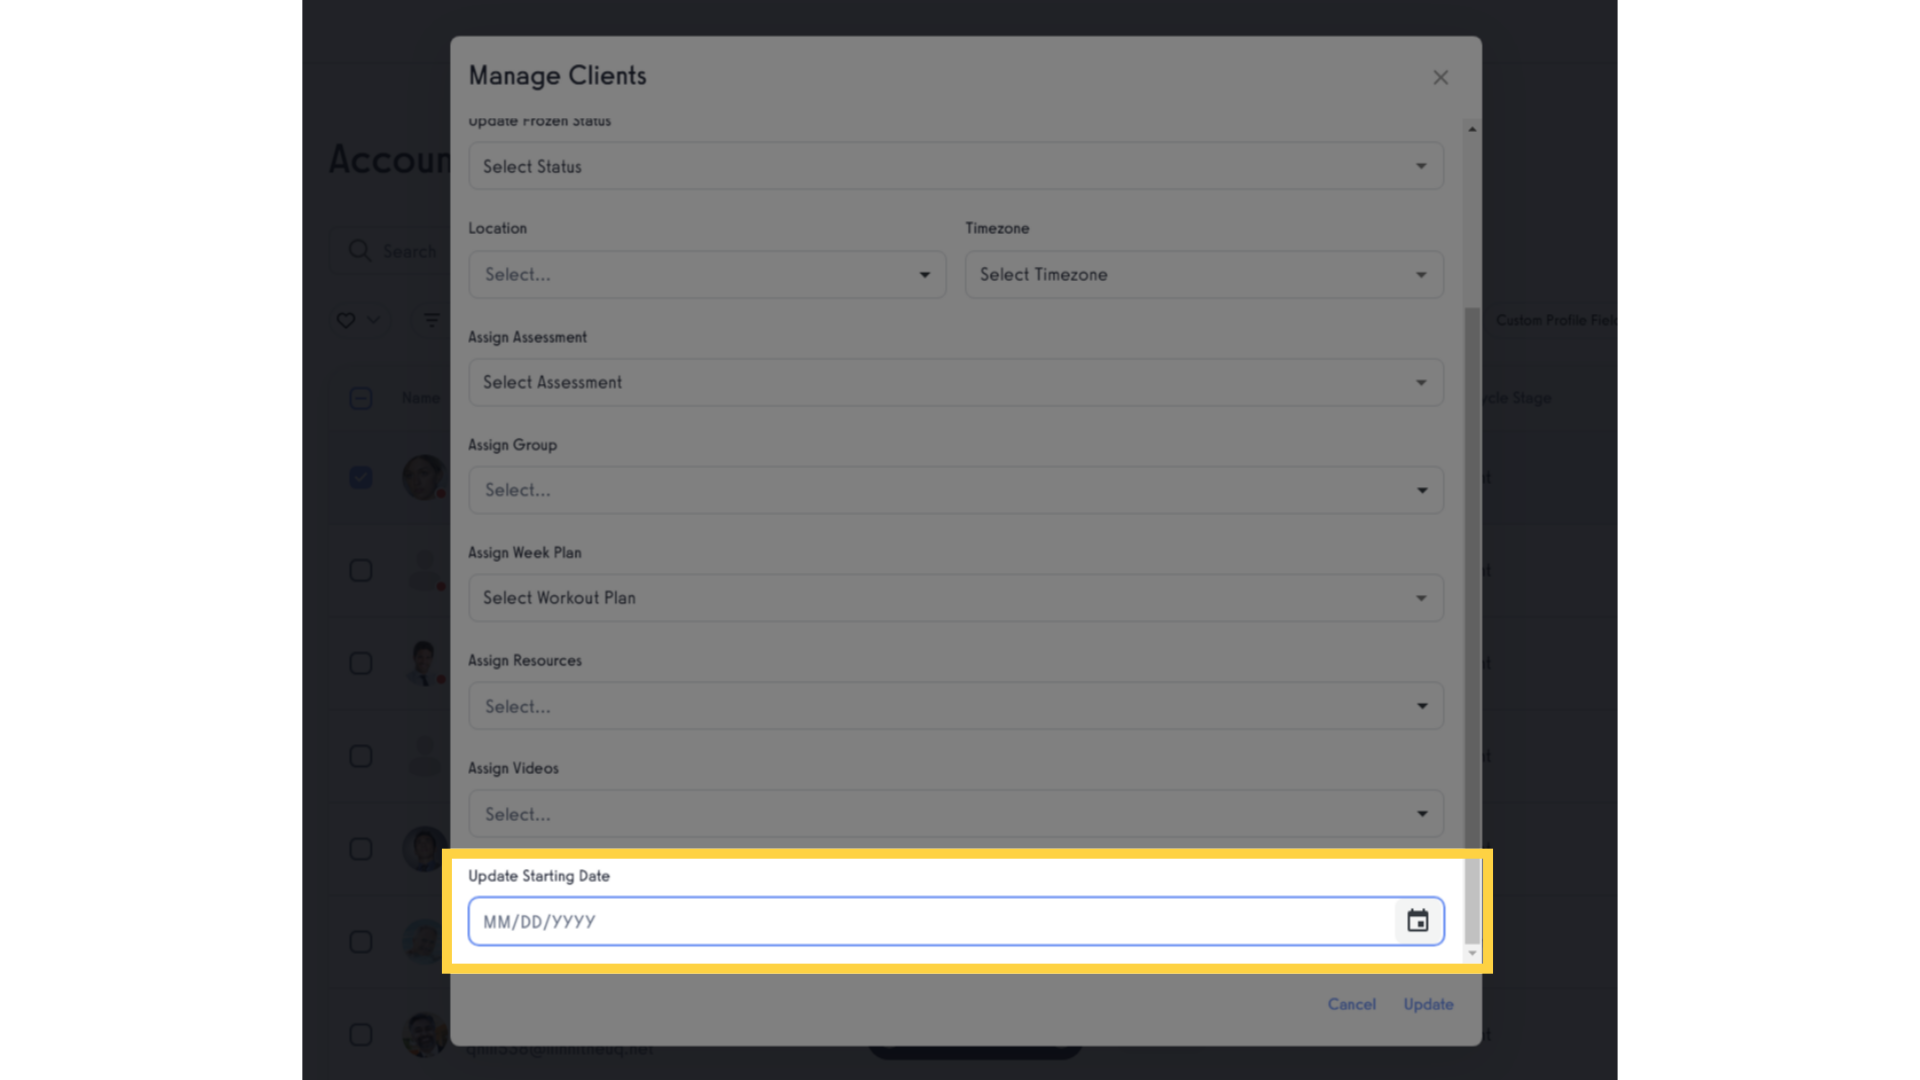
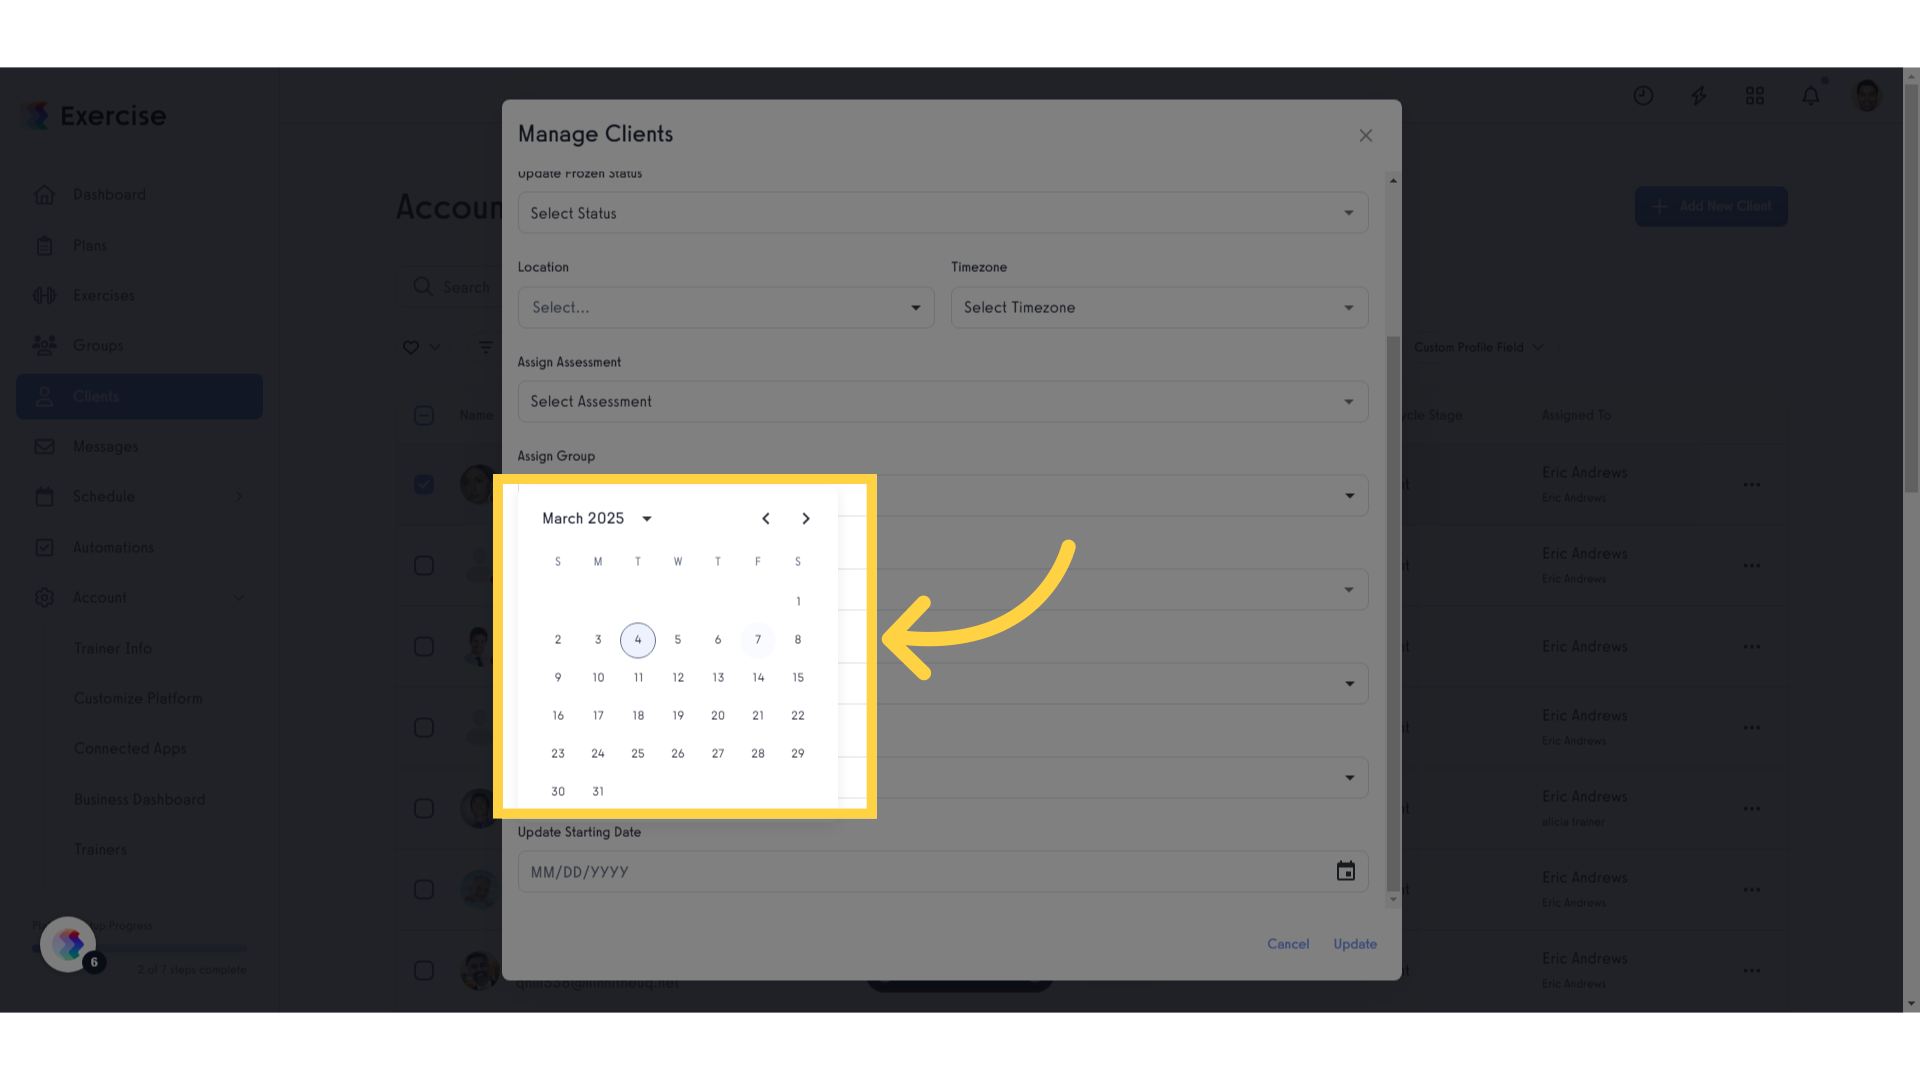
6. Click the calendar icon.
Find the option to edit the starting date.

7. Select a date.
Choose the new starting date.
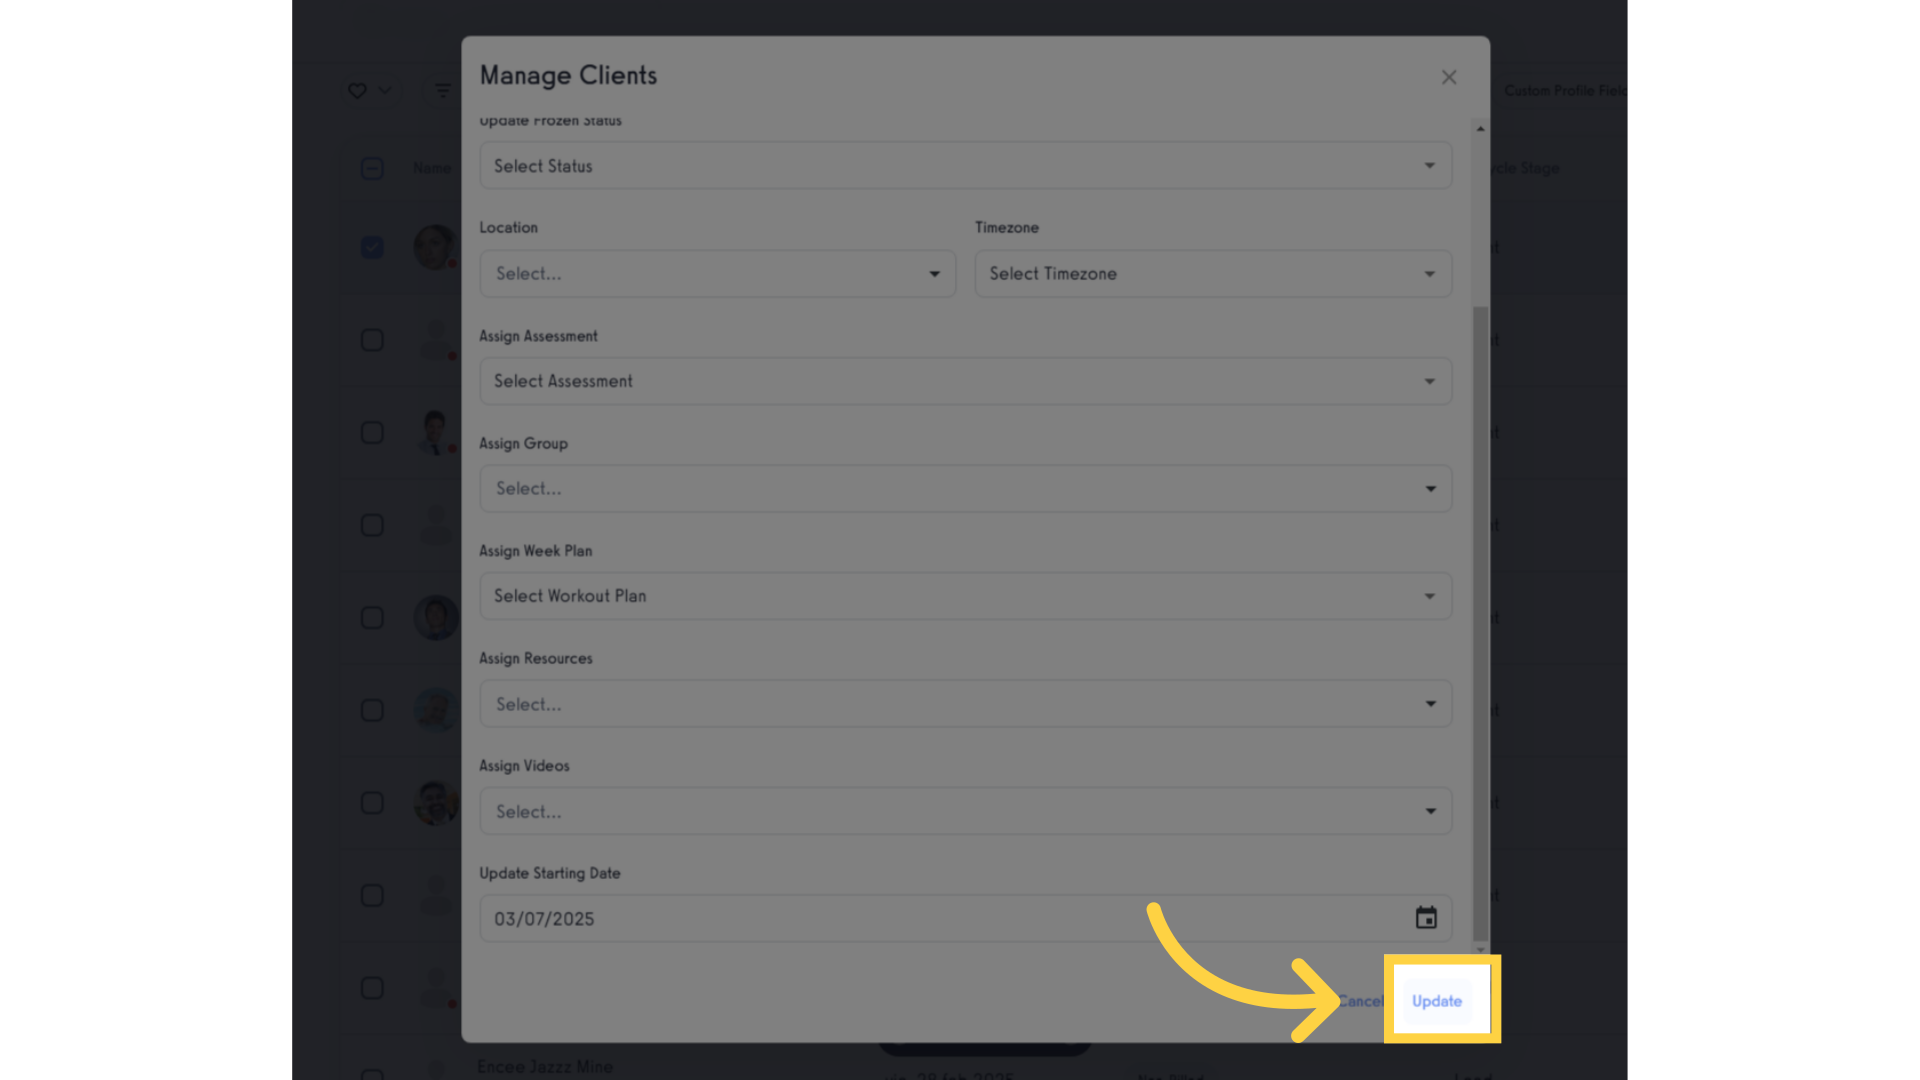
8. Click “Update”.
Save the changes.
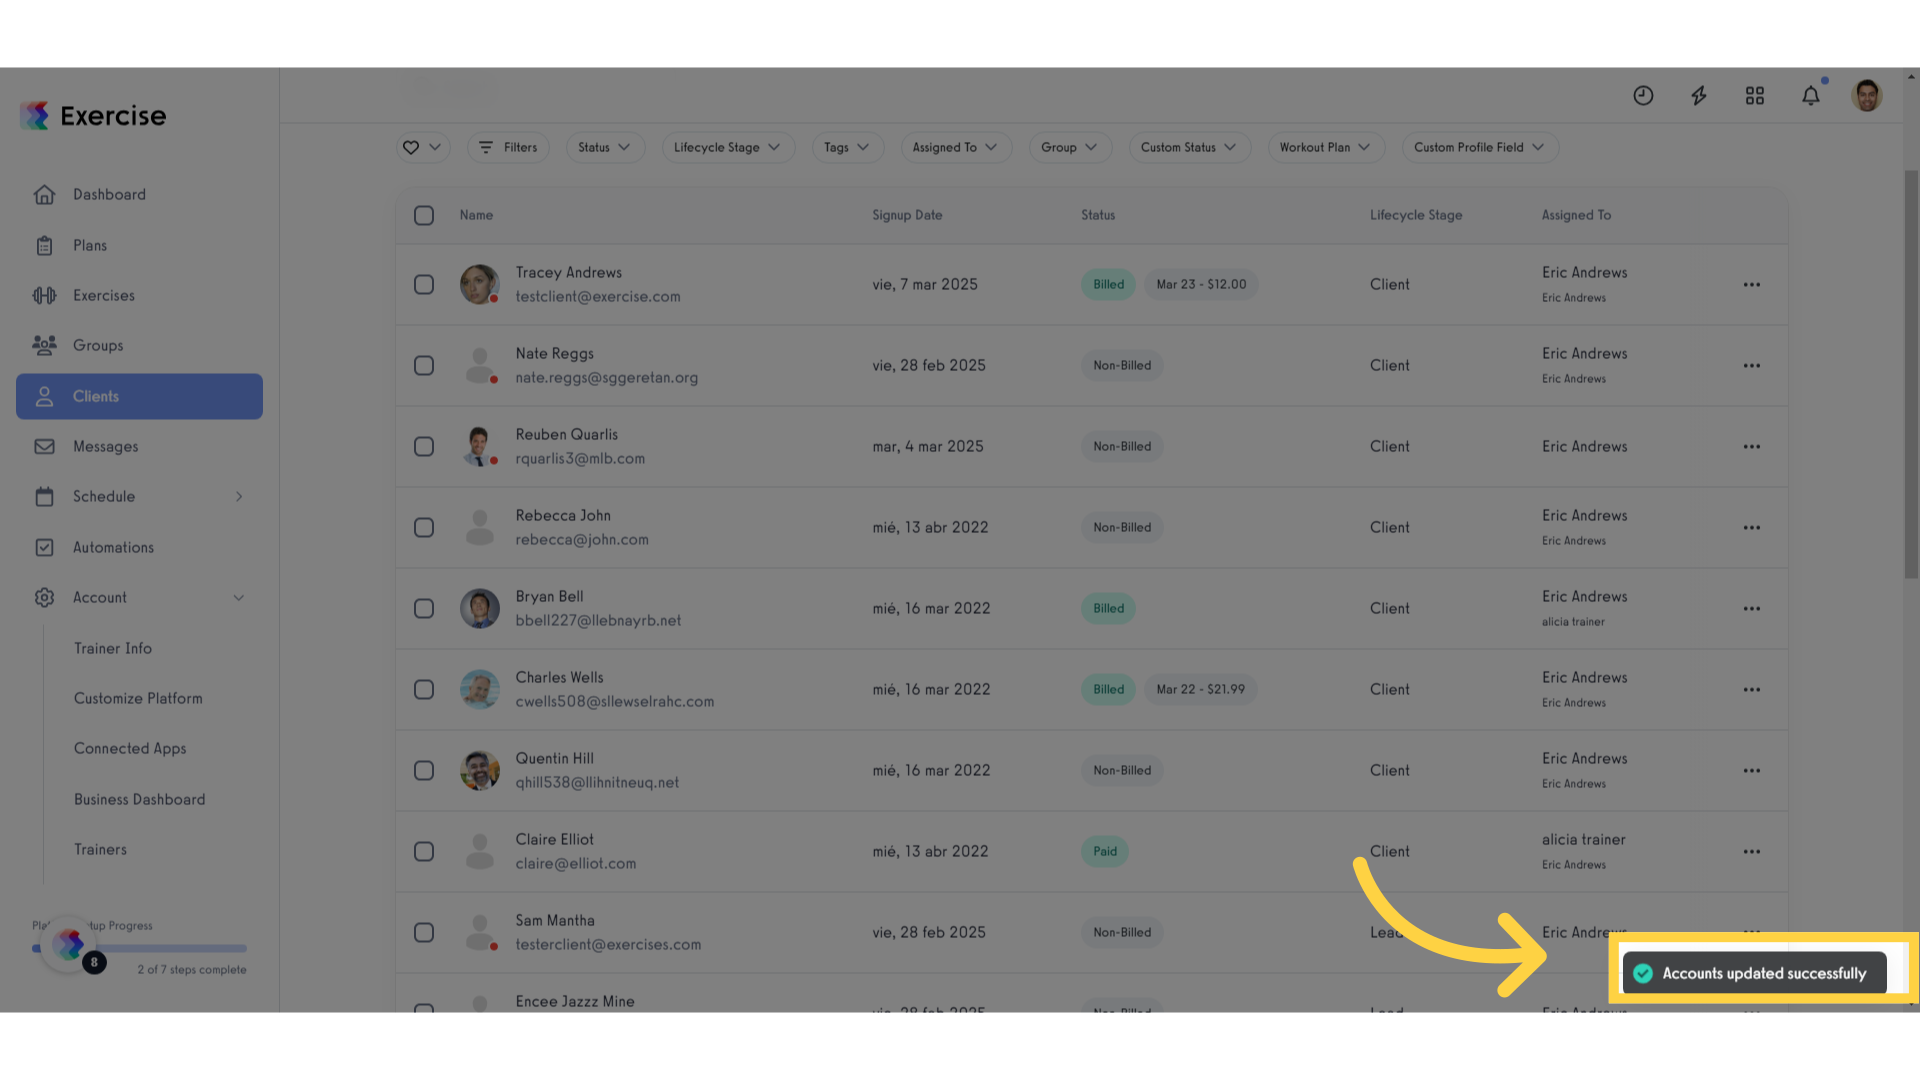
9. Appears a confirmation message.
Confirmation message of successful update.
This guide covered the process of accessing, editing, and saving changes to a Client’s starting date within the application.


