How to Filter Accounts by Lifecycle Stages on the Clients List View
With Exercise.com’s fitness business management software, you can customize the stages of your customer pipeline and easily filter by stage while reviewing accounts.
This guide will show you how to filter your accounts by stages and how to save your default view.
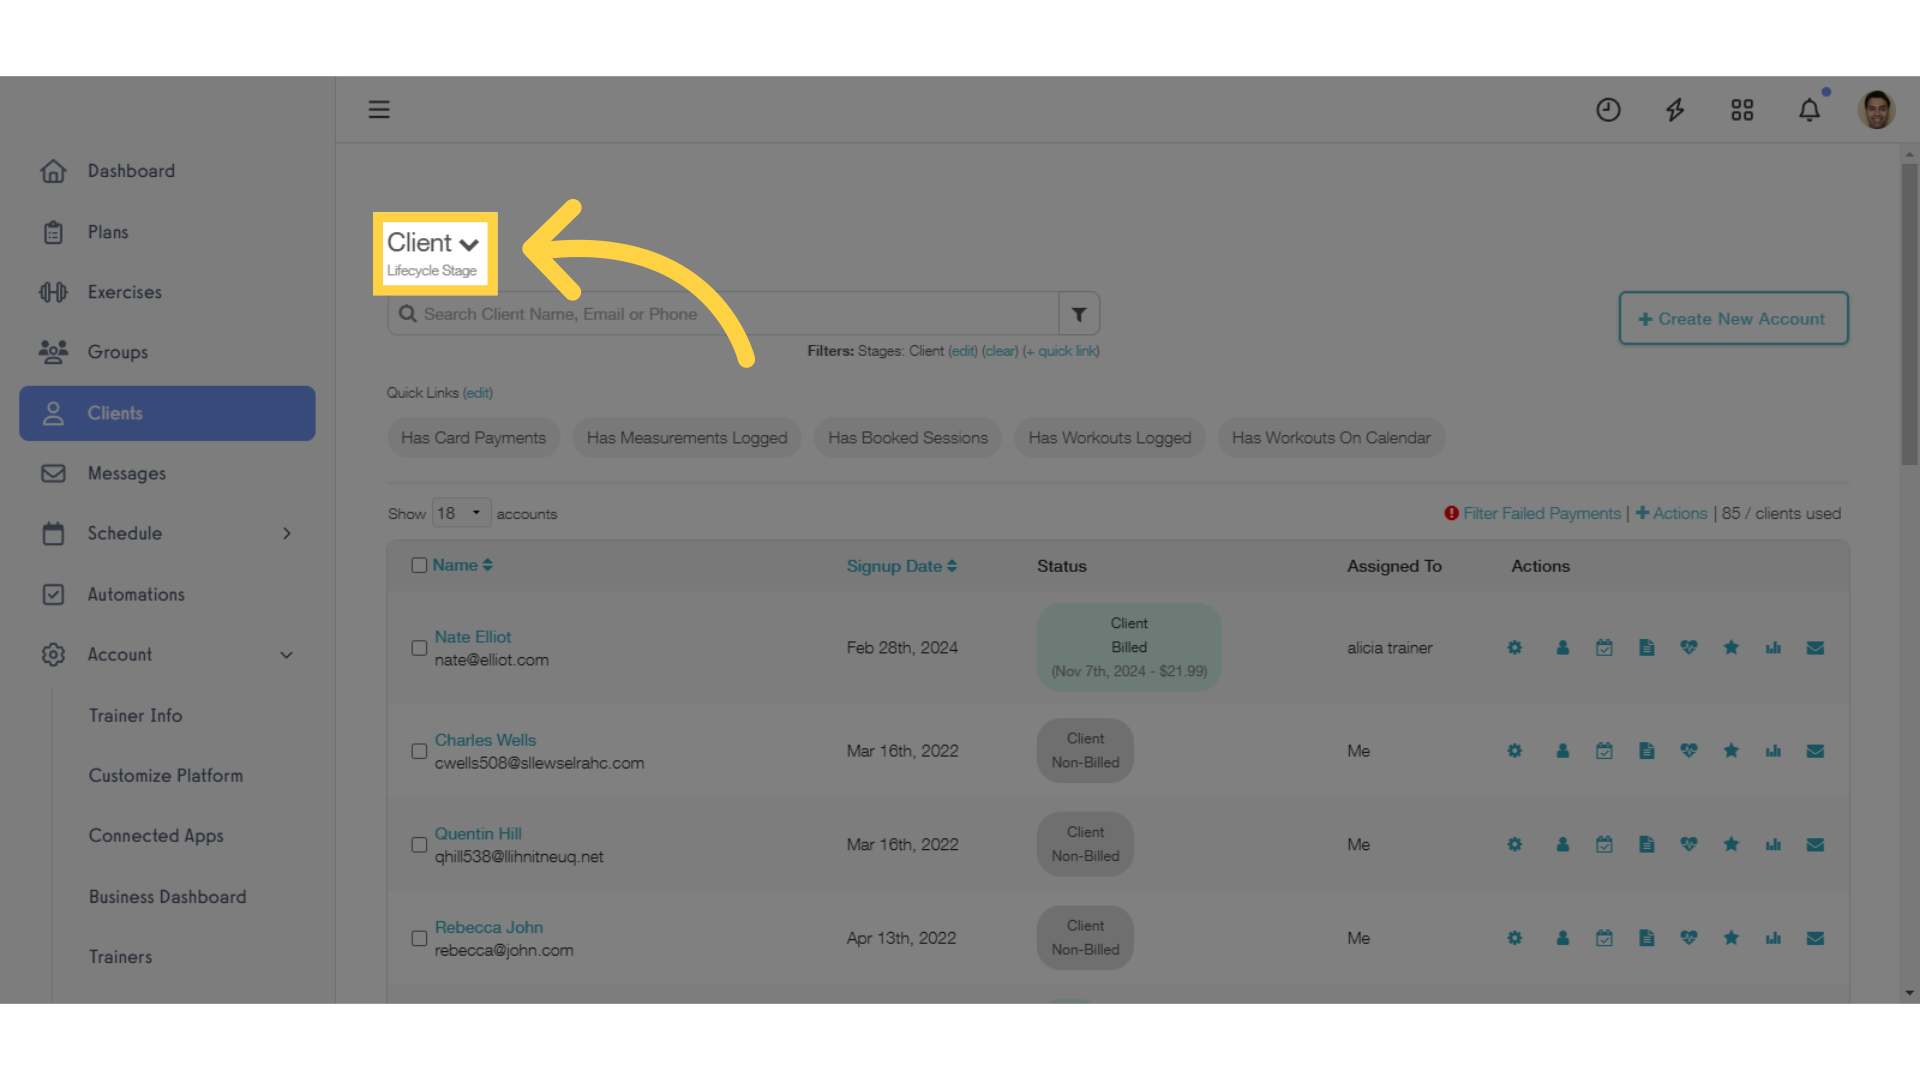
1. Click the down arrow to see the lifecycle stages available.
Click the down arrow next to the current active stage to see the stages you have available on your platform.
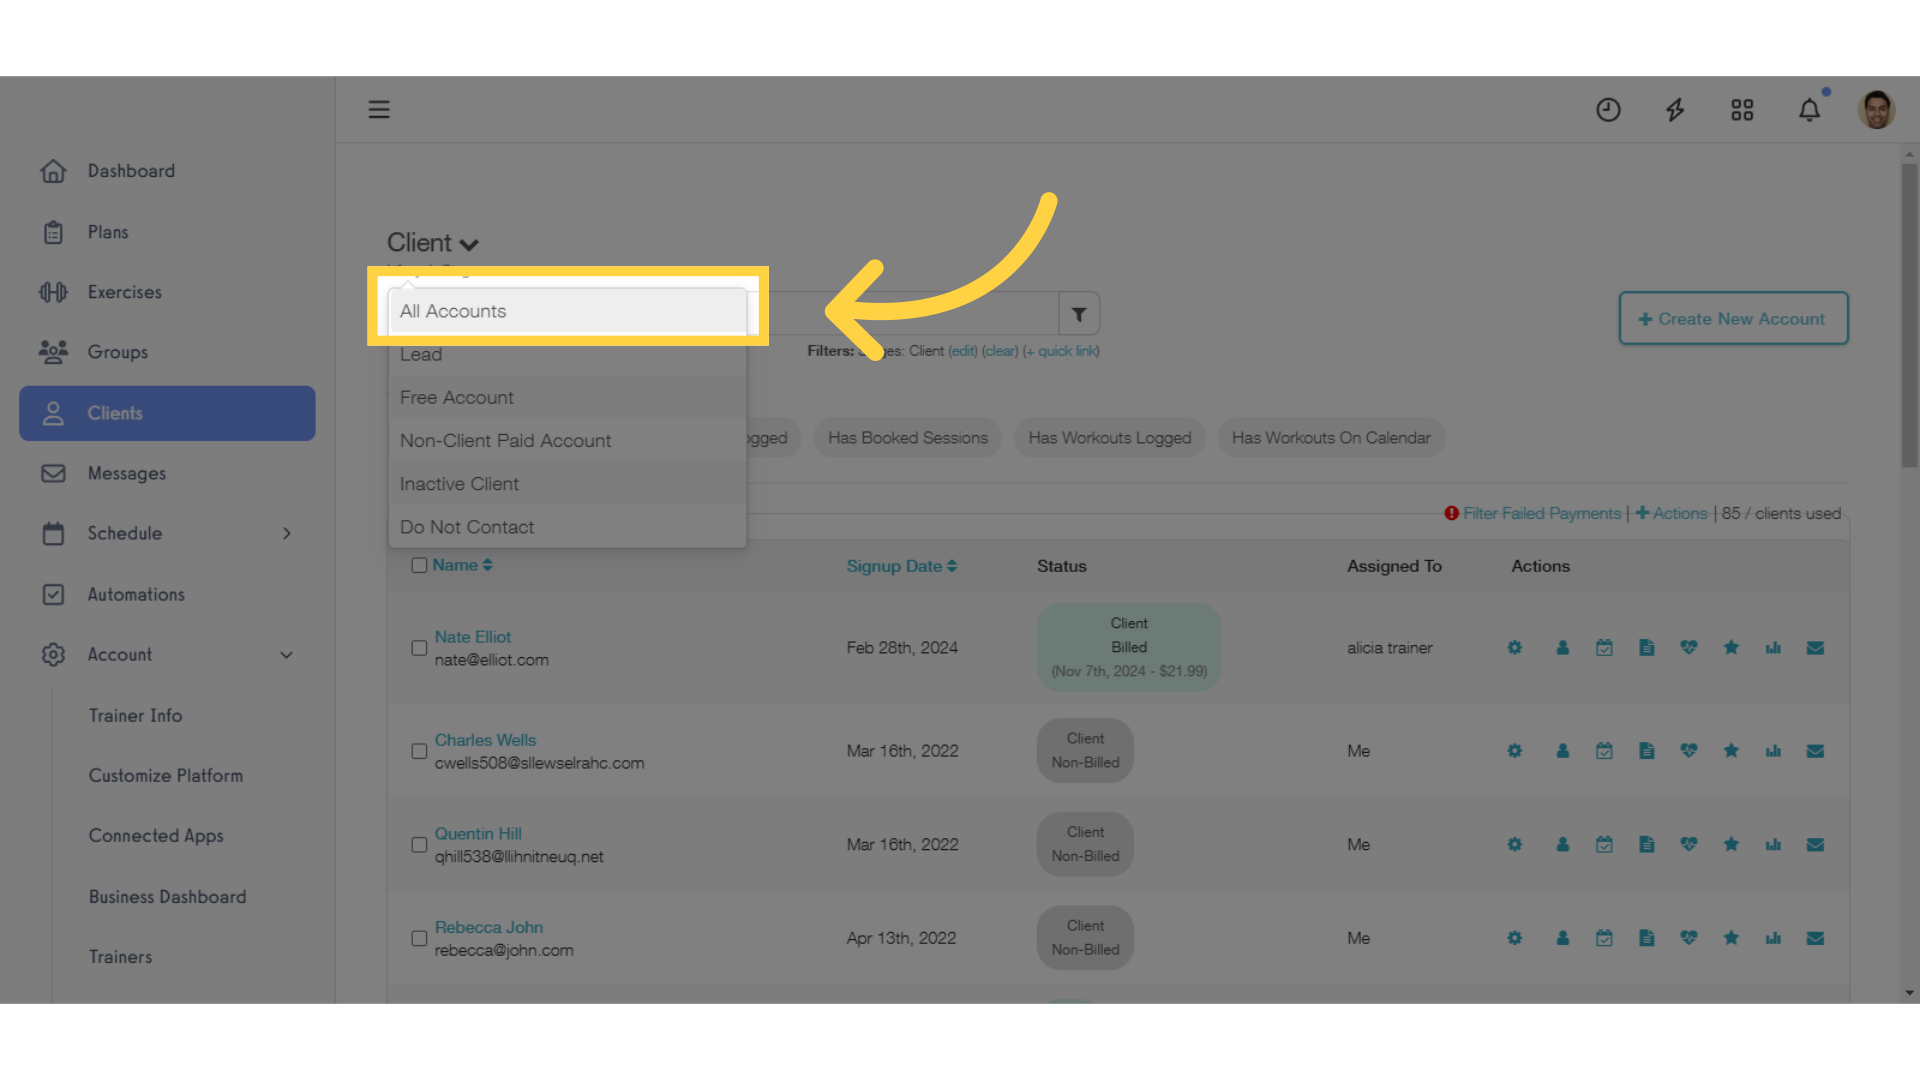
2. Click “All Accounts” to see every customer account from every stage in your platform.
Select “All Accounts” from the options to see all the accounts from all stages on your platform.
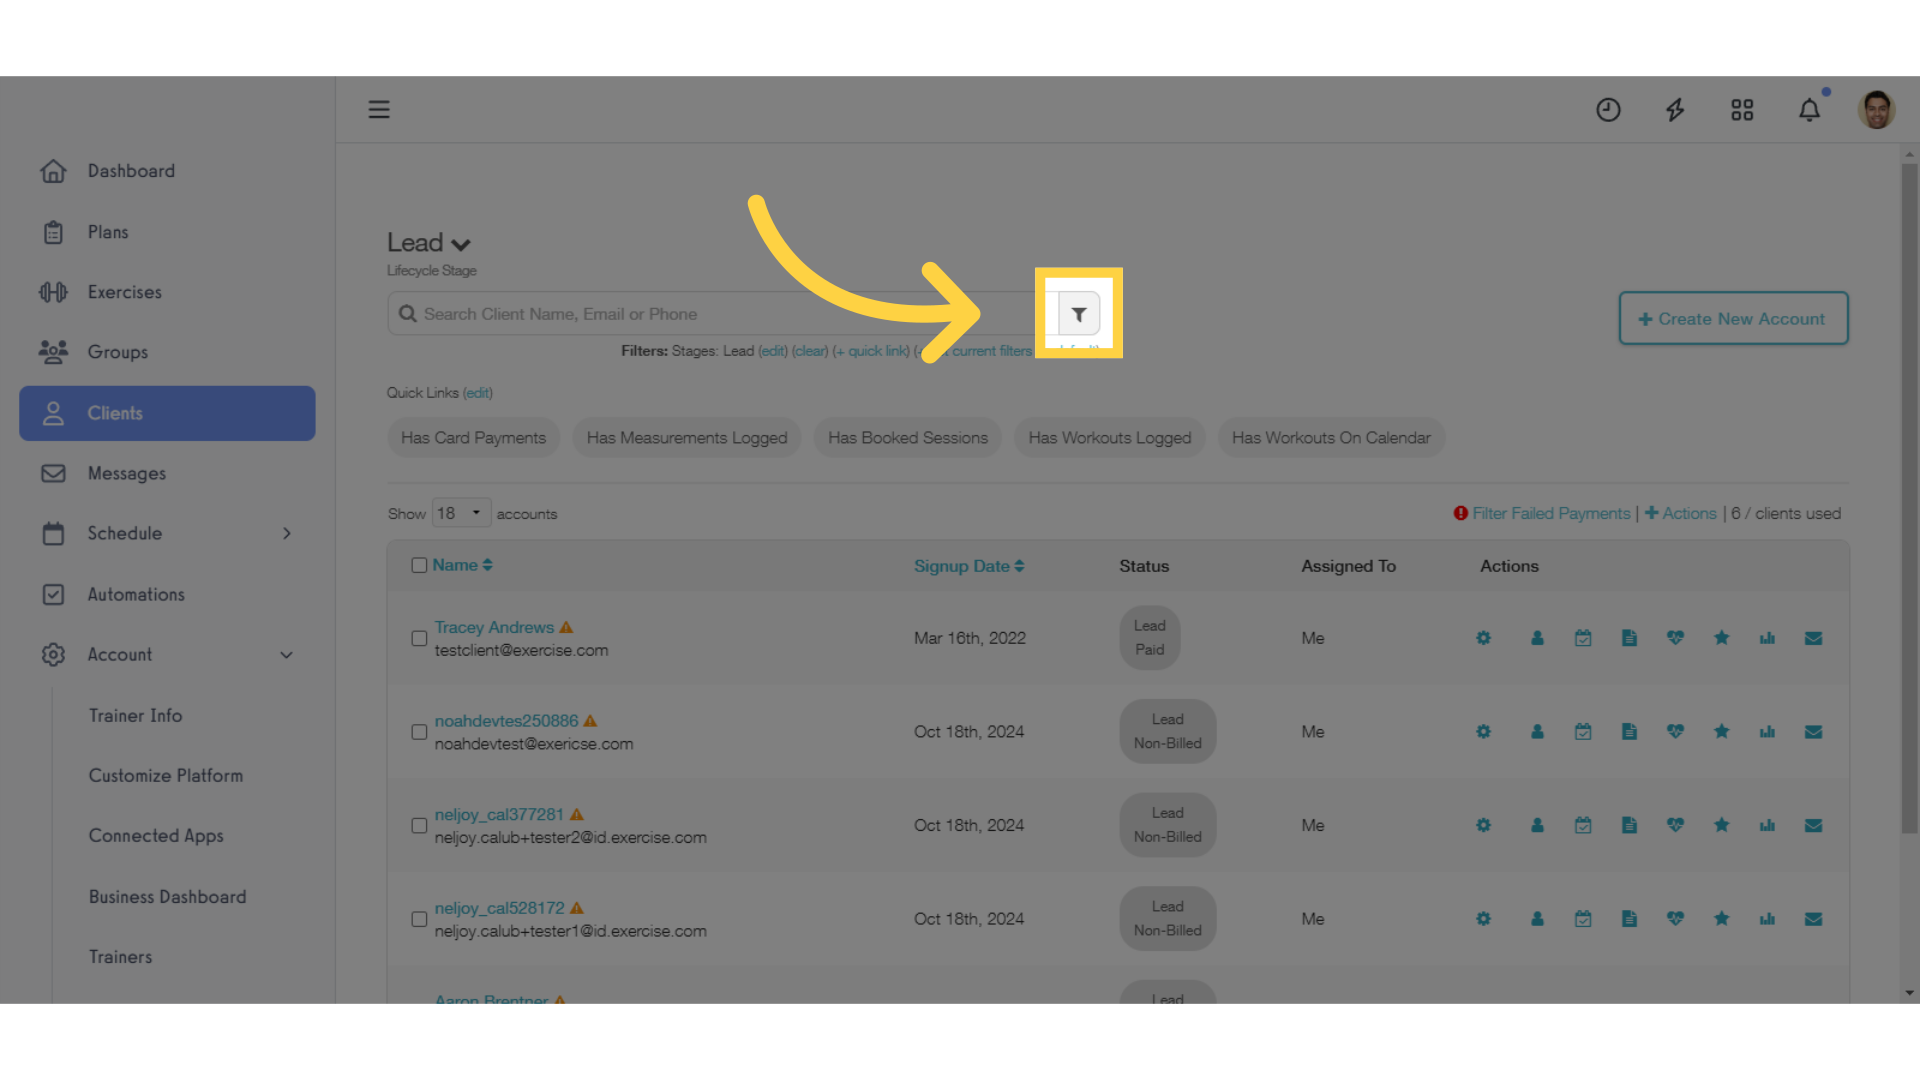
3. Click the filter icon to be able to see multiple stages at once.
If you want to review accounts from multiple stages at the same time, start by clicking the filter icon.
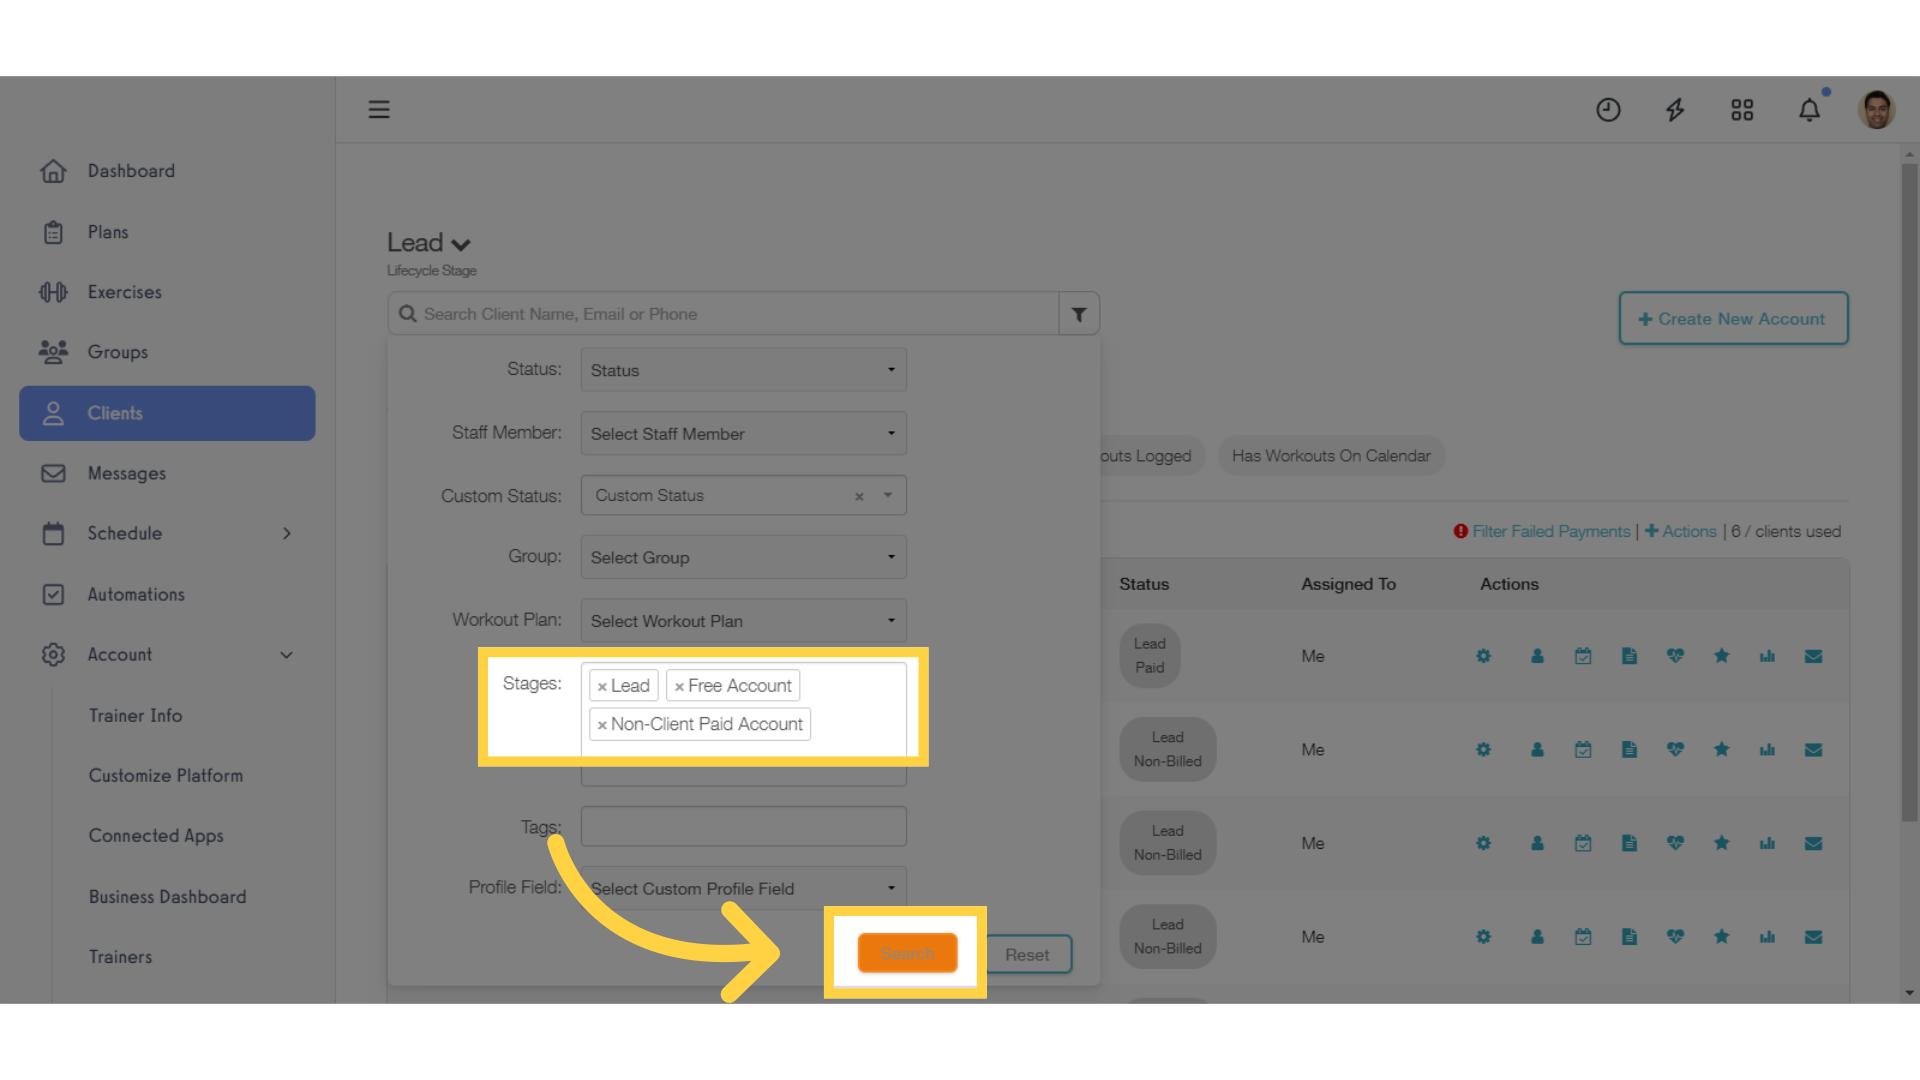
4. Set the Stages you want to see, then click “Search”.
For our example, we’re going to look at leads, free accounts, and non-client paid accounts all at once. Make sure to click “Search” to apply your filter settings.
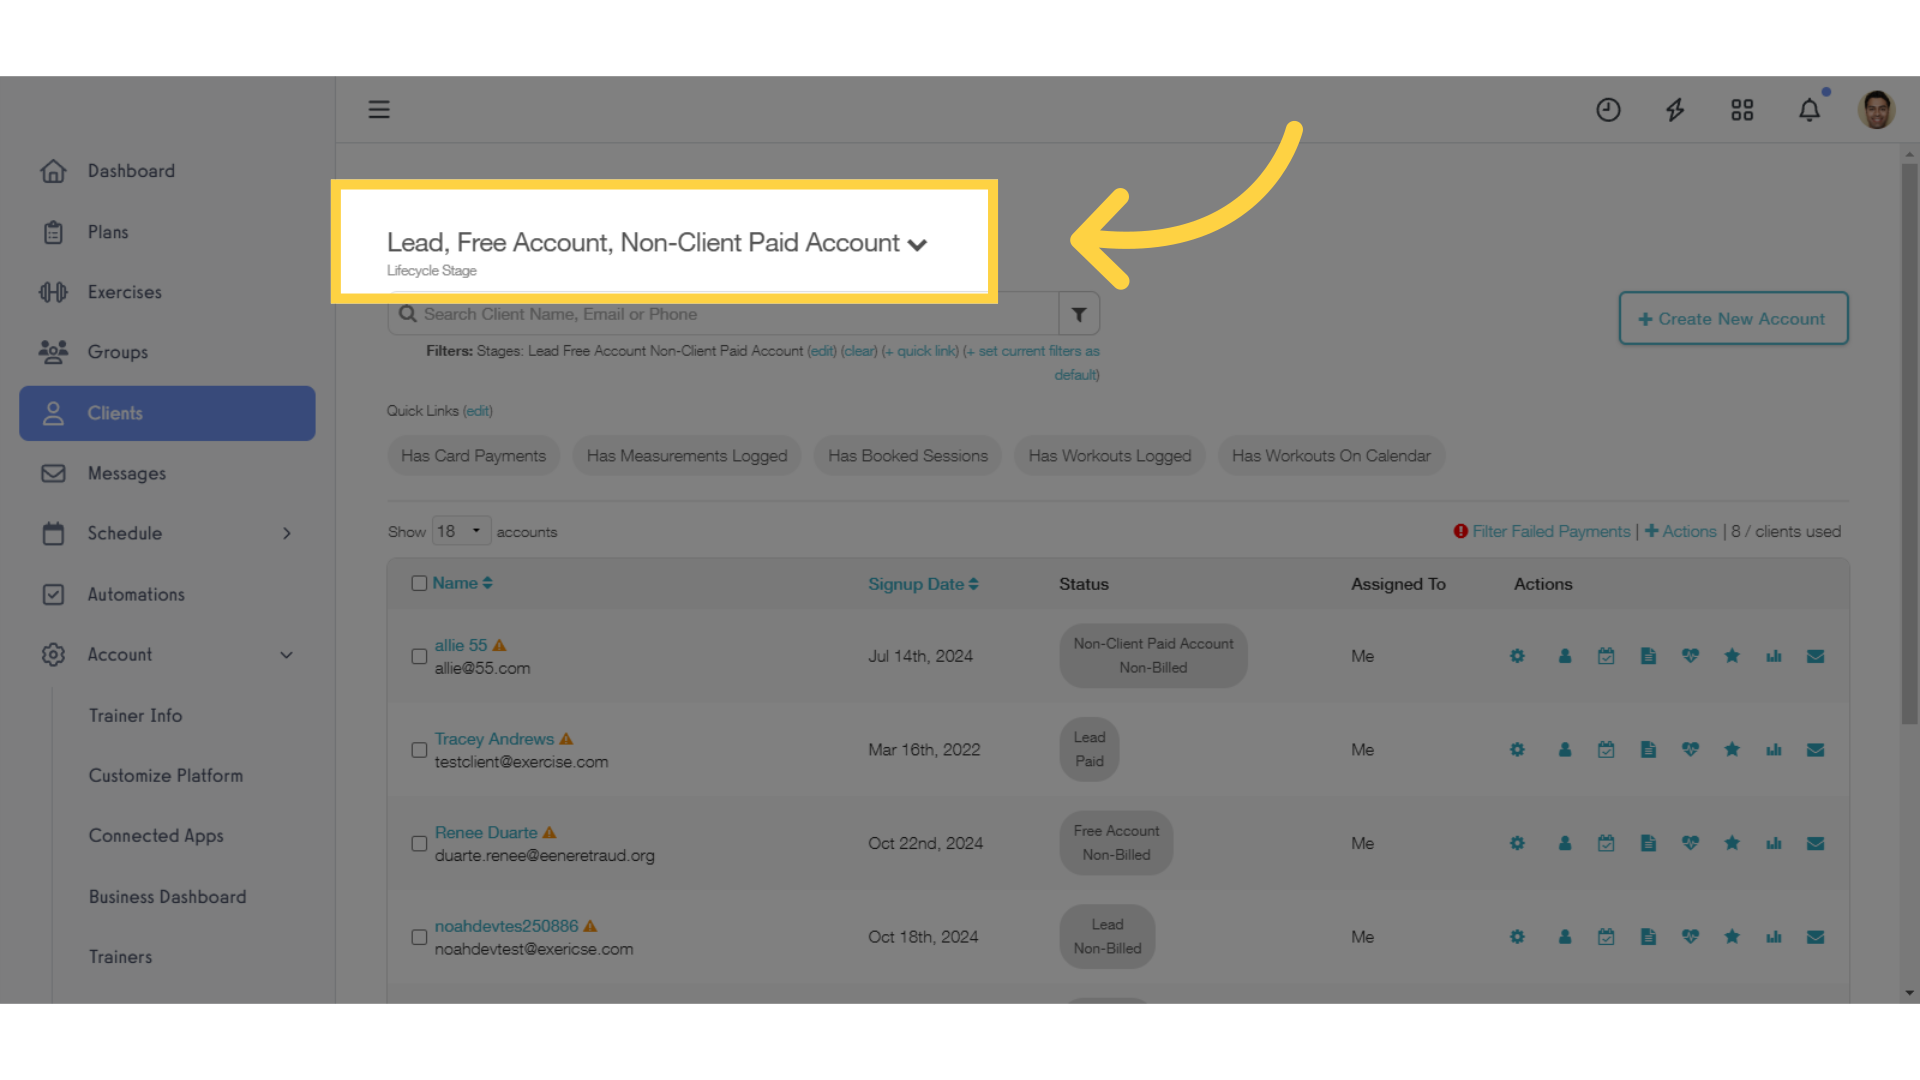
5. Now you can see that all the stages we selected are active.
Now you can see that all the stages we selected with our filters are now visible at the same time.
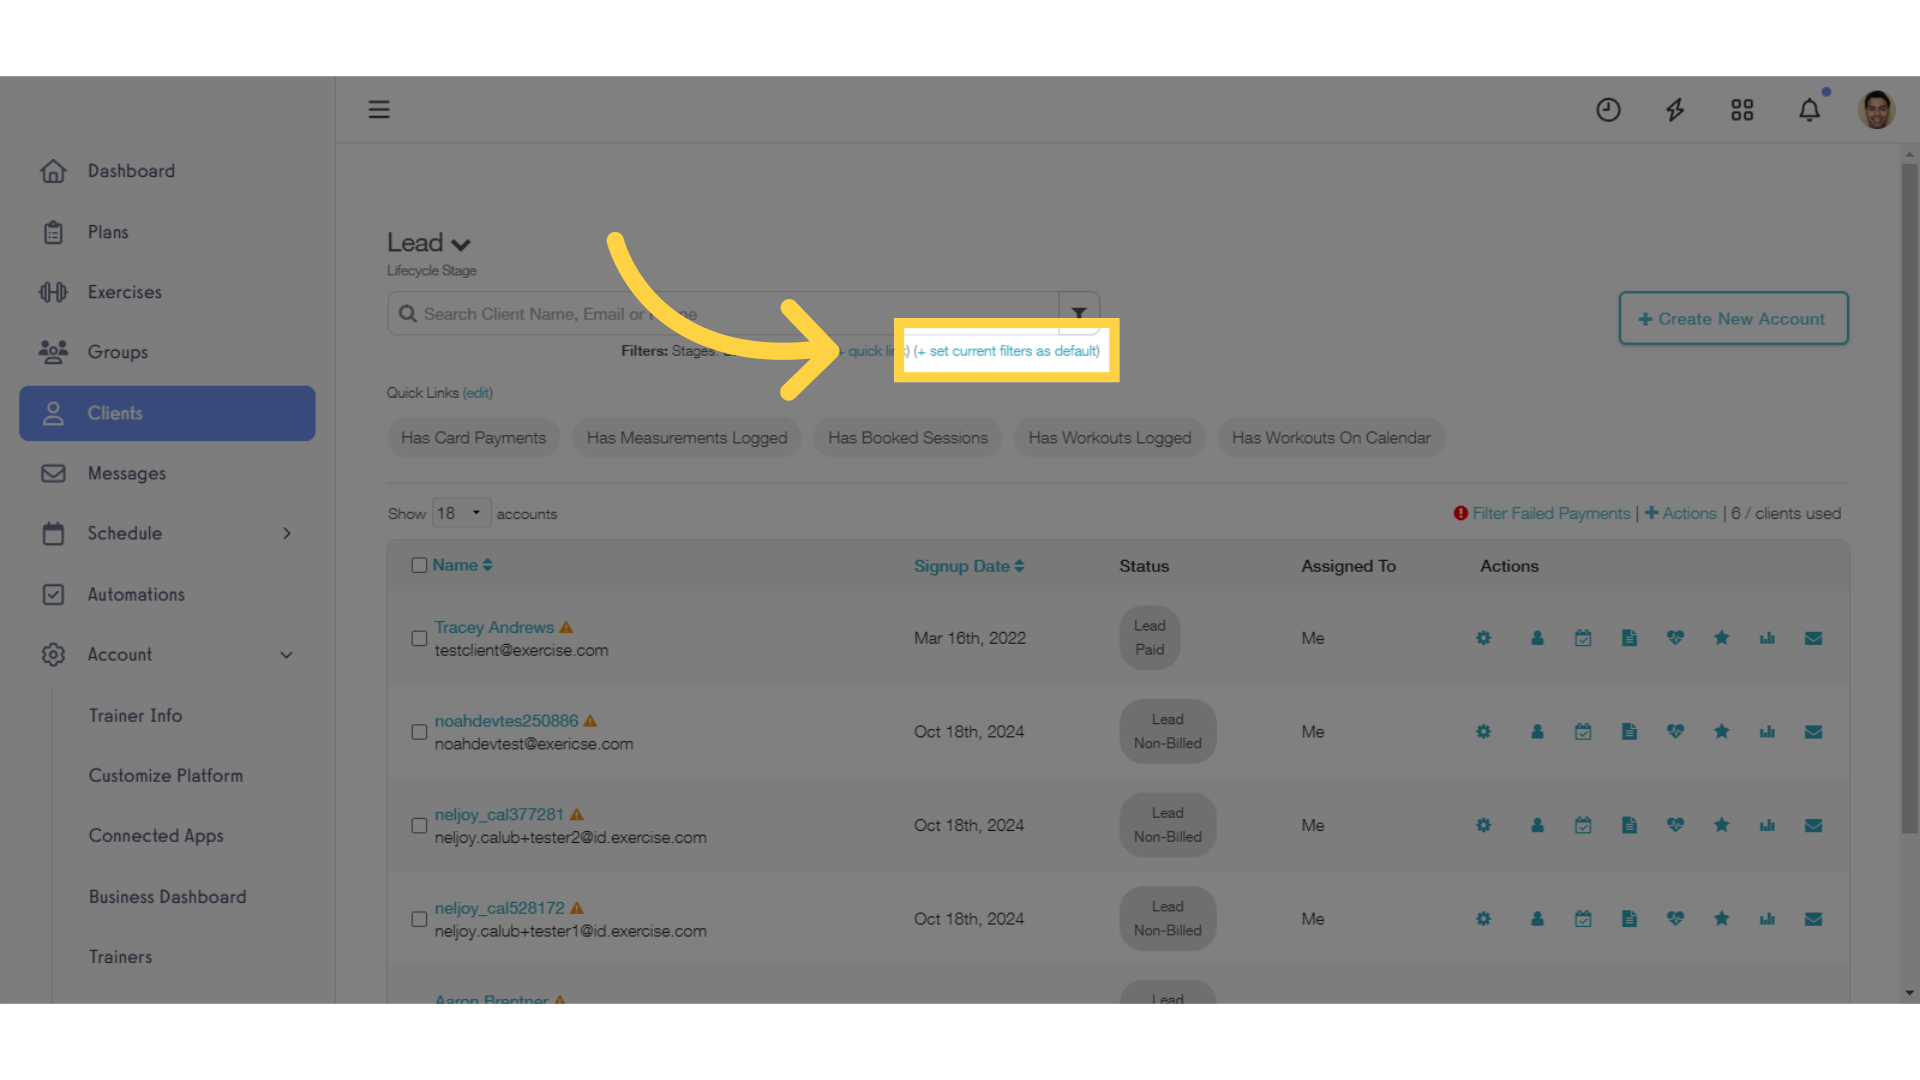
6. Click “+ set current filters as default” to save your default view.
If you want to change the default stage that you and your team will see when you first open the Clients tab, click “set current filters as default” to save your default view.
This guide showed you how to view each stage on the Clients list view, including filtering multiple stages and setting your default view.
Now you can organize and review all of the accounts on your platform with ease.


