How do I manage my client’s dependents?
Using our Gym Management Software, you’re able to manage your client’s dependents.
This guide will walk you through how to manage client’s dependents.
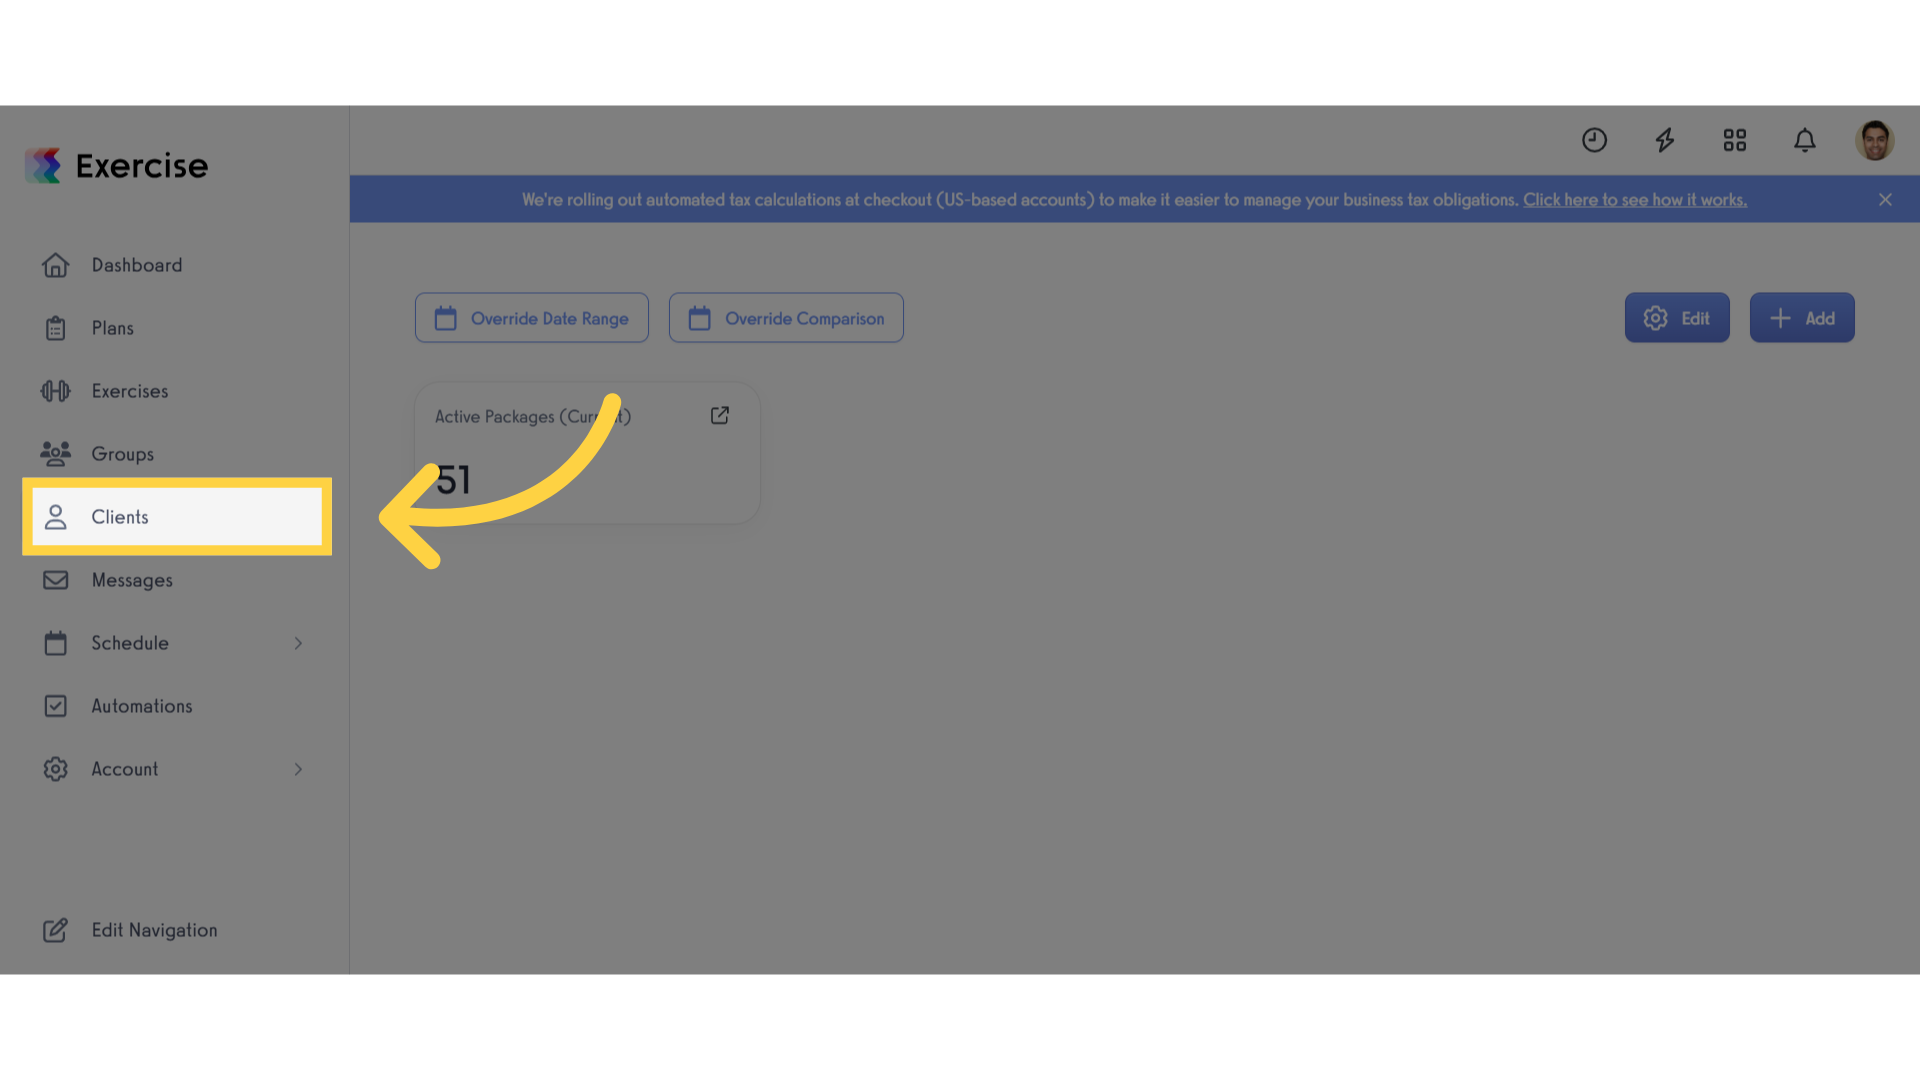
1. Click “Clients”.
To do so, click the “Clients” tab of your Dashboard.
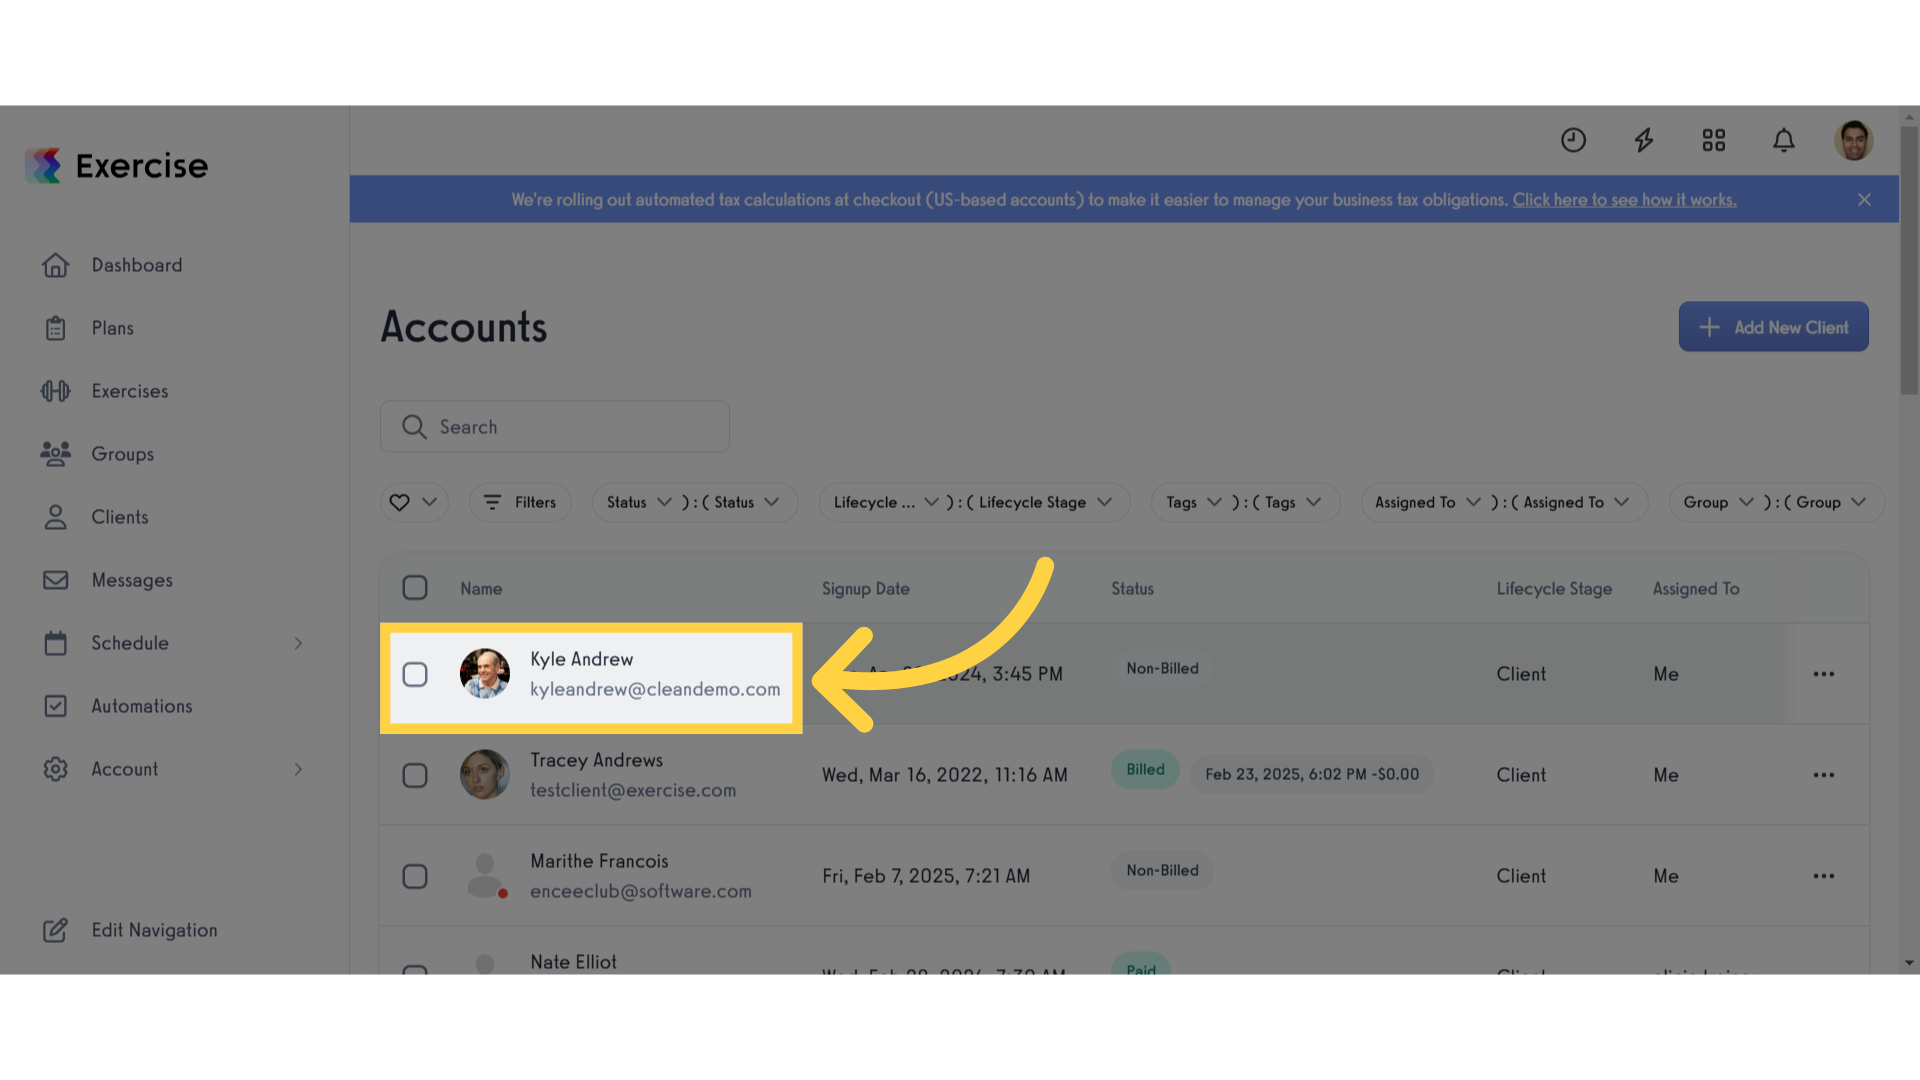
2. Select specific client.
Select the client named Kyle Andrew.
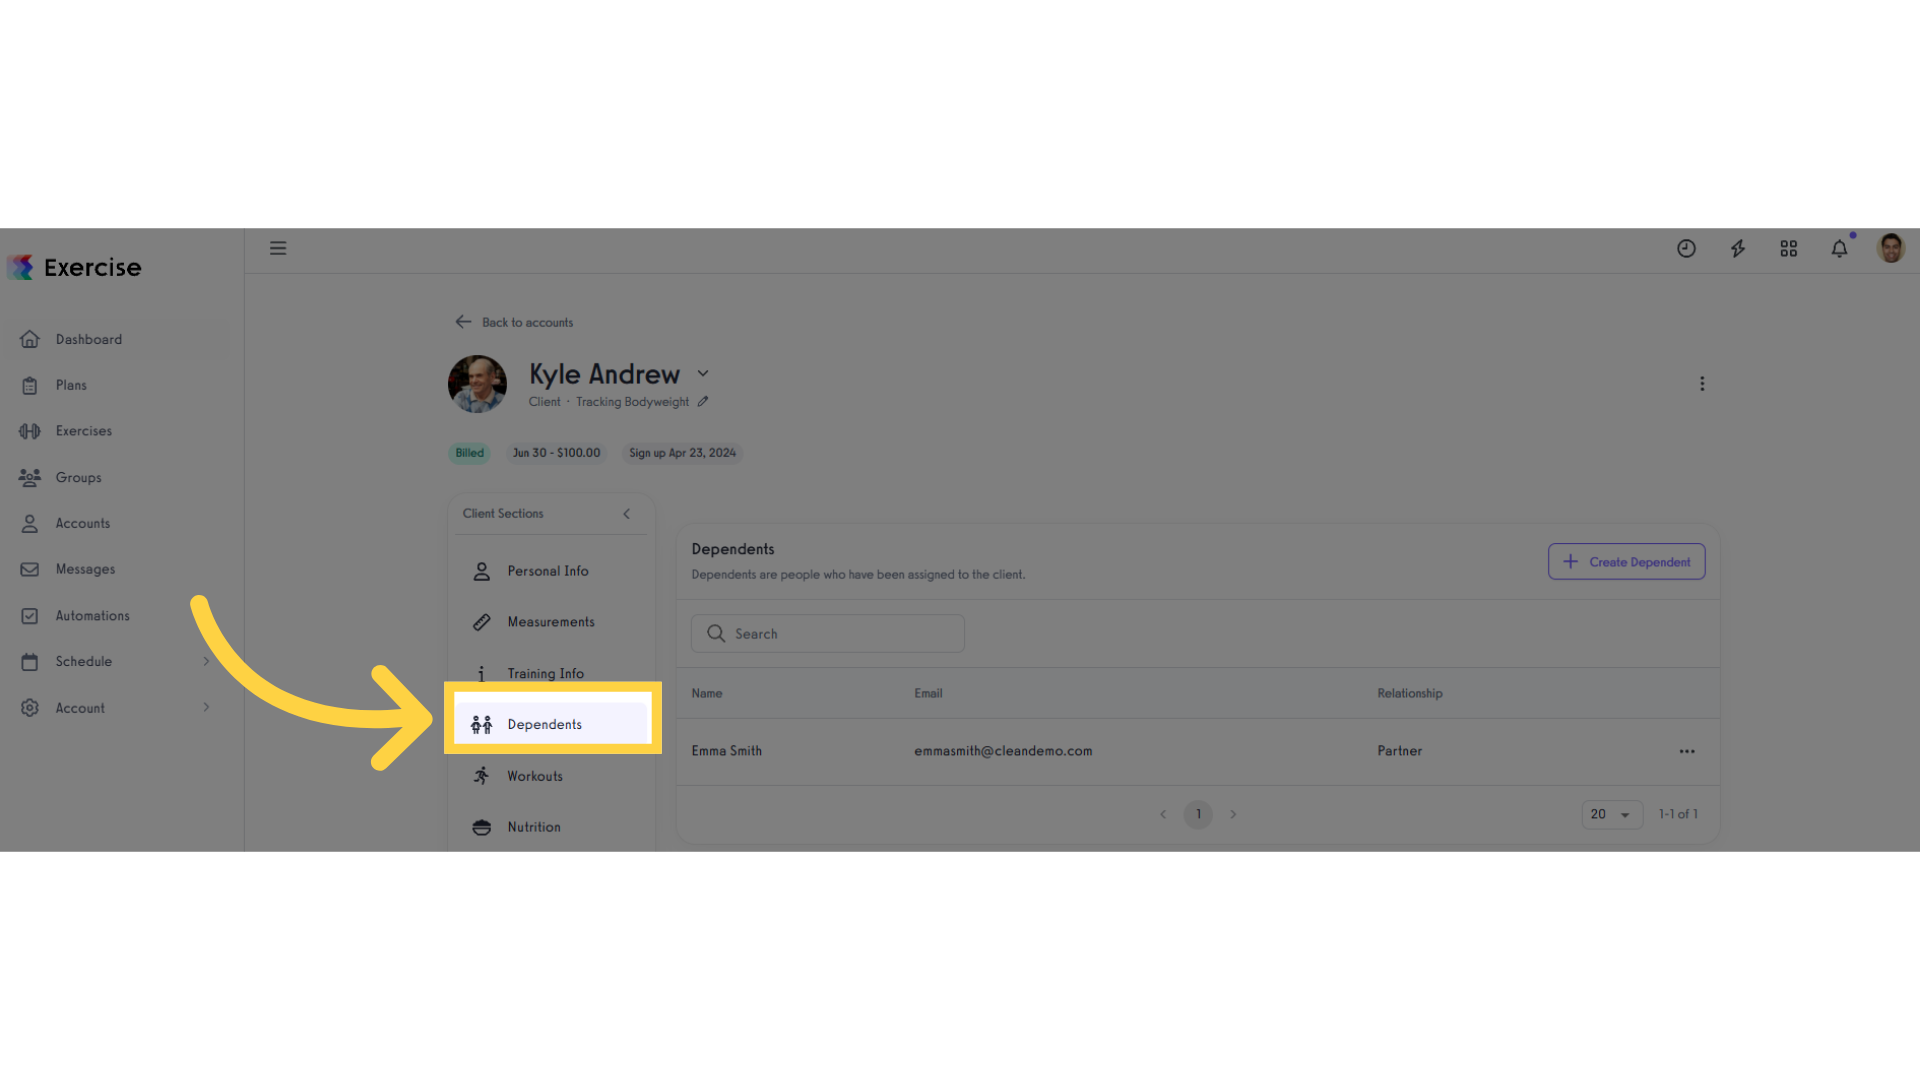
3. Click “Dependents”.
From the client’s personal info go to dependents tab.
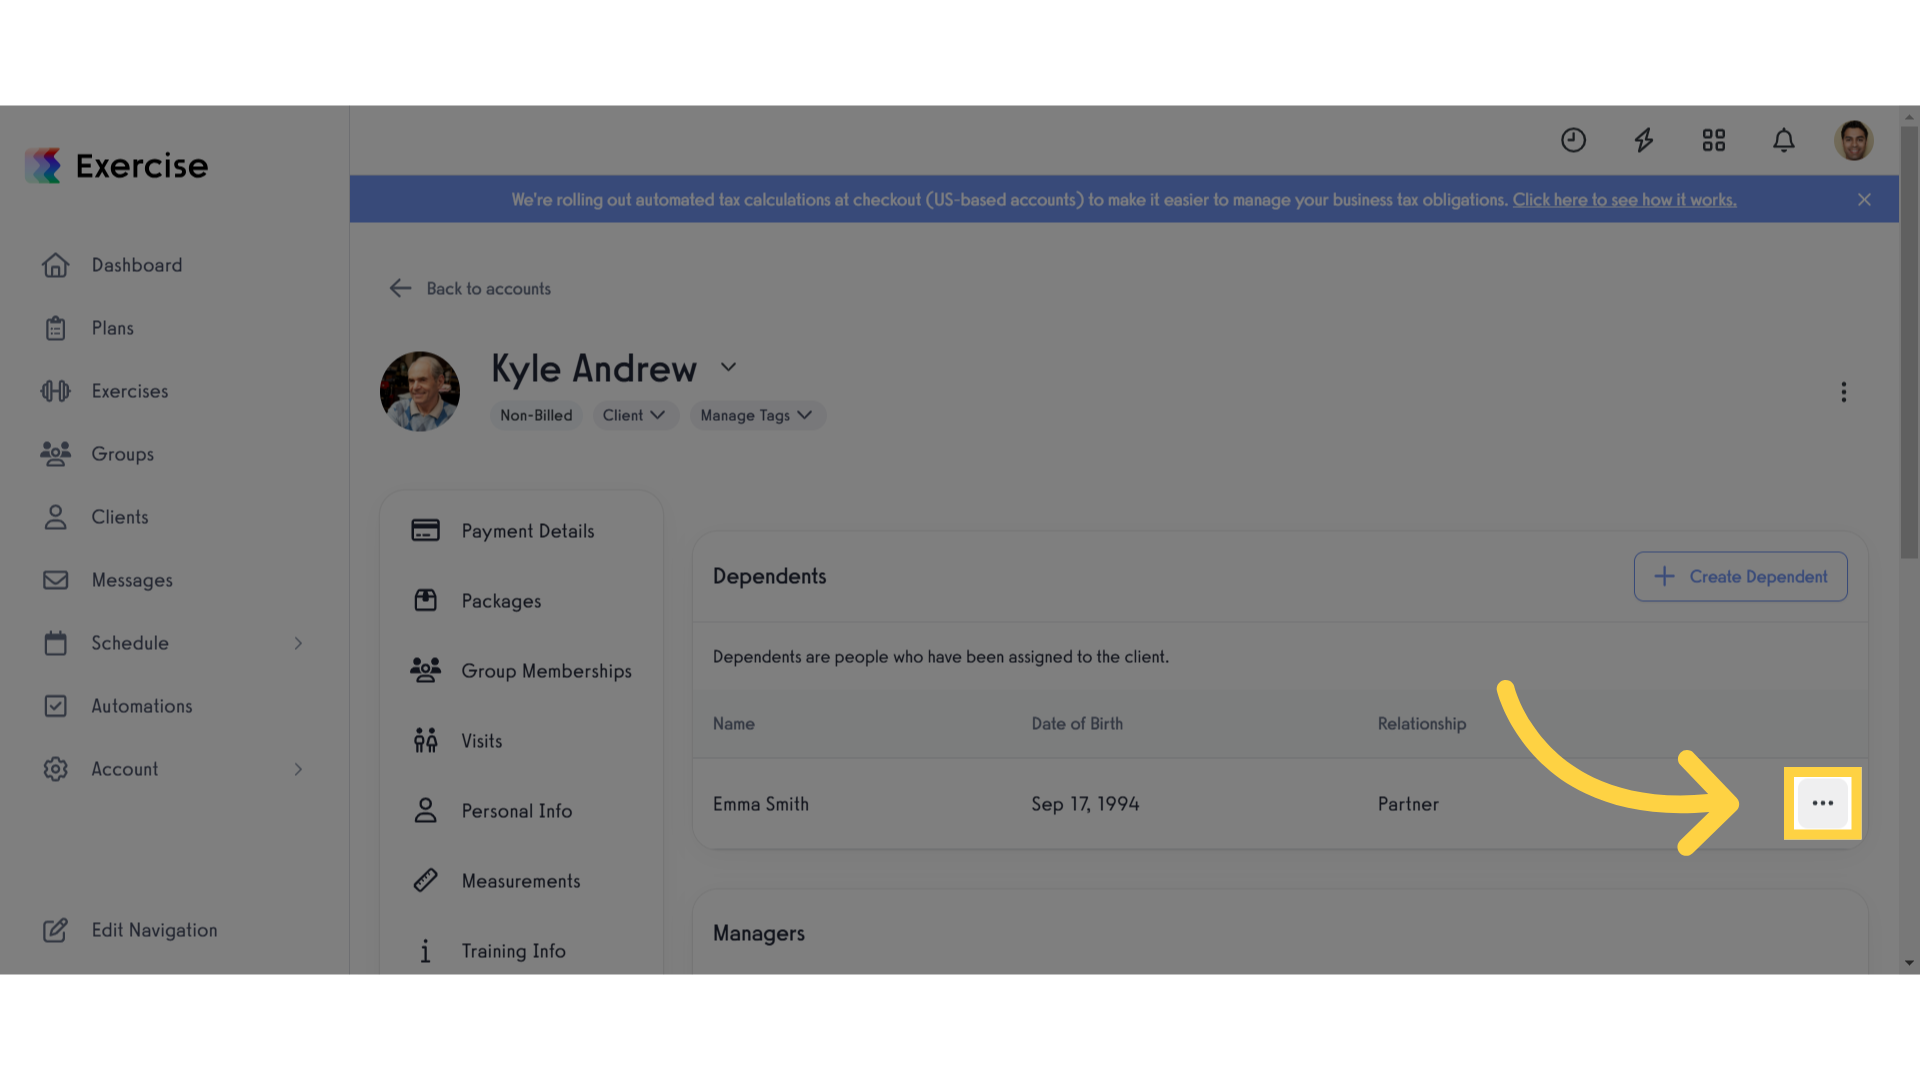
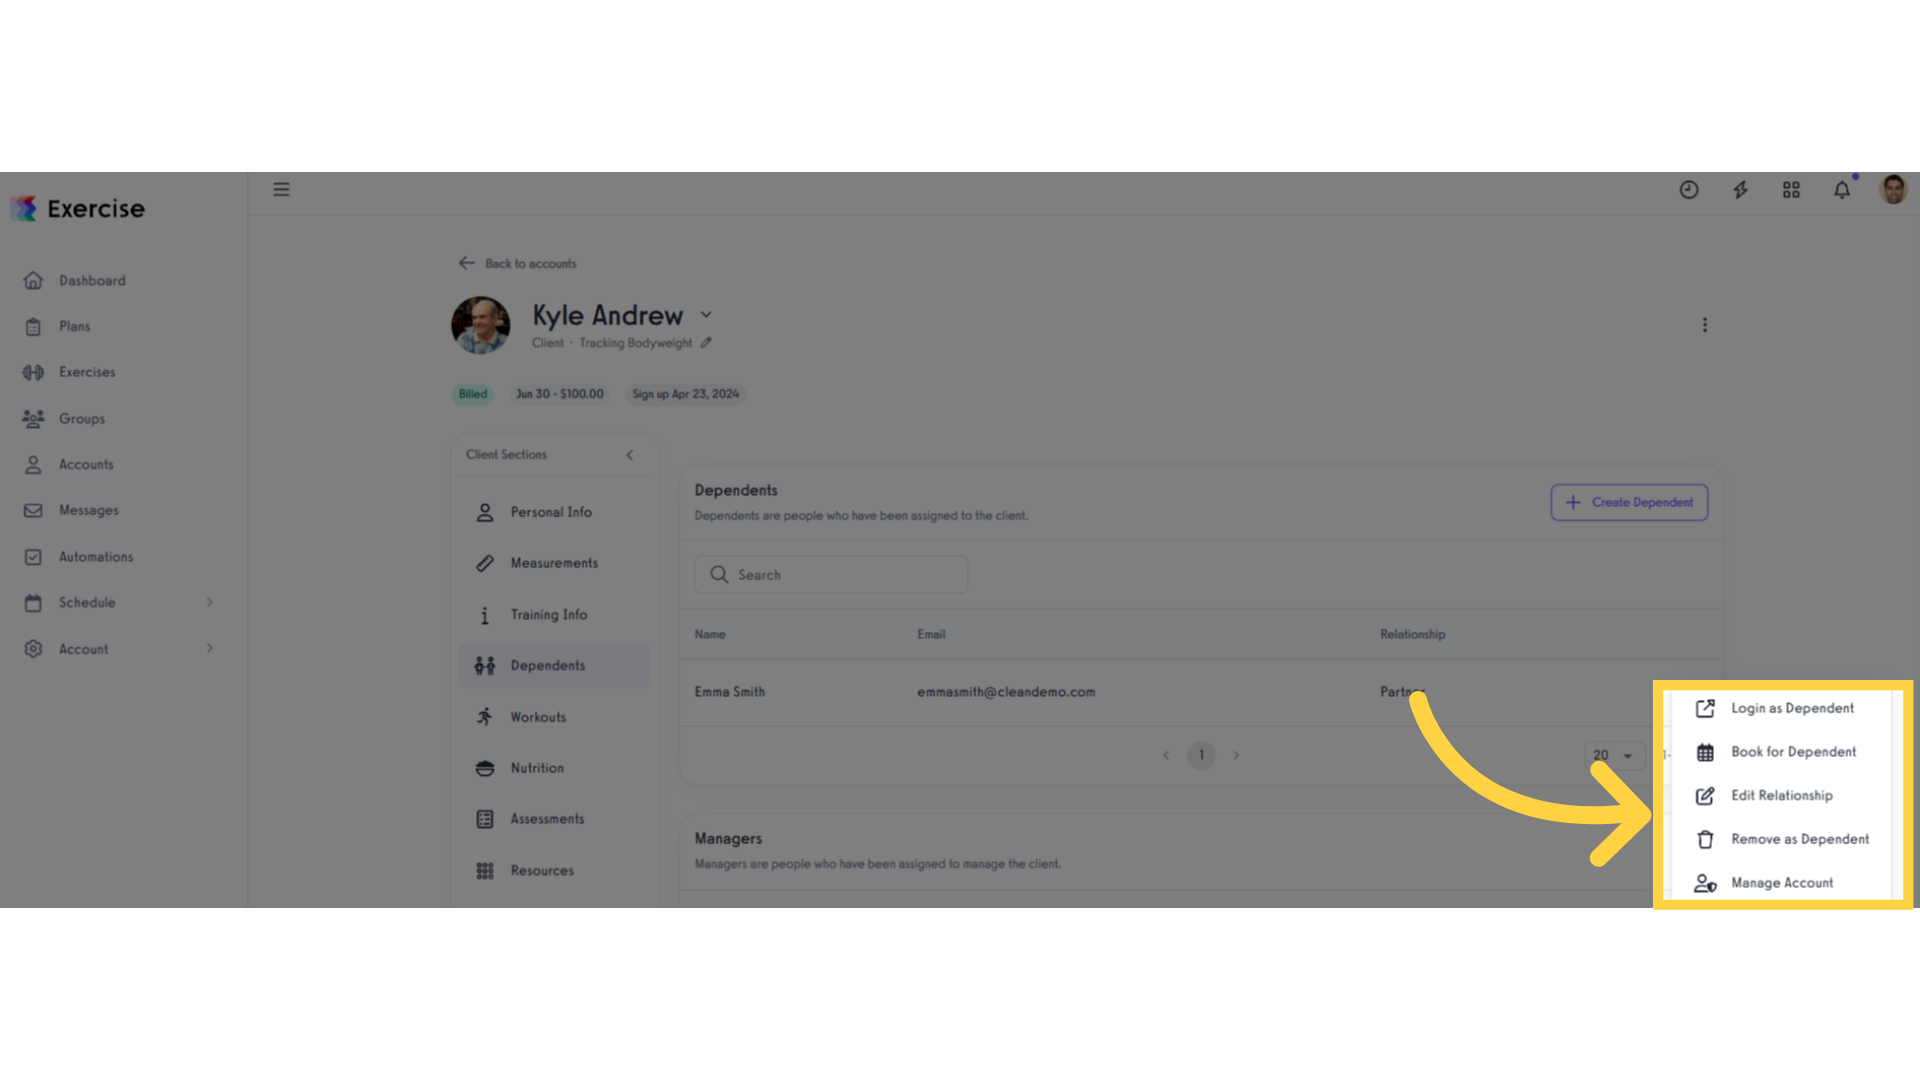
4. Click the three dot button
Click the three dot button to appear the icons to manage dependents.
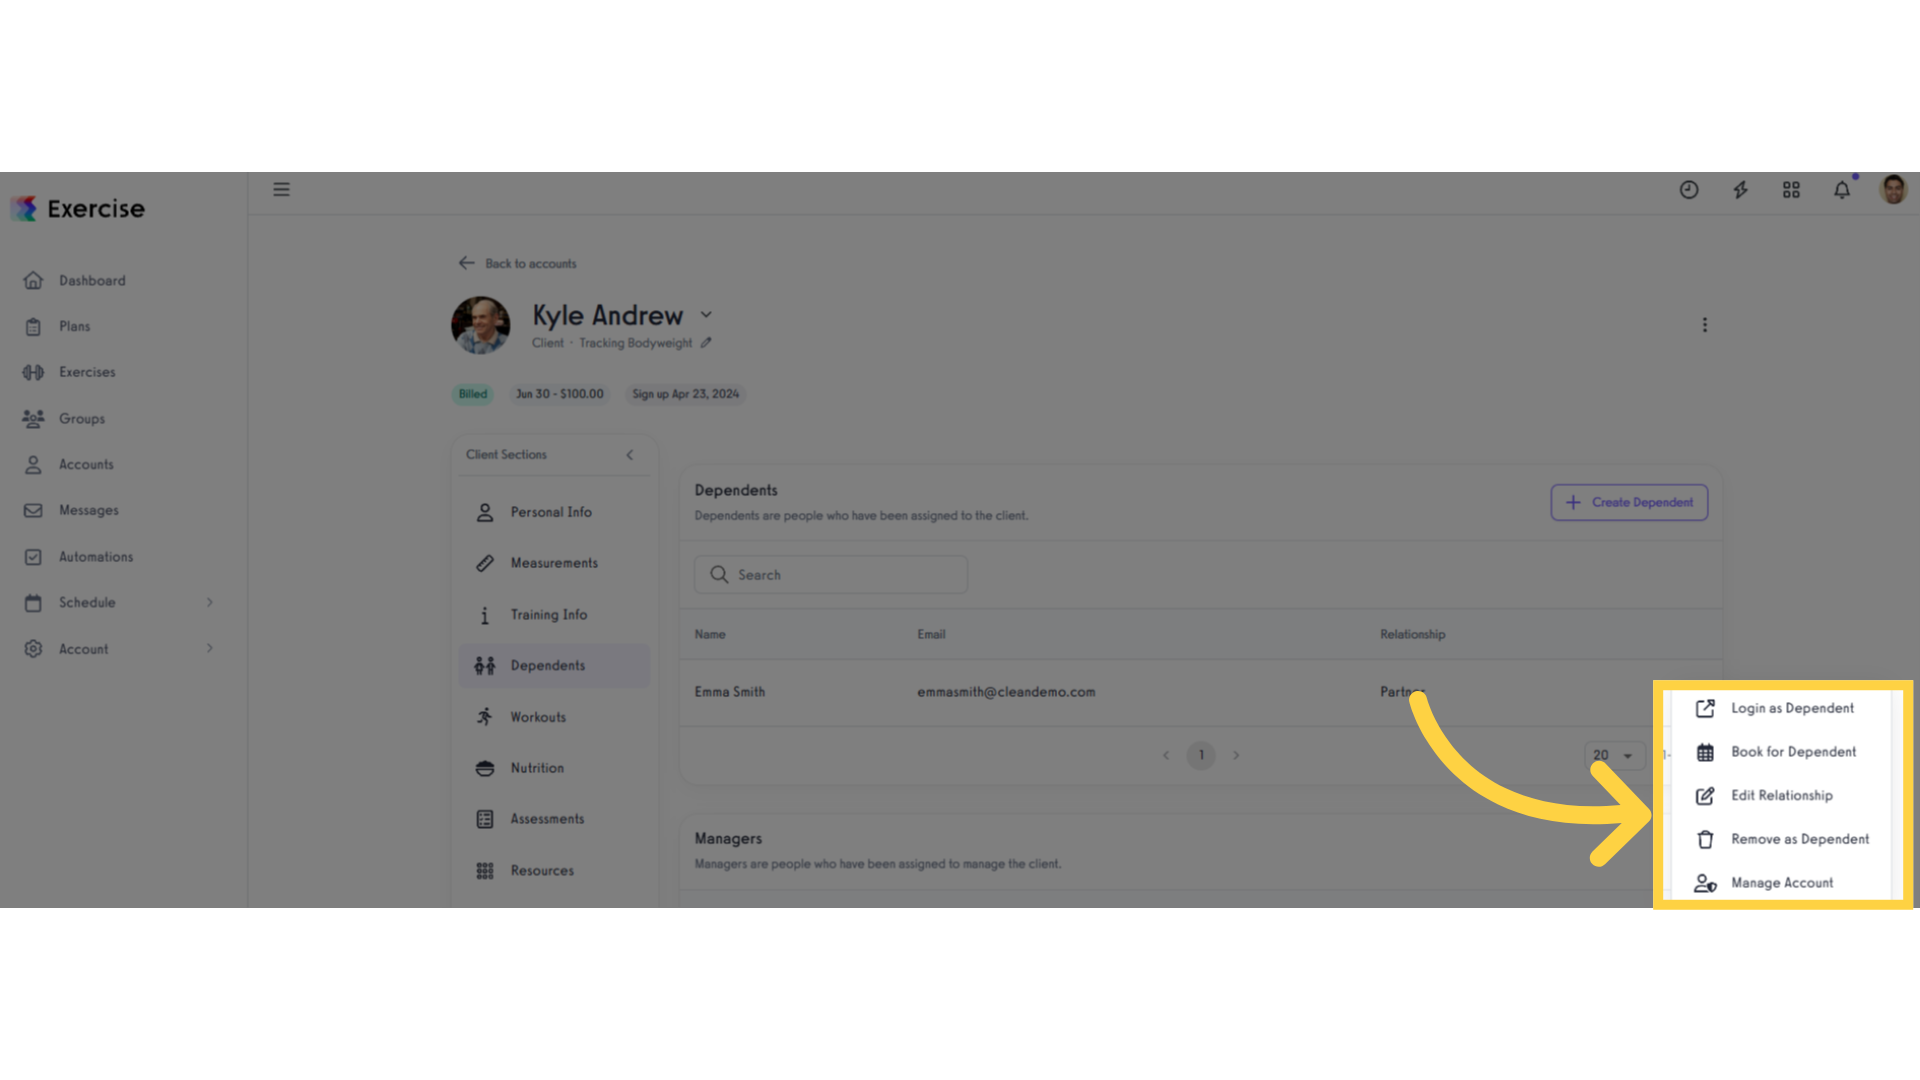
5. Icons to manage dependents.
These are the icons in which you can manage the dependents.
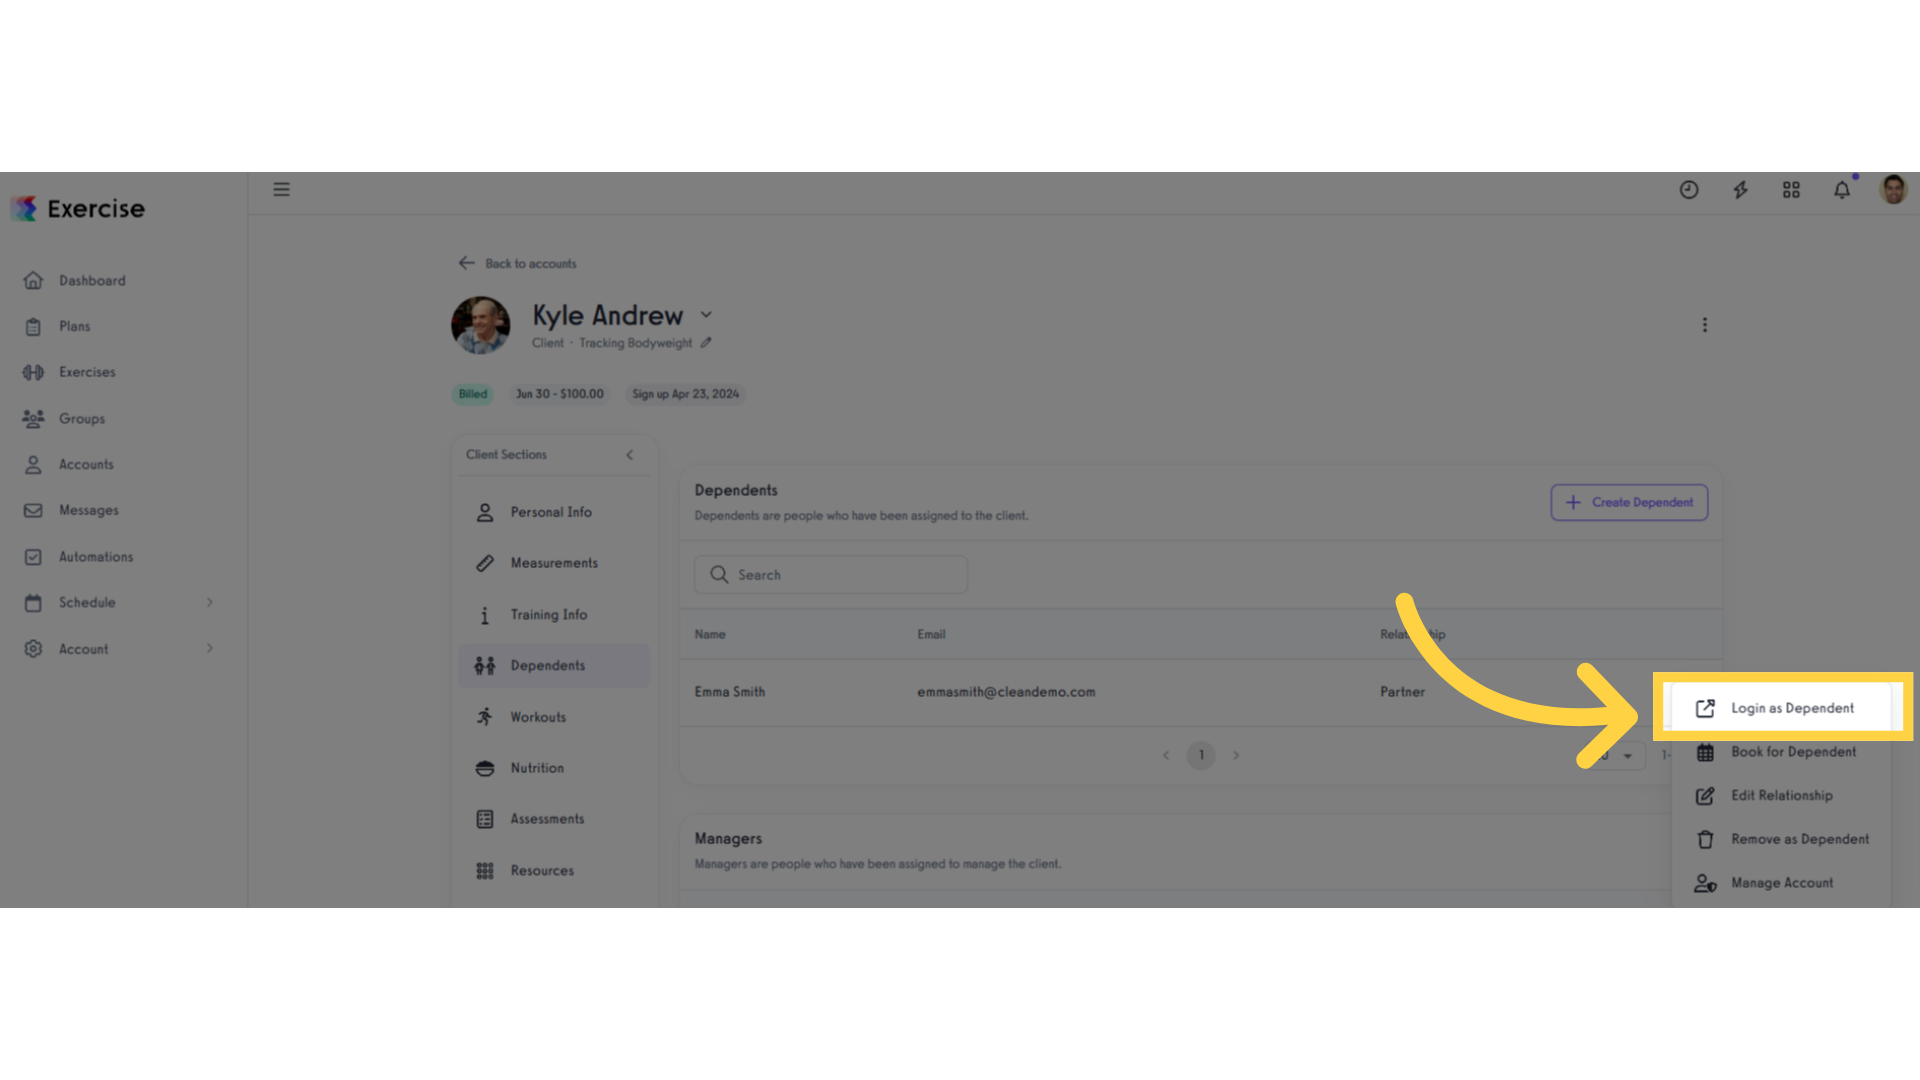
6. Click “Login as Dependent”.
Click the “Login as Dependent” button to login as dependent.
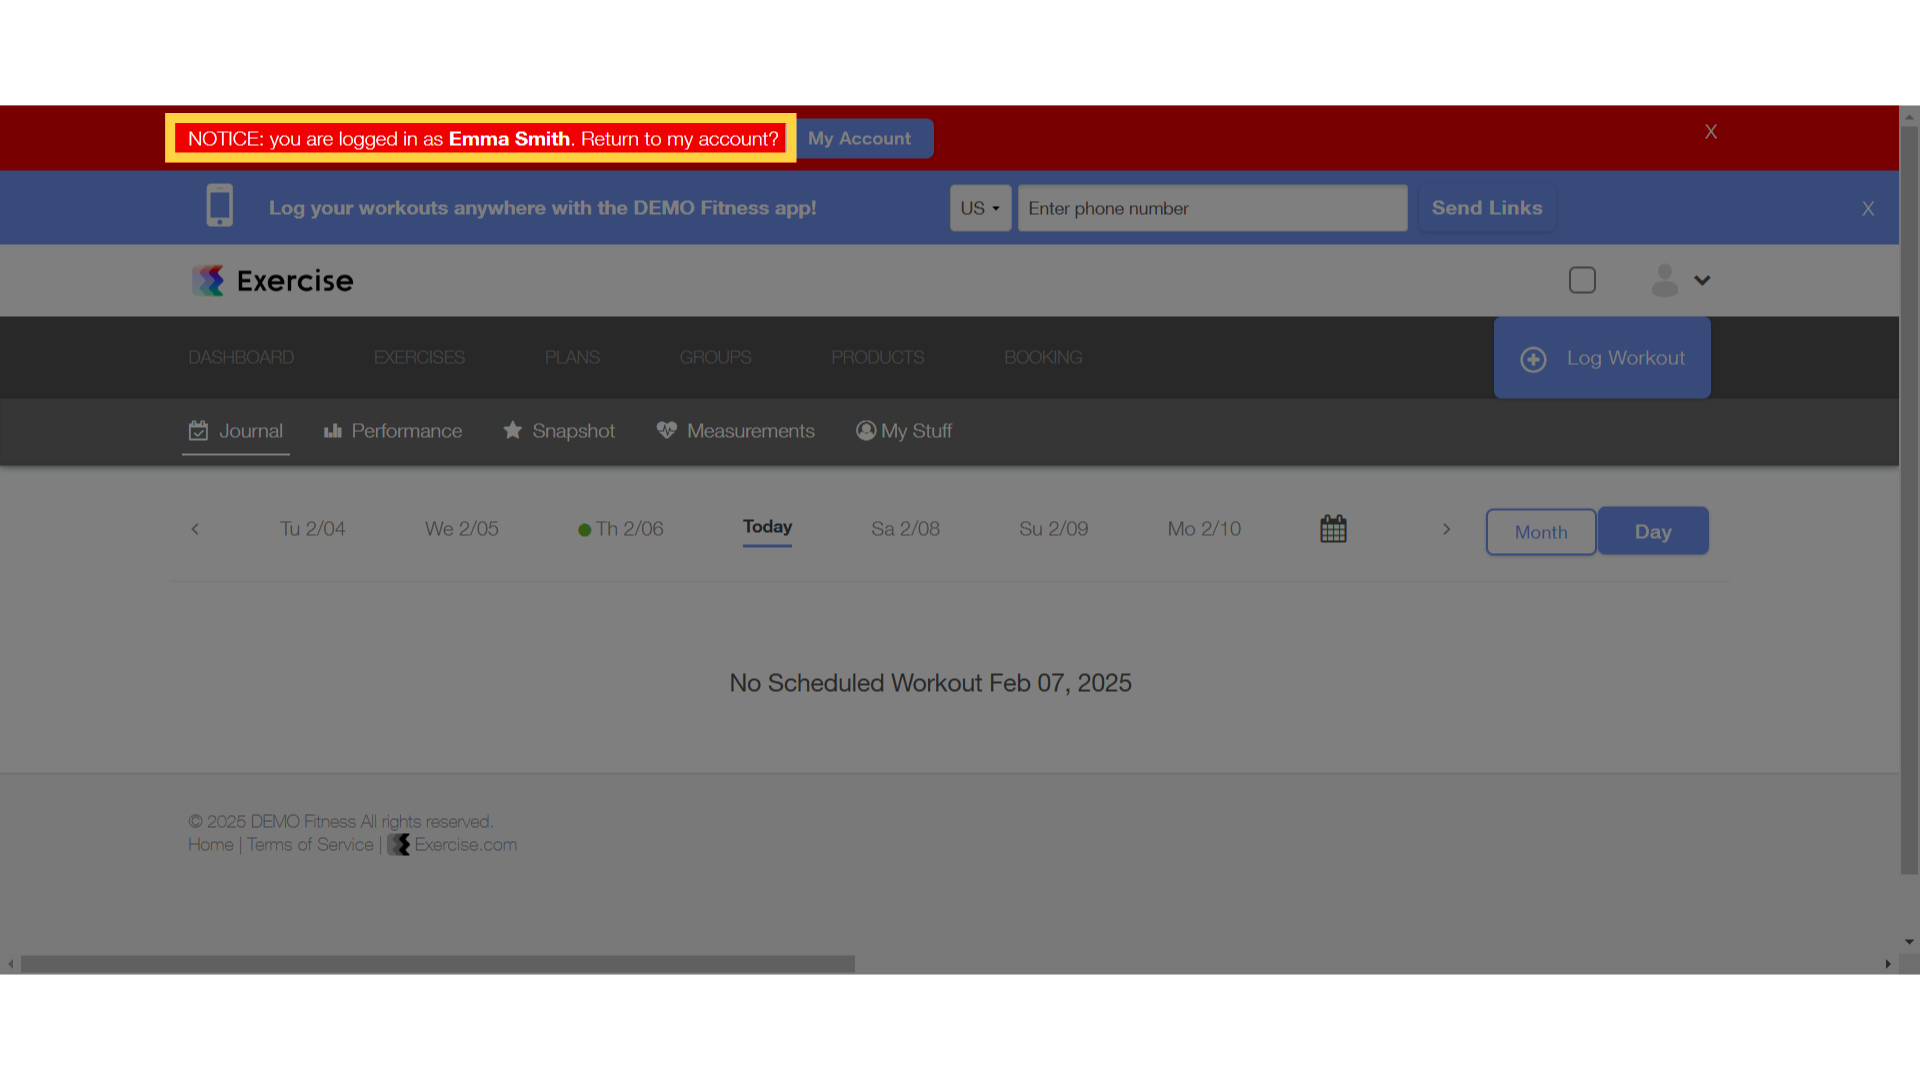
7. Logged in as dependent
When logged in as a dependent, there will be a banner on top of all the pages to show who you are logged in as.
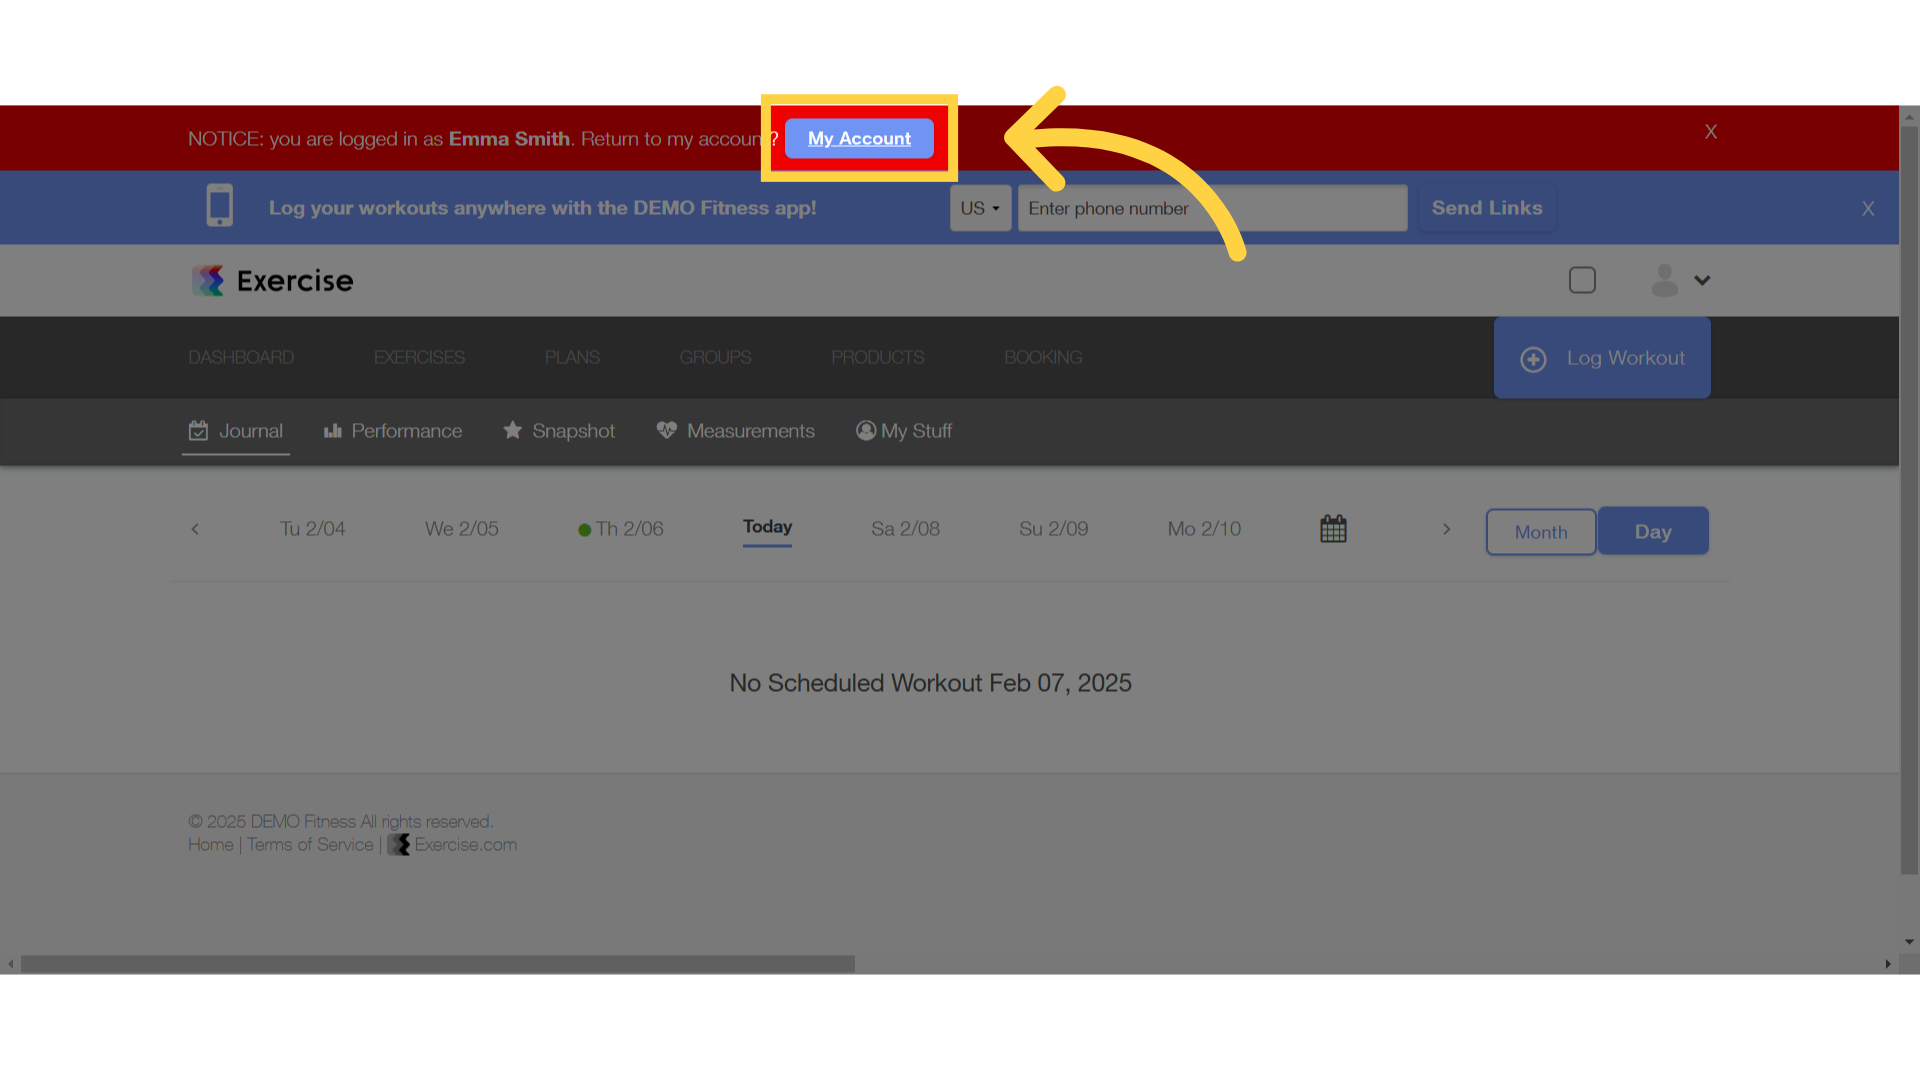
8. Click “My Account”
Click on the “My Account” button to return.
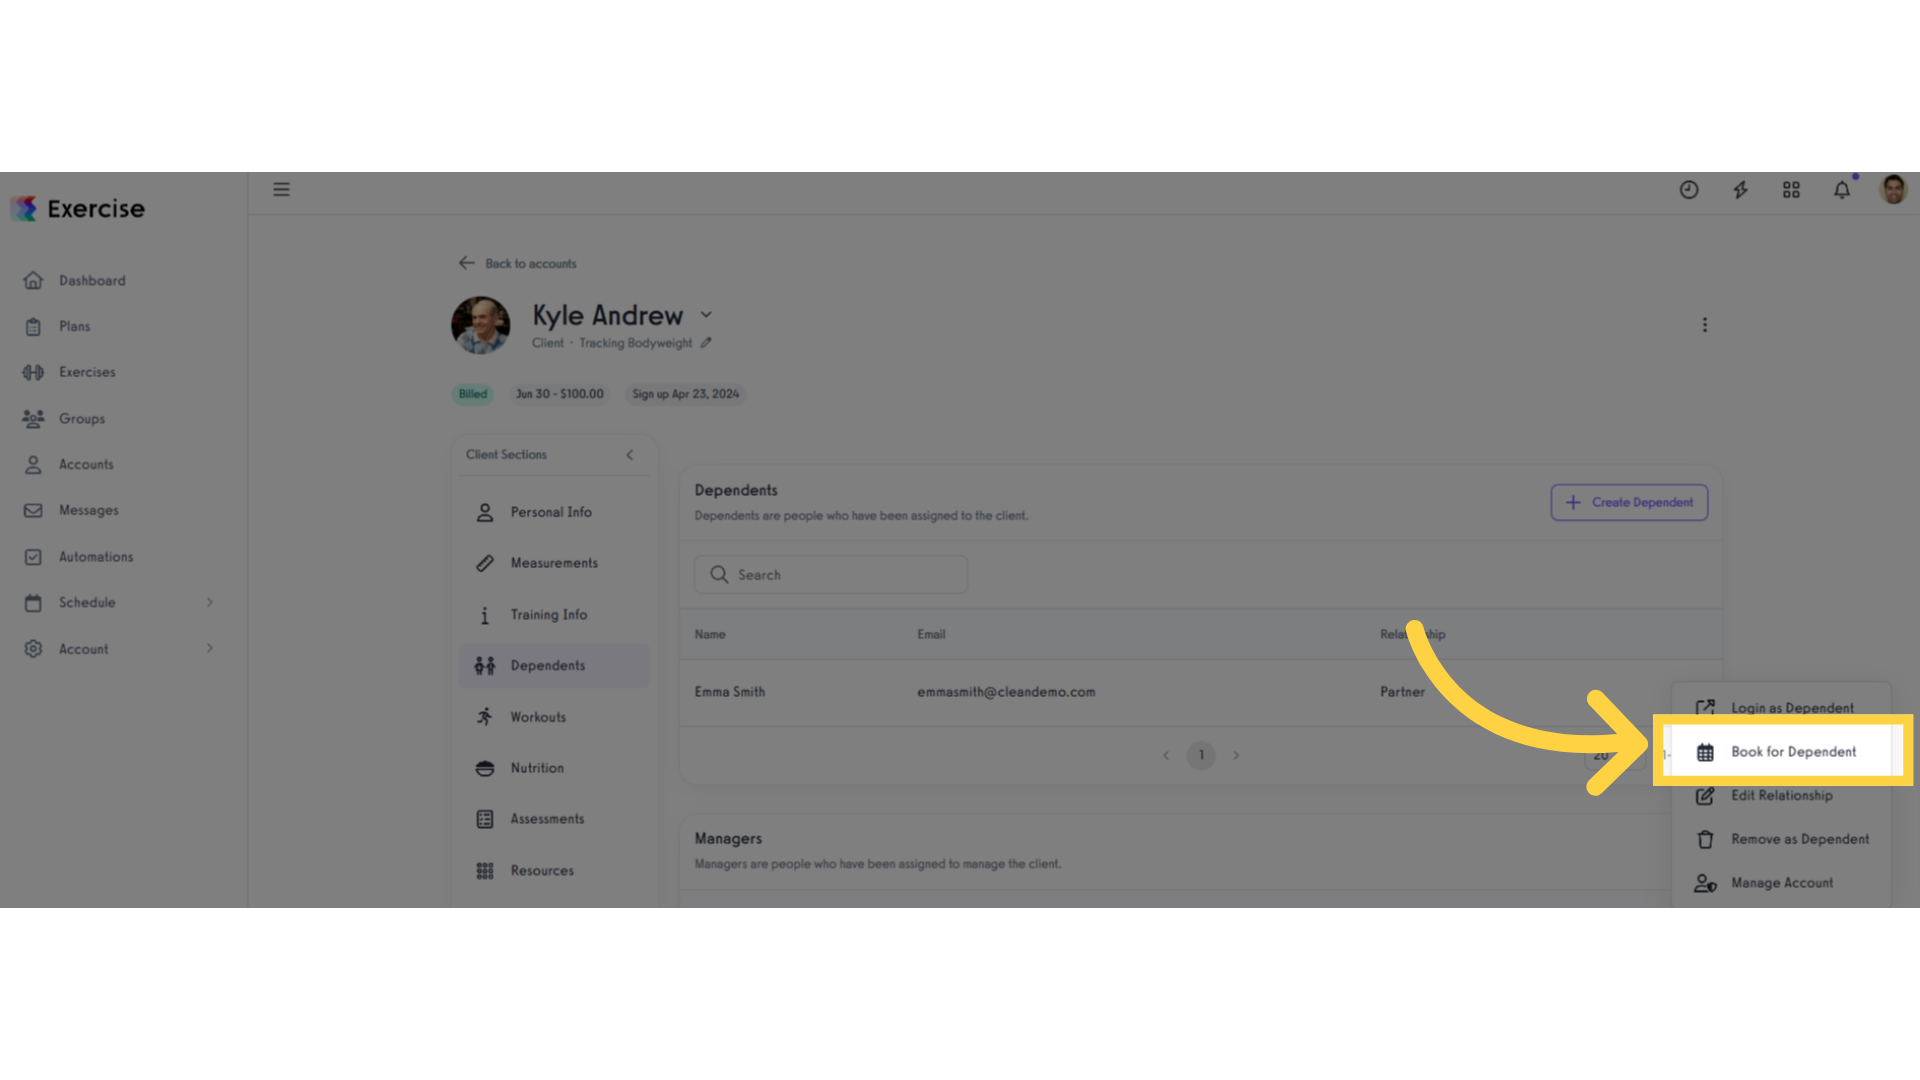
9. Click “Book for Dependent”.
When you click the “Book for Dependent” button you can book the client’s dependent.
10. Click “Edit Relationship”.
When you click the “Edit Relationship” button you can edit client’s dependent details.
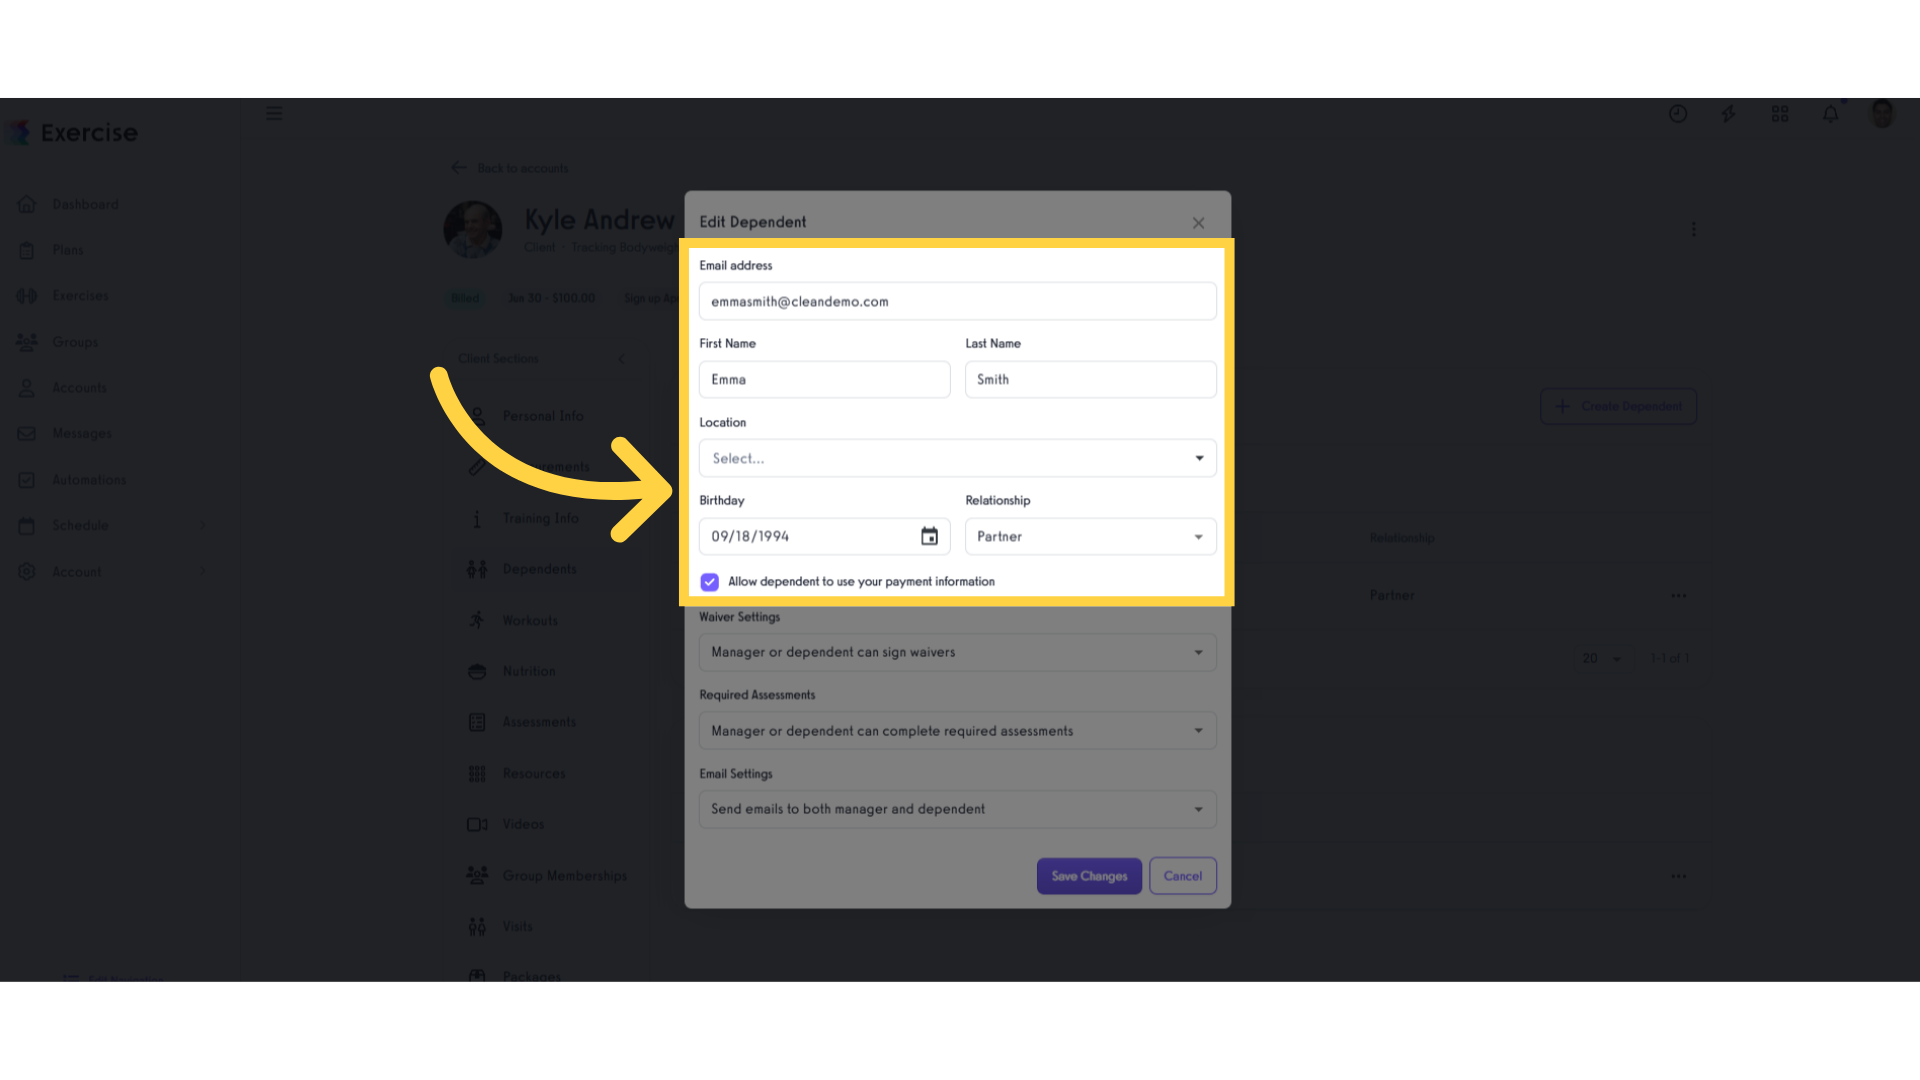
11. Edit “Dependent Information”.
You can edit the dependent information.
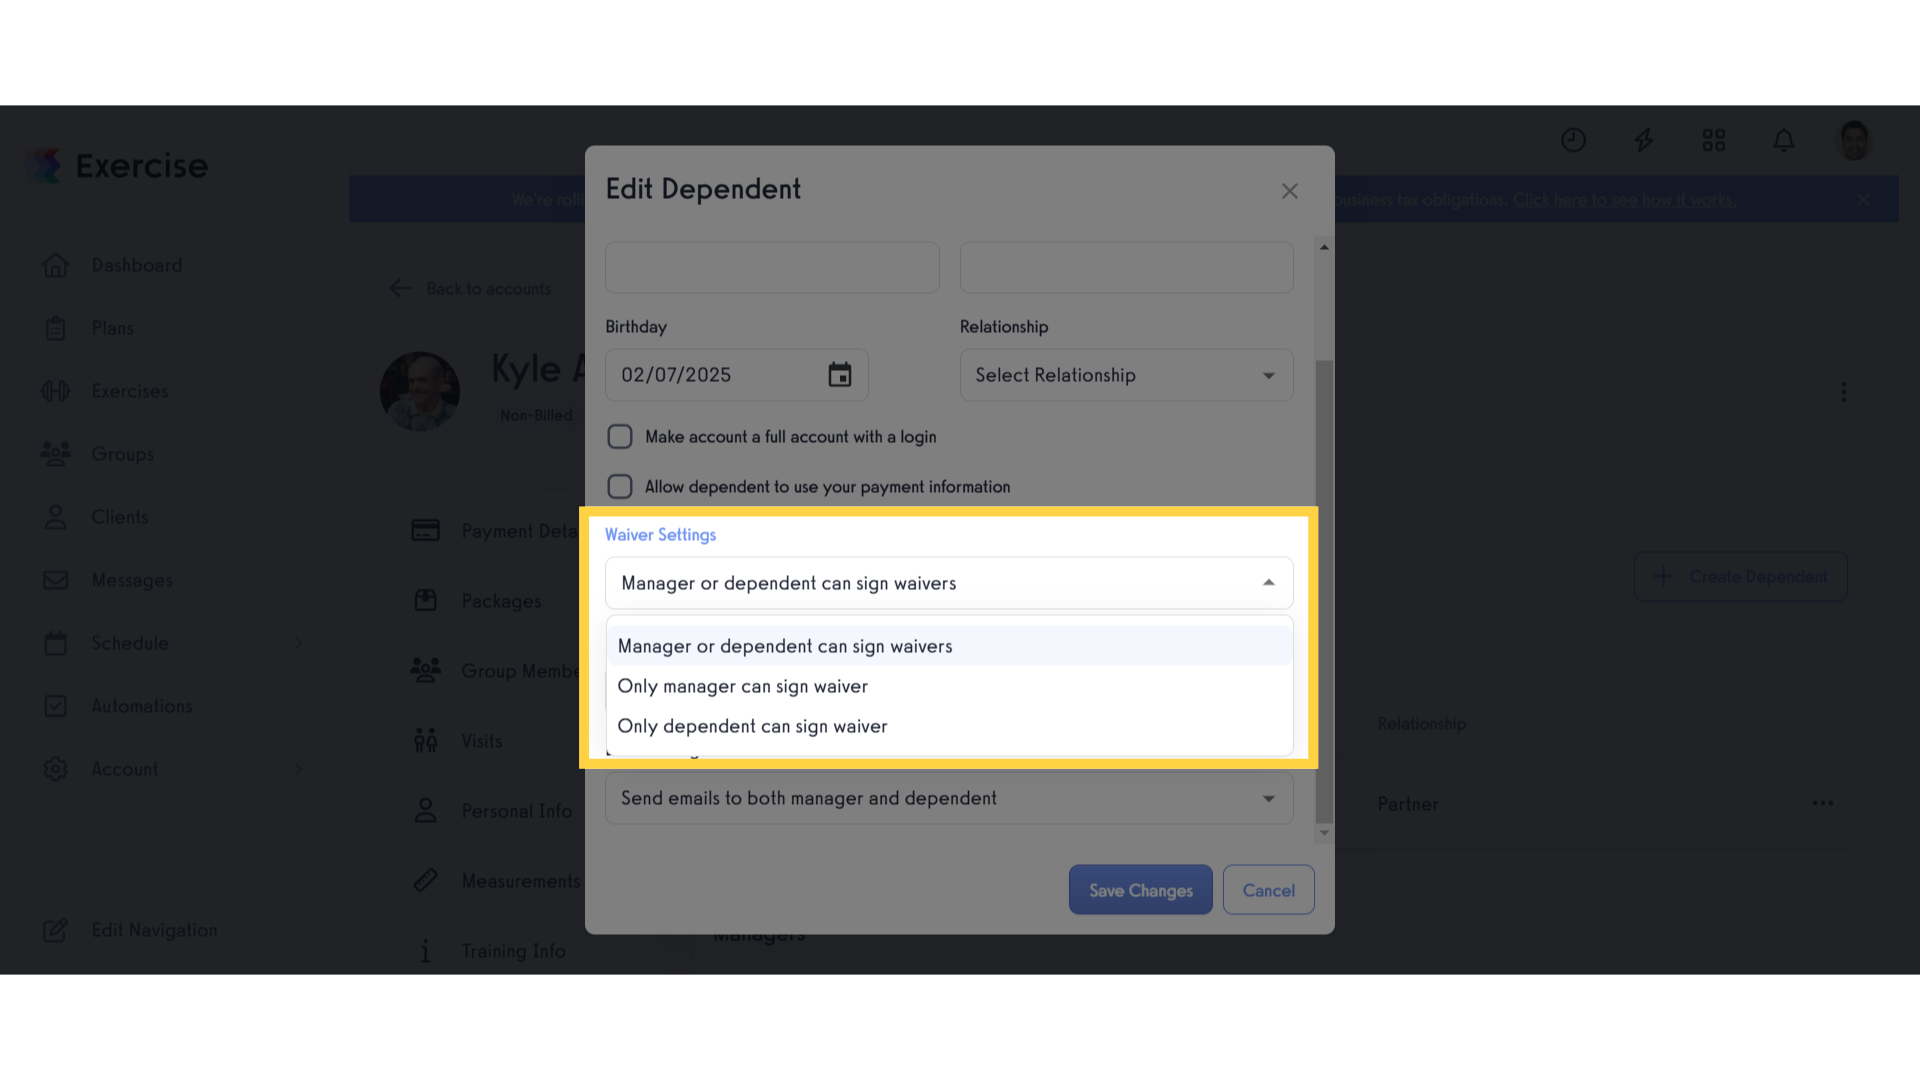
12. Select Waiver Settings.
Select an option for signing waivers.
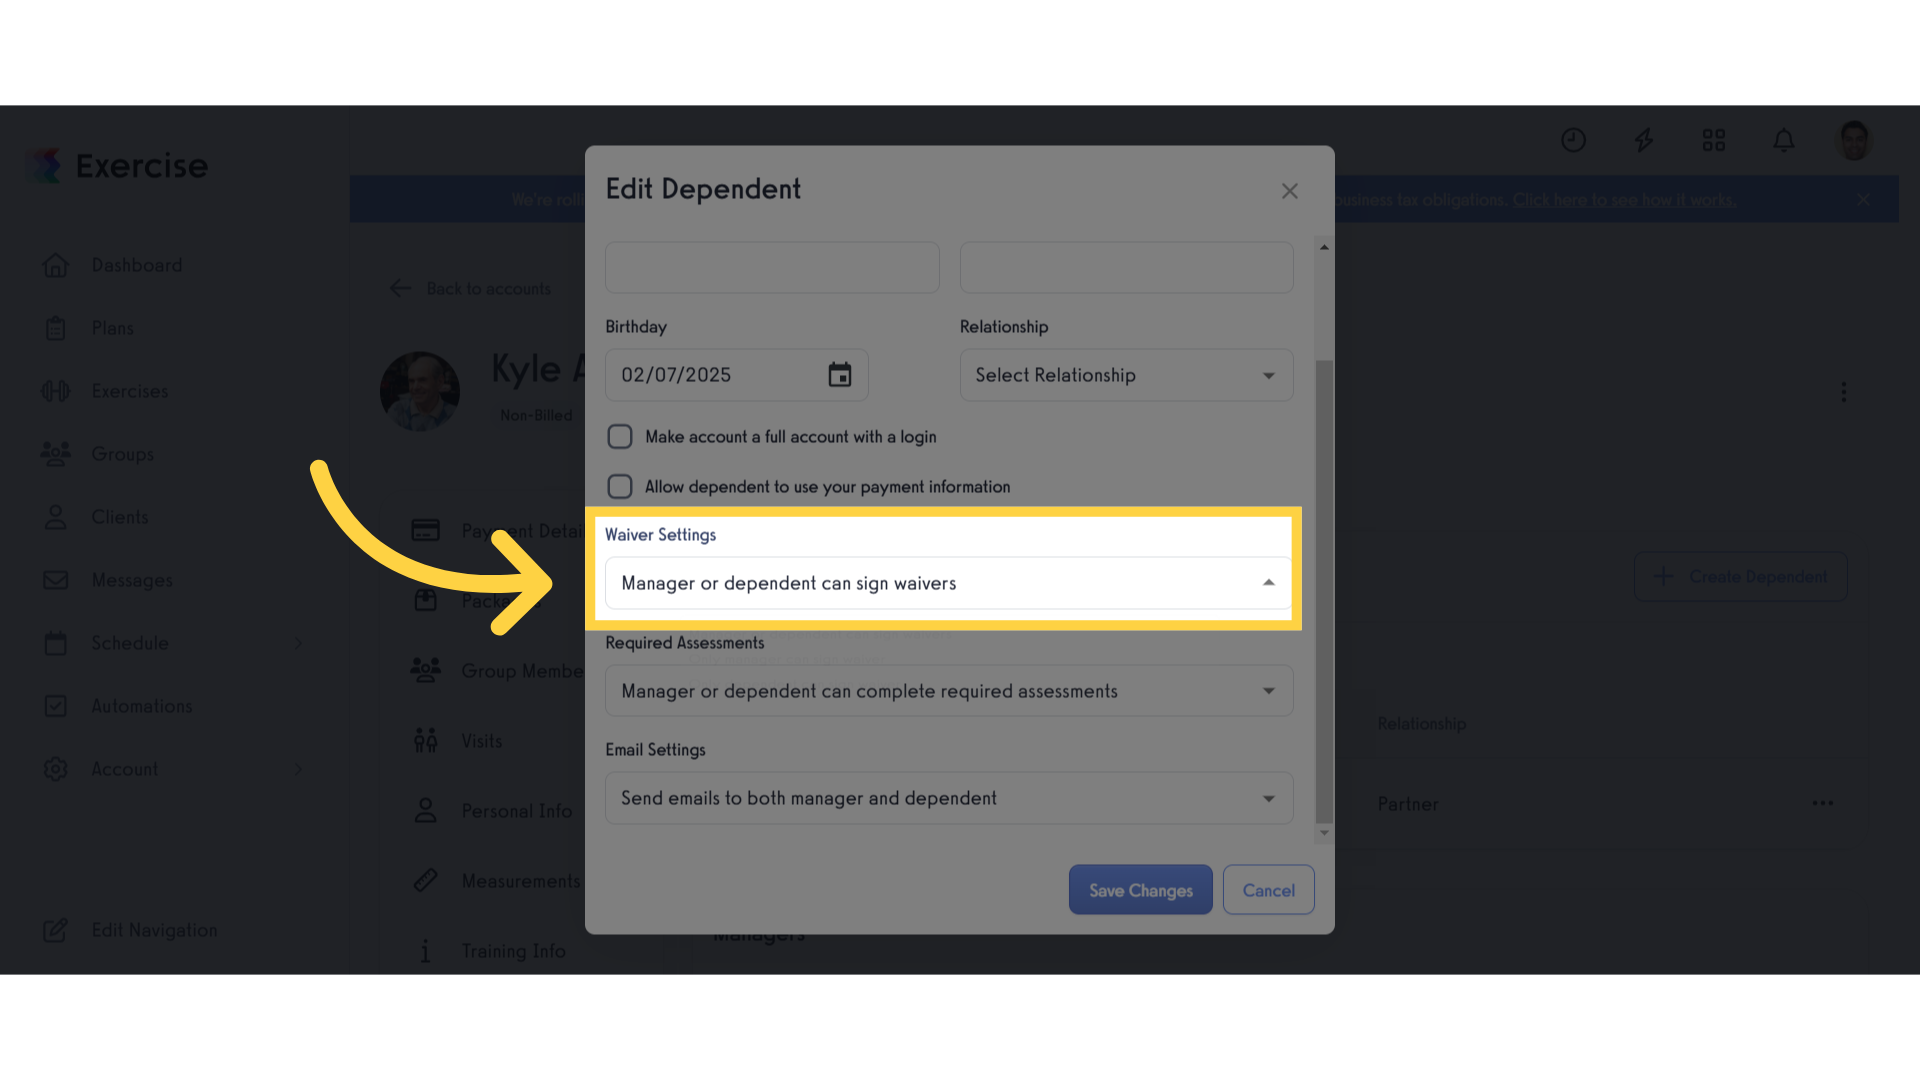
13. Waiver Settings.
The Waiver Settings allow you to choose who will be asked to sign waivers. You can allow both managers and dependents to sign, or limit signing to either managers or dependents.
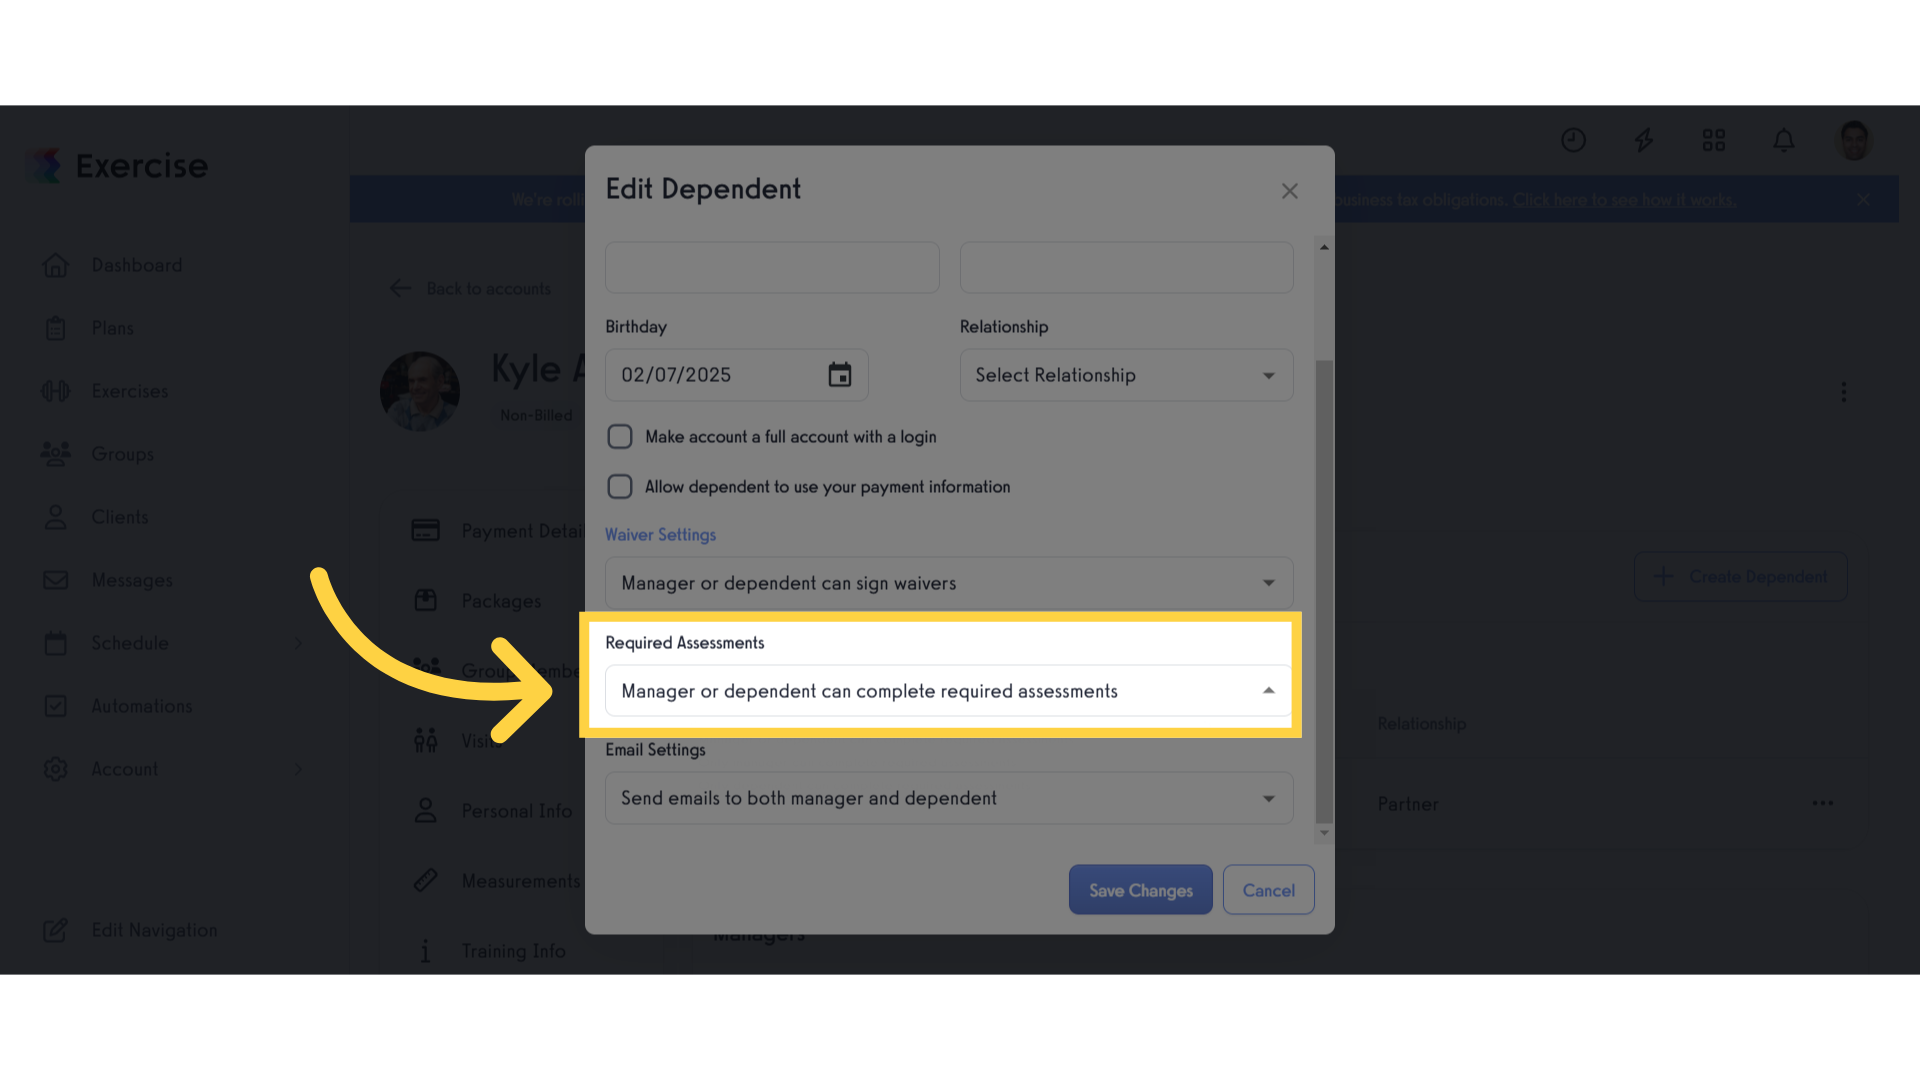
14. Select Required Assessments.
Choose an option for Required Assessments.
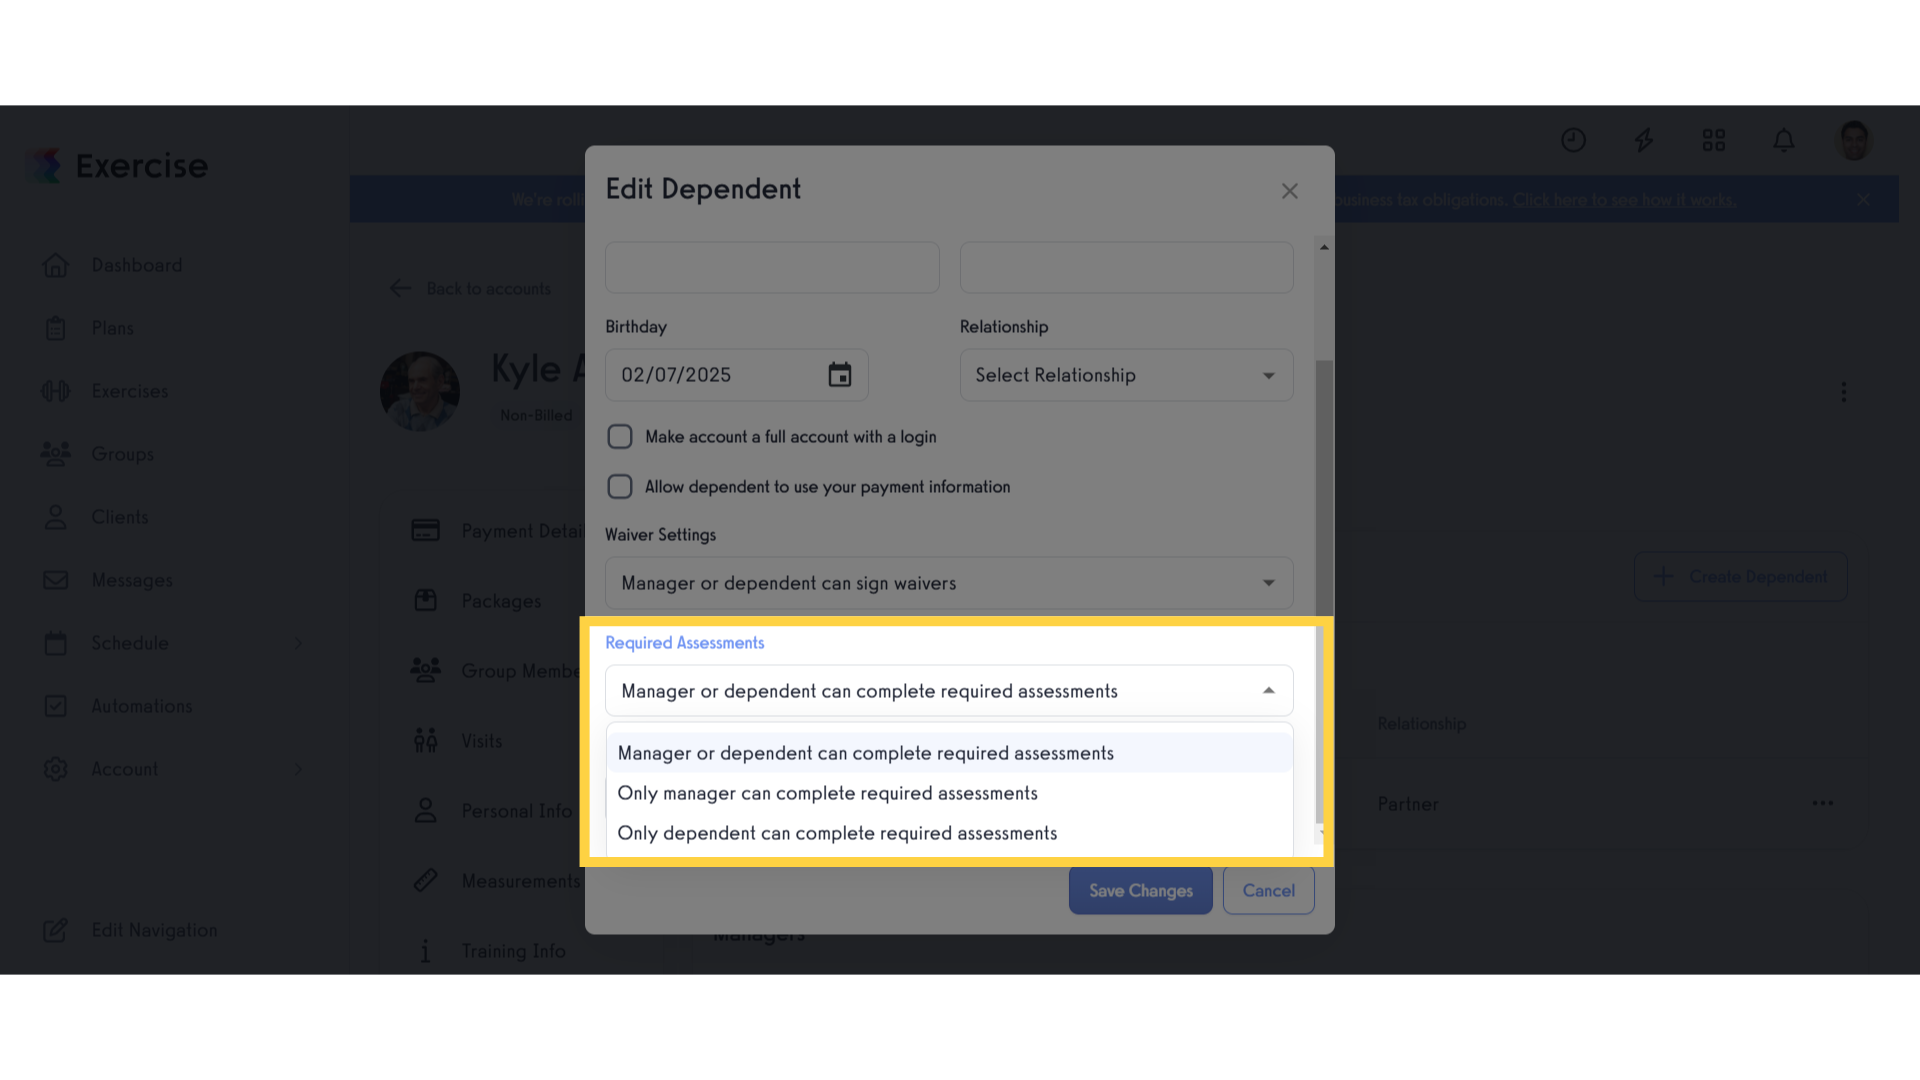
15. Required Assessments.
The required assessments allow you to choose who will be asked to complete required assessments. You can allow both managers and dependents to complete, or limit either managers or dependents.
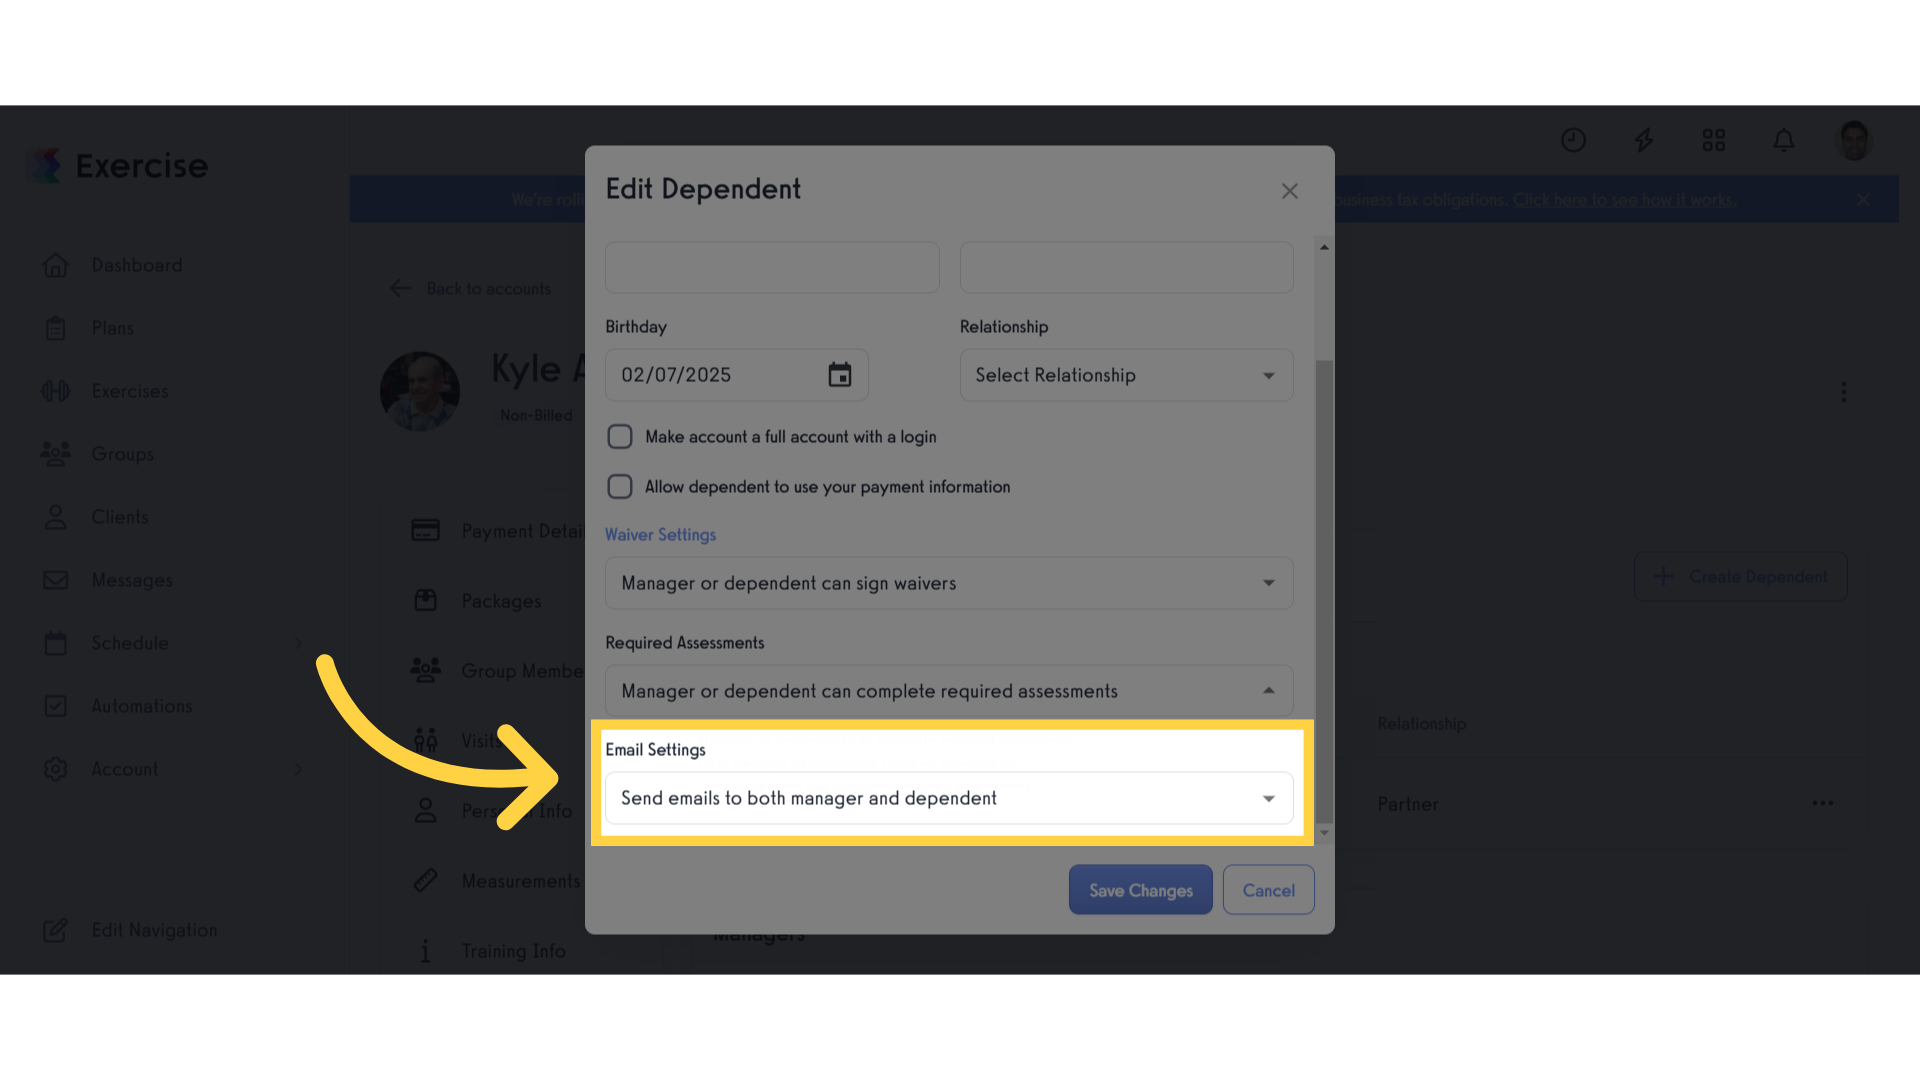
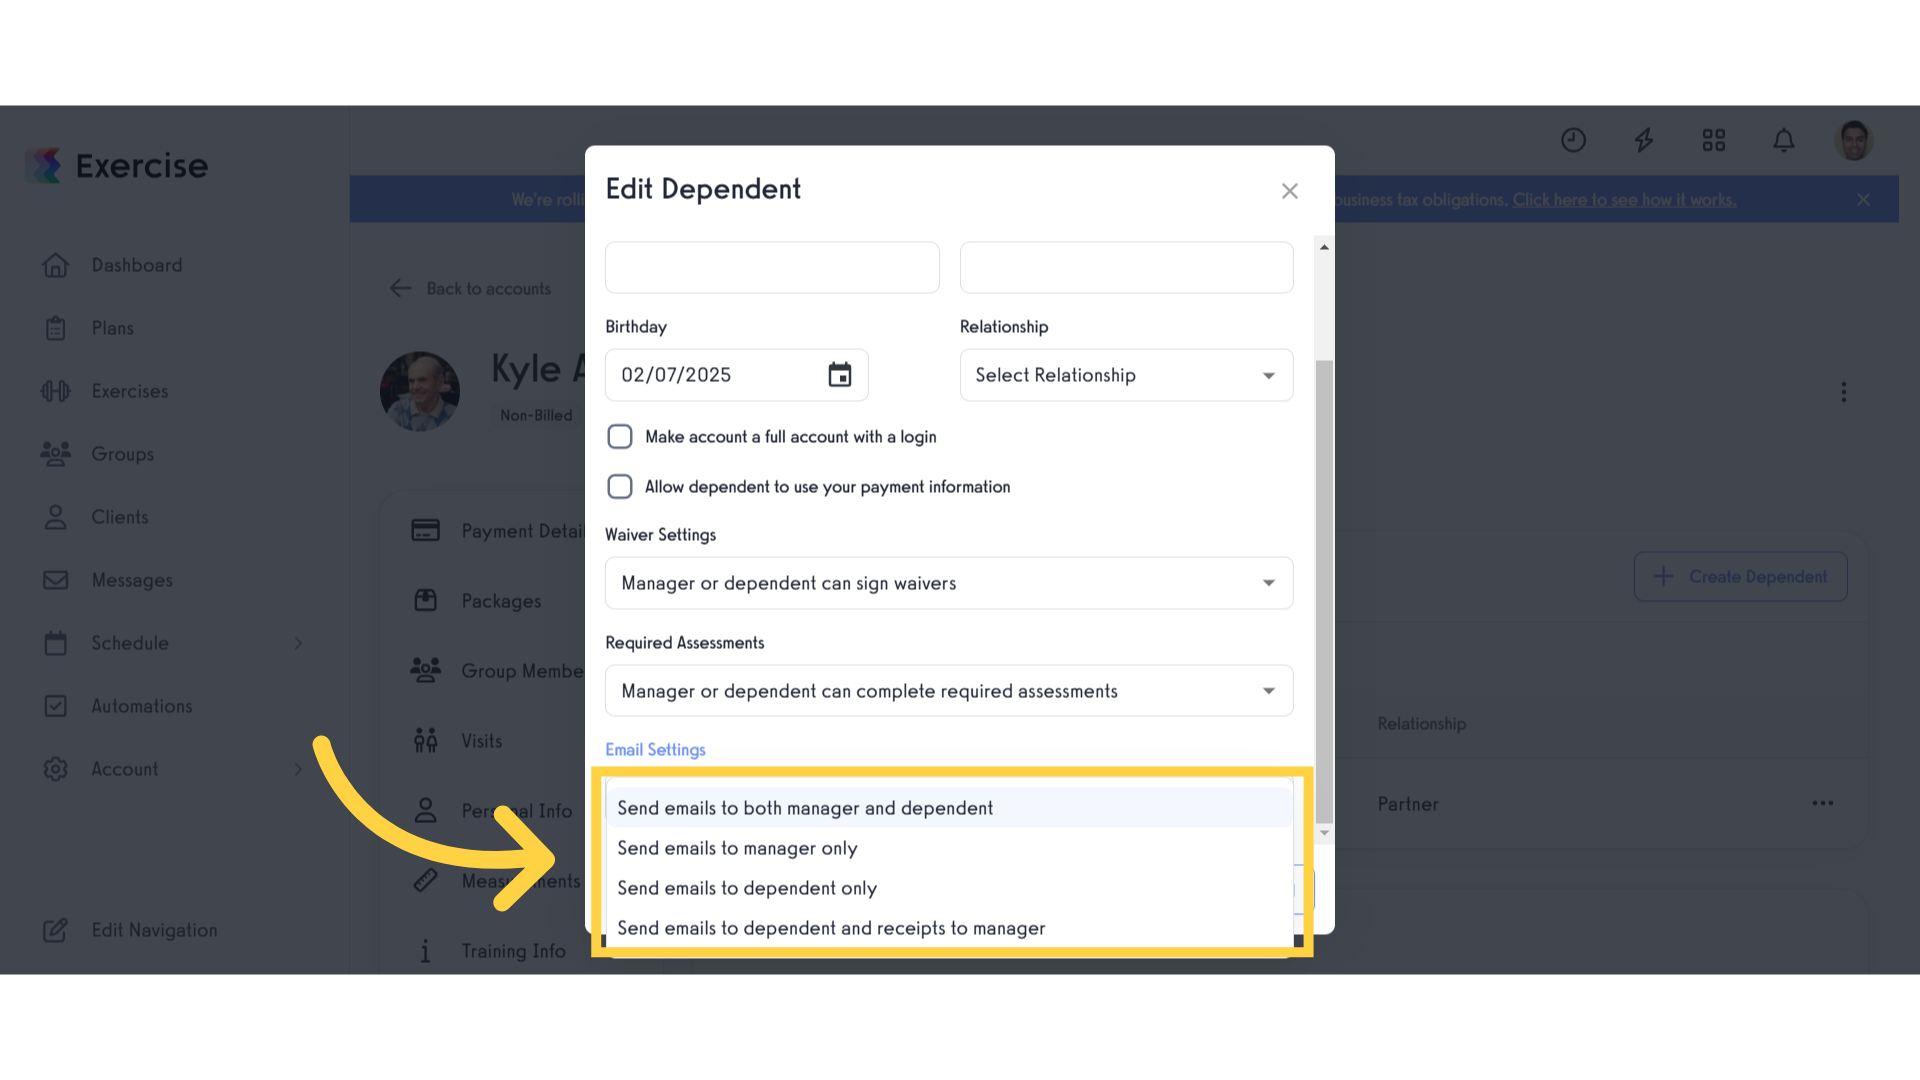
16. Select Email Settings.
Select an option for Email Settings.
17. Email Settings.
The email settings allow you to choose who should receive the email. You can allow both managers and dependents to receive, or limit either managers or dependents, and allow dependents to receive the email and receipts to manager.
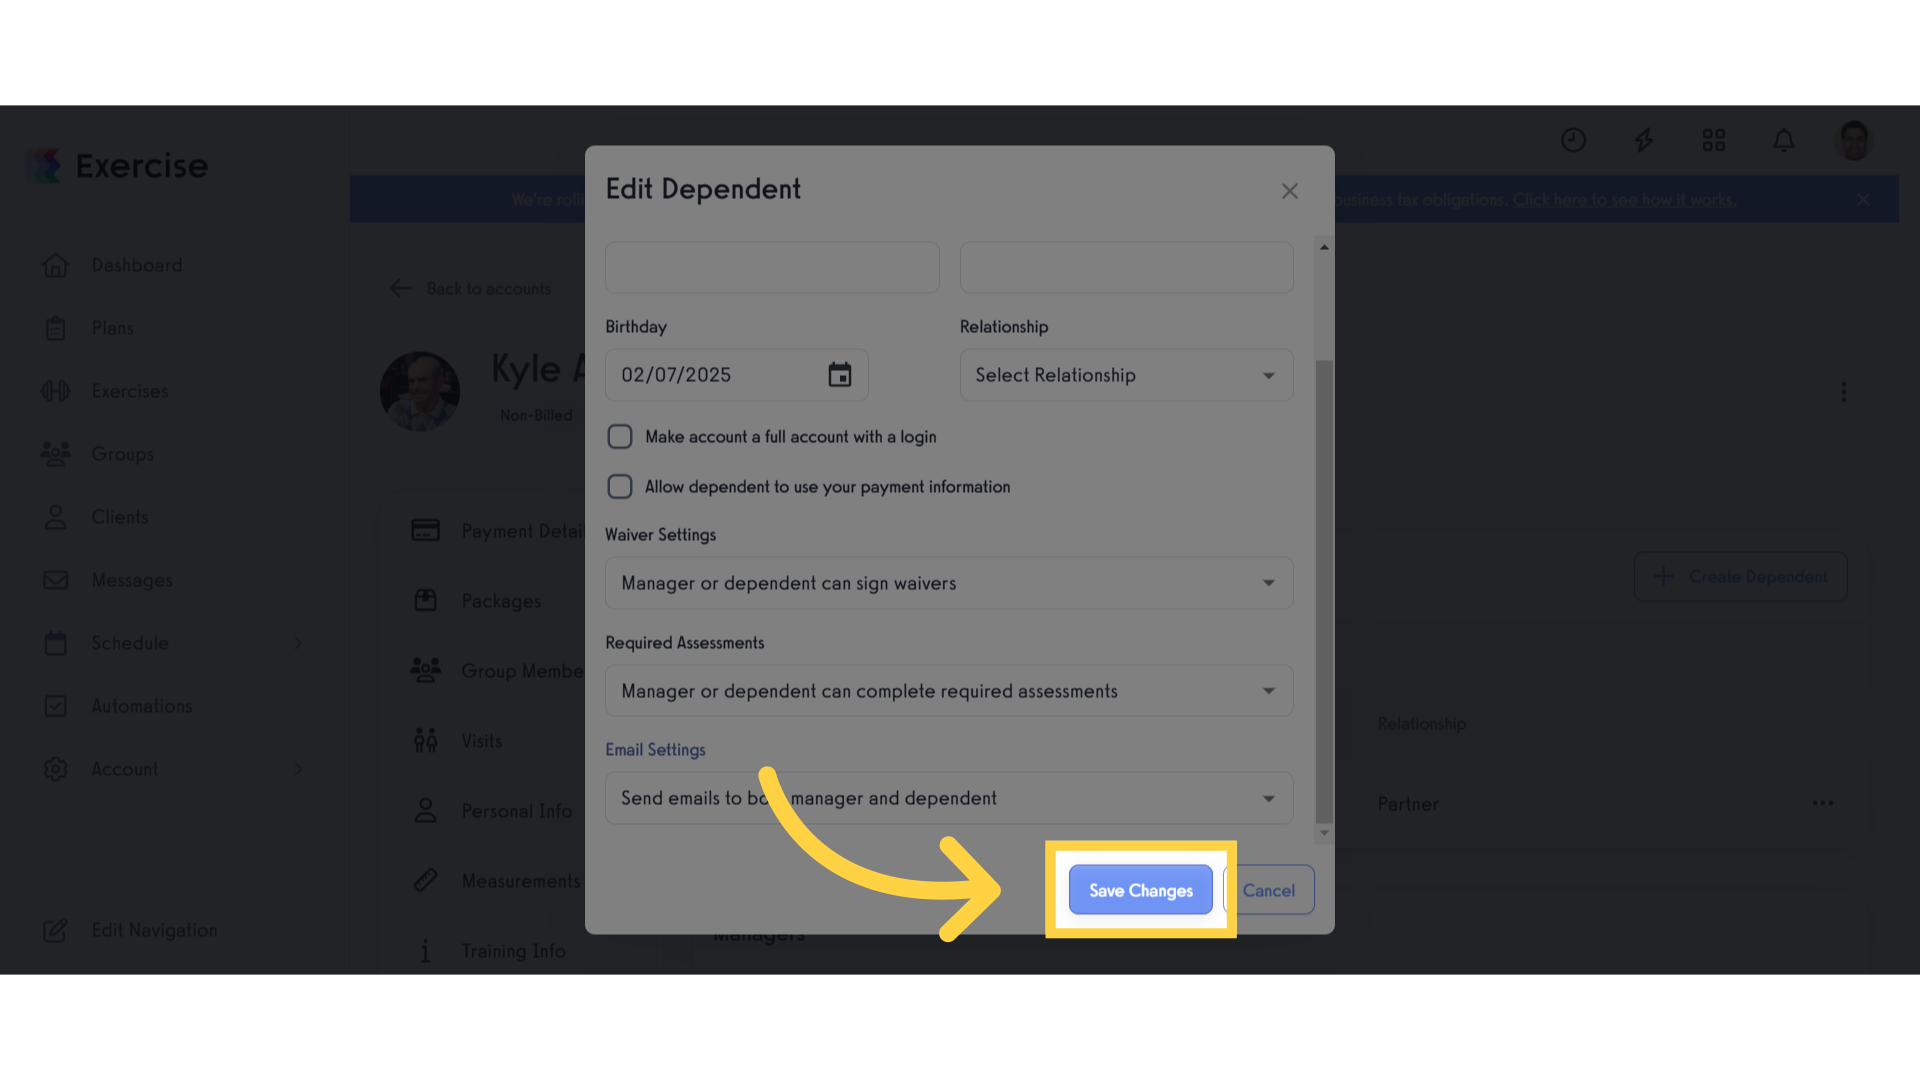
18. Click “Save Changes”.
Save the modifications made.
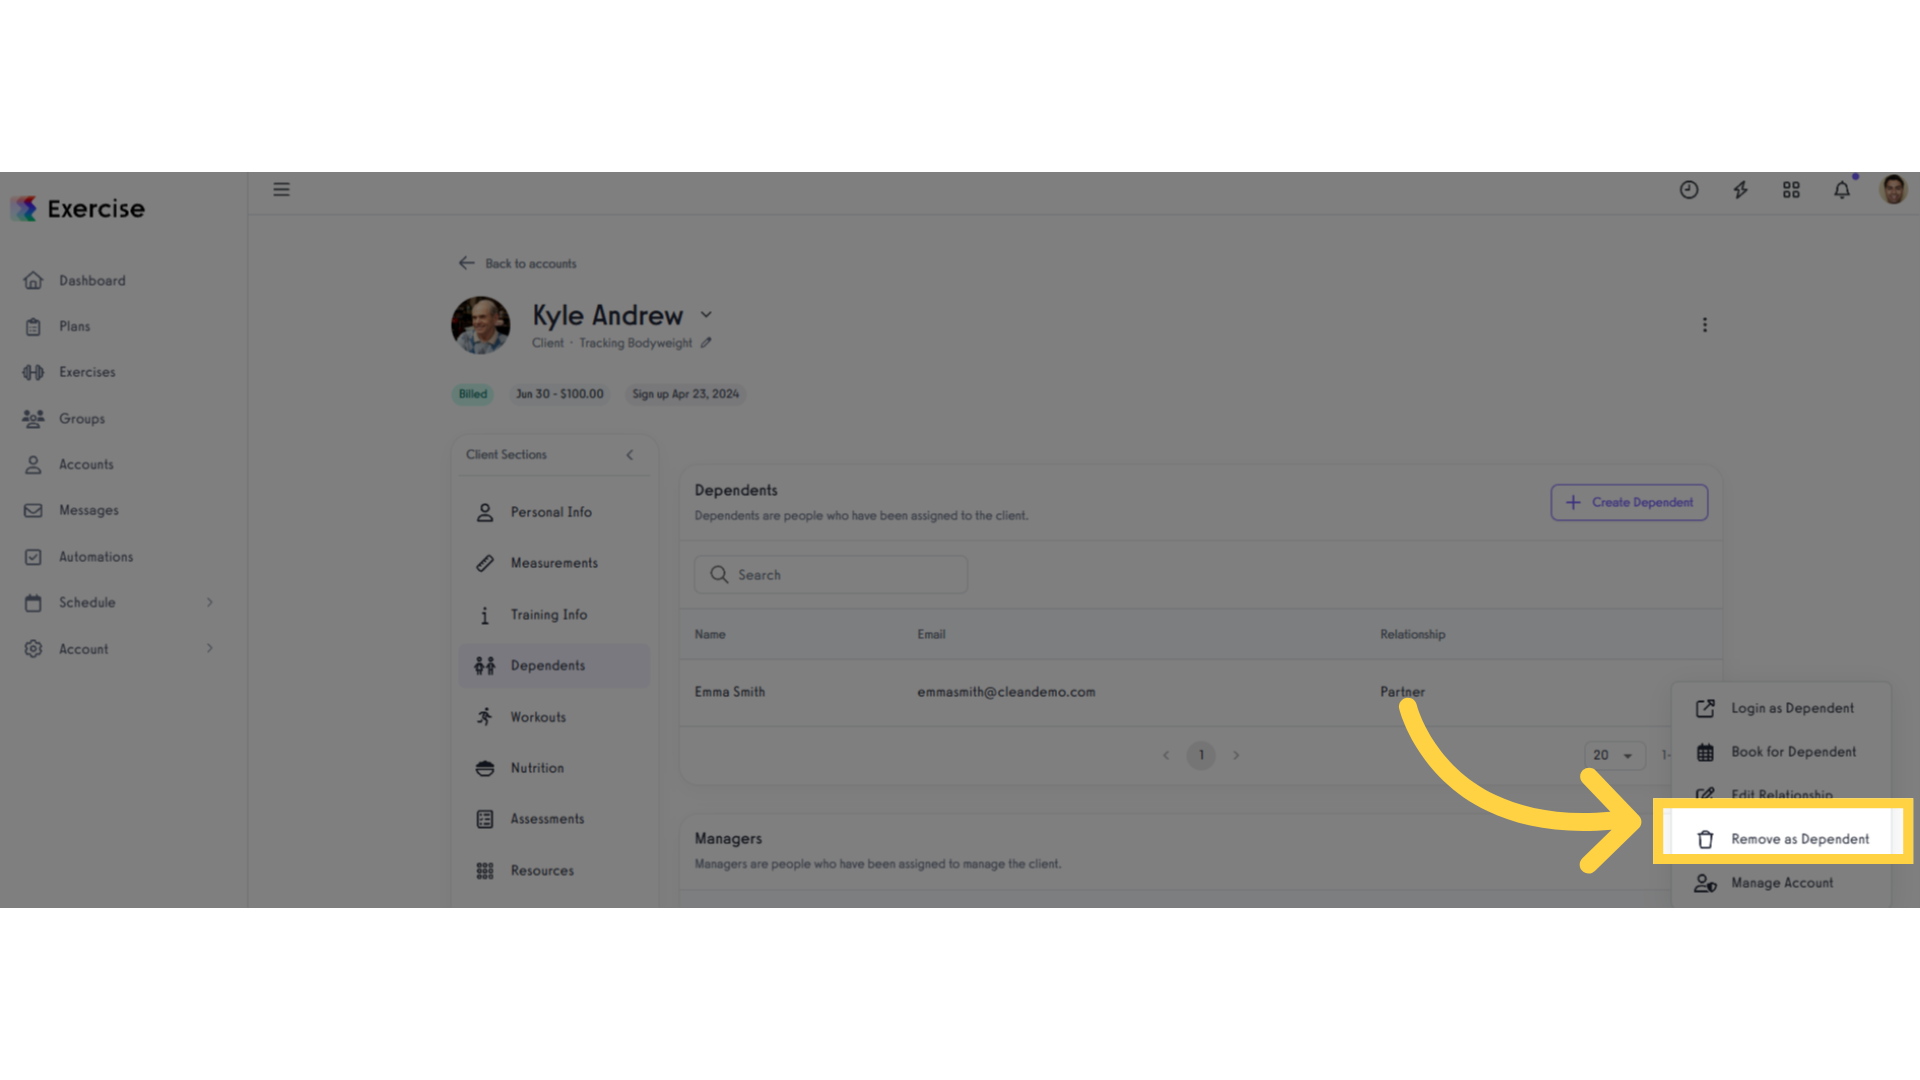
19. Click “Remove as Dependent”.
When you click the “Remove as Dependent” you can delete the client’s dependent.
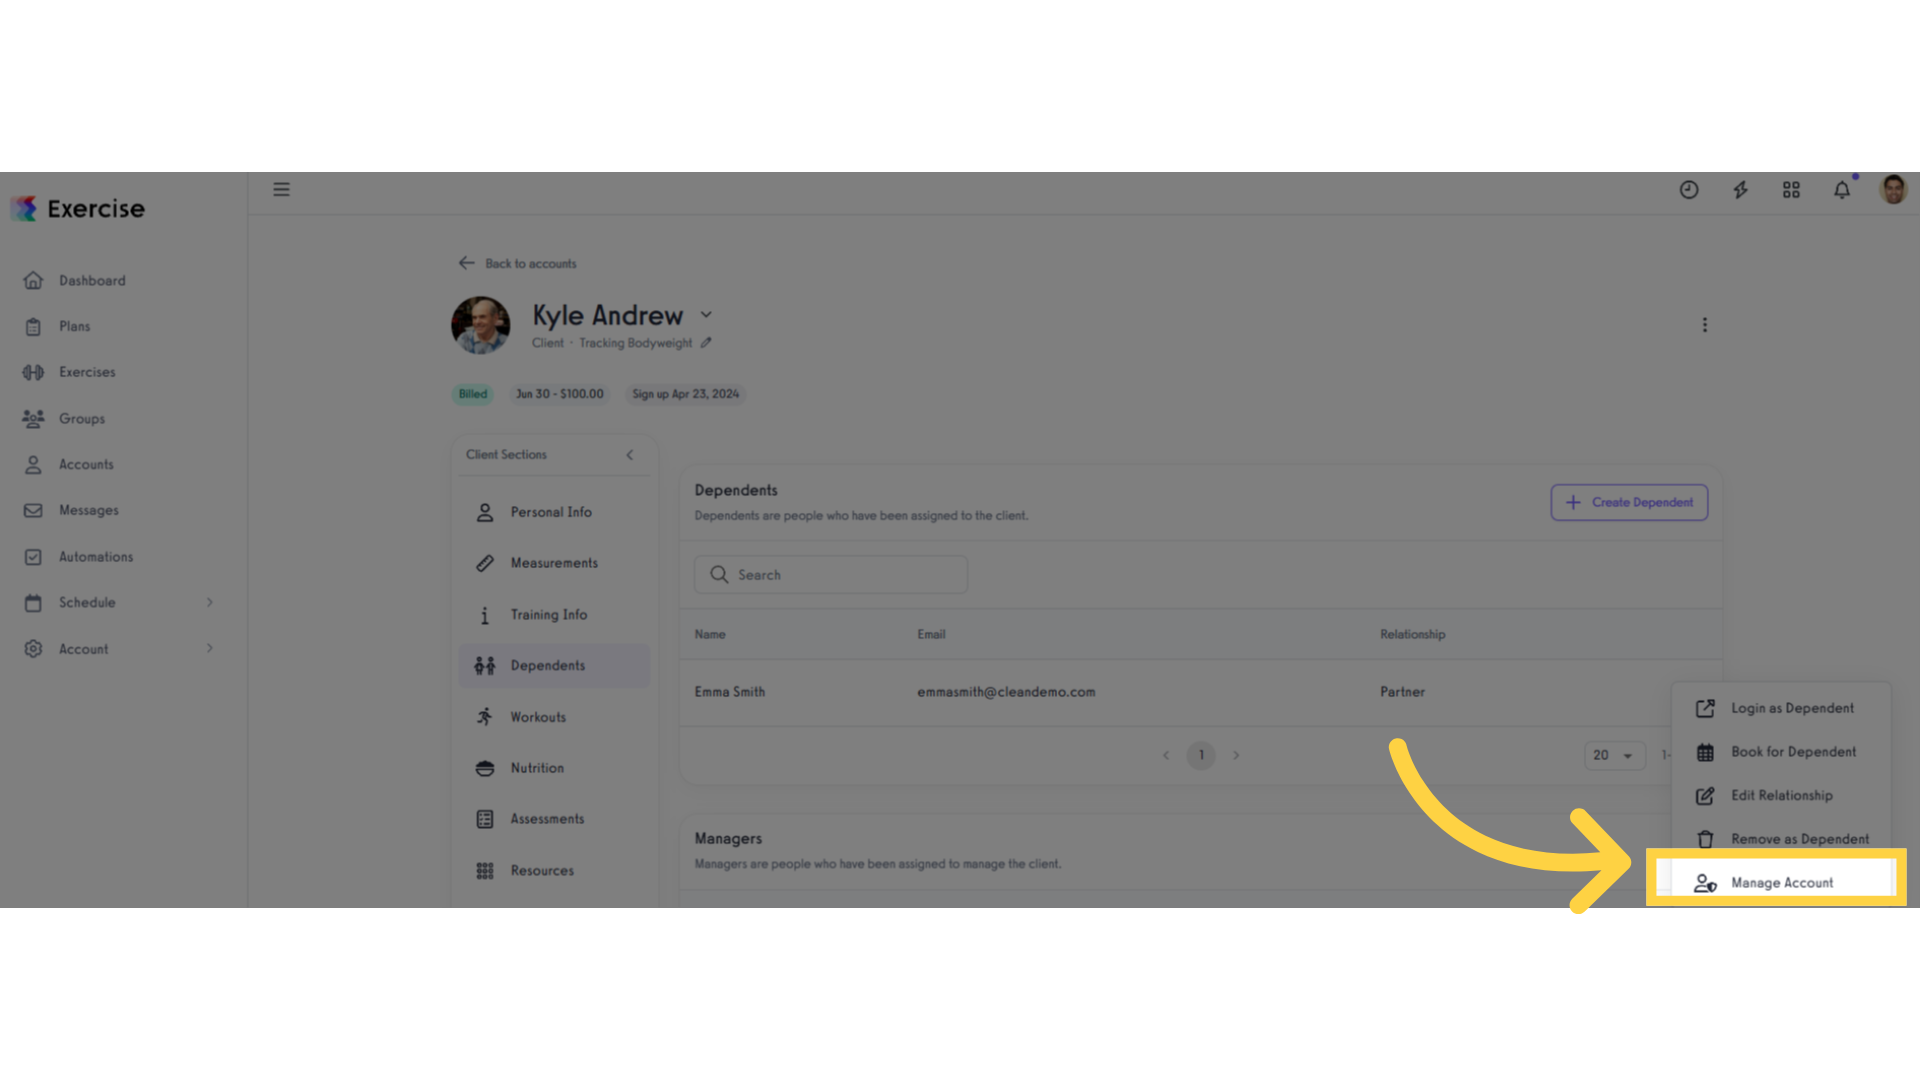
20. Click “Manage Account”.
When you click the “Manage Account” button you can manage the client’s dependent.
The guide covered steps to manage client dependents effectively, including editing profiles, setting permissions, and enabling features like assessments and email notifications. By following these instructions, you can manage client dependents quickly and effectively.


