How to Set Up Required Fields for Staff Creating New Client Accounts?
Introducing a feature that allows you to set required fields when creating client accounts.
1. Click “Account”.
Access the account settings to initiate the customization process for required fields.

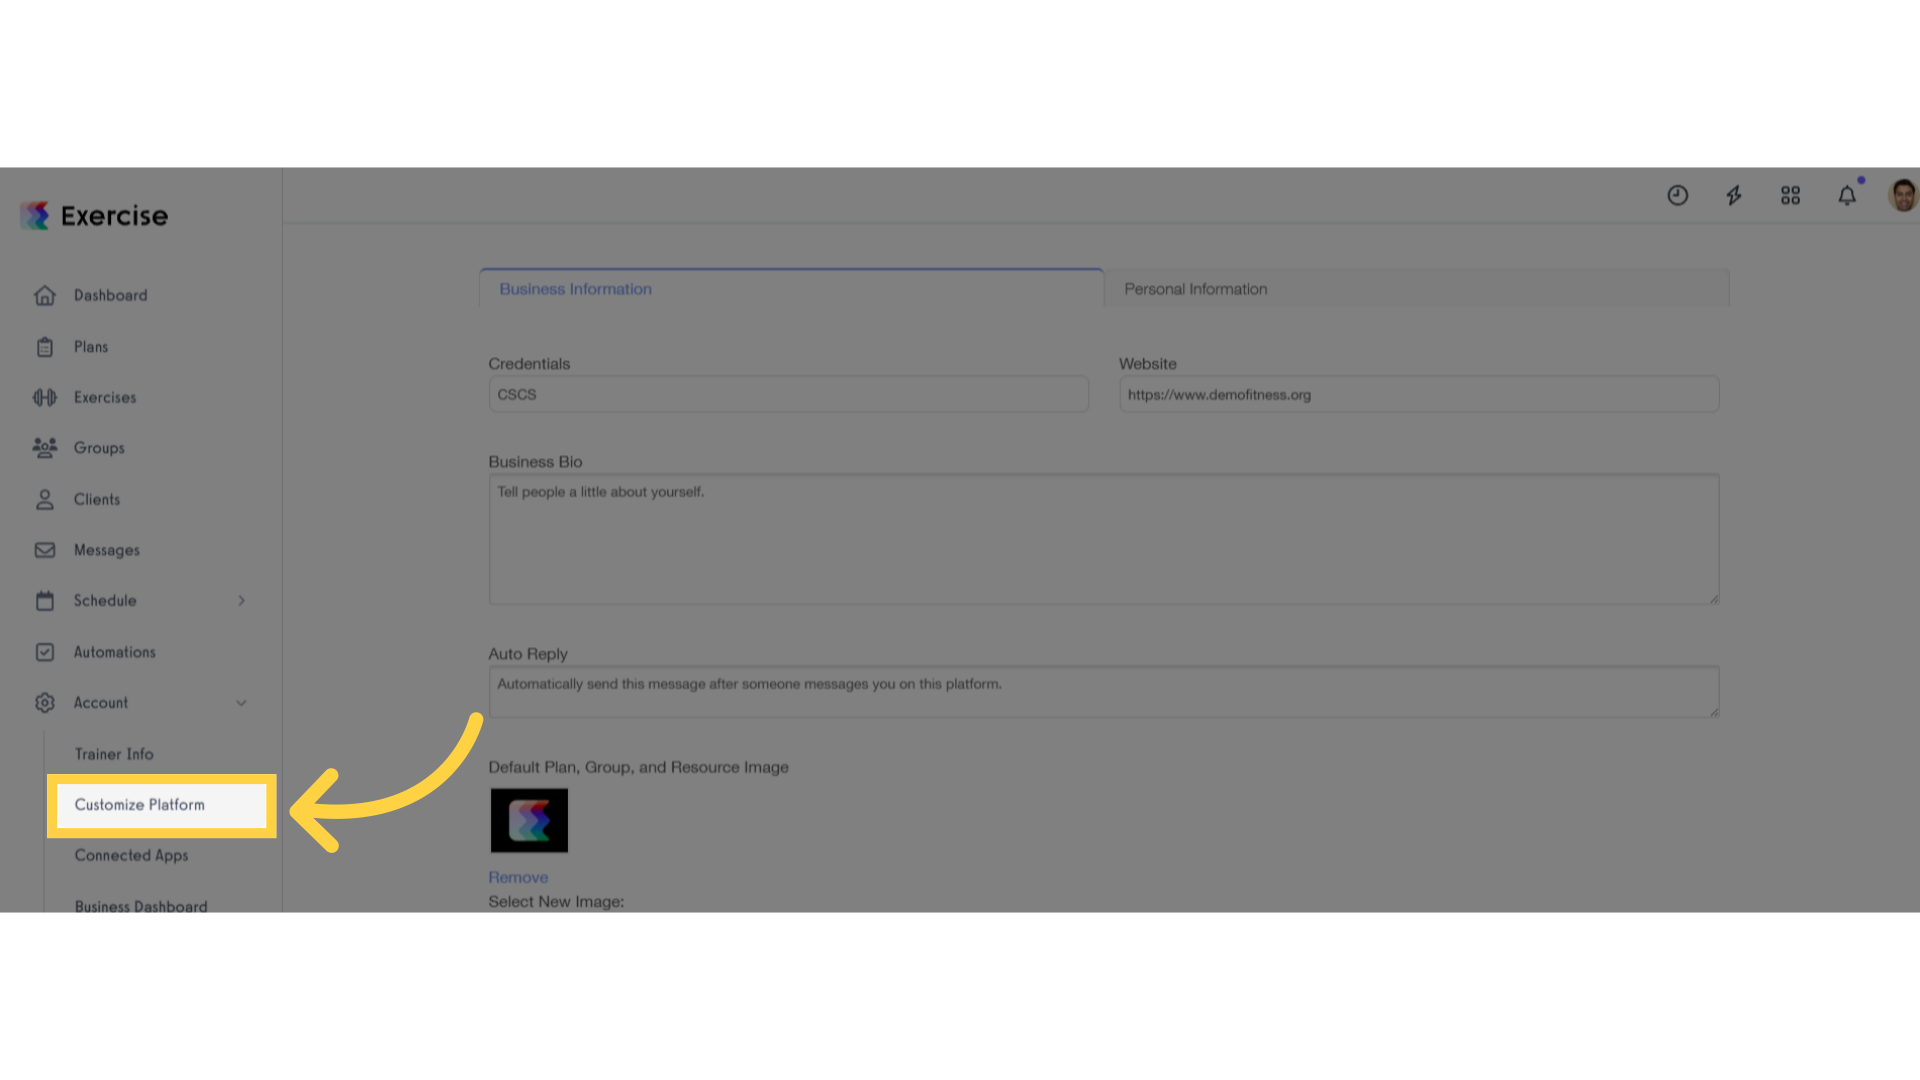
2. Click “Customize Platform”.
Click the ‘Customize Platform’ option to access the page where you can choose the fields that will be required when creating client accounts.
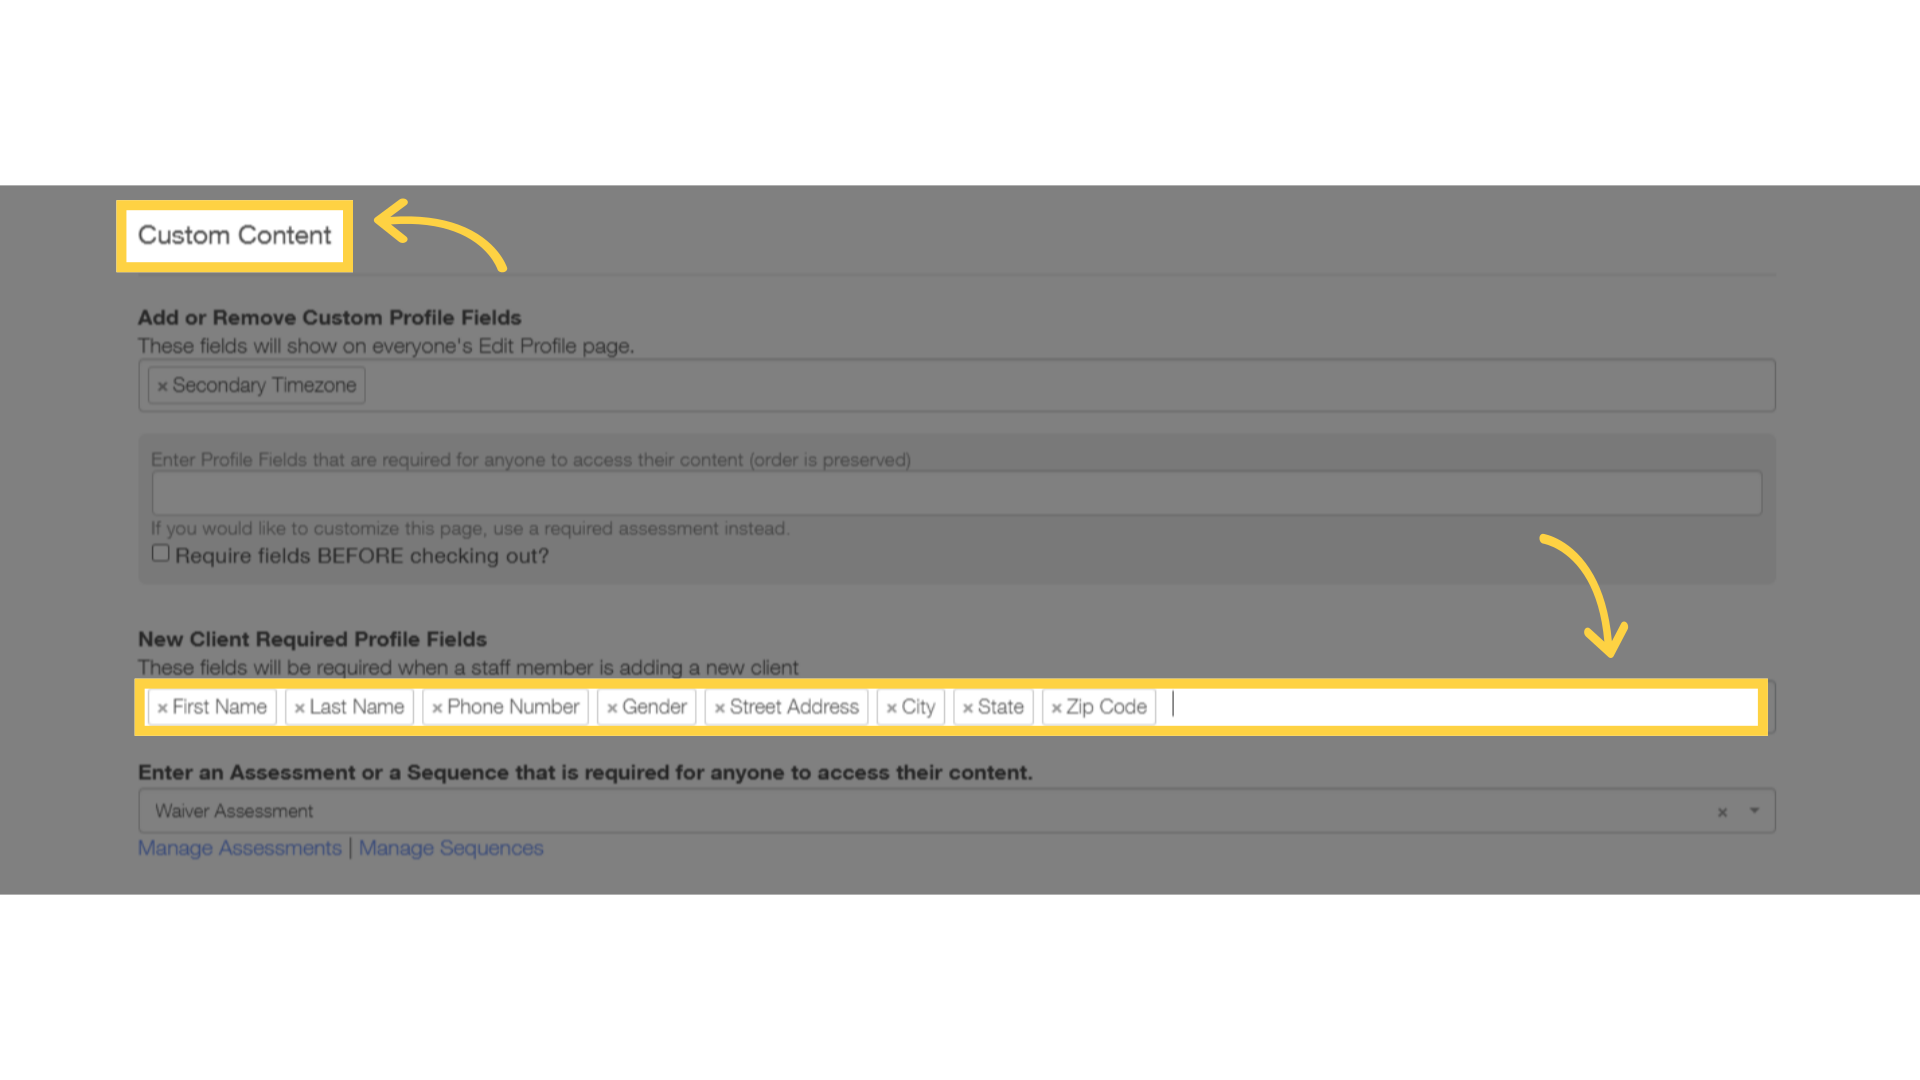
3. Scroll to “Custom Content” section.
Scroll down to the ‘Custom Content’ section, where you’ll find the ‘New Client Required Profile Fields’ dropdown list, containing the fields that will be included during client account creation.
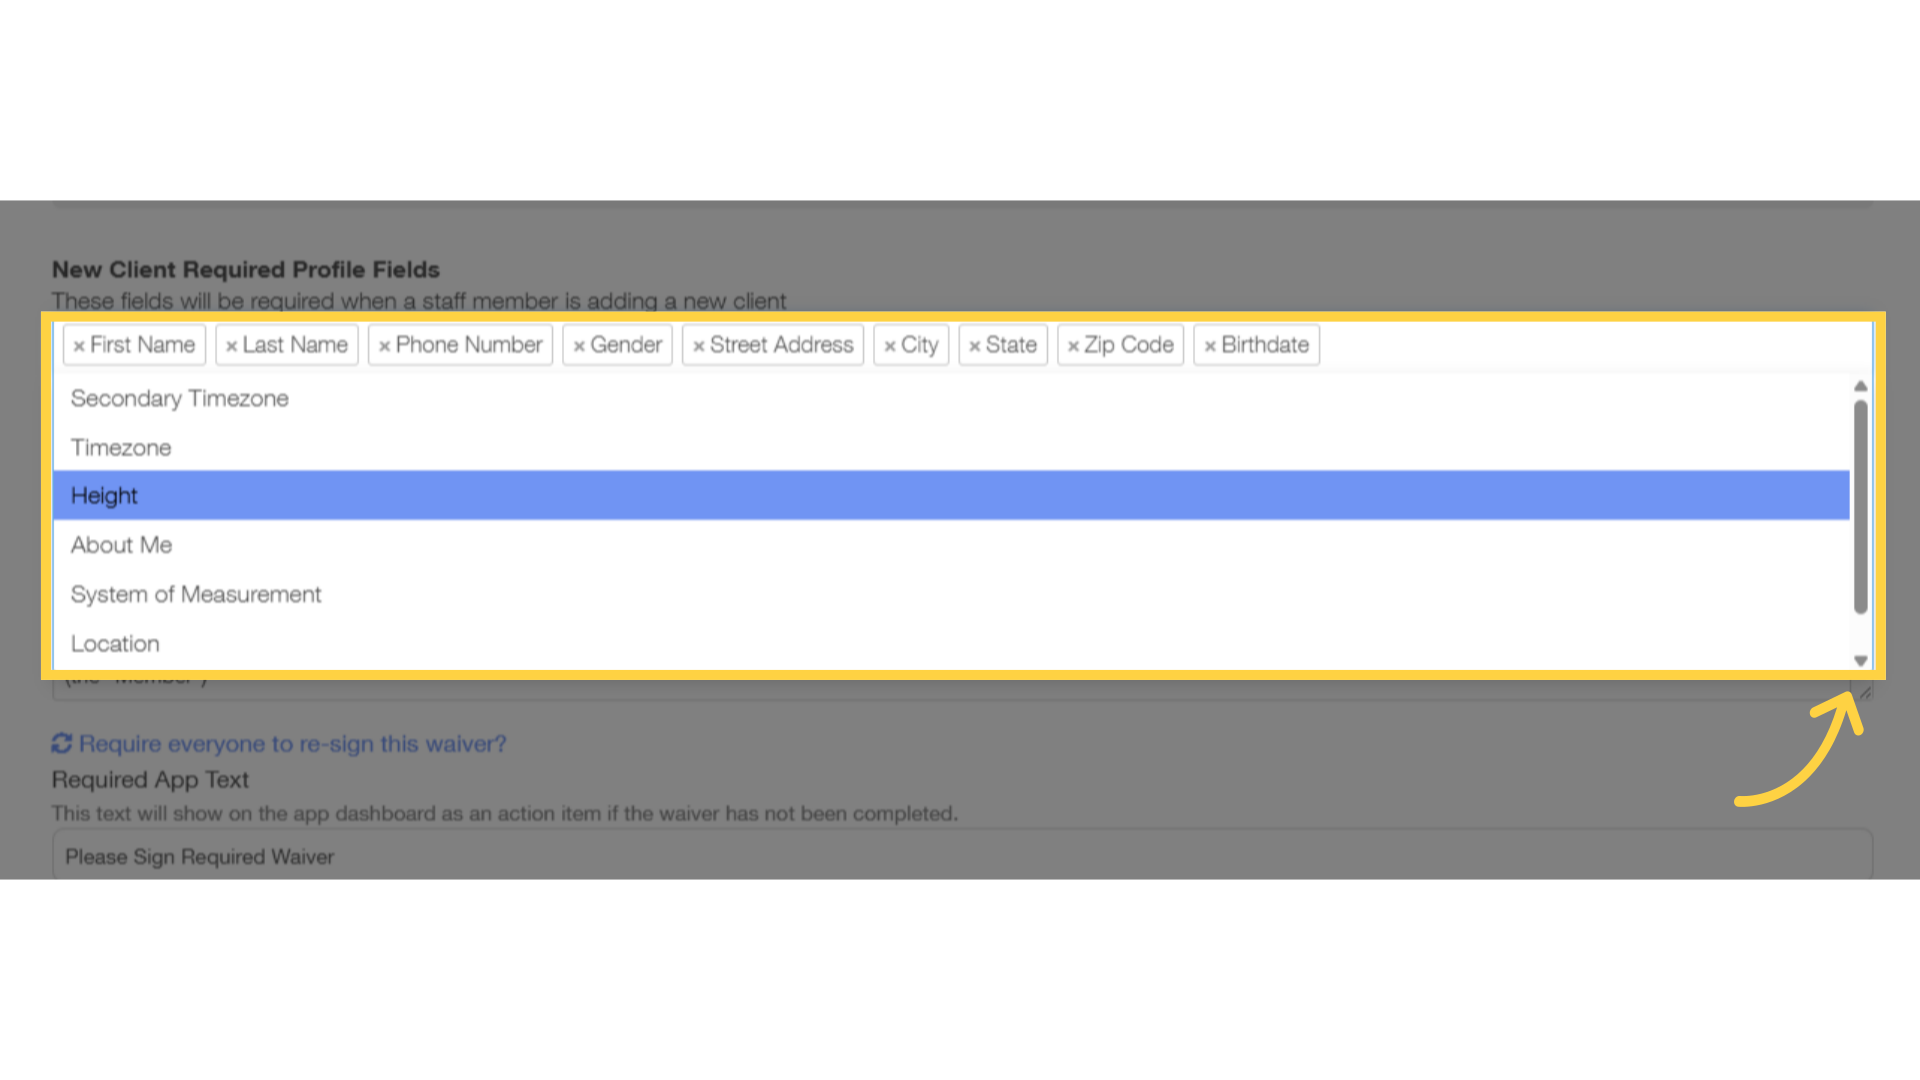
4. Select fields that is required.
Once you make a selection from the dropdown list, these fields will be set as mandatory.
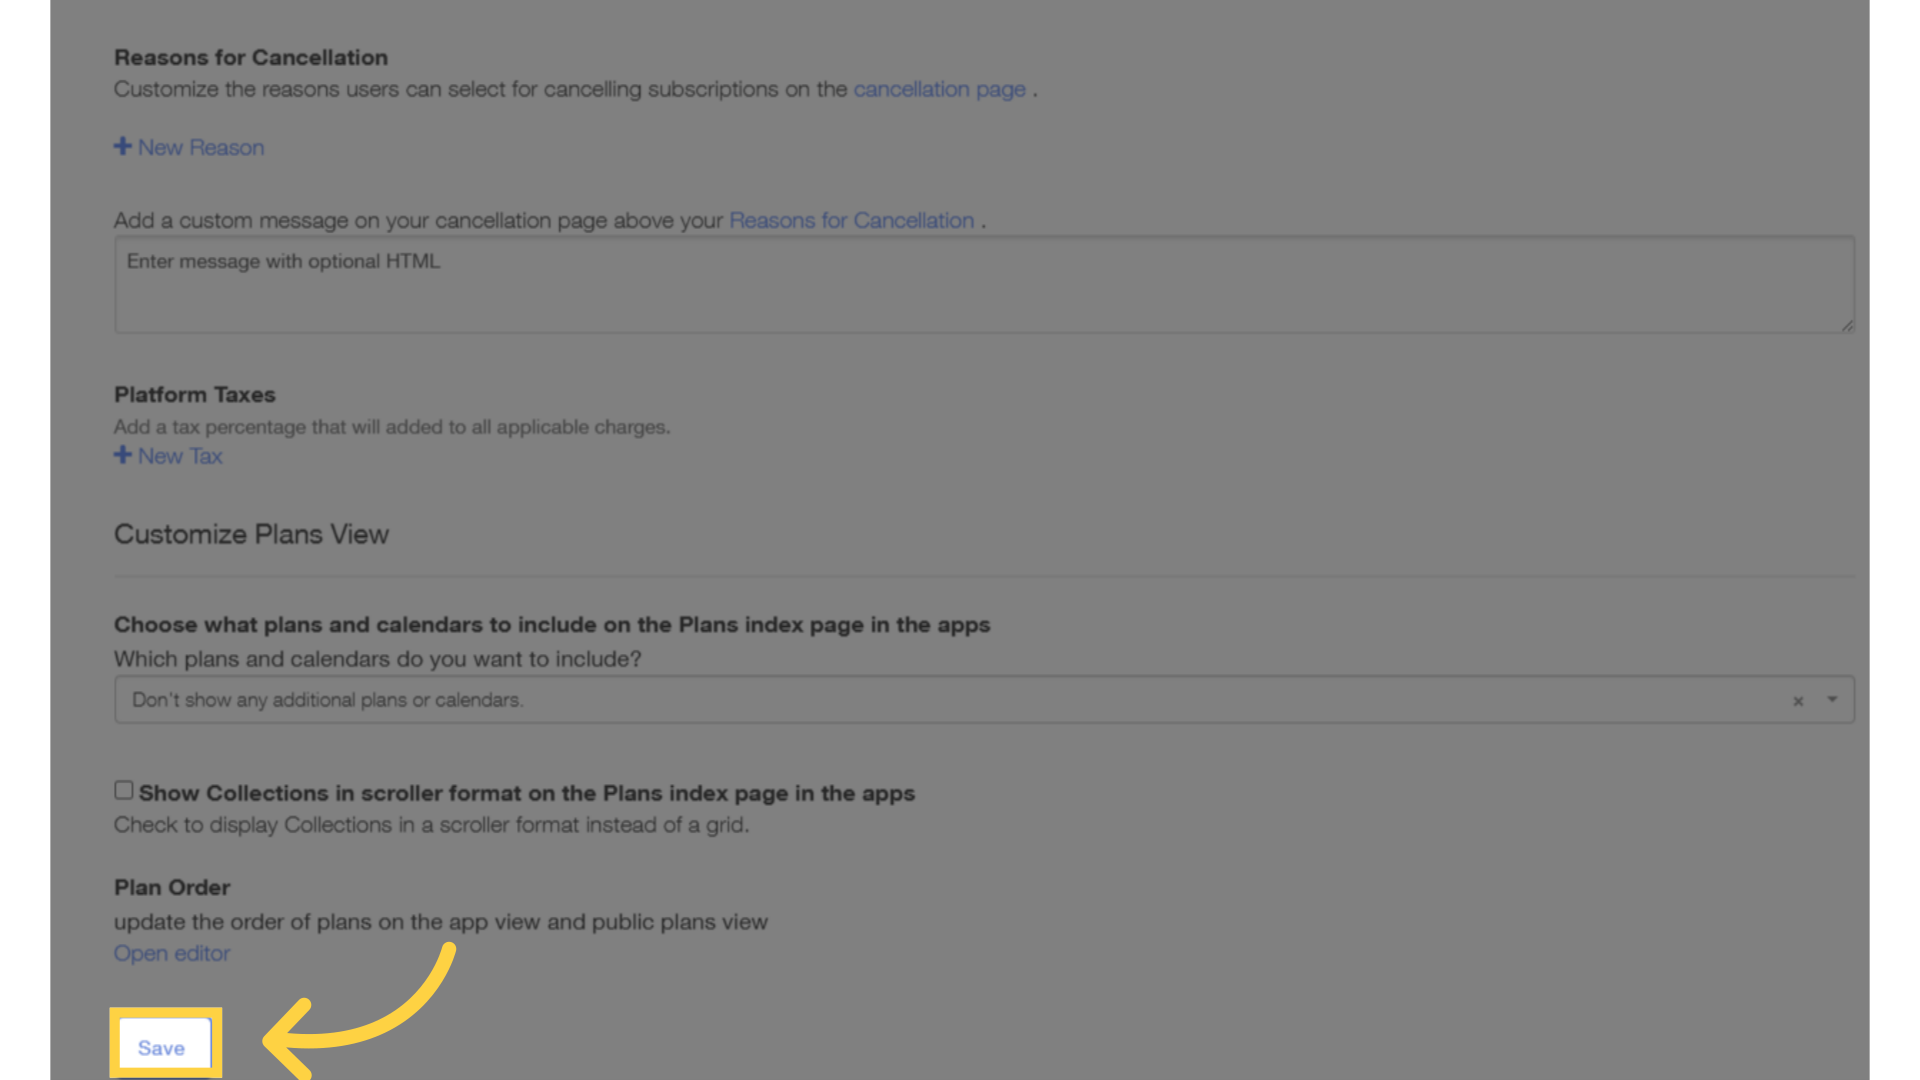
5. Click “Save”.
Finalize your selections by clicking the ‘Save’ button to ensure your changes are saved successfully.
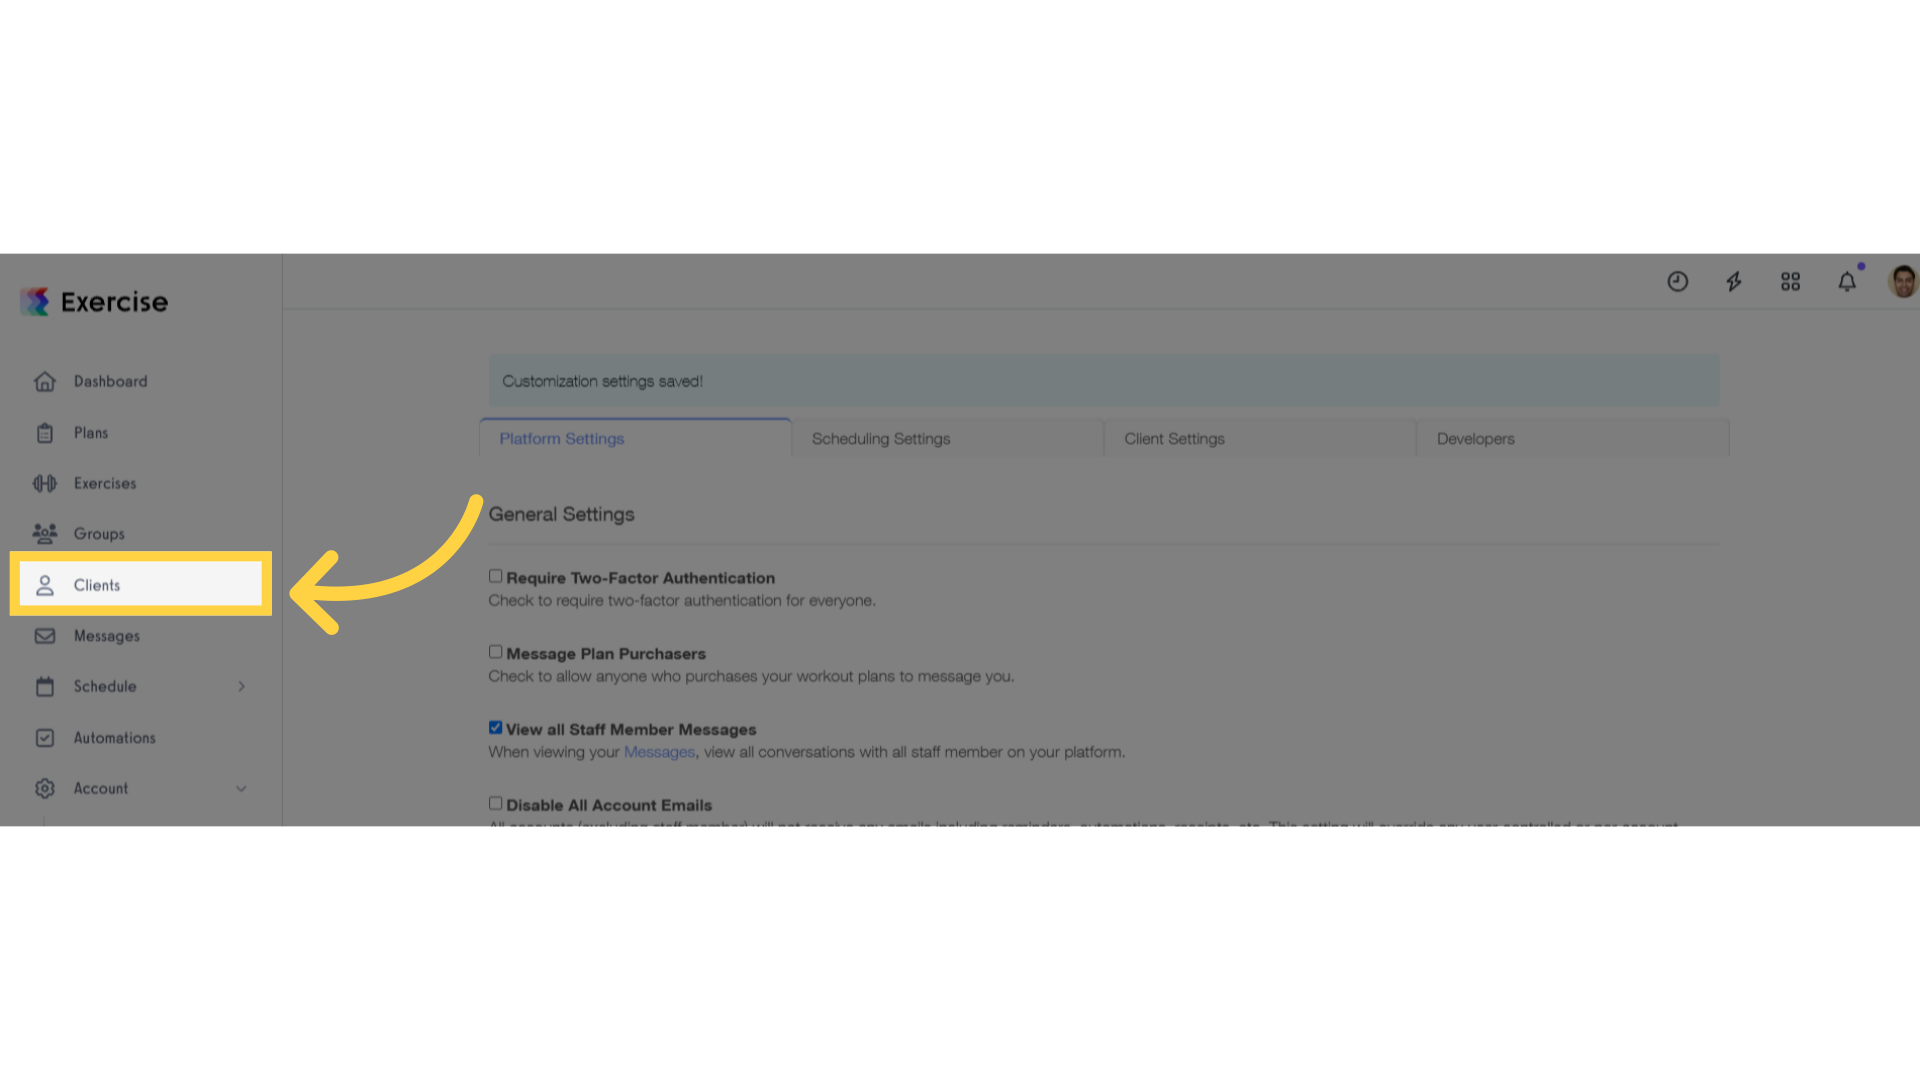
6. Click “Clients”.
Click the ‘Clients’ tab to access the feature for creating client accounts.
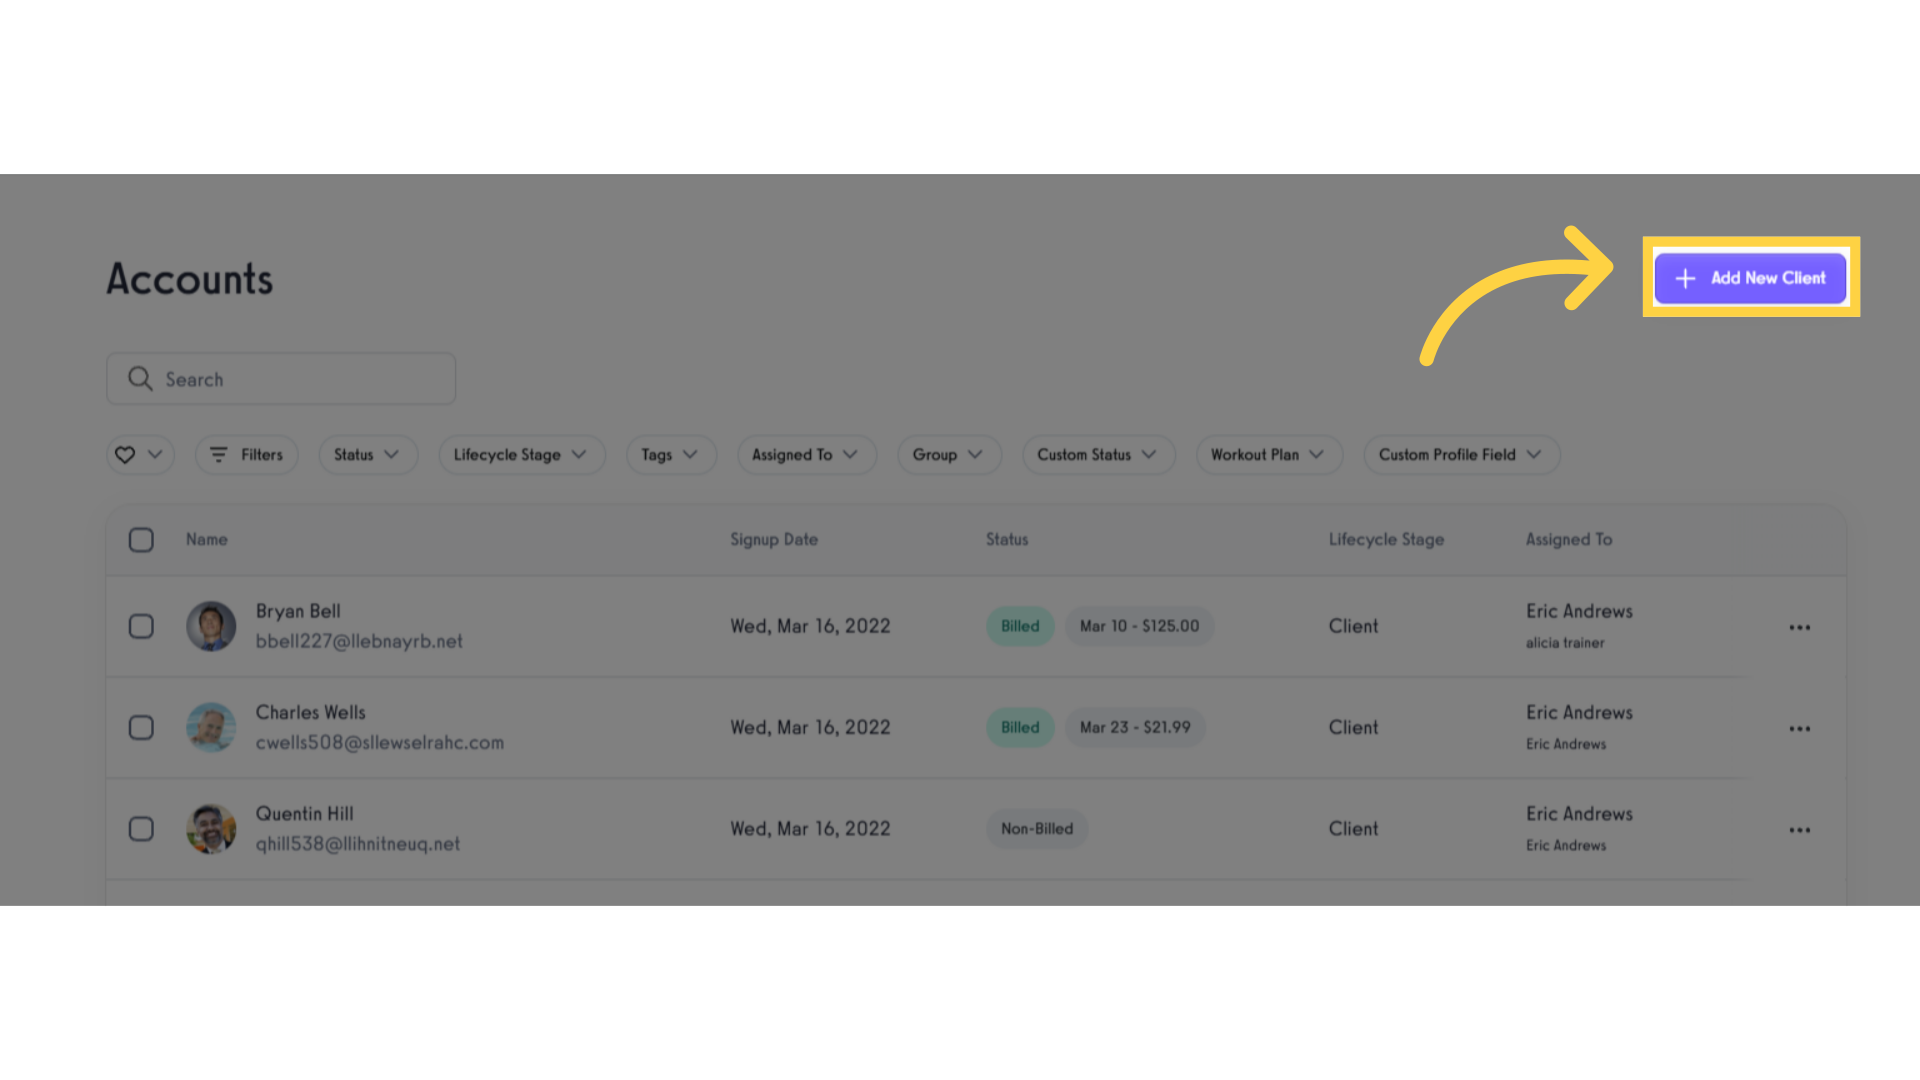
7. Click “Add New Client”.
Click the ‘Add New Client’ button to begin onboarding a new client using the newly set required fields.
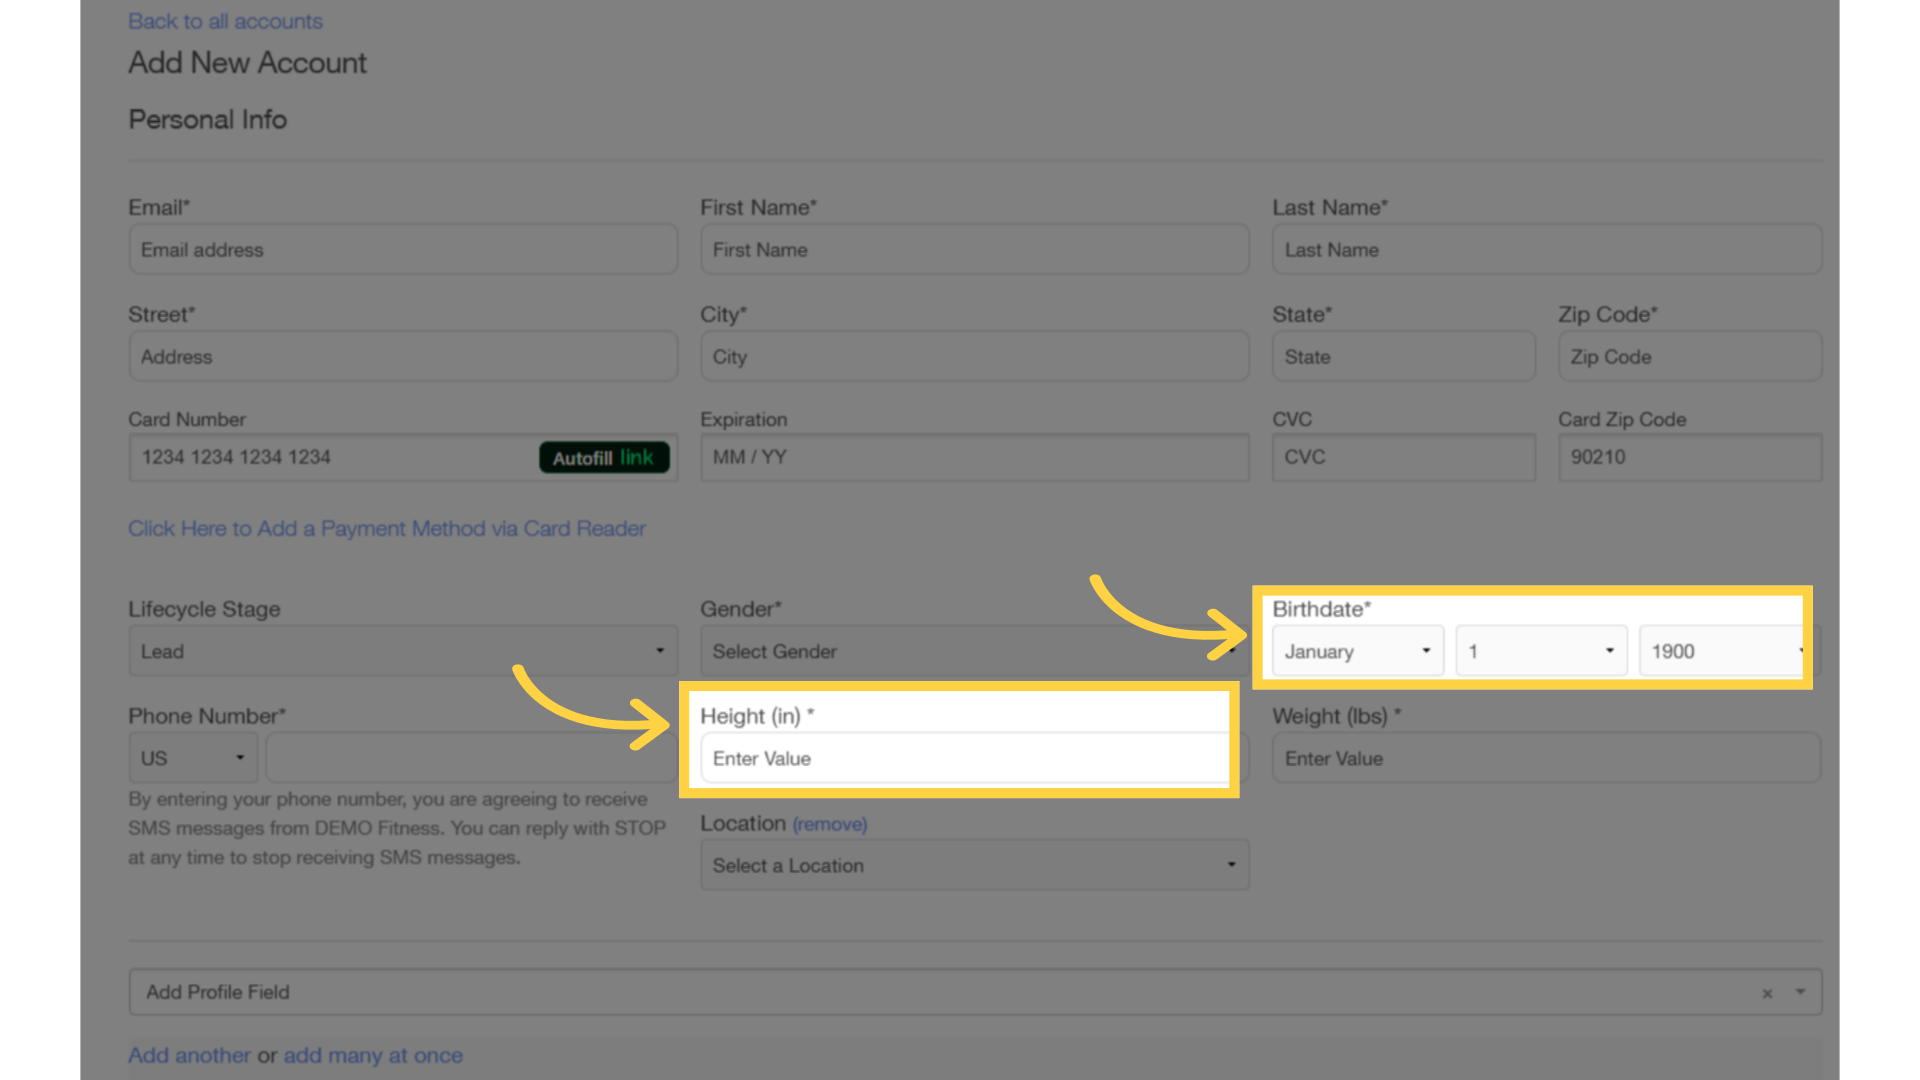
8. Verify the fields that are required.
Check the client account creation page, where you’ll notice that all required fields are marked with an asterisk symbol.
This guide covers the steps to set required fields during client account creation.


