How to Set Up Automations that Move Accounts from Stage to Stage
With lead management on your fitness business management software from Exercise.com, you’ll be able to use the Assign a Lifecycle Stage automation to move accounts from stage to stage in your customer pipeline based on the triggers that work for your business.
This guide walks you through using the Assign a Lifecycle Stage automation to customize how accounts on your custom branded platform will move from stage to stage.
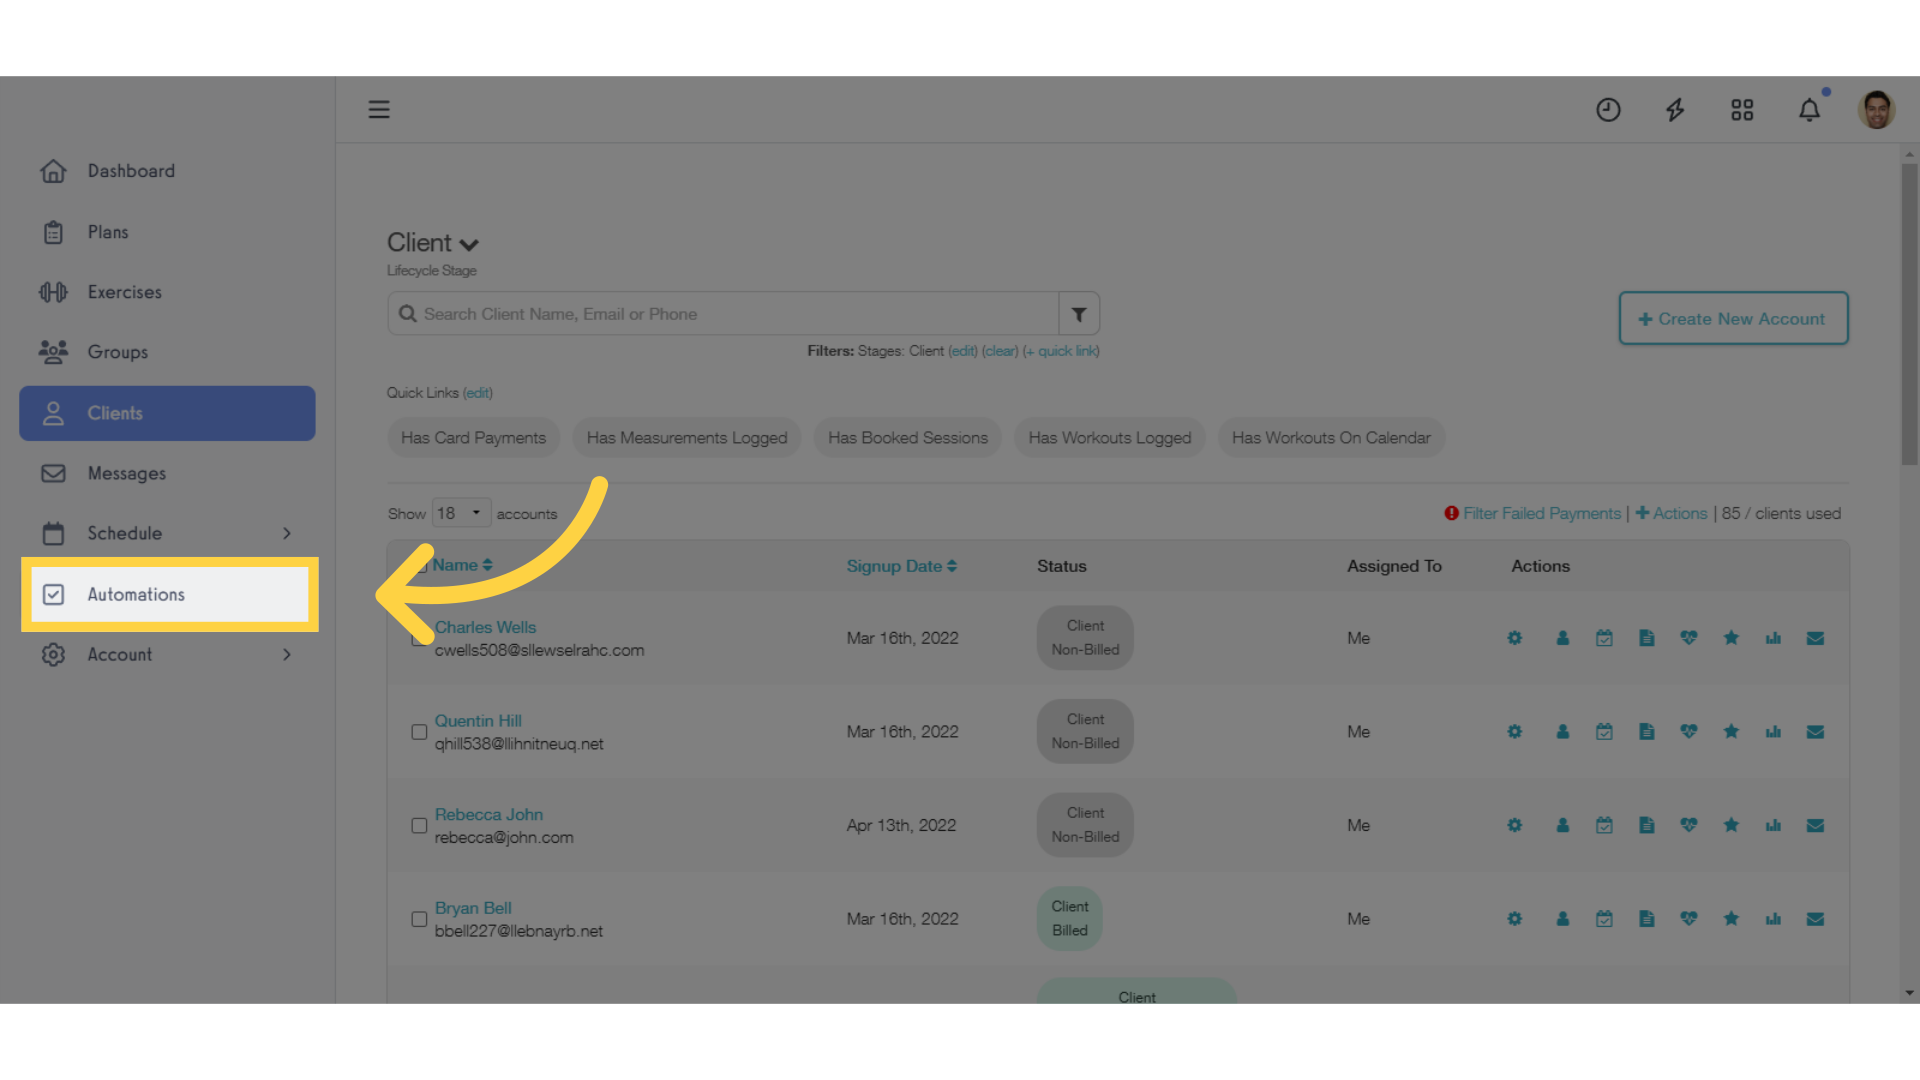
1. Click “Automations” in the left side menu.
To get started, click the Automations tab in the left side menu.
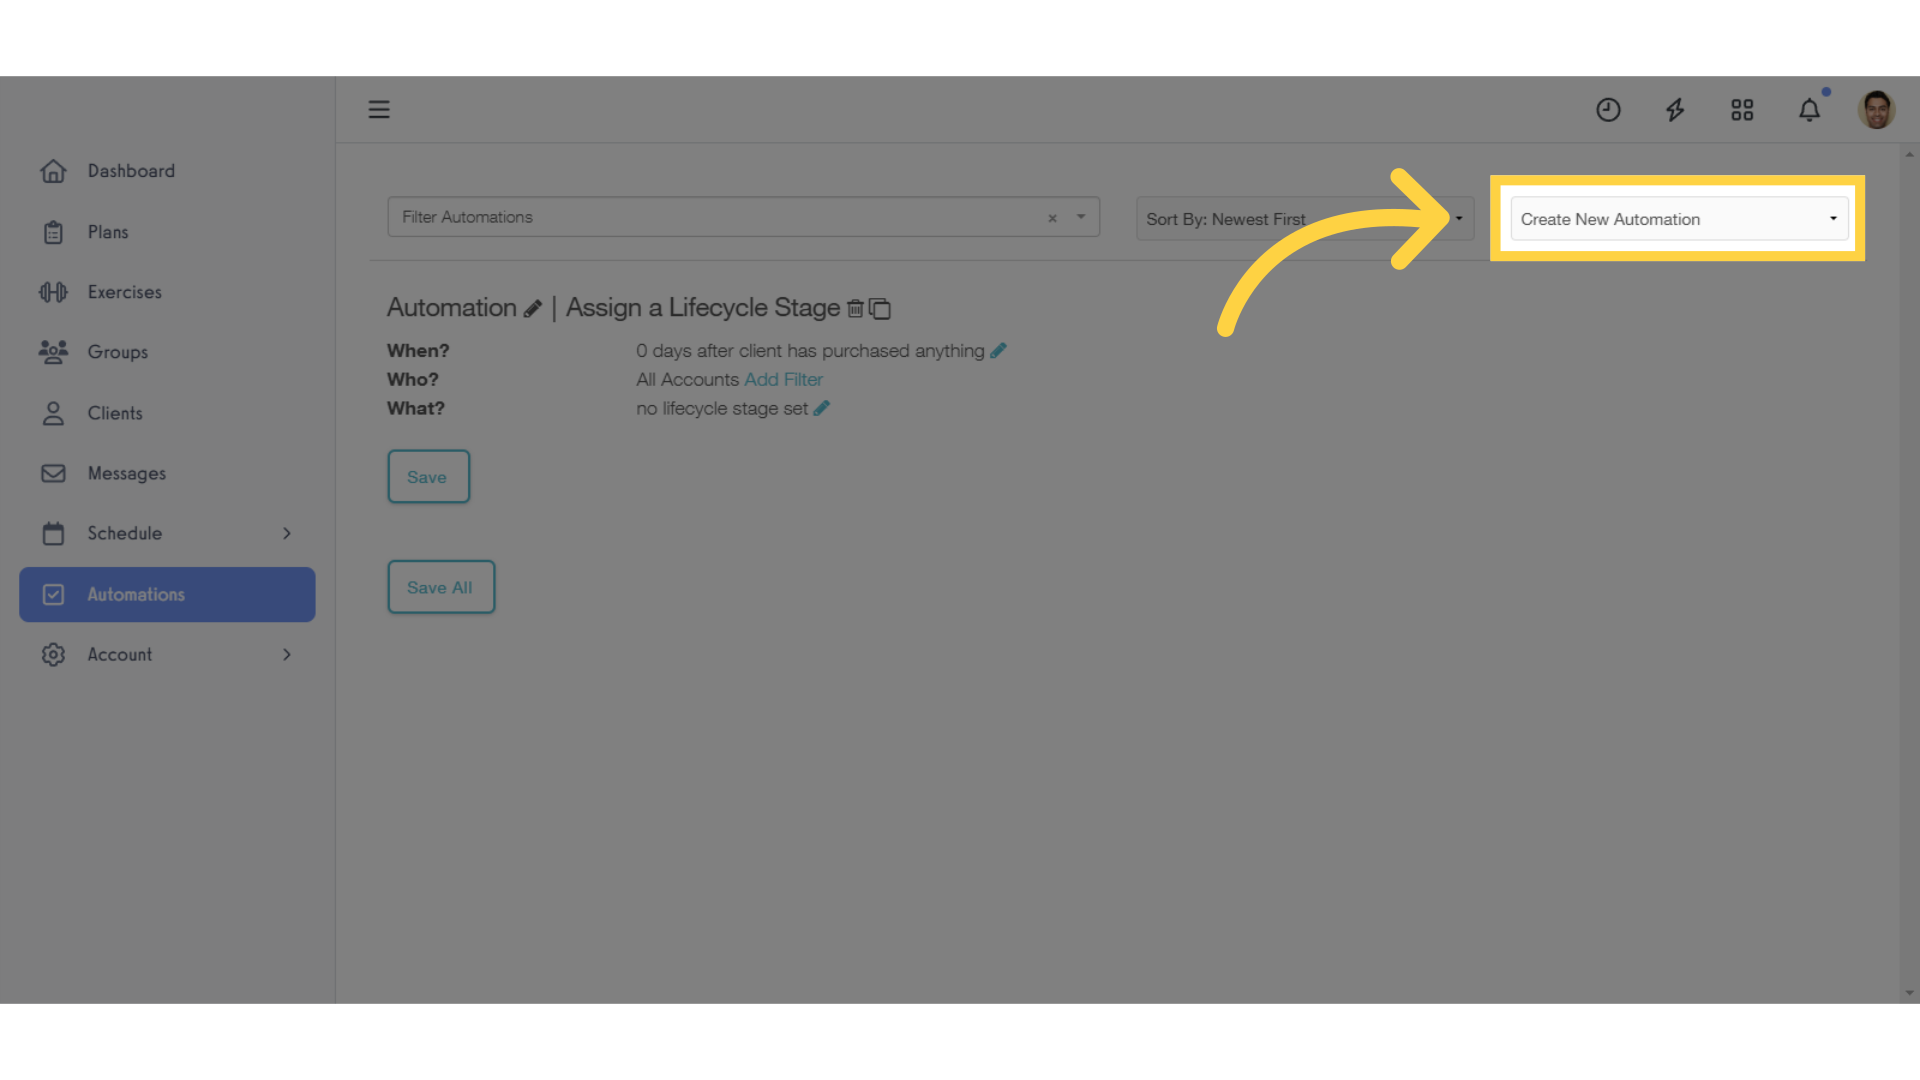
2. Click “Create New Automation” and select the “Assign a Lifecycle Stage” option.
Click “Create New Automation” to open the dropdown menu and choose the “Assign a Lifecycle Stage” option to set it up.
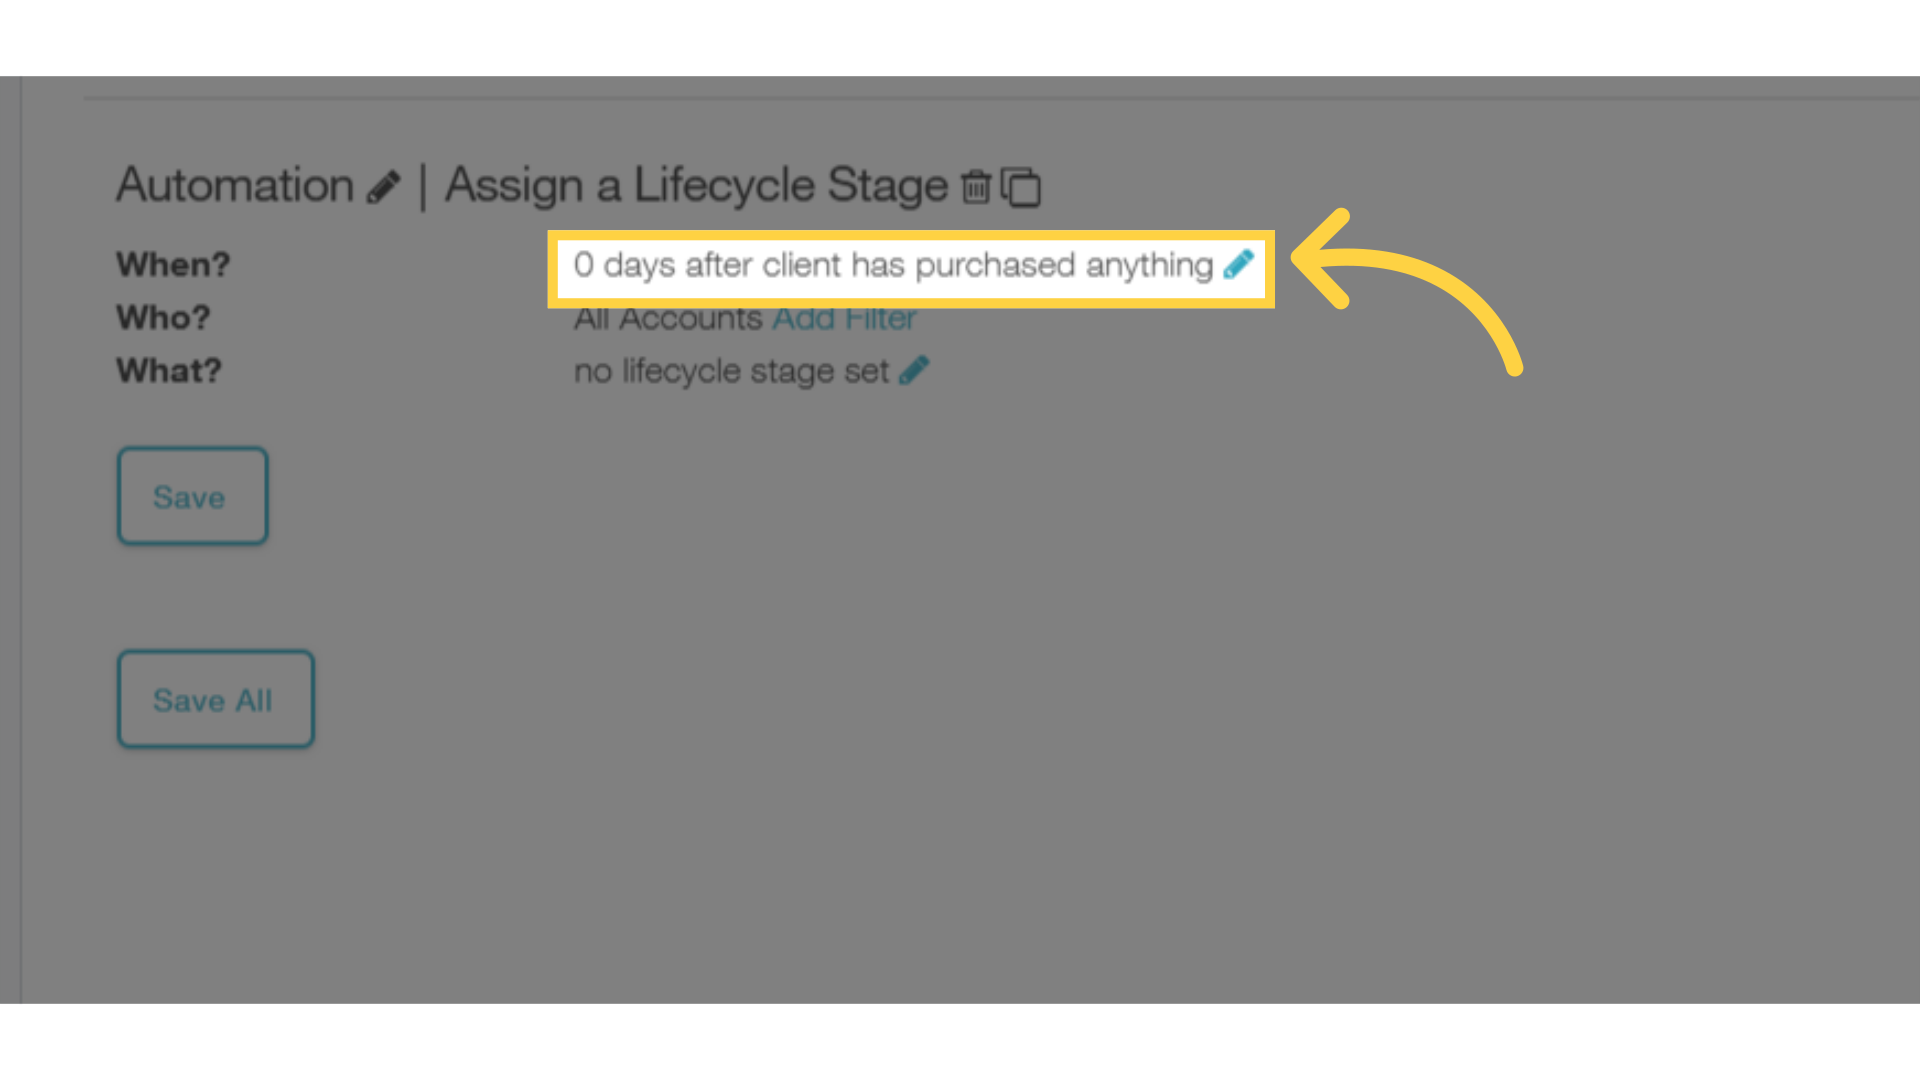
3. Click the edit icon for “When” to set up the automation trigger.
Click on the edit icon for “When” to choose what trigger will start the automation.
4. You can trigger automations with a variety of actions or events.
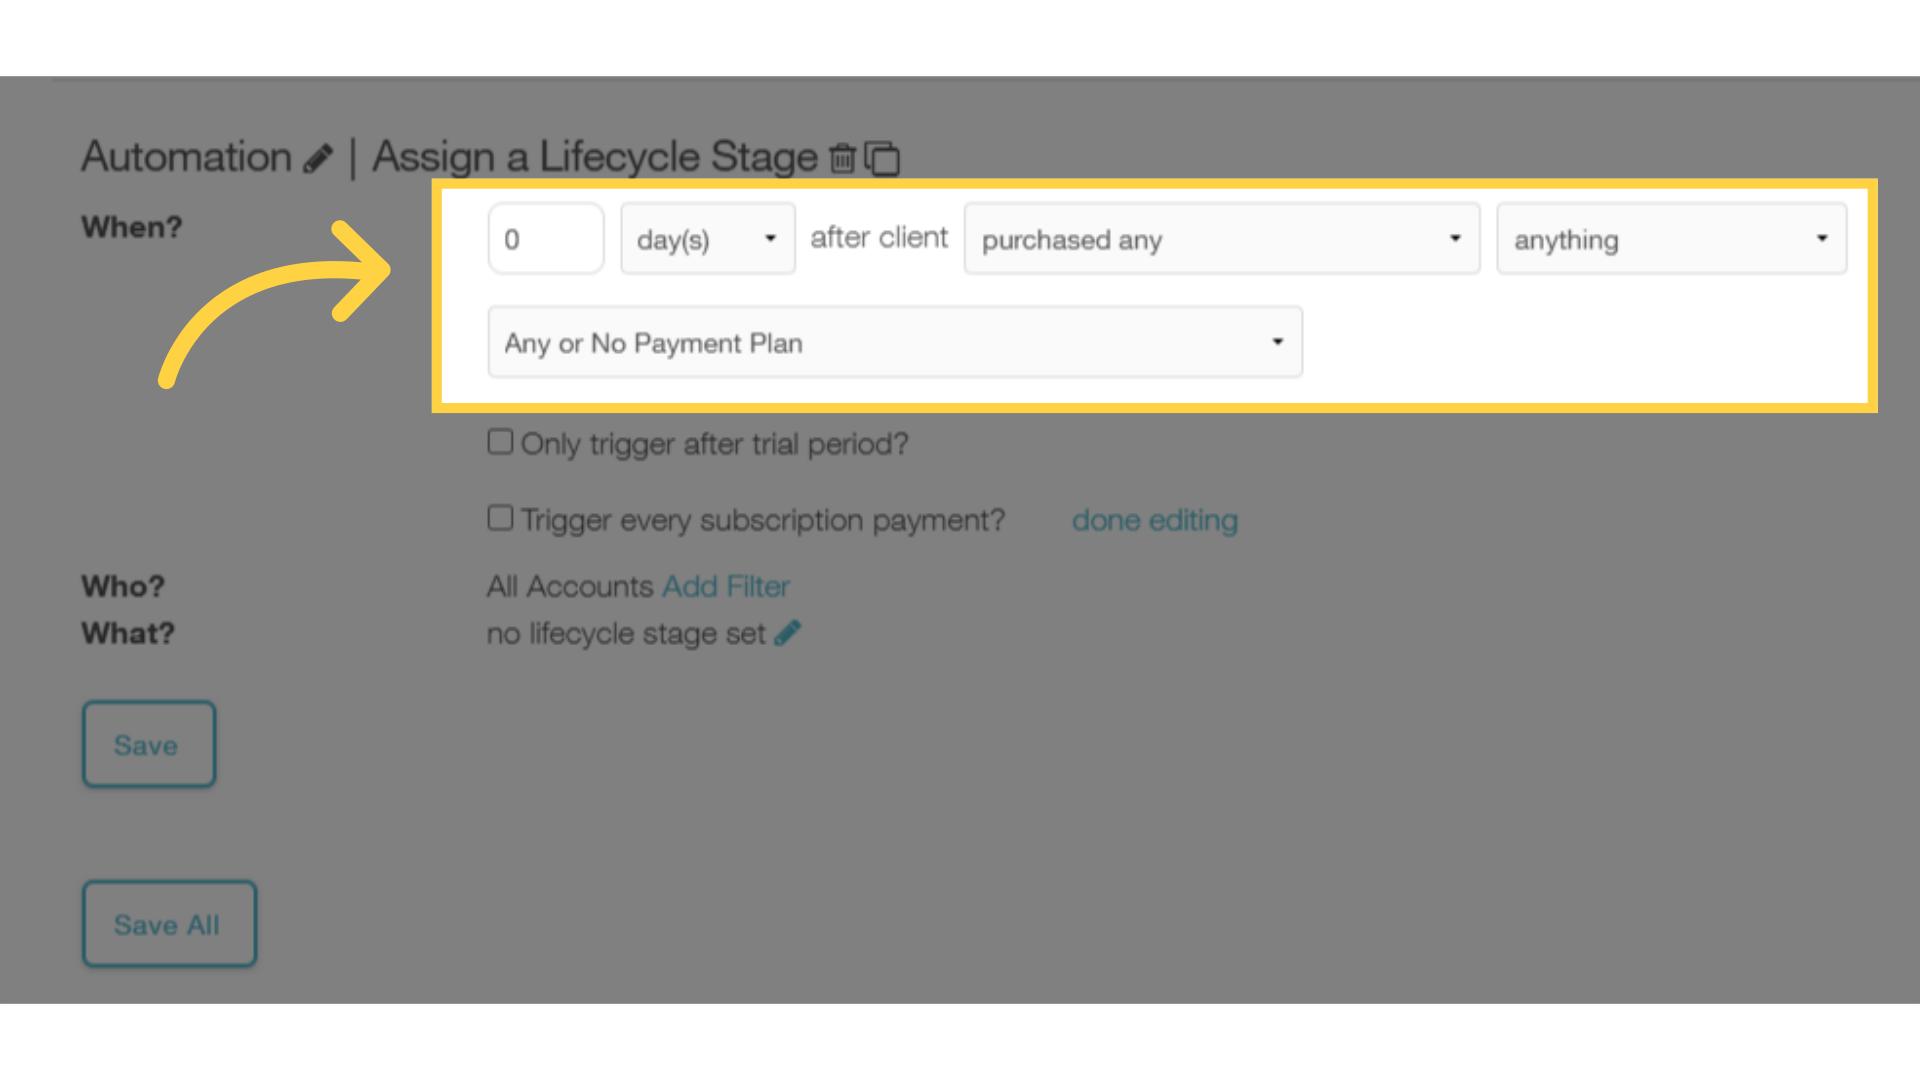
Click the “purchased any” dropdown to see the additional options for the triggers you can use to start an automation.
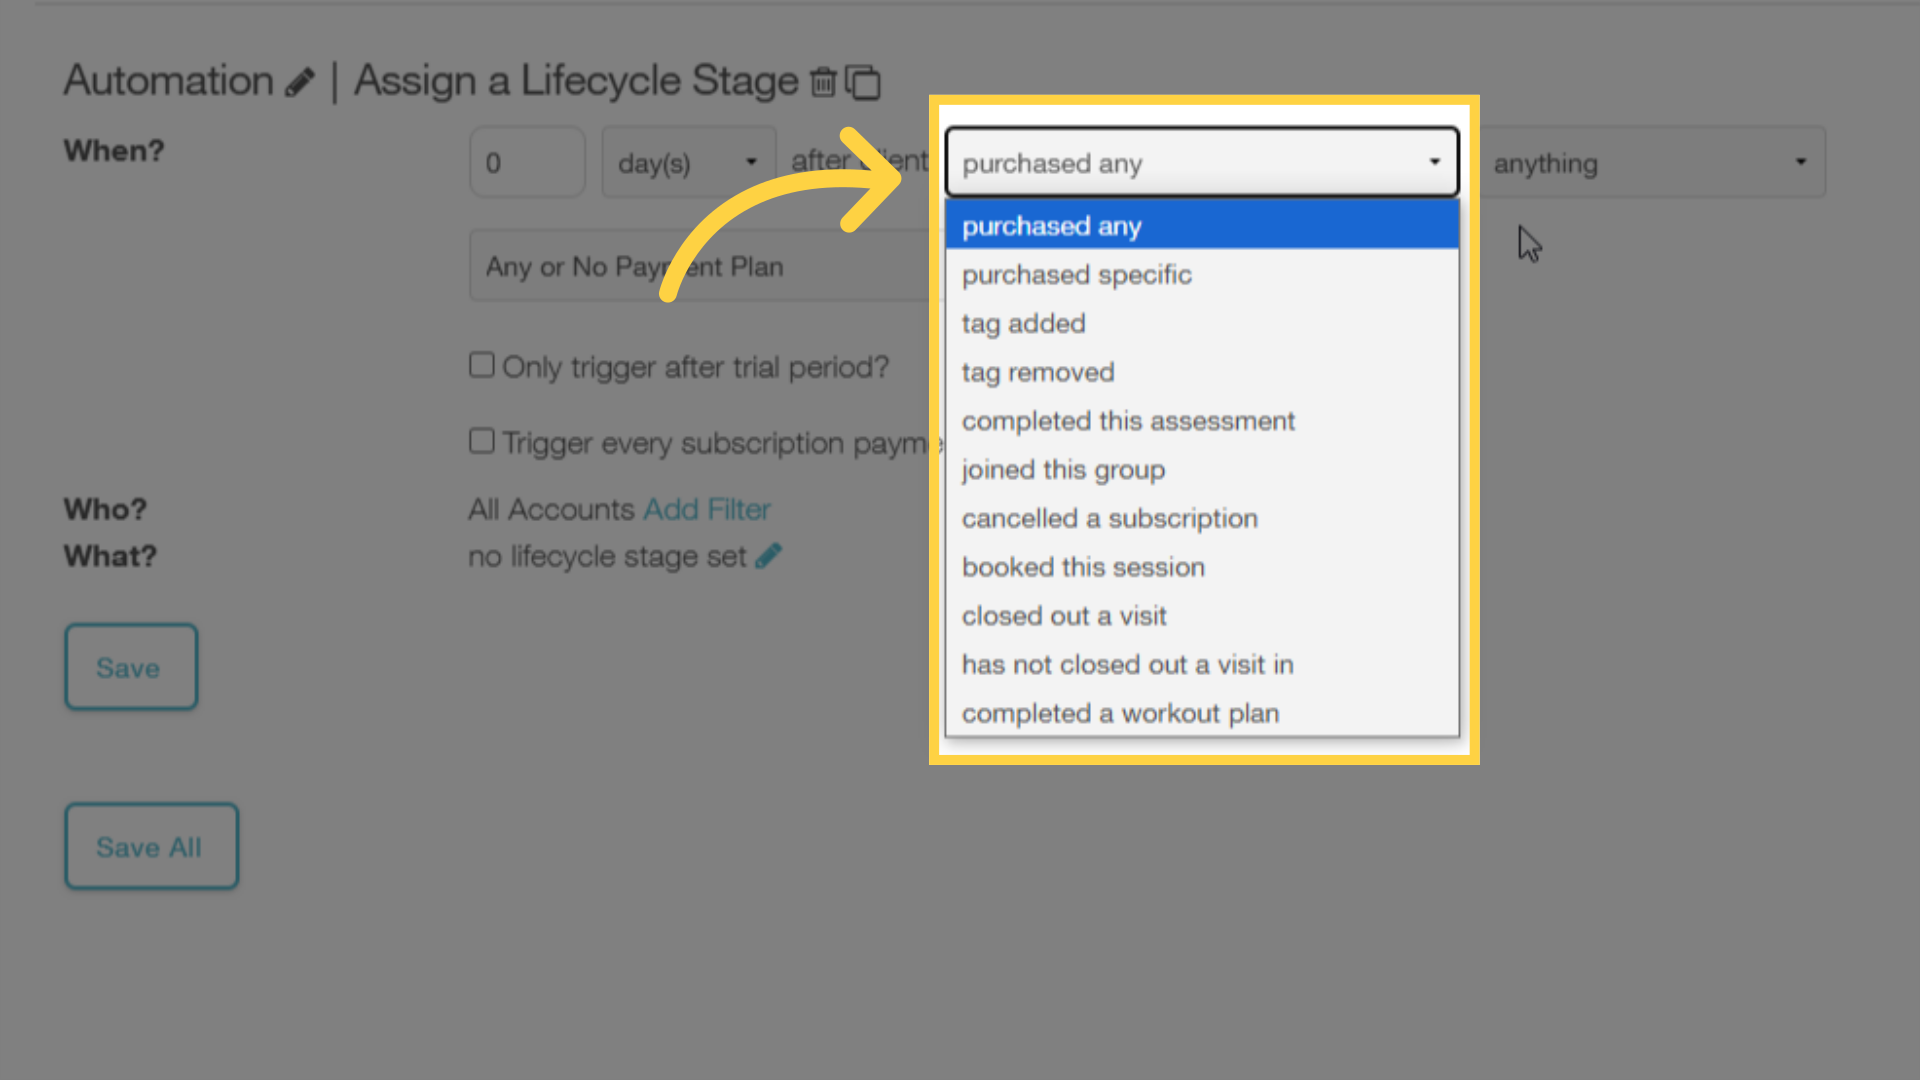
5. Use the purchase items for any purchase or for when a specific item is purchased.
You can change the lifecycle stage for someone’s account once any purchase is made – or when only a specific item is purchased.
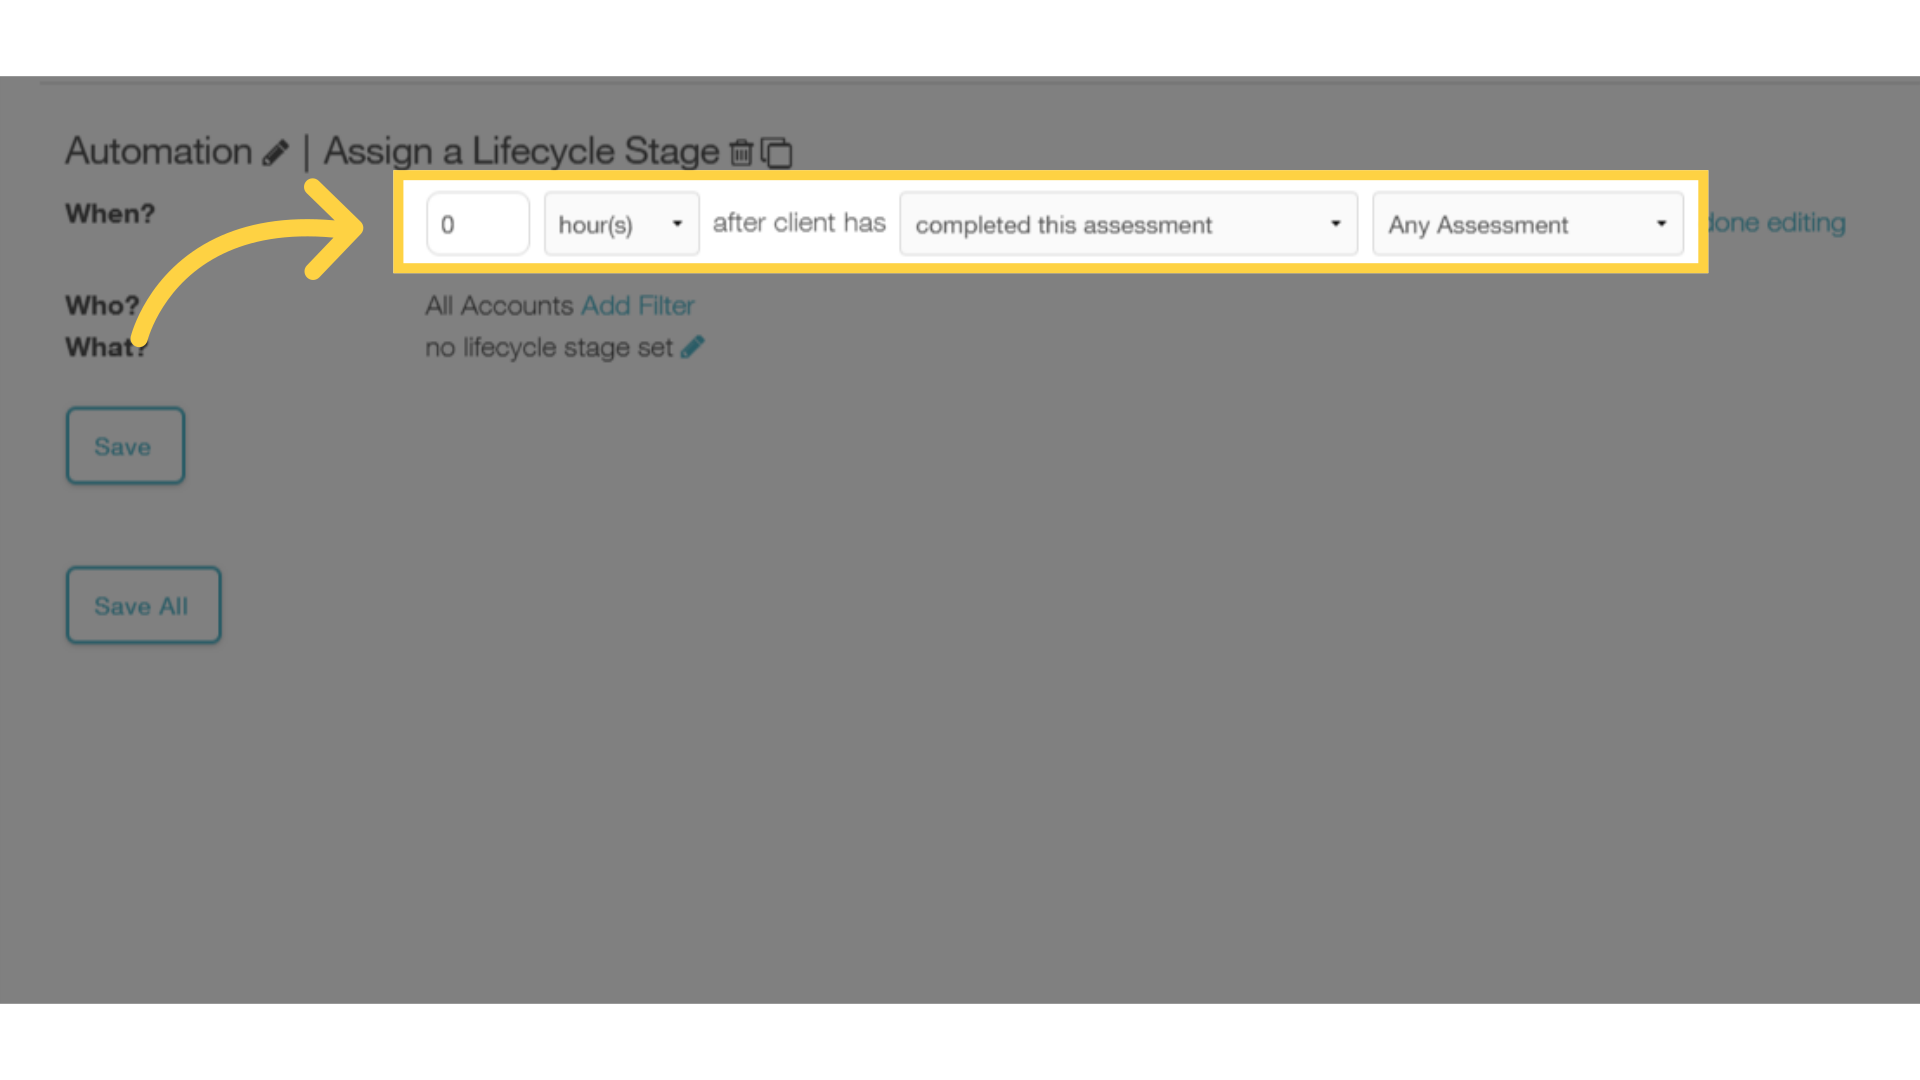
6. You can use the “completed this assessment” trigger to start automations when someone completes an assessment on your platform.
You can also trigger automations when an assessment is completed, such as when someone completes a lead generation form.
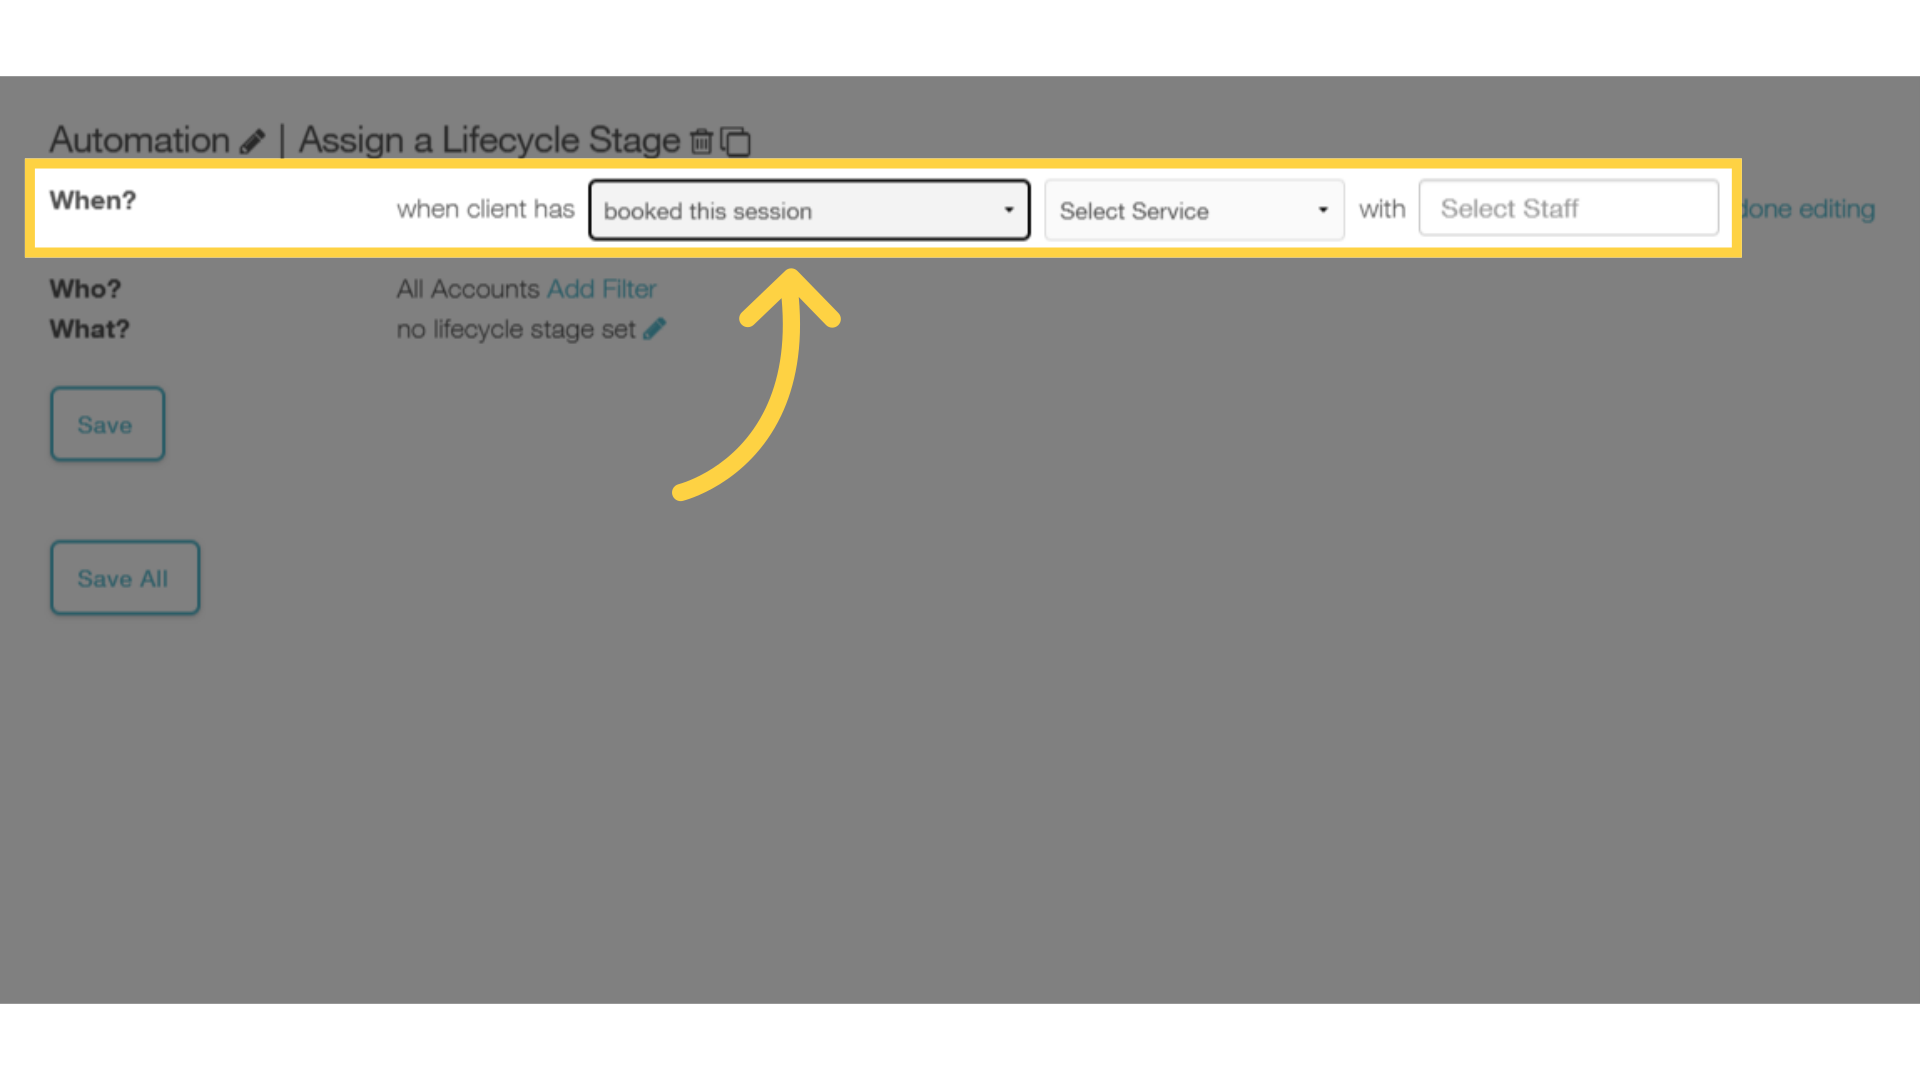
7. You can also trigger automations based on any session, or a specific service being booked.
If you want to trigger automations based on any session, or a specific service being booked, use the “booked this session” trigger.
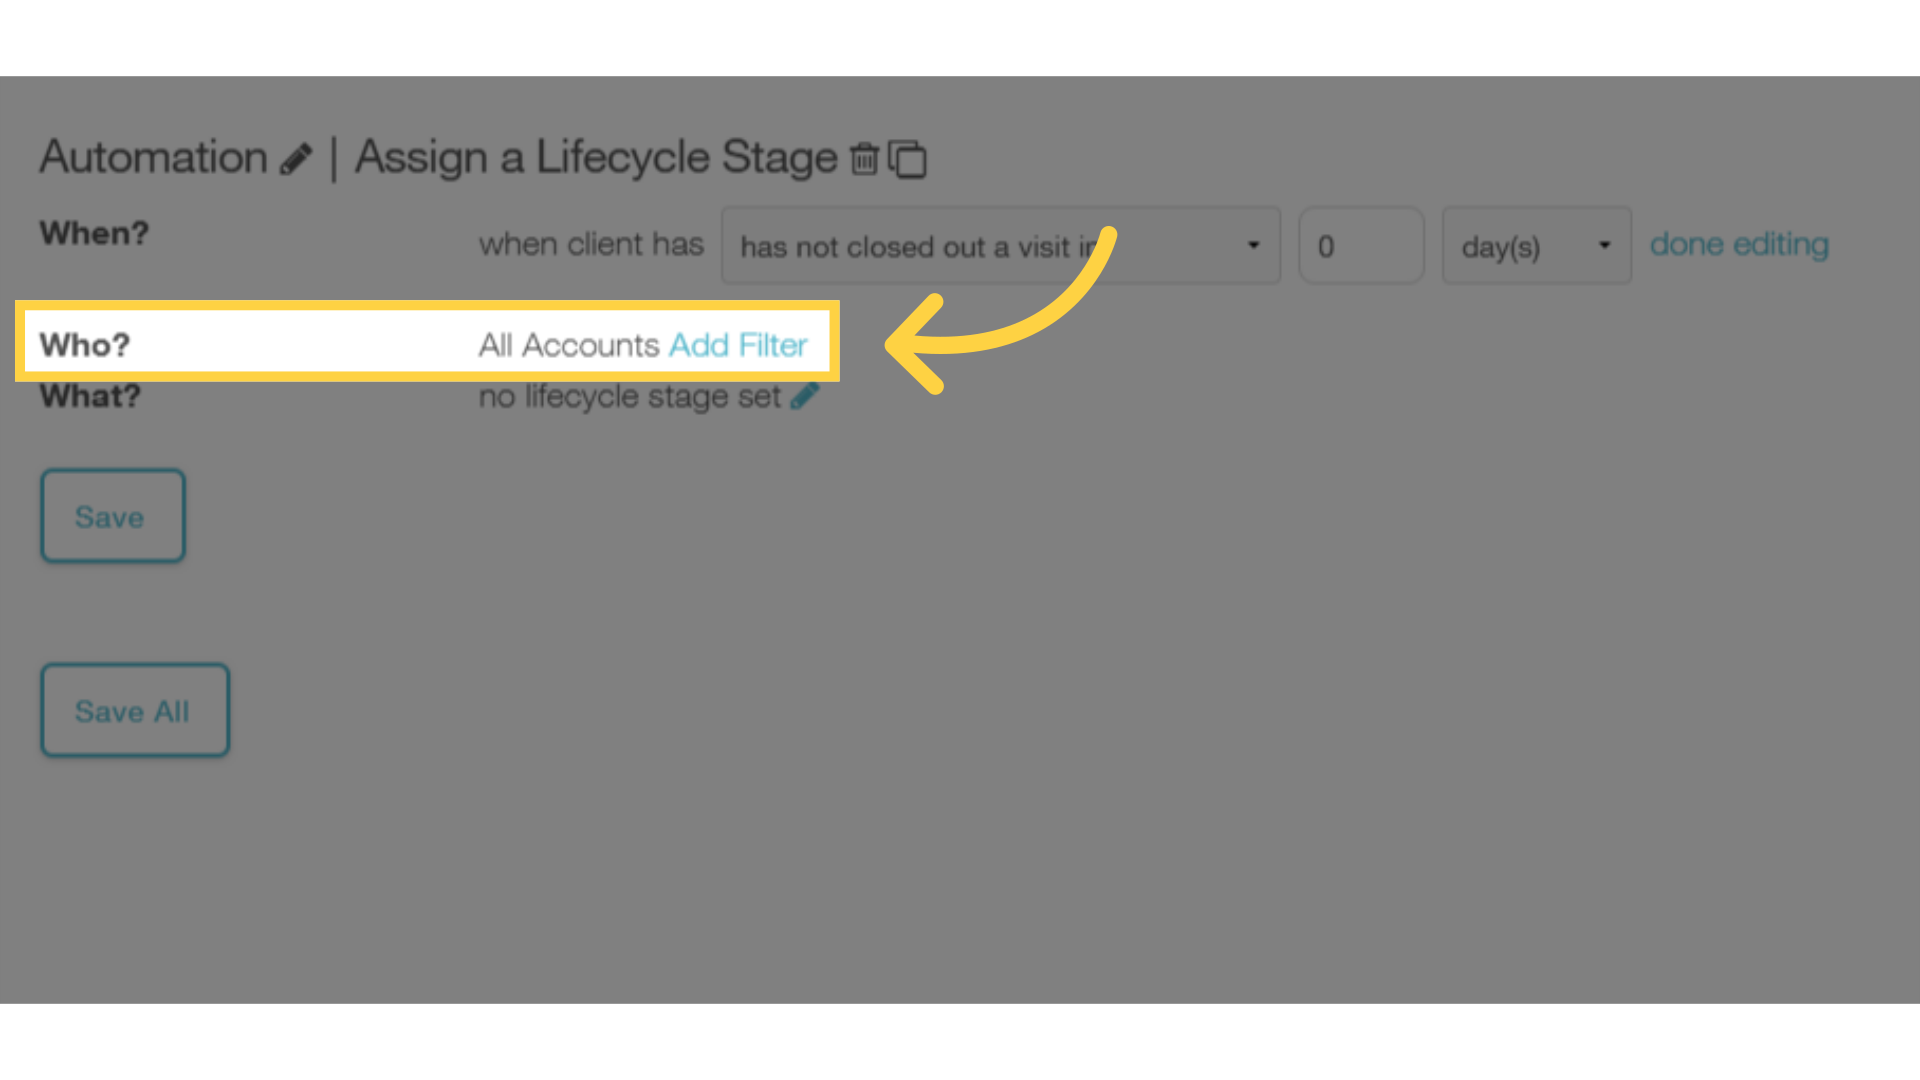
8. Click the the “Add Filter” link next to “All Accounts”.
Now let’s select which stage(s) we want this automation to apply to. You can use the “Who” filter settings to make sure that your automation only runs for specific stages of your customer lifecycle. Click the “Add Filter” link.
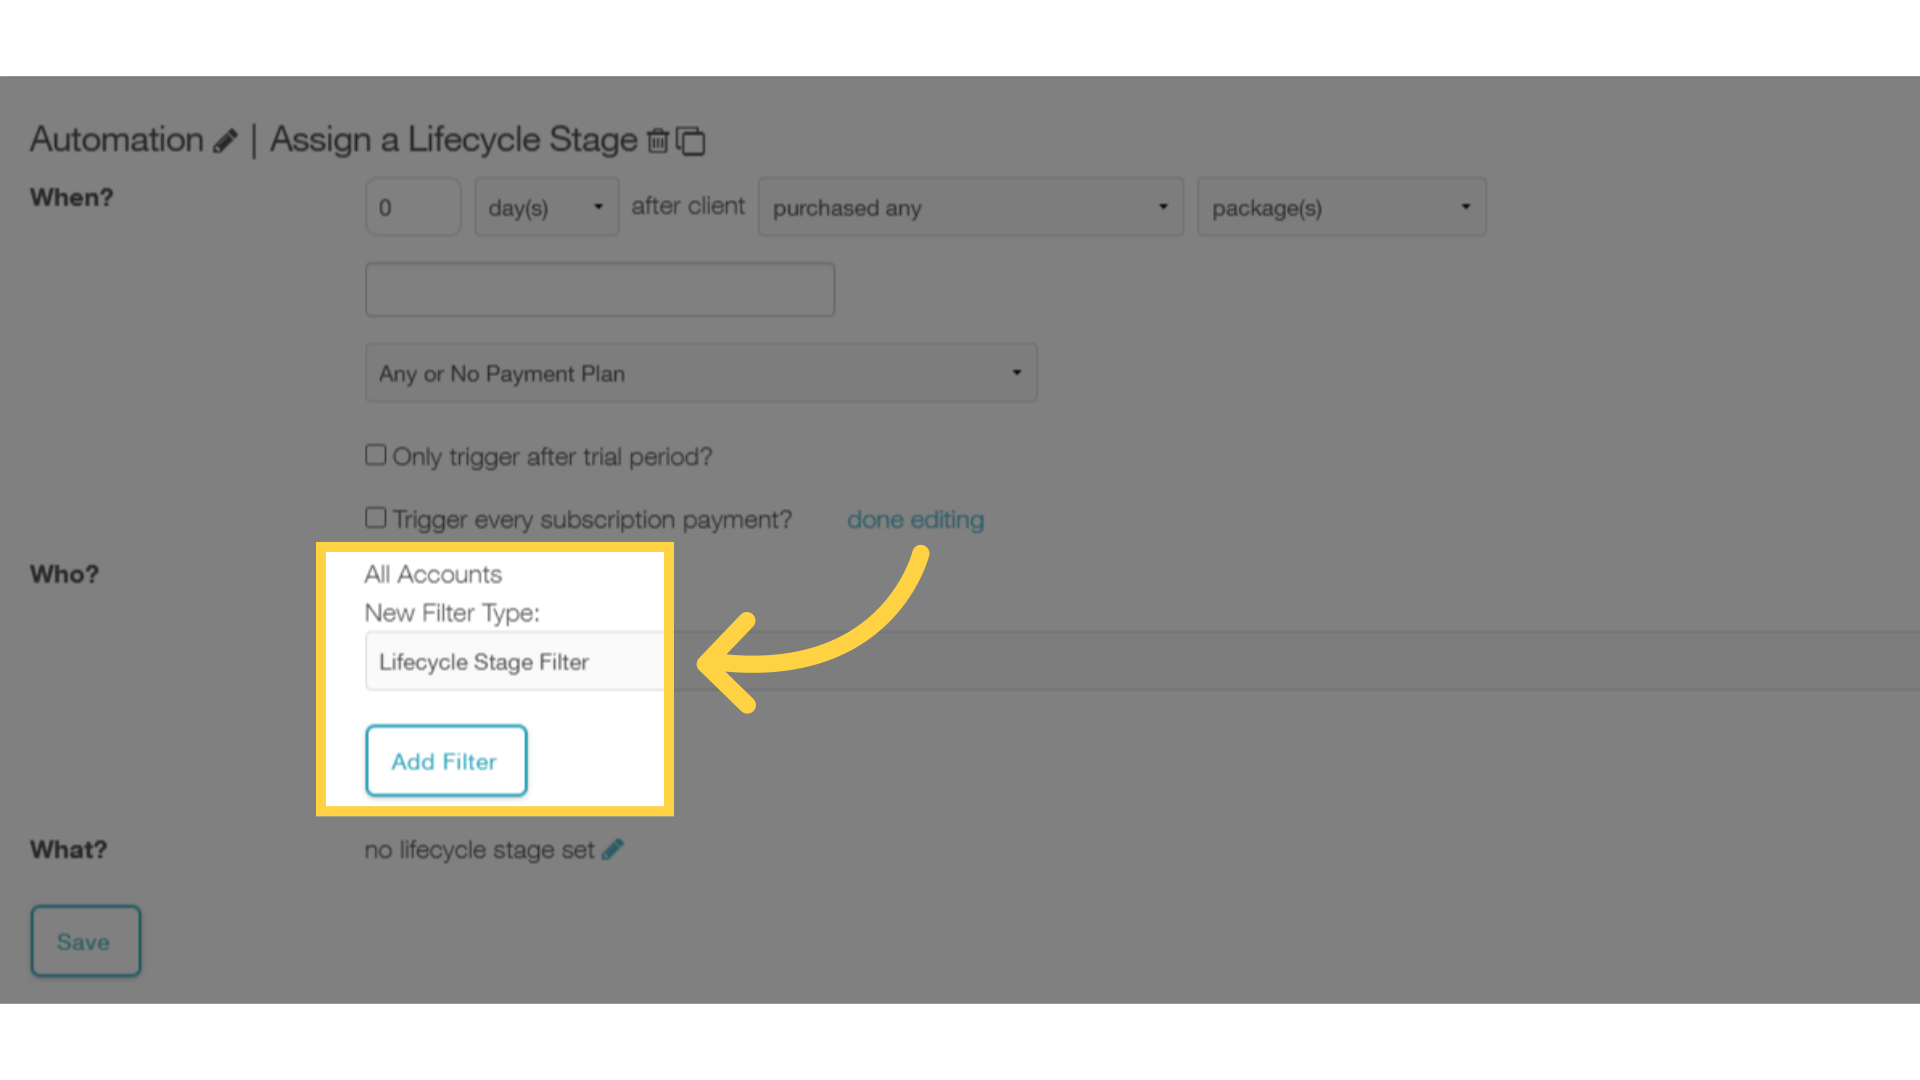
9. Select “Lifecycle Stage Filter” and click the “Add Filter” button.
Click the “Lifecycle Stage Filter” and click the “Add Filter” button to choose the stages that you want this automation to apply to.
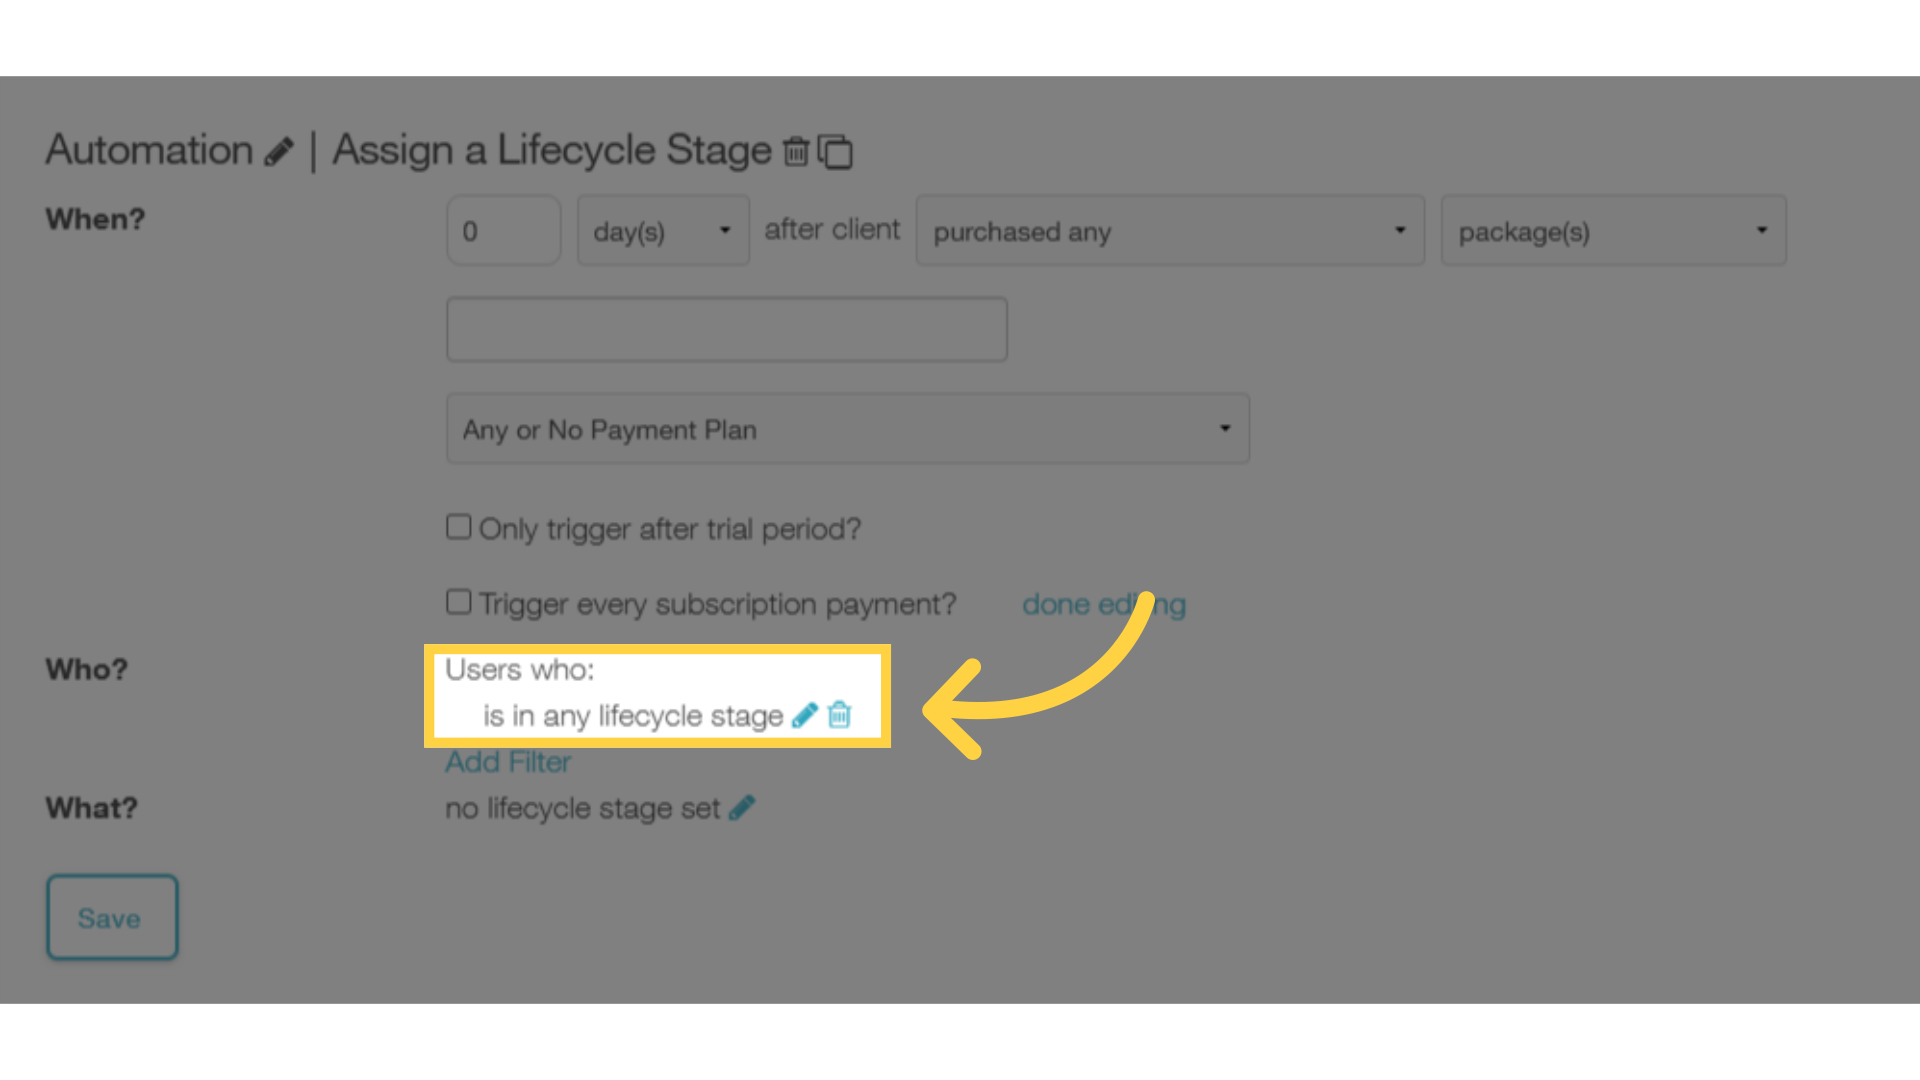
10. Click the edit icon to specify which lifecycle stages will be affected by this automation.
Click the edit icon to specify which lifecycle stages will be affected by this automation.
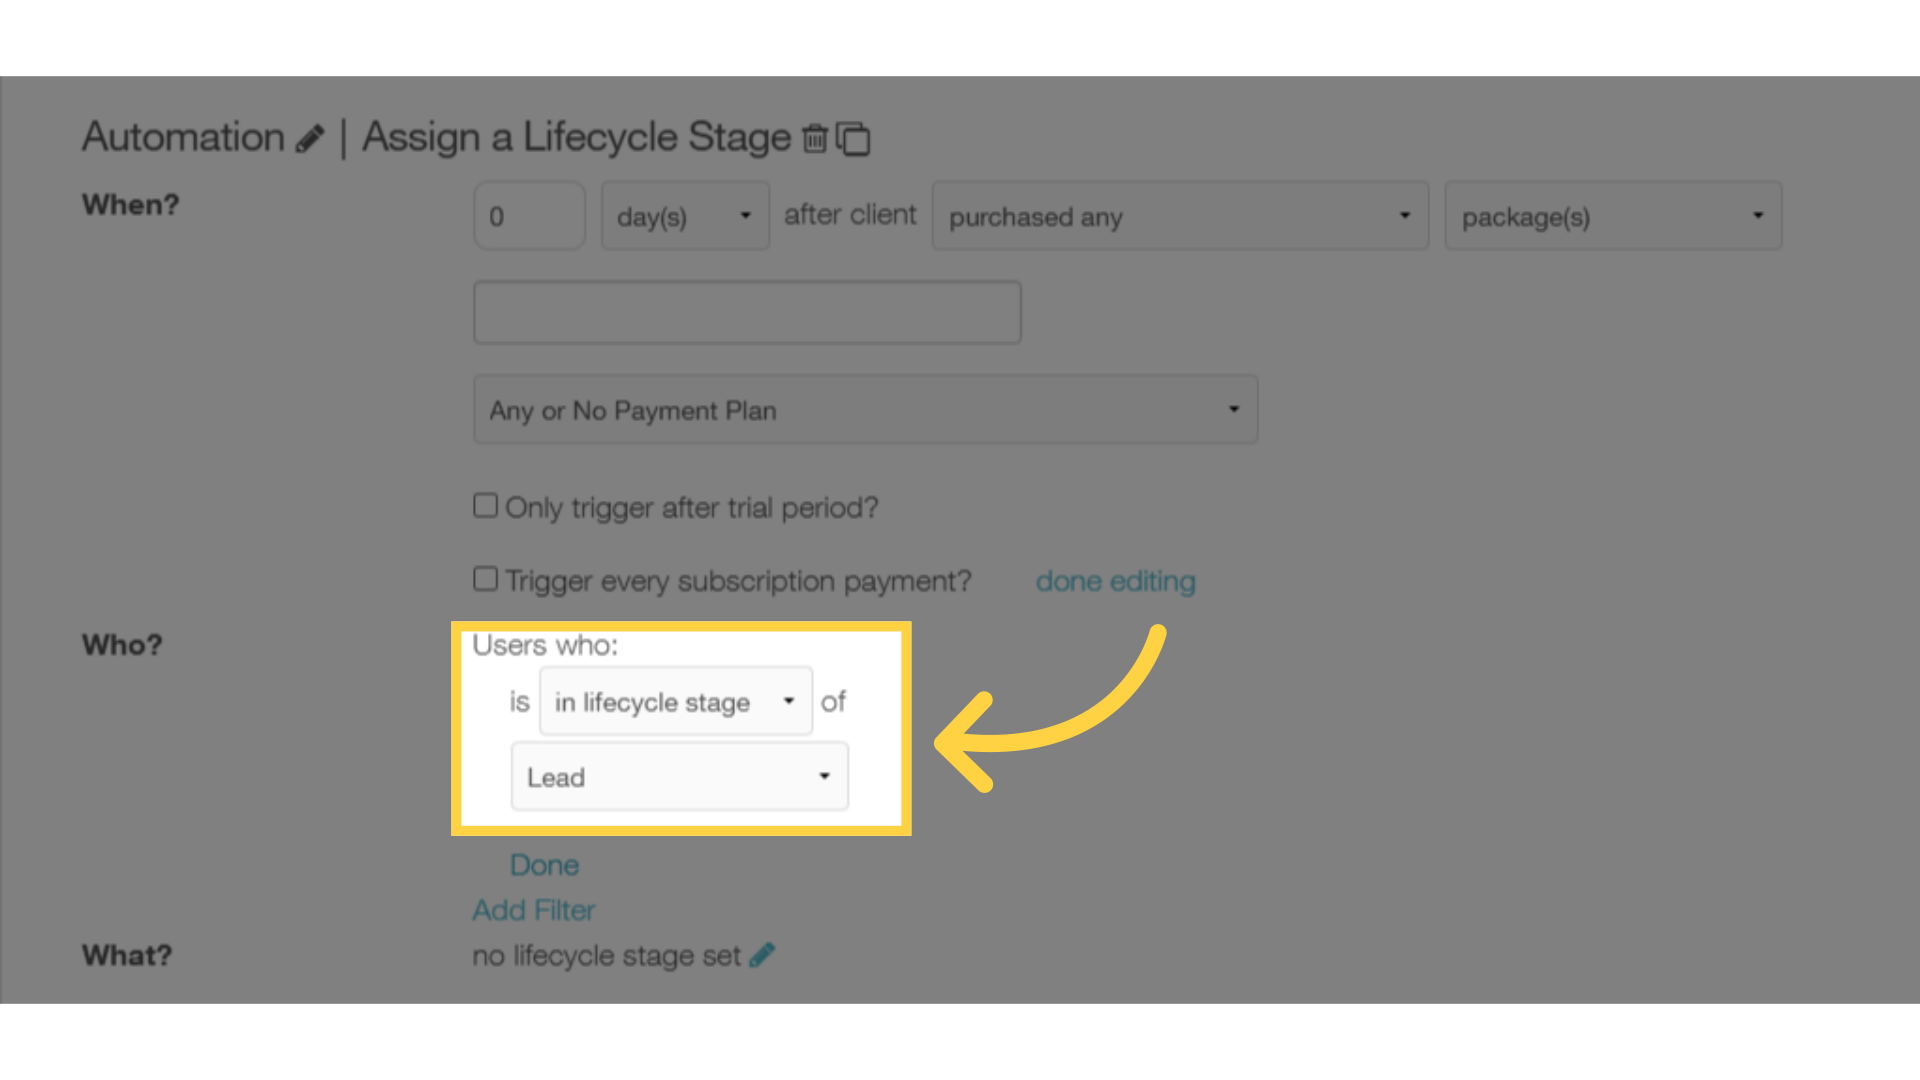
11. Choose which stage and click “Done”.
Choose the stage you want, then click the “Done” link. In our example, we’ve chosen Leads.
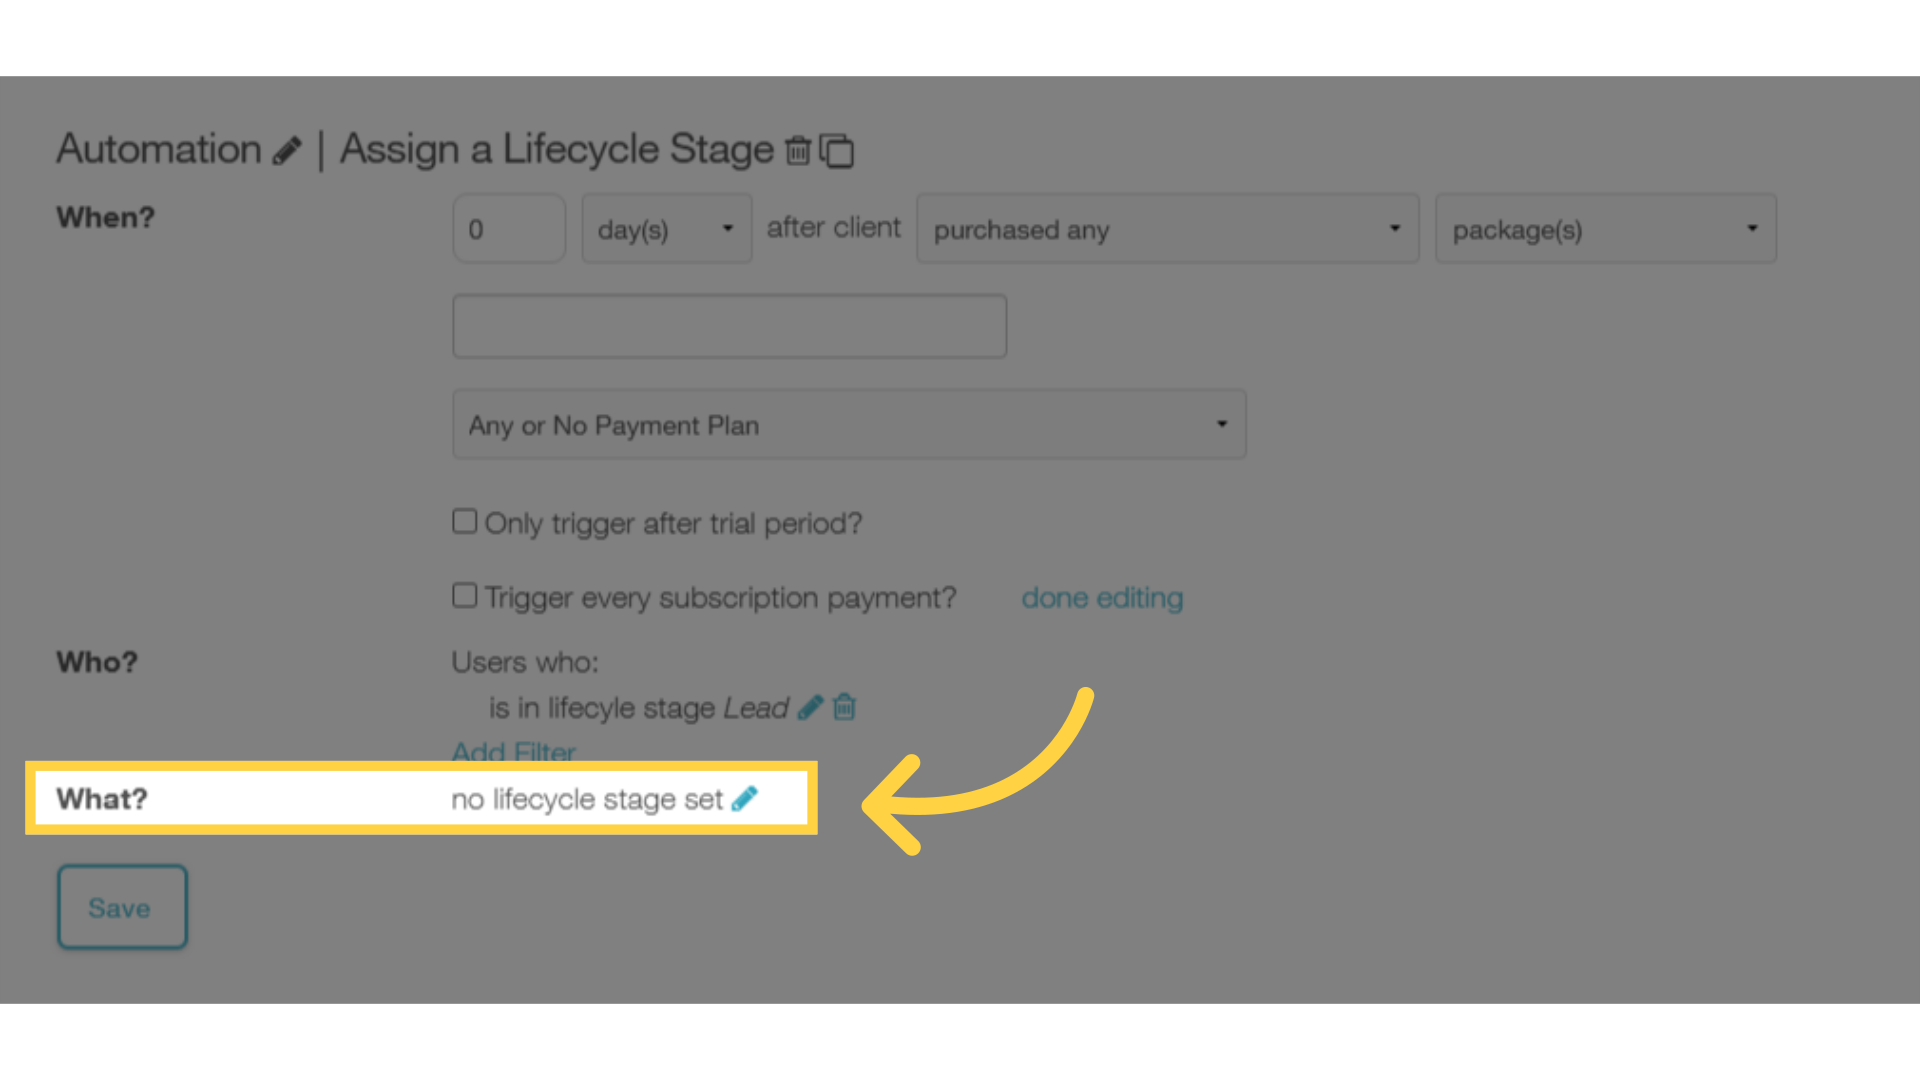
12. Click the edit icon for the “What?” option.
Click the edit icon for the “What” stage to choose what stage this automation will convert affected accounts to.
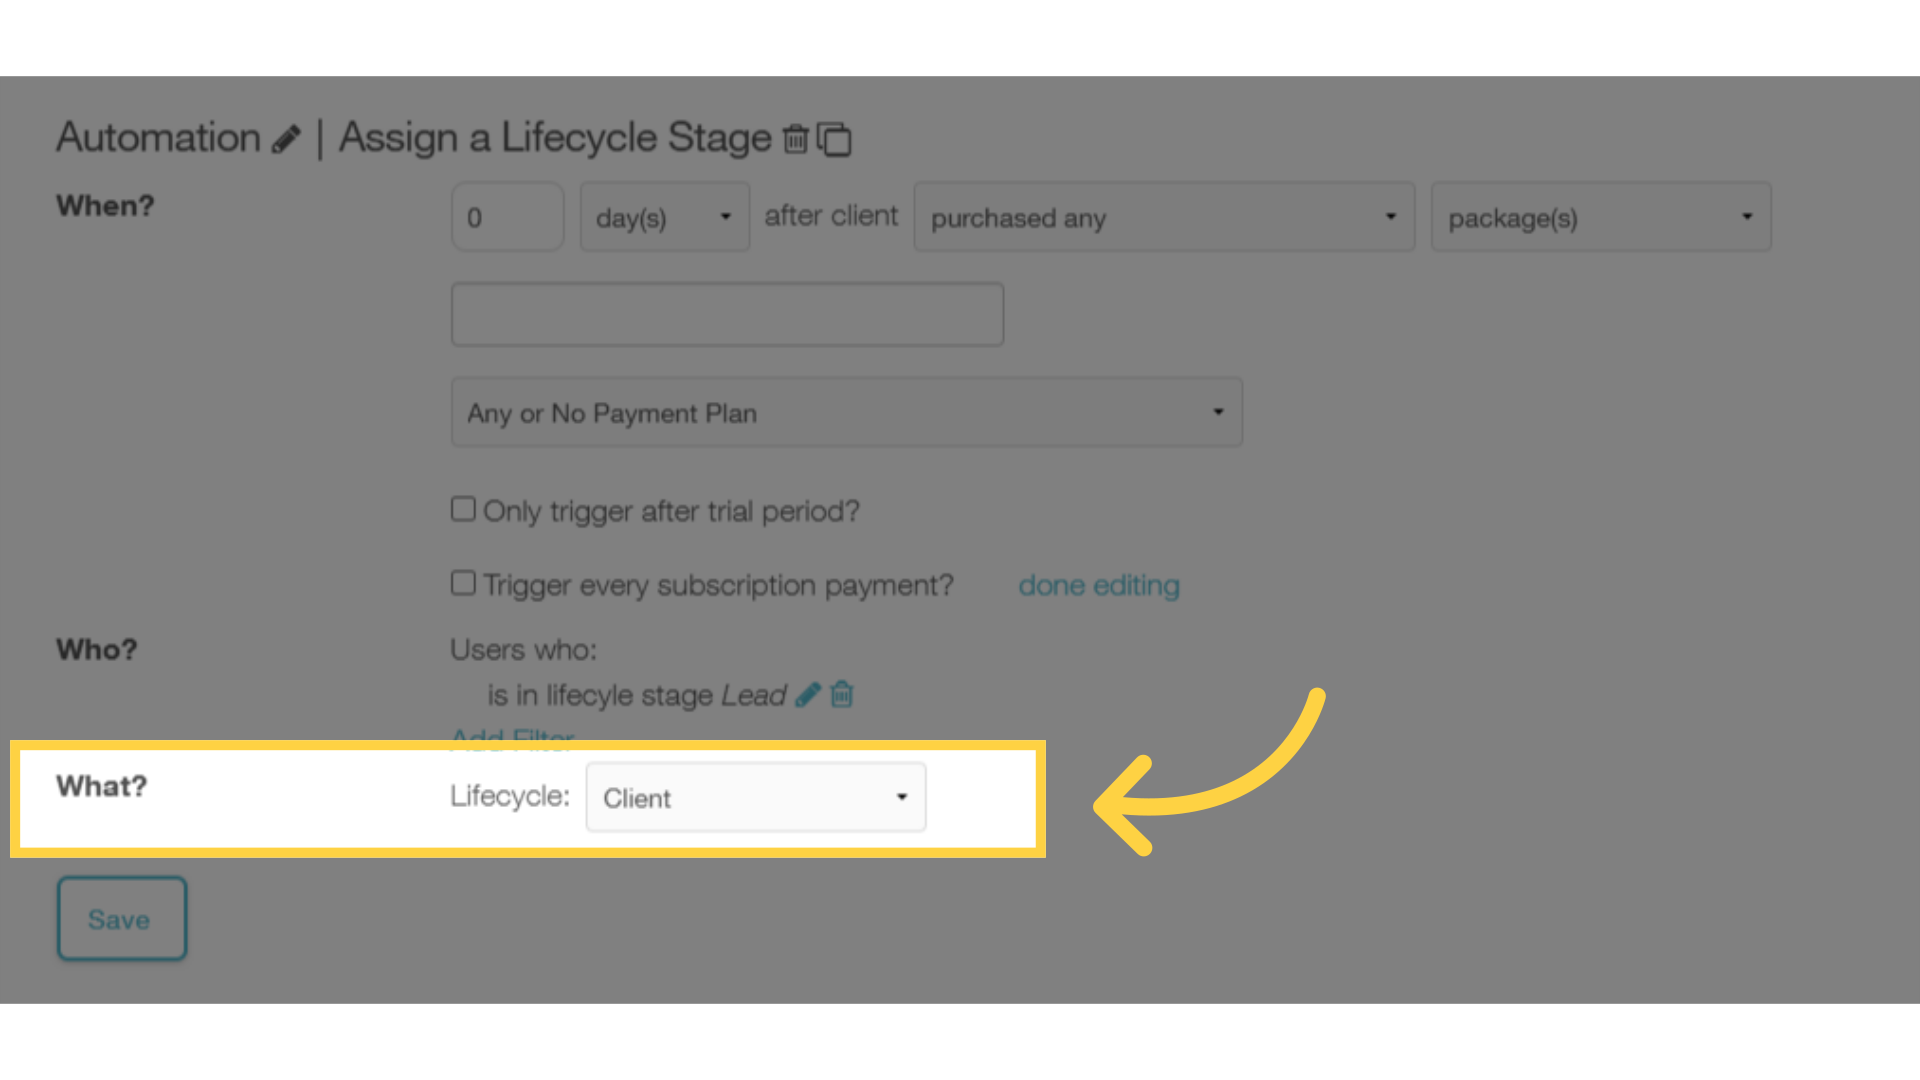
13. Set the lifecycle stage where you want accounts to end up.
Select a stage from the Lifecycle options.
14. Click the “Save” button to save your changes.
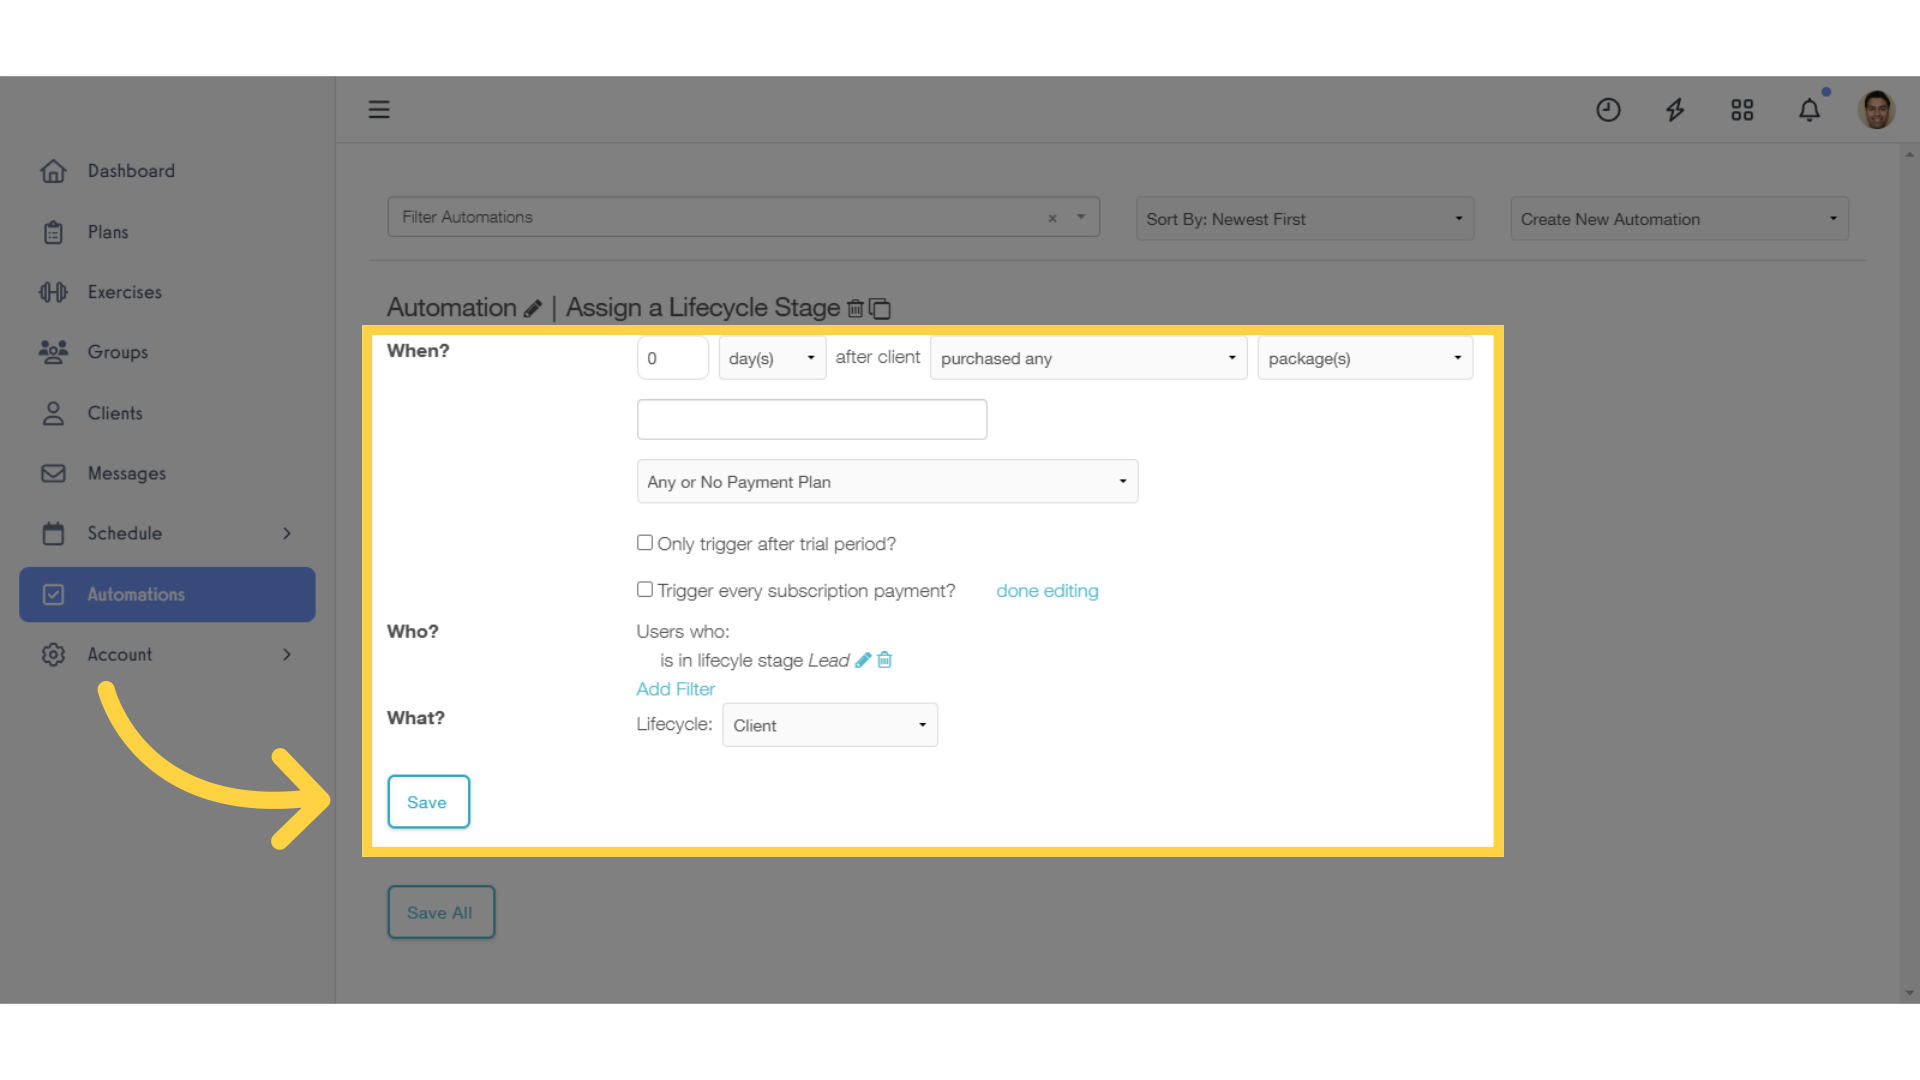
Save your changes when you are ready. In our example, we’ve set it up so that Lead accounts that purchase any package will be immediately converted to the Client stage.
This guide showed you the process for setting up automations to transition accounts between lifecycle stages seamlessly. Now you can automate your customer pipeline from start to finish.


